Cute Summer Nail Designs 2026: 200+ Inspo, Trends, and Expert Tips for Every Style
Summer nails are having a real moment in 2026. Bright colors, glossy chrome, tiny fruit charms, soft pastels. The options feel endless, and honestly, a little overwhelming.
That is exactly why this guide exists.
Whether you want a quick salon reference photo or a full DIY plan for your kitchen table, you will find it here. This guide covers every major style trending this summer. Bright and neon looks. Soft pastels. Chrome and glazed finishes. Fruit art, florals, ombre, and short nail ideas that actually work.
You will also get real answers, not just pretty pictures. What colors suit your skin tone. Which shapes hold up best for your lifestyle. How long a design actually takes to create. What keeps gel polish from lifting in summer heat.
Nail artists see real shifts every season, and this guide reflects what is actually happening at the chair right now, not just what looks good on a moodboard.
By the end, you will know exactly which summer nail look fits you, your schedule, and your budget. No guesswork needed.
Editor’s Note: Nailinspo.pro curates real nail inspo from working nail artists. Every design here comes from an artist our team has personally verified. We do not use AI-generated images, and we do not pull from anonymous or unverifiable sources.
Our team checks each artist’s page for consistent, real work before featuring them. We may earn a commission on some links at no cost to you. Learn more on our About page.
What’s Trending in Summer Nails for 2026
Nail trends shift fast, but this year has a clear direction. People want texture, real color depth, and details that actually mean something.
This Year’s Biggest Nail Trends
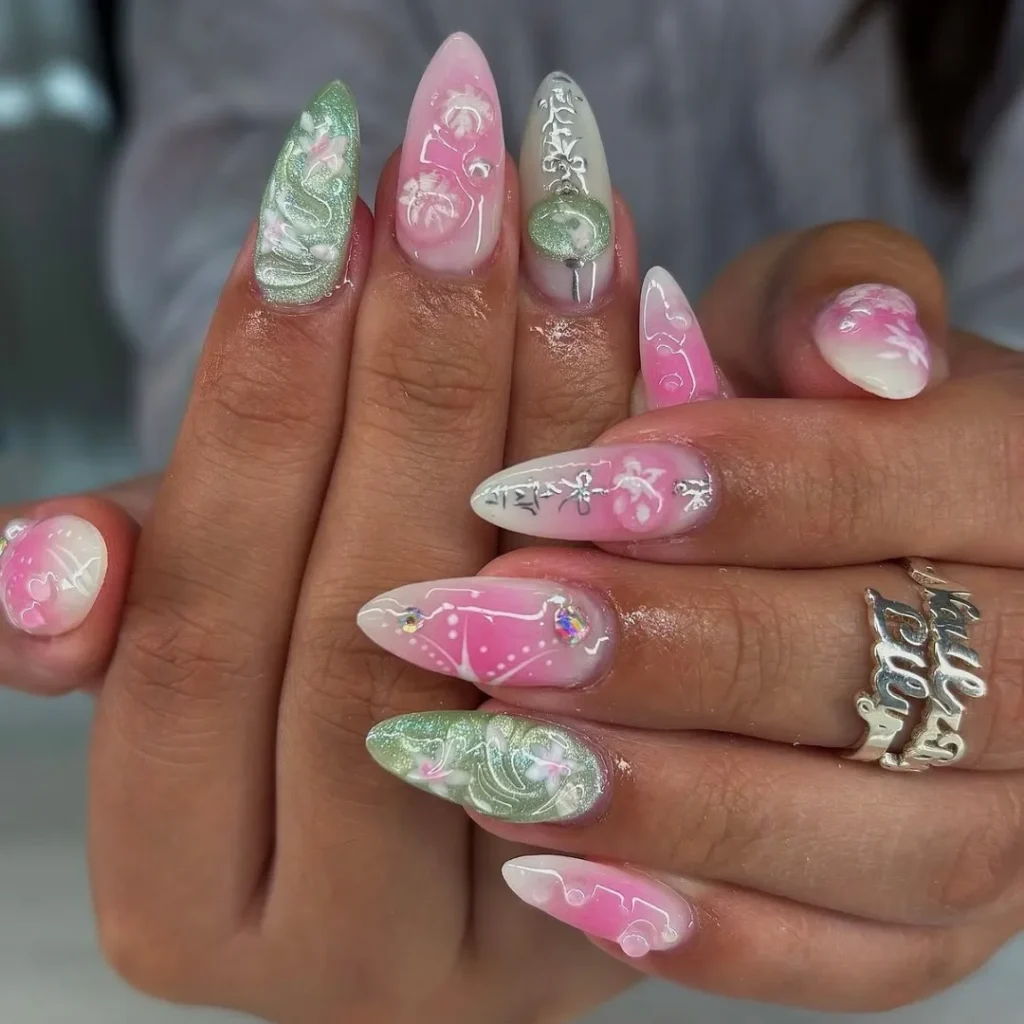
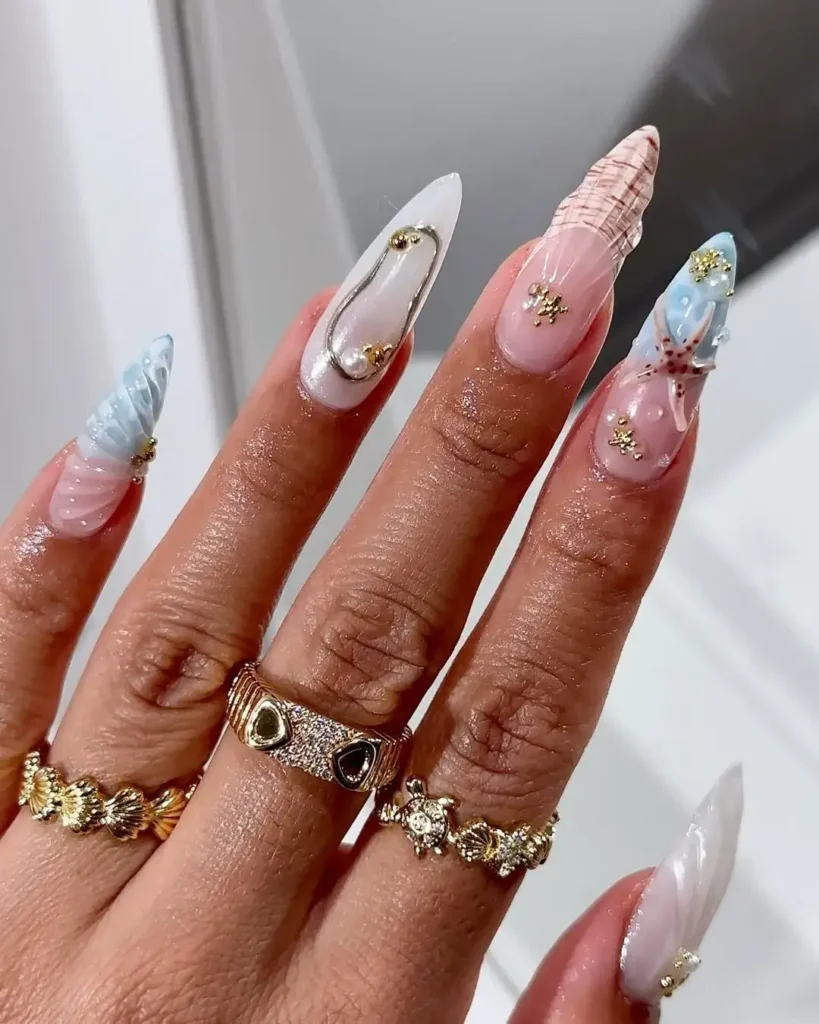
Mermaidcore is back, but it looks different now. Last year it was shimmer and blue tones. This year it has texture. Think shell details and soft wave effects that catch the light.
Chrome nails are still everywhere, but the shade has changed. Icy pink chrome feels dated. Warm bronze, caramel, and soft silver chrome feel fresh for 2026.
Botanical nail art has grown more detailed too. Artists are hand-painting tropical leaves and layered petals instead of simple daisies. The result looks closer to real flowers than cartoon shapes.
Pistachio and matcha green are the standout colors this summer. They work on almost every skin tone and pair well with both bright and neutral outfits.
Reverse French tips are also having a big moment. The color sits at the base of the nail instead of the tip. It works well on short nails and feels more modern than the classic French look.
What’s New vs. What’s Evolving From Last Summer
Some trends carried over but got an upgrade. Chrome nails did not disappear. They just moved from cool pink tones to warmer earthy shades.
Glazed nails also evolved. Last summer, the glazed look stayed mostly on nude bases. Now it shows up on bold colors too, which makes it feel bolder and more playful.
Fruit nail art followed a similar path. Micro fruit designs were popular last year. This year, fruit art has grown larger and more realistic, often taking up a full nail instead of tiny clusters.
Butter yellow, last year’s breakout color, has not faded. It simply shares the spotlight now with pistachio green and warm chrome tones.
Expert Insight: What Nail Artists Are Seeing This Season
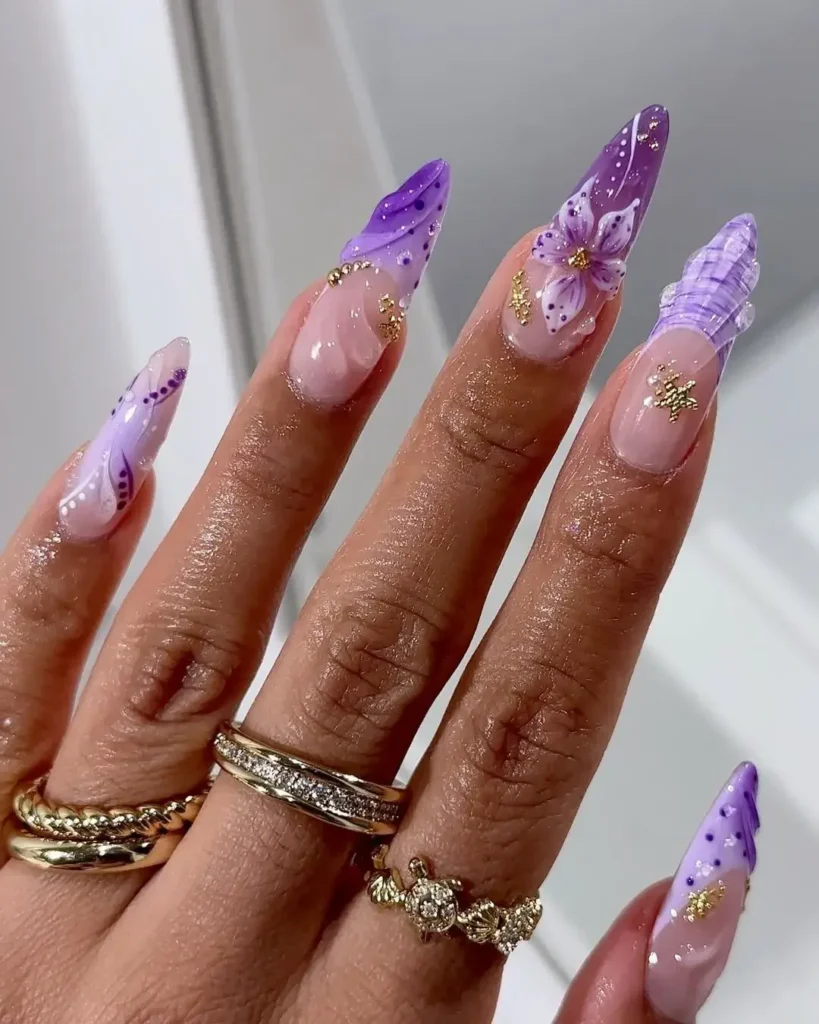
Nail artists report more requests for texture this year. Clients want dimension, not just flat color. That includes raised gel details, 3D florals, and layered chrome finishes.
Short and natural nails are also getting more attention at the salon. Many clients want elevated designs that still feel low maintenance. Micro details like tiny dots or thin French lines work well here because they add personality without overwhelming a smaller nail bed.
Placement matters more than people expect. Nail artists often place small accents near the cuticle rather than the tip. This creates the illusion of length, especially on shorter nails.
Overall, summer 2026 favors designs with a little more thought behind them. Bold color is still popular, but the details are what set this season apart.
Best Summer Nail Colors for 2026
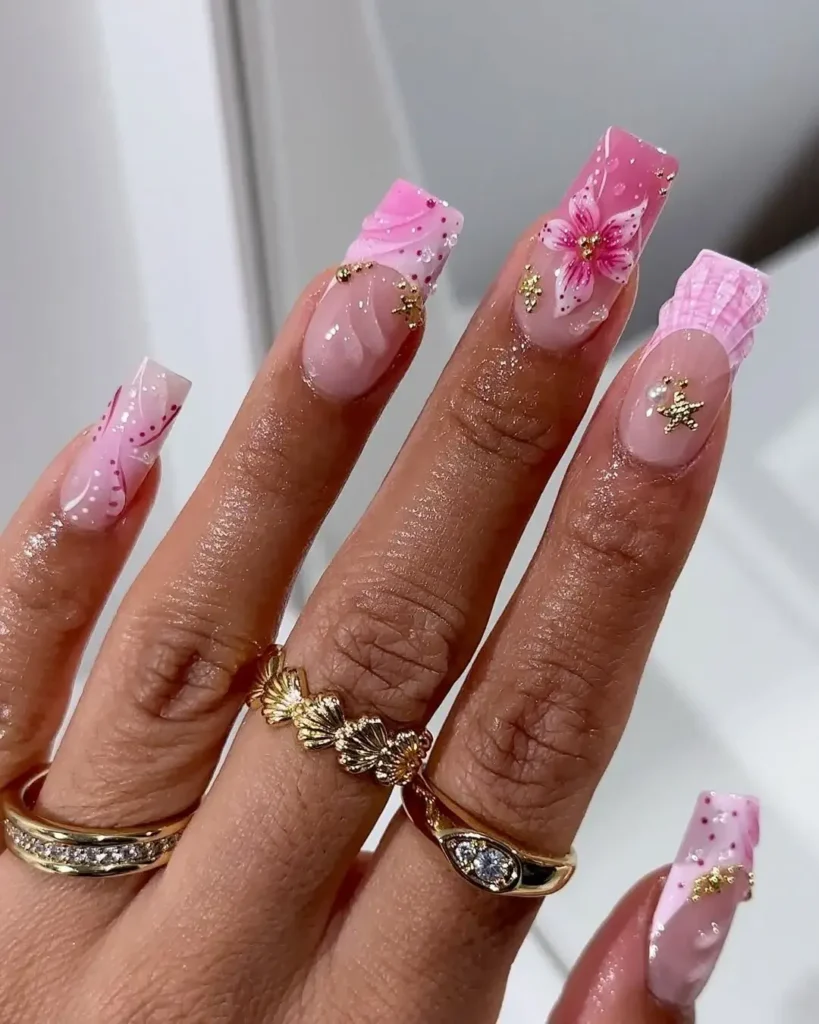
Color drives most nail decisions in summer. The right shade can brighten your whole look, so it helps to know what is actually trending this year.
Bright & Saturated Colors
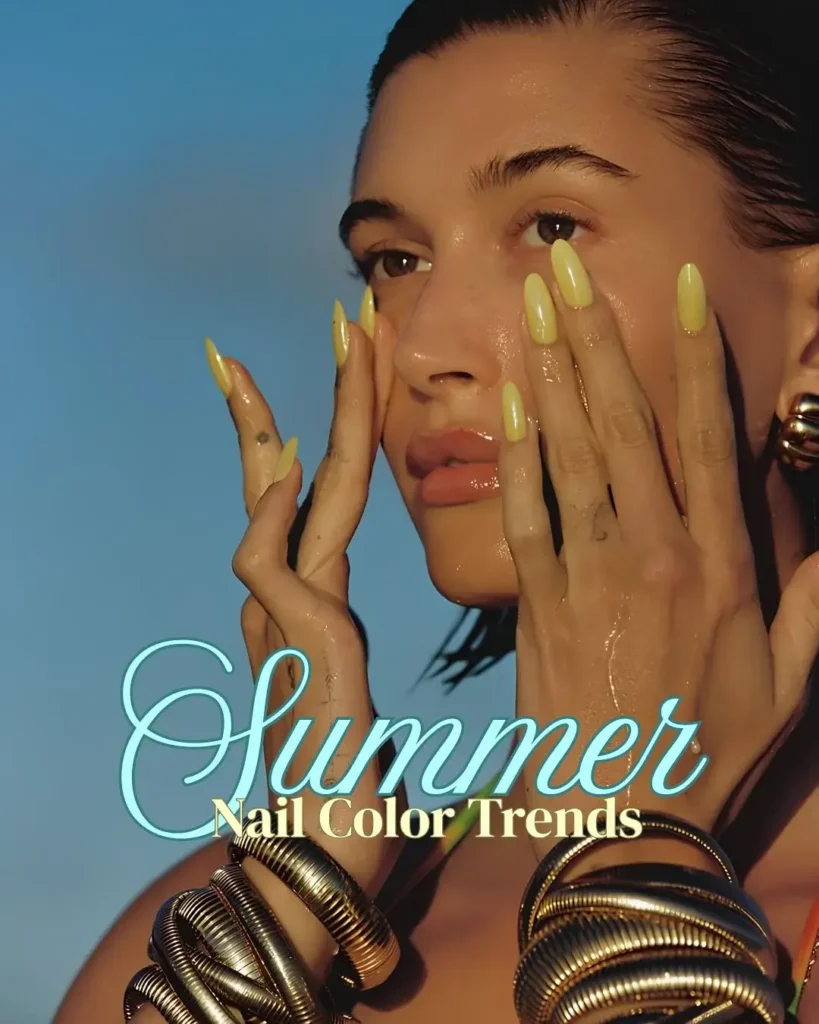
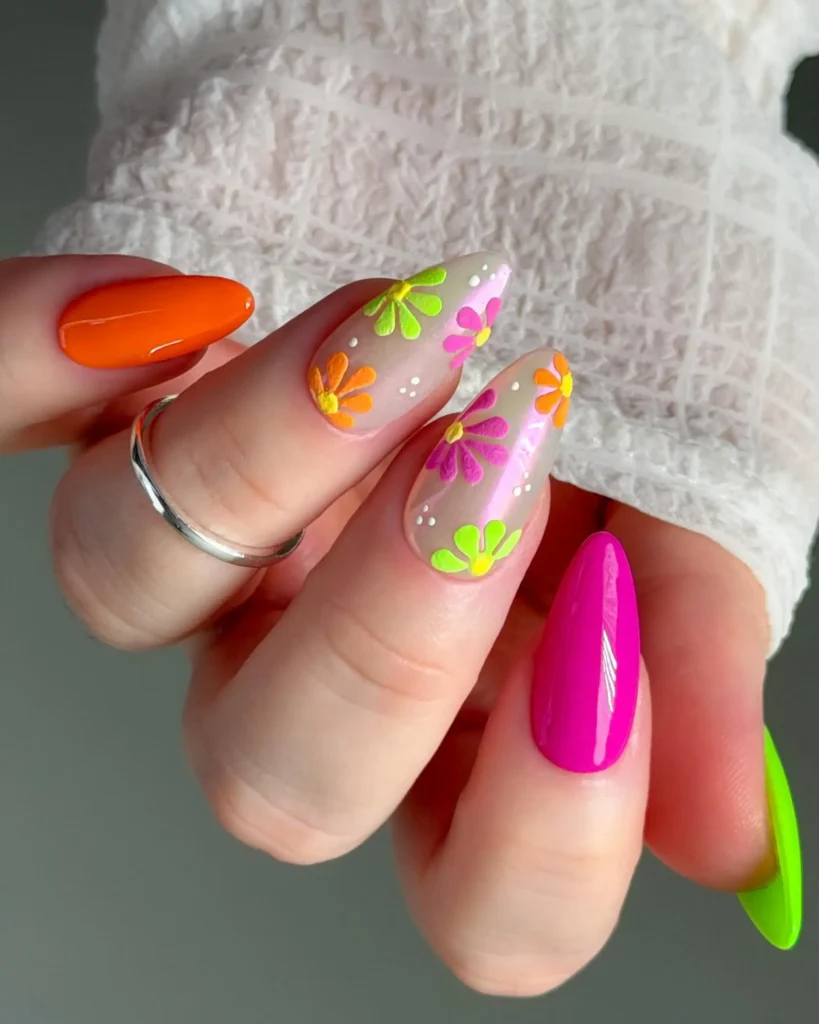
Bright colors dominate summer nails every year, but 2026 leans toward richer, more saturated tones. Hot pink stays strong, especially paired with orange or cherry red accents.
Neon lime and electric blue also show up often this season. These shades work best on shorter nails, where a small pop of color reads as fun instead of overwhelming.
Cherry red remains a summer classic. It pairs well with white French tips or solo as a glossy, high-shine finish.
Pastel & Soft Colors
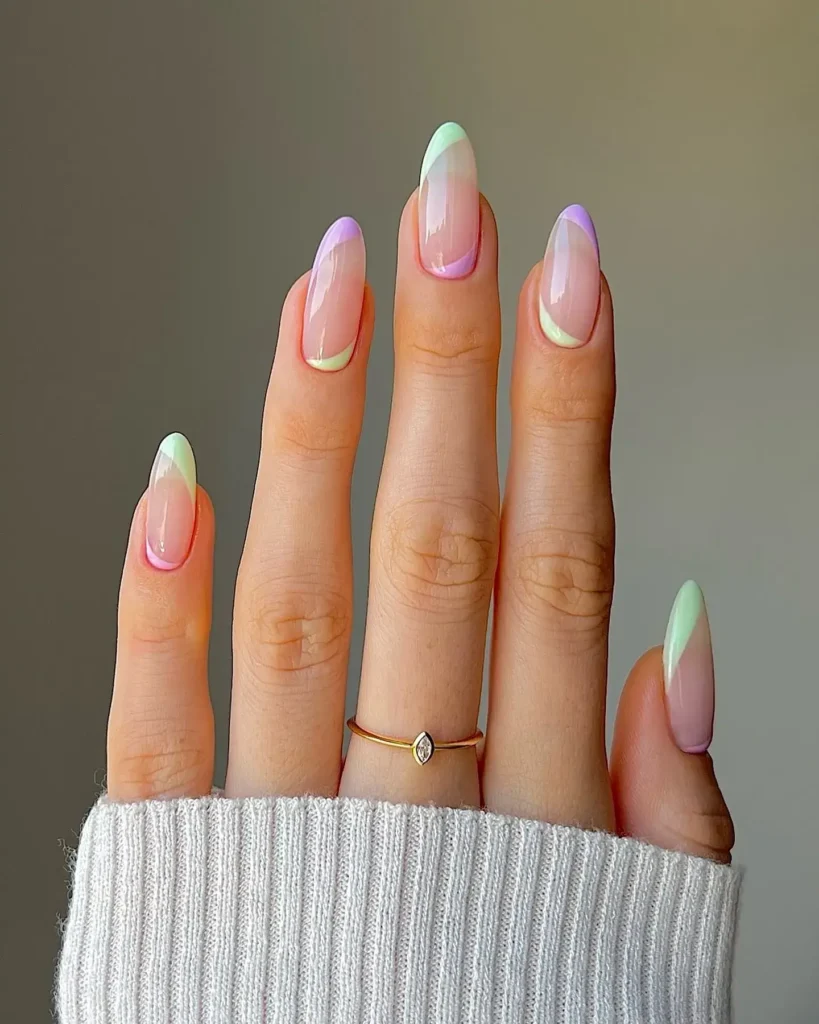
Pastels feel gentler this year, almost dusty rather than candy bright. Soft lavender, baby blue, and blush pink lead the pack.
Pistachio green has become one of the most requested pastel shades this summer. It sits between green and neutral, which makes it easy to wear with almost any outfit.
Pastel colors also work well layered under sheer or jelly finishes. This softens the color further and adds a subtle glow.
Earthy & Neutral Tones
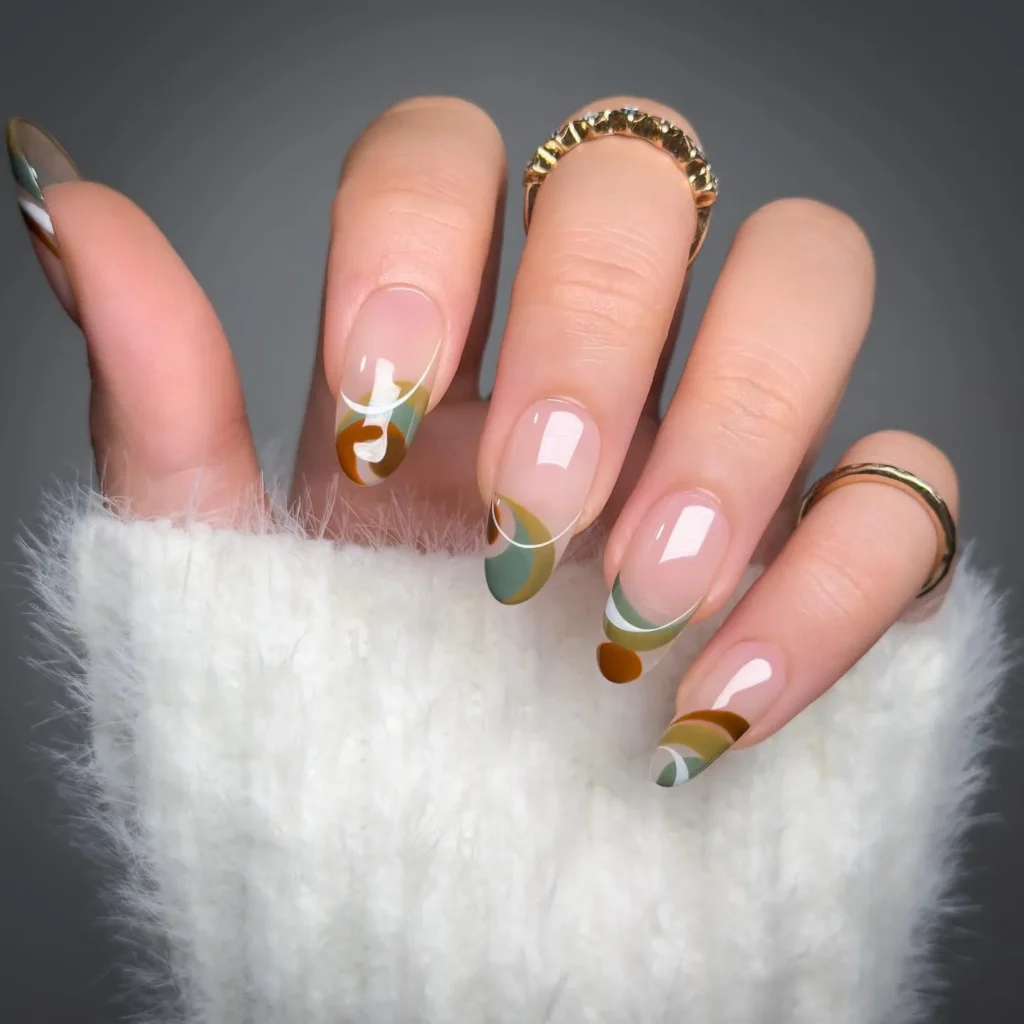
Neutral shades have grown more popular for people who want understated nails. Milky white, soft taupe, and warm beige lead this category.
Mocha and terracotta tones also feel fresh for summer 2026. They pair well with tanned skin and work in both casual and formal settings.
These shades photograph well too, which matters if your nails end up in vacation photos or work meetings.
How to Choose Between Bright vs. Neutral for Summer
Your daily routine matters more than trend charts here. Bright colors suit people who change their nail color often or want their manicure to stand out.
Neutral tones suit people who want their nails to match every outfit without a second thought. They also tend to show less wear between salon visits.
Skin tone plays a role too. Warm undertones often look striking in coral, orange, and warm reds. Cool undertones tend to pop more in blues, lavenders, and true pinks.
If you are unsure, start with one bold accent nail on an otherwise neutral set. It gives you color without full commitment.
How to Choose the Right Summer Nail Look for You
Picking a design is easier once you know what actually works for your nails and your life. A few simple factors narrow the choices fast.
By Nail Shape
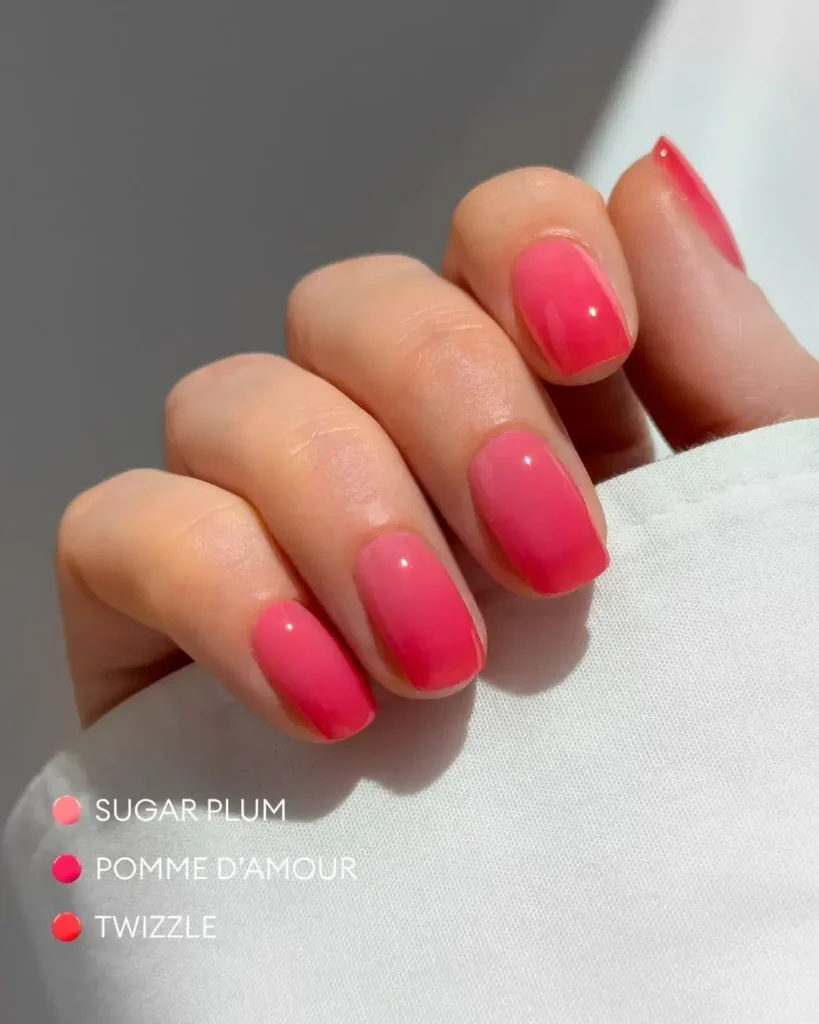
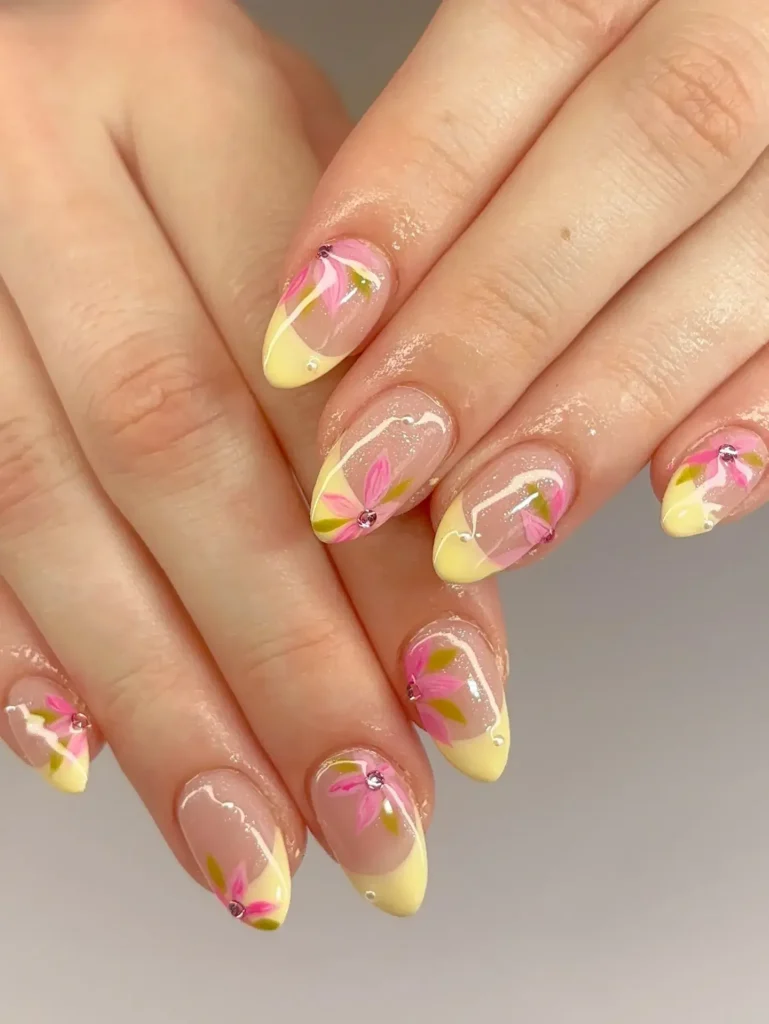
Almond and coffin shapes handle bold, detailed art well because they offer more surface space. Florals, chrome, and ombre all show up beautifully on these shapes.
Square and squoval shapes suit cleaner, simpler designs like French tips or single color glazes. The straight edges keep patterns looking crisp.
Round and short oval shapes work best with smaller details, like dots or thin lines, since there is less room for large designs.
By Nail Length
Long nails give you room for 3D art, detailed florals, and multi-step chrome finishes. They also make ombre and gradient designs easier to blend.
Short nails work best with simpler techniques. Micro French tips, small dots, and single color glazes look polished without competing for space.
Medium-length nails offer the most flexibility. Most designs in this guide translate well to that length without much adjustment.
By Skin Tone and Undertone
Skin tone can change how a nail color reads once it is on your hand, even if it looked great in the bottle.
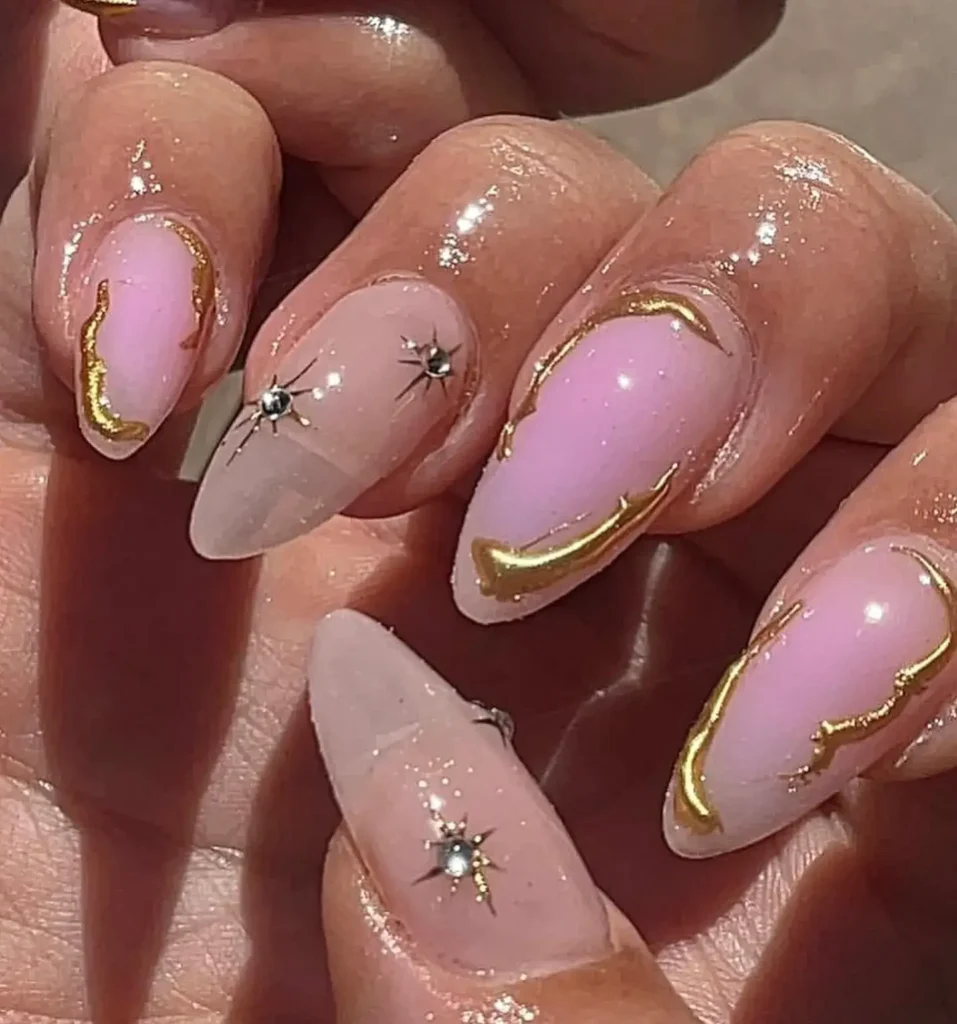
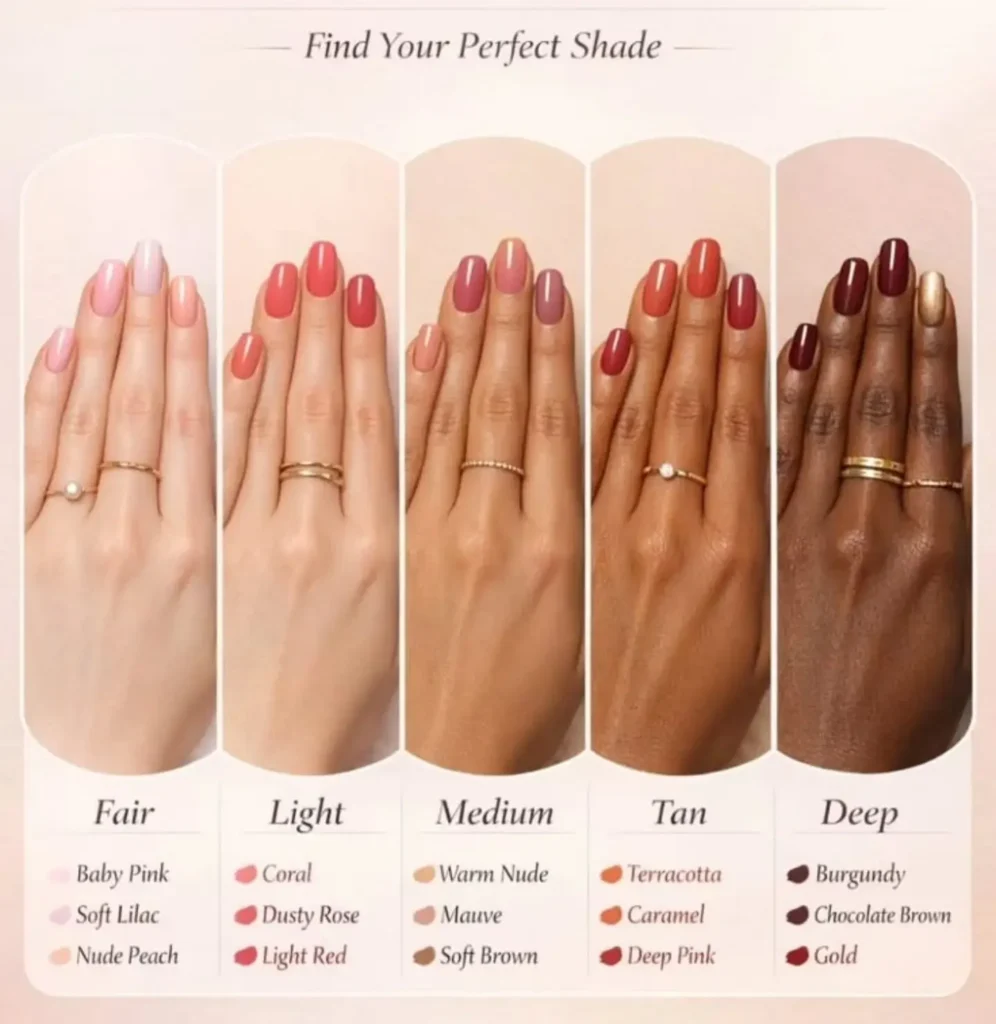
Warm undertones usually suit coral, terracotta, warm reds, and golden chrome finishes.
Cool undertones often look best in blue-based pinks, lavender, and icy or silver chrome tones.
Neutral undertones have the most flexibility and can wear both warm and cool shades comfortably.
By Occasion (Vacation, Work, Wedding, Poolside)
Vacation calls for bold, photo-ready designs like tropical florals or bright ombre sets. These hold up well in photos and match a relaxed dress code.
Work settings usually call for something quieter. Nude glazes, soft neutrals, or simple French tips read as professional without looking plain.
Wedding guest nails often sit somewhere in between. Soft florals or a milky white base feel appropriate without pulling focus from the event.
Poolside days call for shorter, simpler designs. Water and sunscreen wear down detailed art faster, so simpler sets last longer.
By Effort Level (Salon vs. DIY, Time to Create)
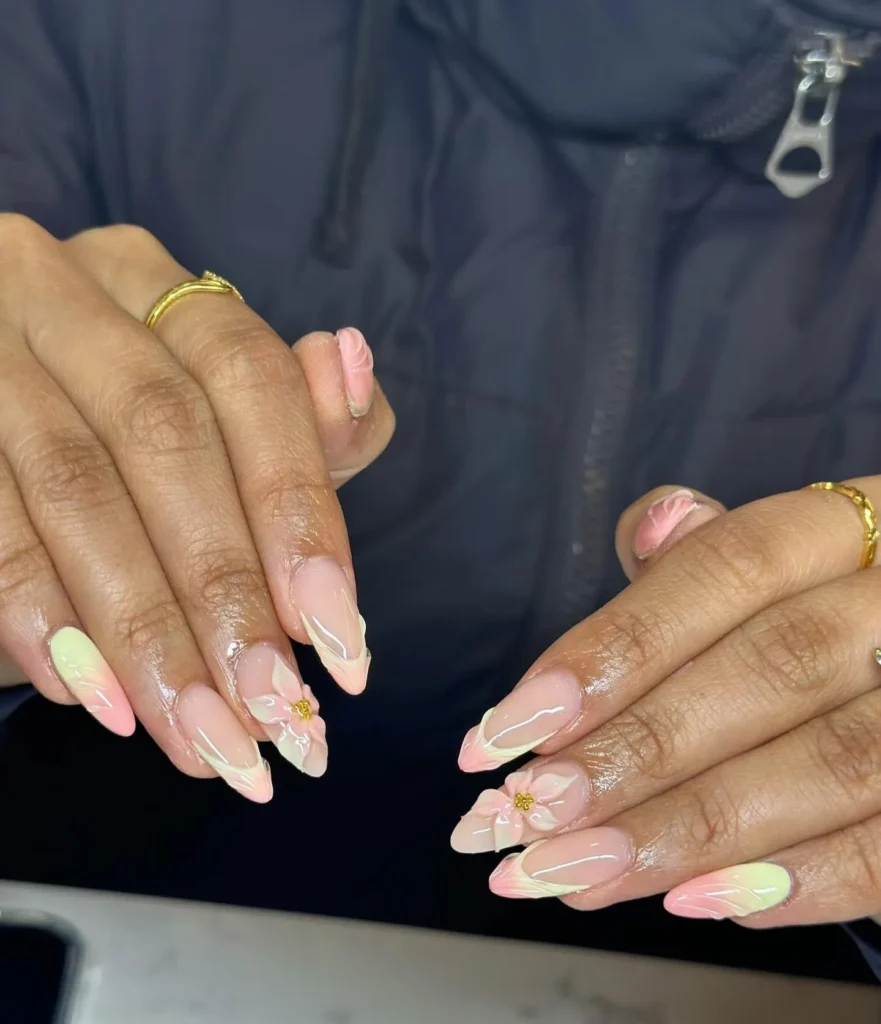
Some designs take real skill and time. Detailed florals, sculpted 3D art, and multi-color chrome sets usually work best at a salon.
Simpler looks are realistic to do yourself. A single glaze color, basic French tip, or small dot accent can take under thirty minutes at home.
If you are new to nail art, start with a design that has one focal point rather than several details across every nail. It keeps the process manageable and still looks intentional.
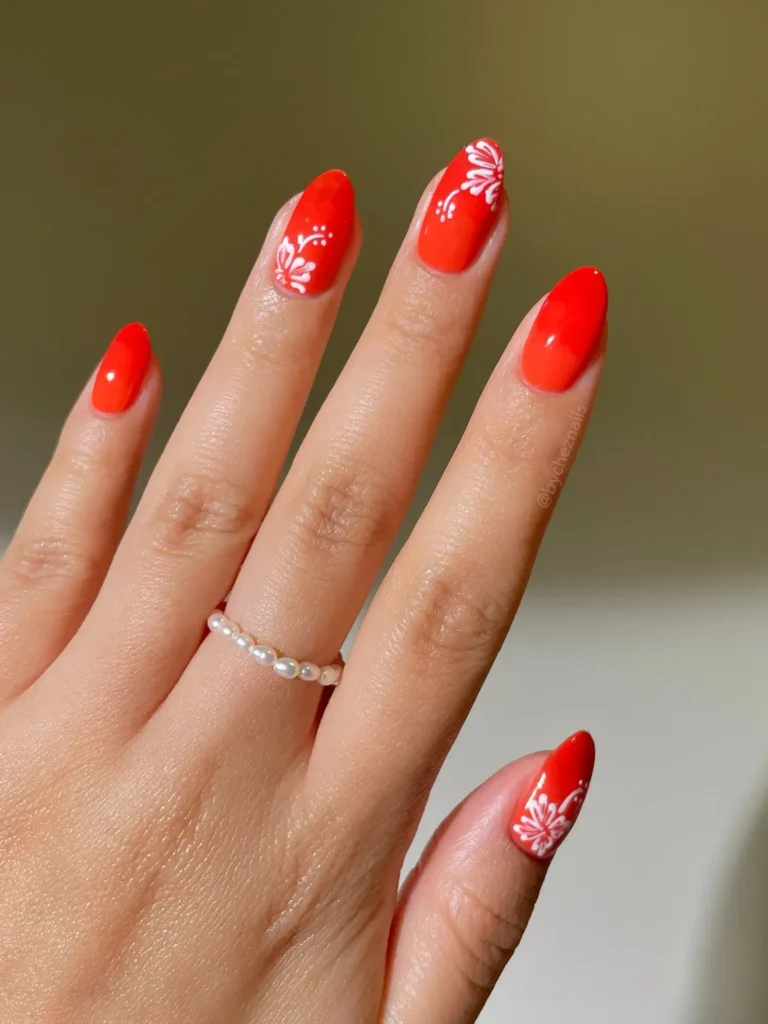
Bright and Neon Summer Nail Designs
Bright colors define summer nails every year. This year, the shades run bolder, and the pairings feel more unexpected.
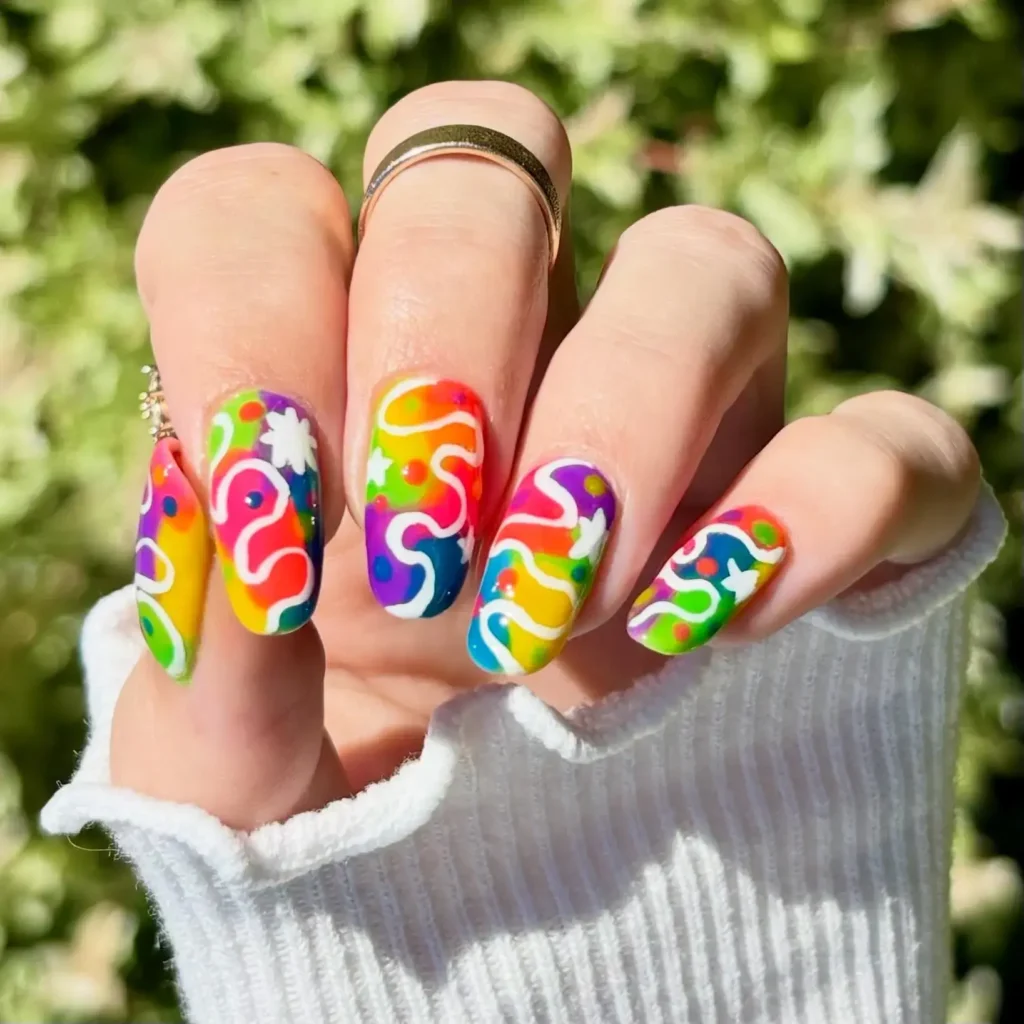
1. Hot Pink Chrome Tips
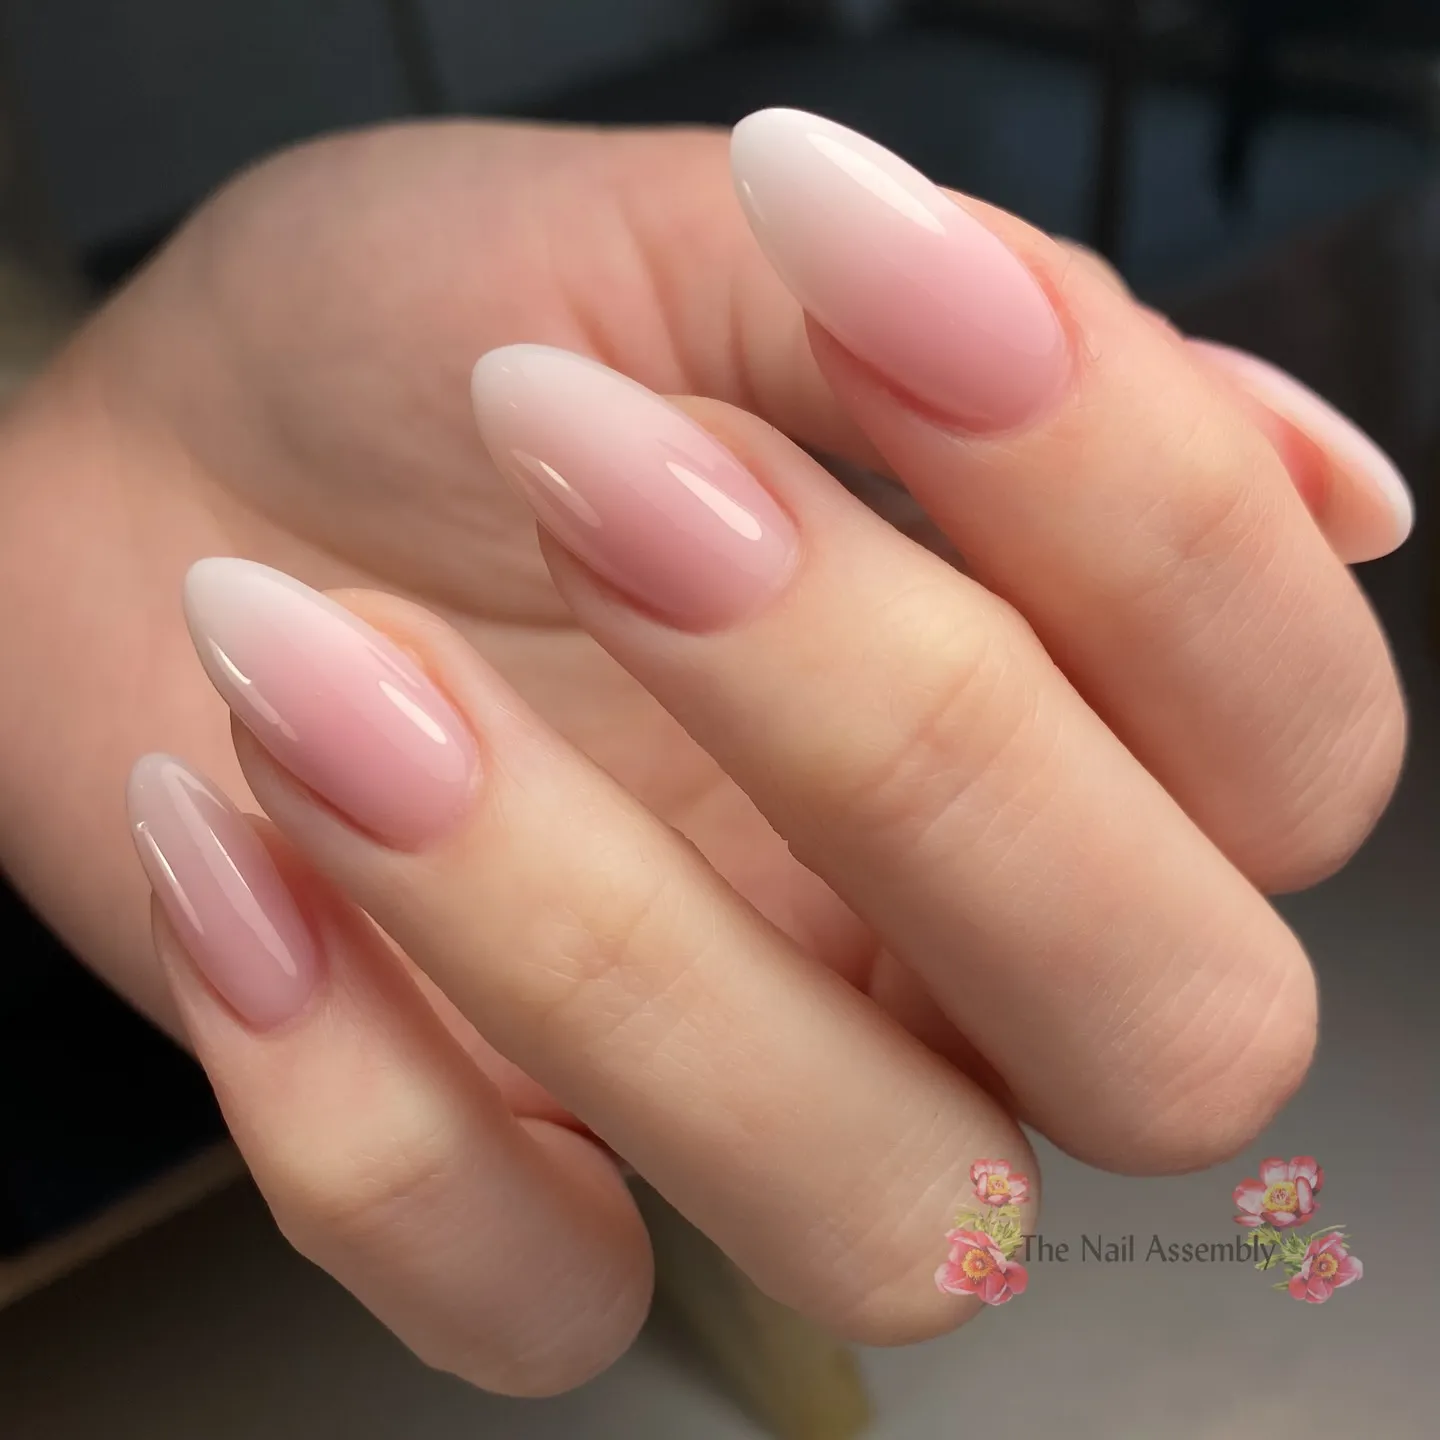
A glossy nude base meets chrome tips in hot pink. The chrome catches light from every angle, which gives the color extra depth.
Perfect for: Beach trips and pool days
Best shapes: Almond, coffin
Pro tip: Apply chrome powder only after the base coat fully cures, or the finish turns patchy.
Time to DIY: About 45 minutes with a chrome kit
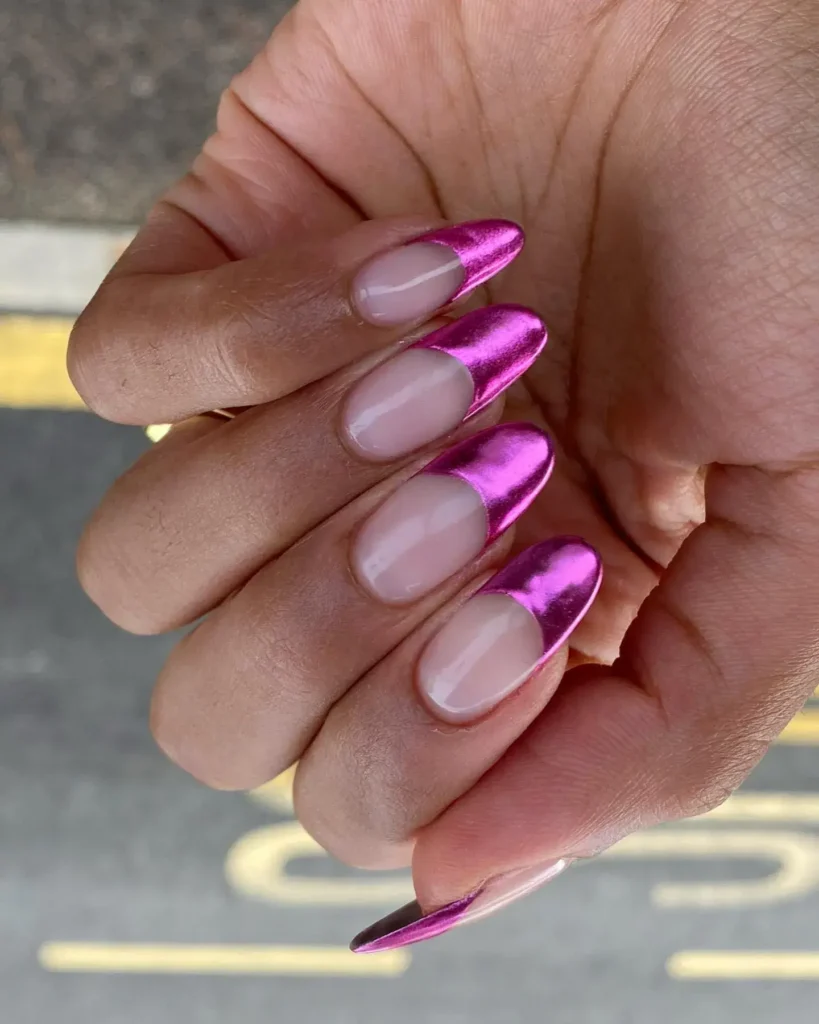
2. Electric Lime Ombré
Lime green fades into a soft white base for a fresh, high-energy look. The gradient softens the neon so it stays wearable.
Perfect for: Festival season, casual summer days
Best shapes: Square, squoval
Pro tip: Use a makeup sponge to blend the gradient. It gives a smoother fade than a brush.
Time to DIY: 30 to 40 minutes
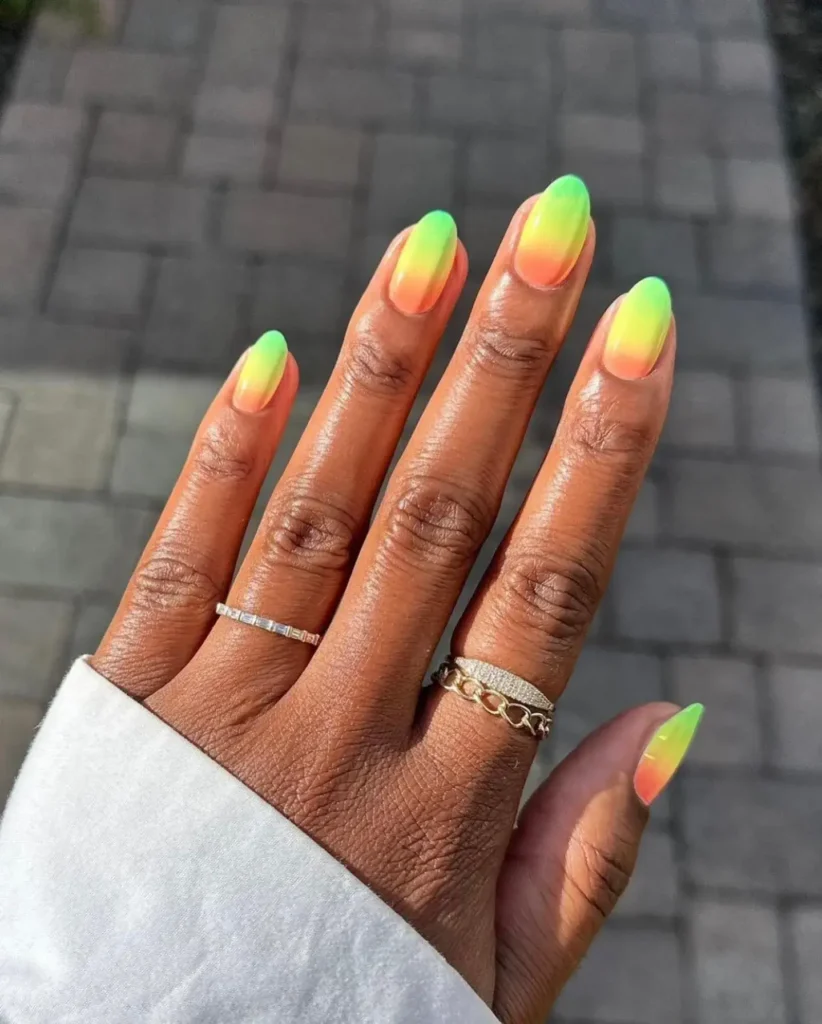
3. Neon Coral Glazed Finish
A sheer glaze sits over bright coral, softening the shade just enough to keep it wearable for daytime.
Perfect for: Vacation, brunch, everyday wear
Best shapes: Oval, round
Pro tip: Two thin coats of glaze look glossier than one thick coat.
Time to DIY: 20 minutes
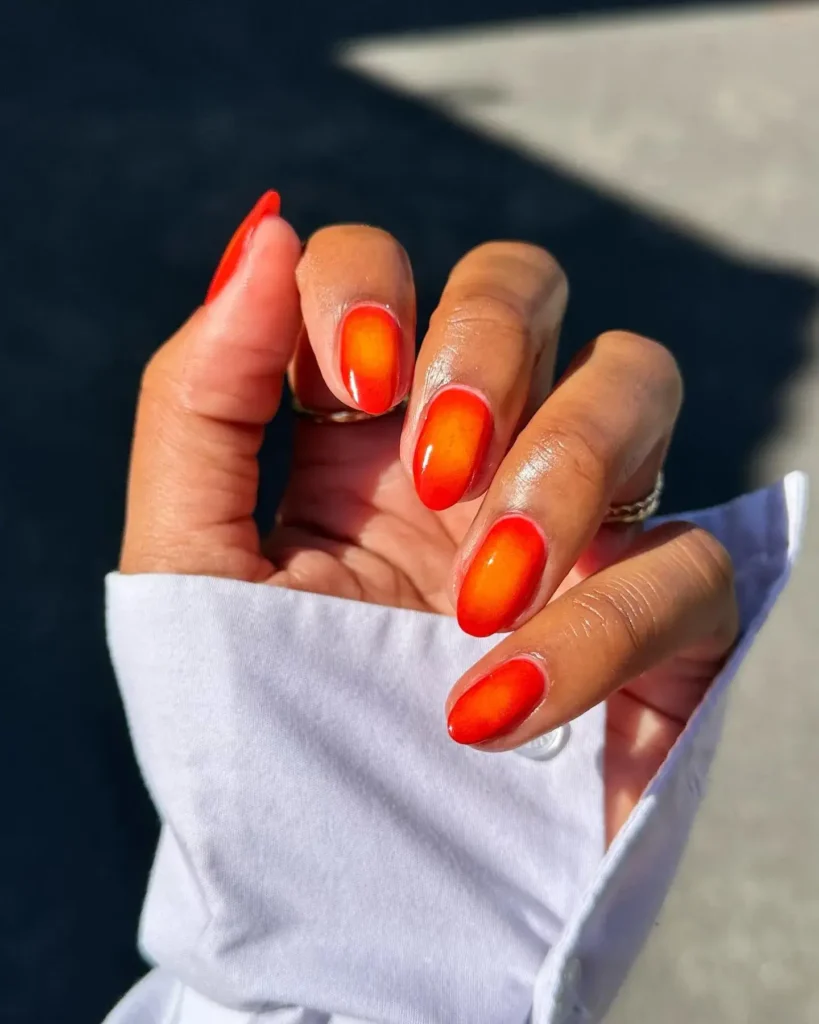
4. Viva Magenta + Orange Nails
Magenta and orange sit side by side across the set, either split down the middle or alternating nail to nail.
Perfect for: Bold dressers, statement looks
Best shapes: Almond, coffin
Pro tip: Keep both shades at the same finish, either both glossy or both matte, so the pairing feels intentional.
Time to DIY: 40 minutes
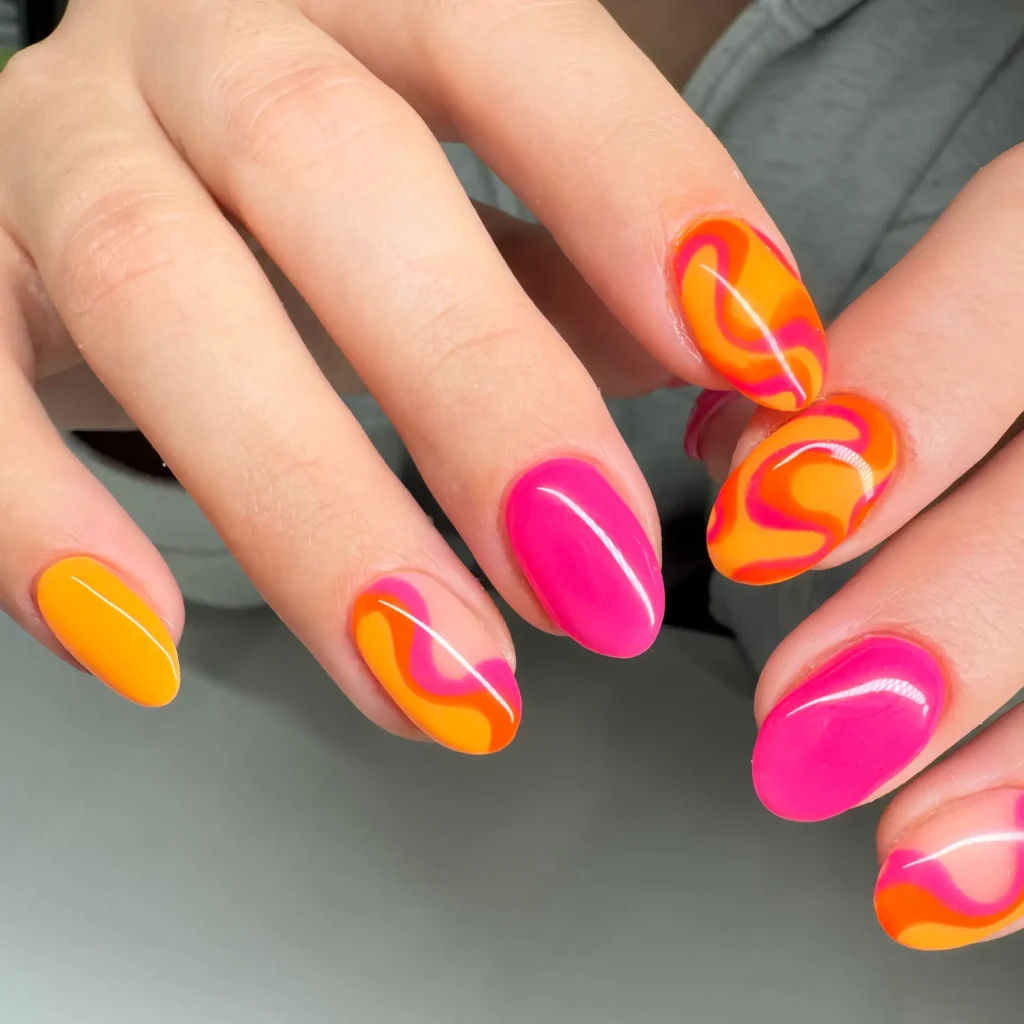
5. Tie-Dye Bright Mani
Multiple bright colors blend together on each nail, creating a swirled, tie-dye effect.
Perfect for: Music festivals, playful everyday looks
Best shapes: Short round, square
Pro tip: Work with wet polish only. Once one color dries, the swirl effect stops blending.
Time to DIY: 35 minutes
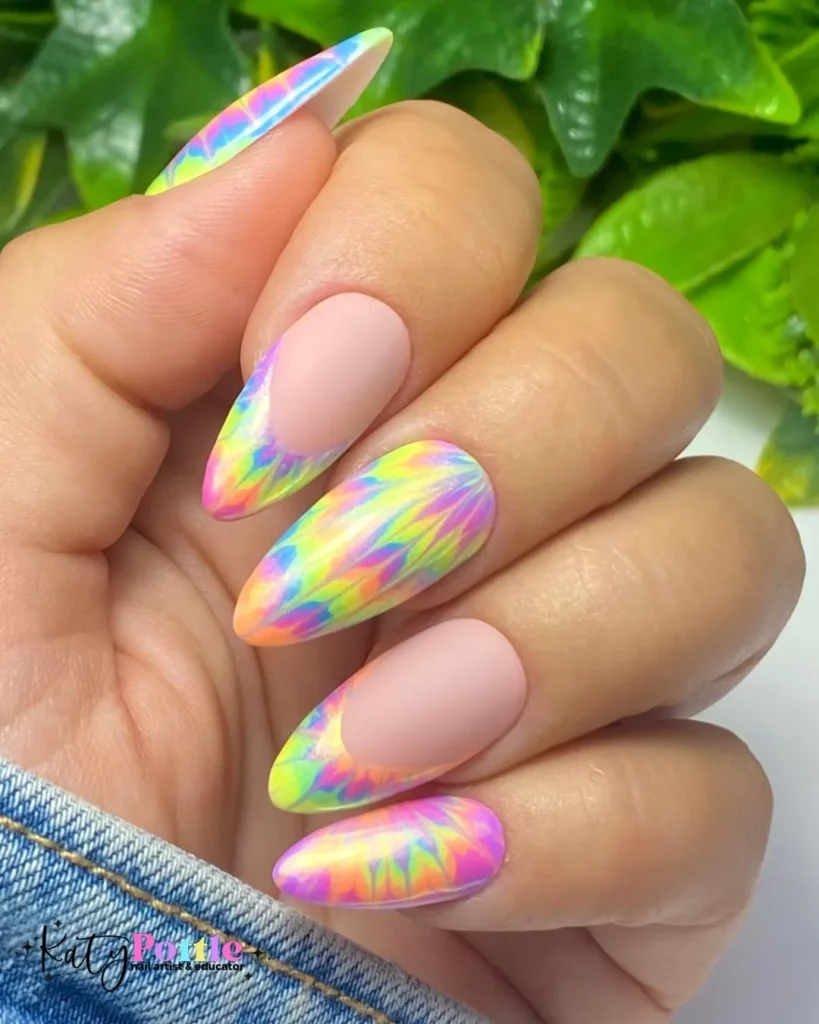
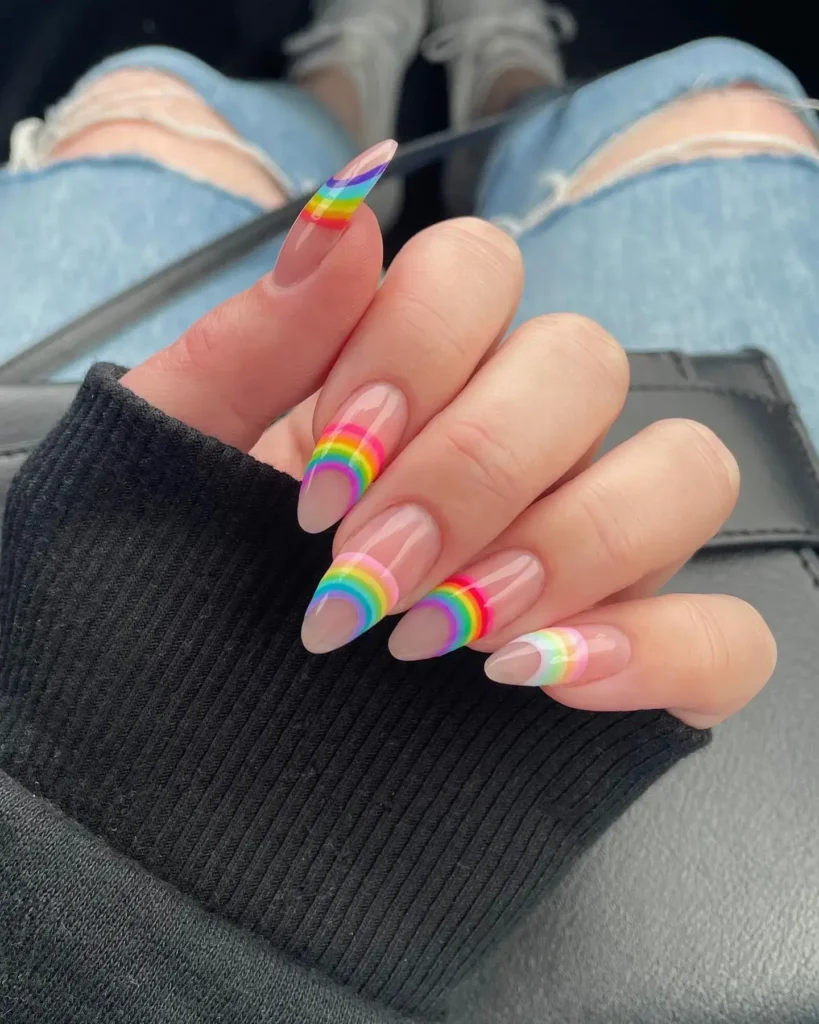
6. Rainbow Reverse French
Instead of a white tip, each nail gets a different bright color placed at the base near the cuticle.
Perfect for: Short nails, minimal effort styling
Best shapes: Short square, short oval
Pro tip: Use striping tape to keep the reverse French line clean.
Time to DIY: 25 minutes
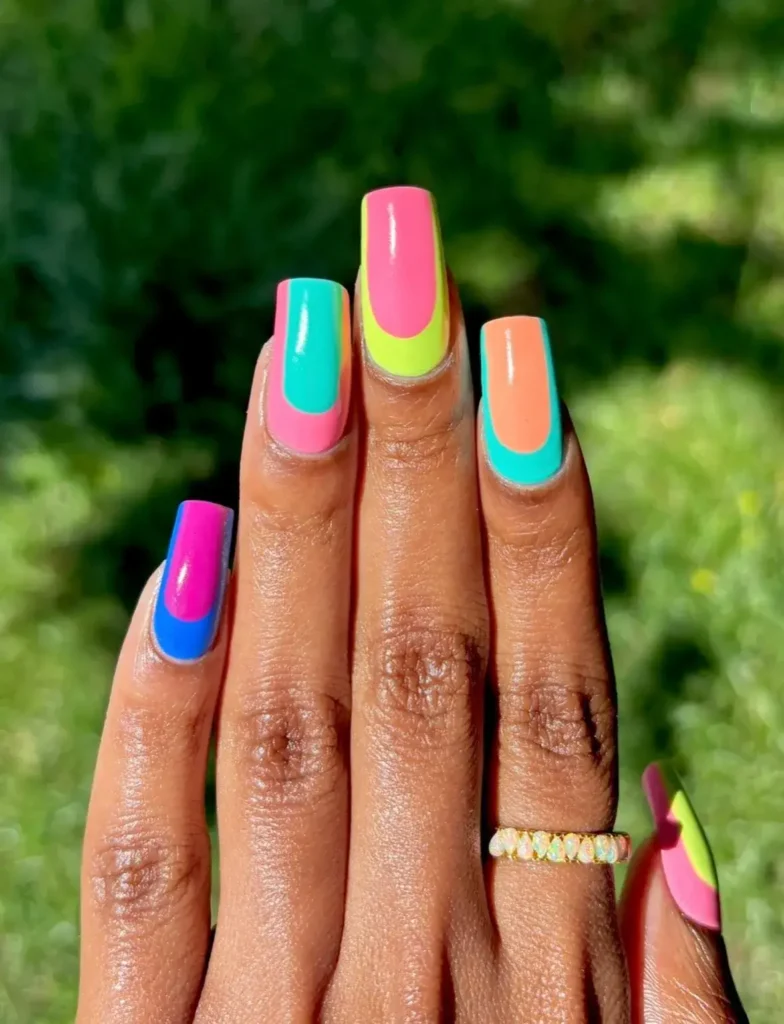
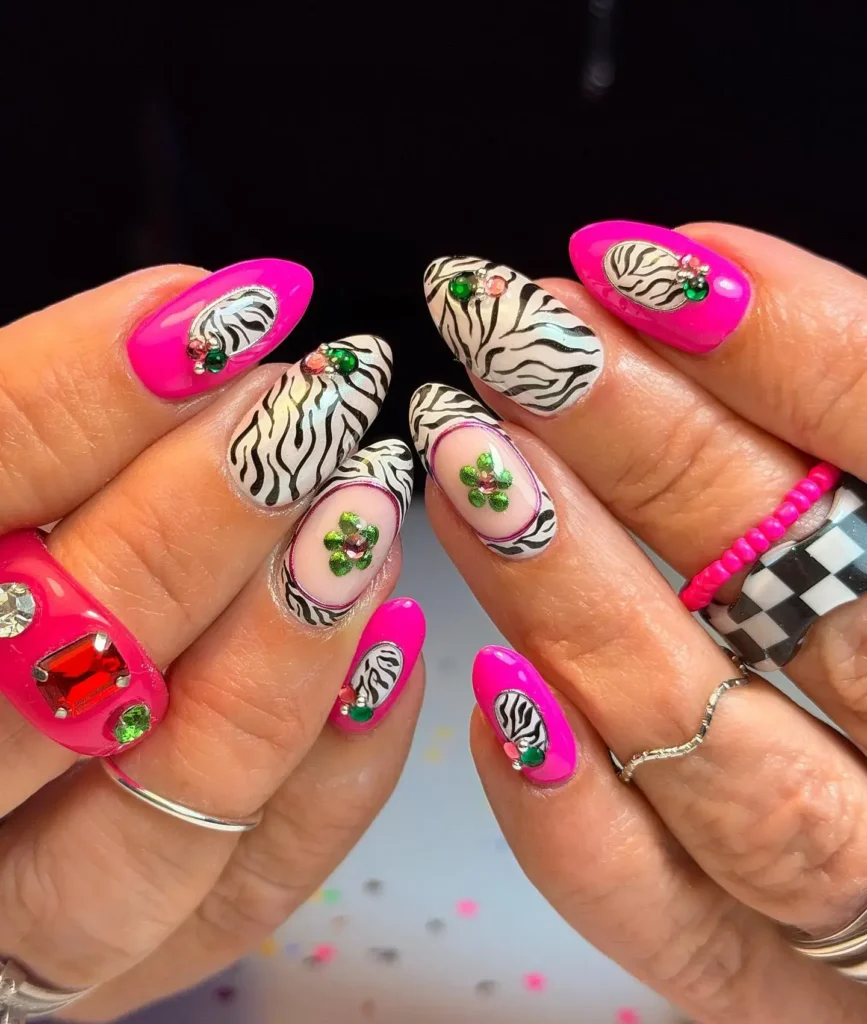
7. Zebra Stripe Brights
Bold black stripes sit over a bright base color, most often hot pink or orange.
Perfect for: Statement nails, going-out looks
Best shapes: Almond, coffin
Pro tip: A thin detail brush works better than a striping brush for sharp zebra lines.
Time to DIY: 30 minutes
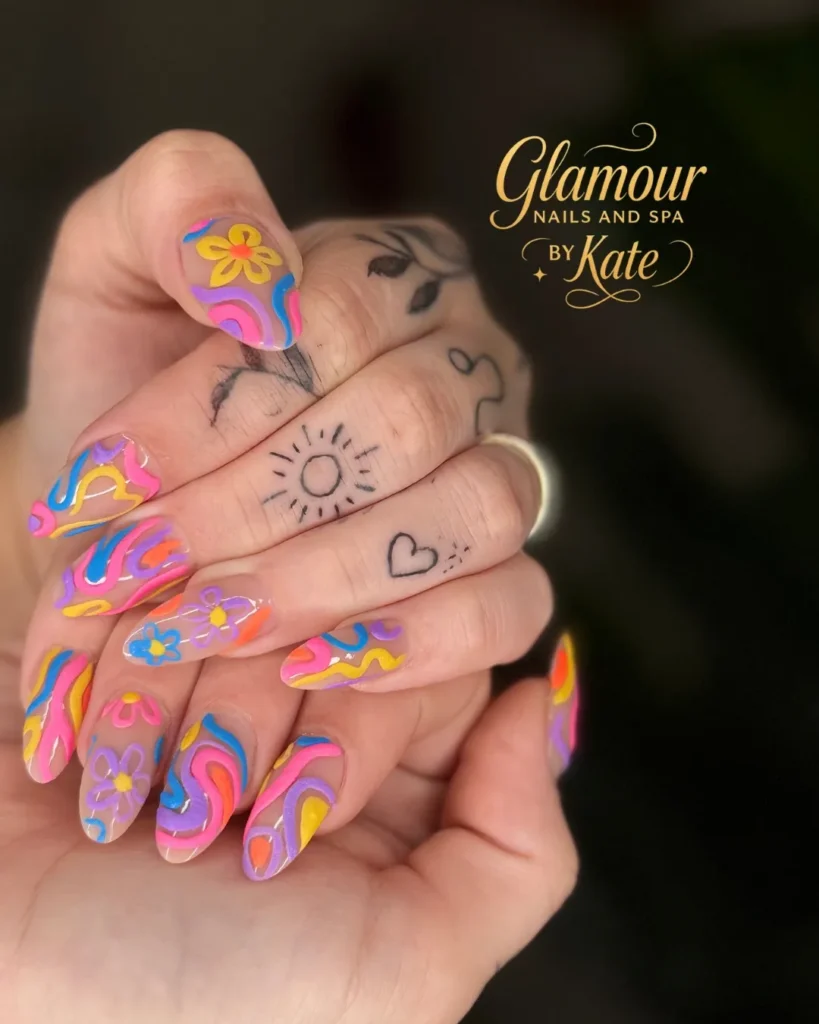
8. Groovy Psychedelic Nails
Wavy lines and abstract shapes in multiple bright colors cover the nail, inspired by retro seventies patterns.
Perfect for: Maximalist styles, creative expression
Best shapes: Coffin, almond
Pro tip: Sketch the design in pencil on paper first if you are new to freehand art.
Time to DIY: 50 minutes
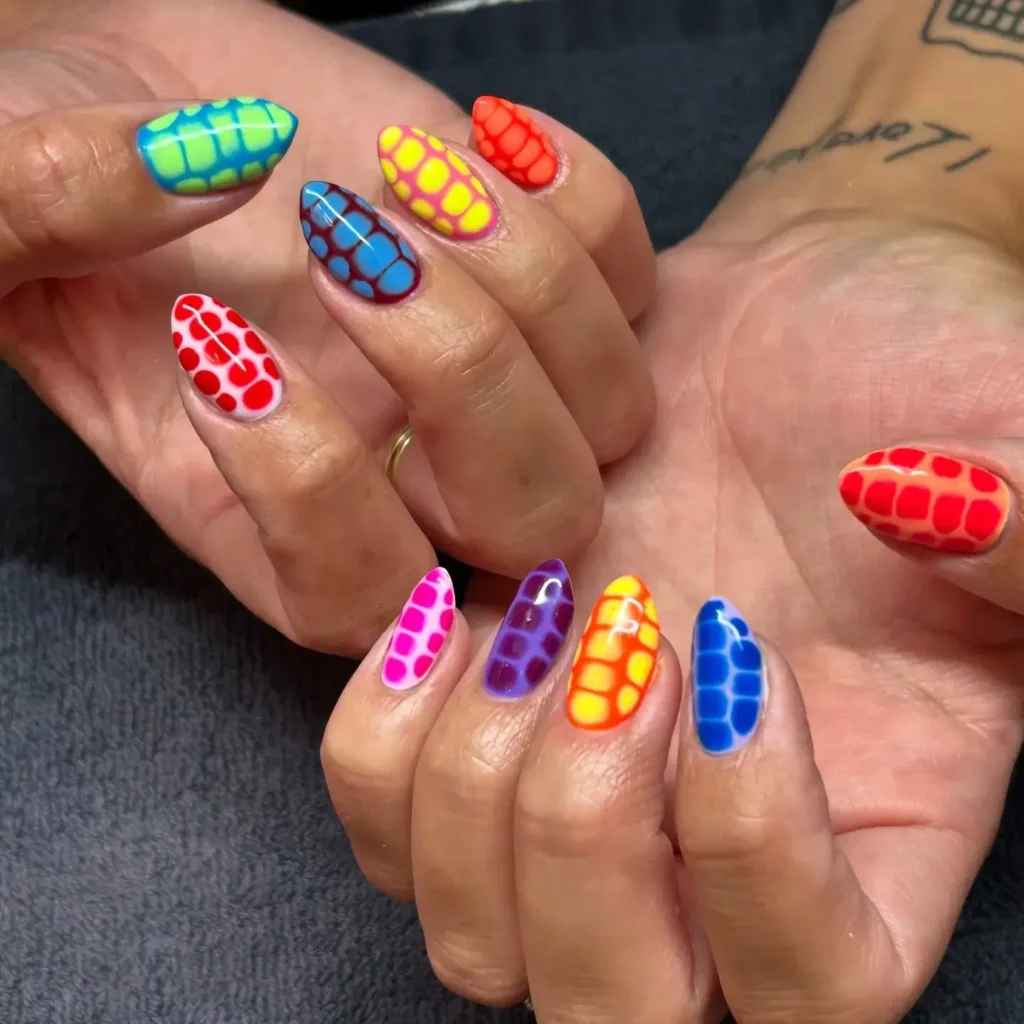
9. Crocodile Print Brights
A textured crocodile pattern sits in a bright color like olive green or hot pink, often paired with a clean white base.
Perfect for: Trend followers, texture lovers
Best shapes: Short square, squoval
Pro tip: A small dotting tool creates the scale pattern more easily than a brush.
Time to DIY: 40 minutes
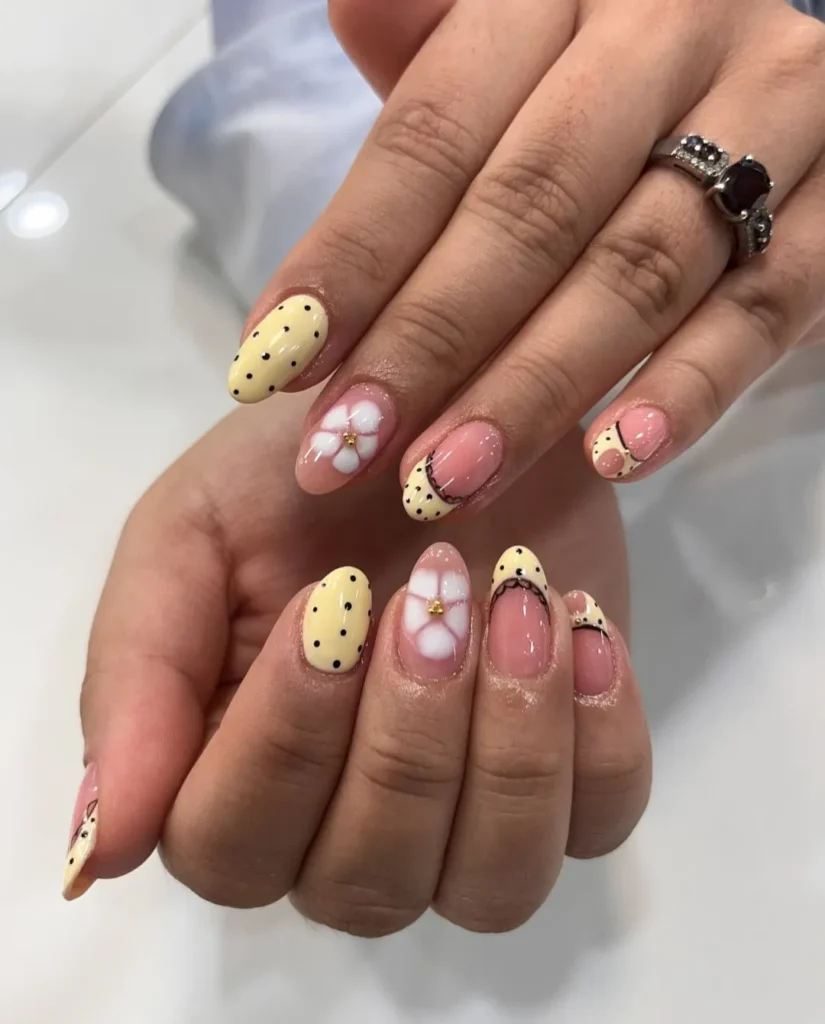
10. Vacation Polka Dots
Bright, colorful dots cover the nail in a playful, mismatched pattern, often paired with a white or pastel base.
Perfect for: Beach vacations, casual summer days
Best shapes: Short oval, round
Pro tip: A dotting tool in two sizes creates more visual interest than one uniform dot size.
Time to DIY: 30 minutes
Pastel Summer Nail Designs
Pastel shades bring a softer energy to summer nails. They feel calm, wearable, and easy to match with almost any outfit.
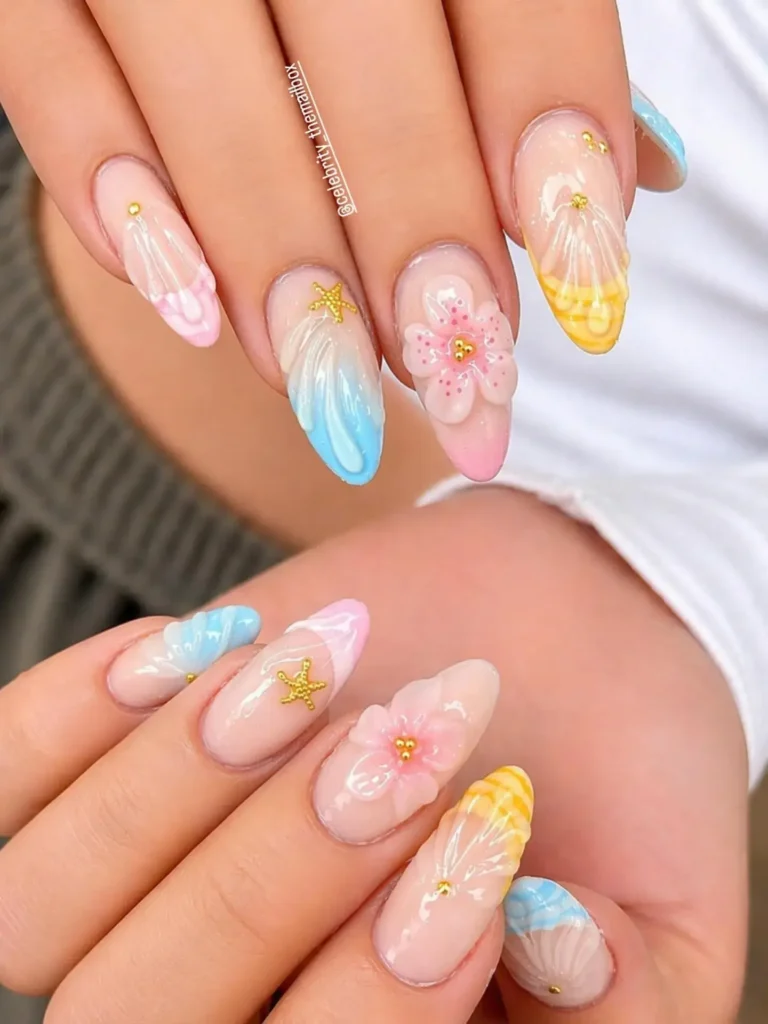
11. Lavender Haze
A muted lavender shade covers the nail in a soft, matte or semi-gloss finish. The color reads as gentle without feeling washed out.
Perfect for: Everyday wear, minimalist styles
Best shapes: Almond, oval
Pro tip: Use a slightly thicker second coat to keep the lavender from looking sheer or streaky.
Time to DIY: 20 minutes
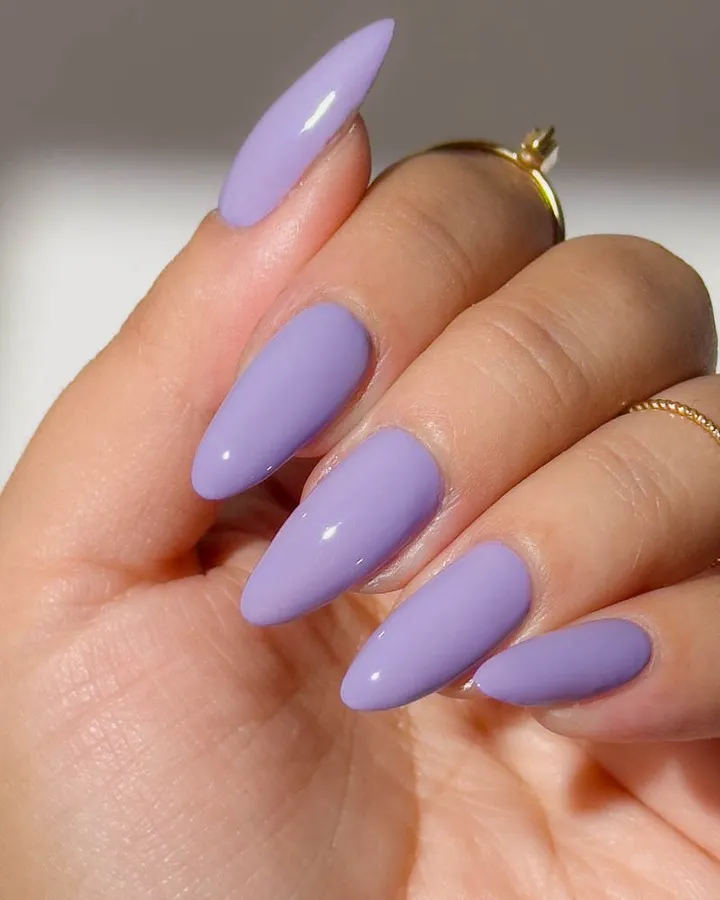
12. Mint Mojito Nails
A cool mint green sits under a glossy top coat, giving the shade a fresh, cocktail-inspired feel.
Perfect for: Pool days, casual summer outings
Best shapes: Square, squoval
Pro tip: Mint shows brush strokes easily, so use thin, even coats for a smooth finish.
Time to DIY: 20 minutes
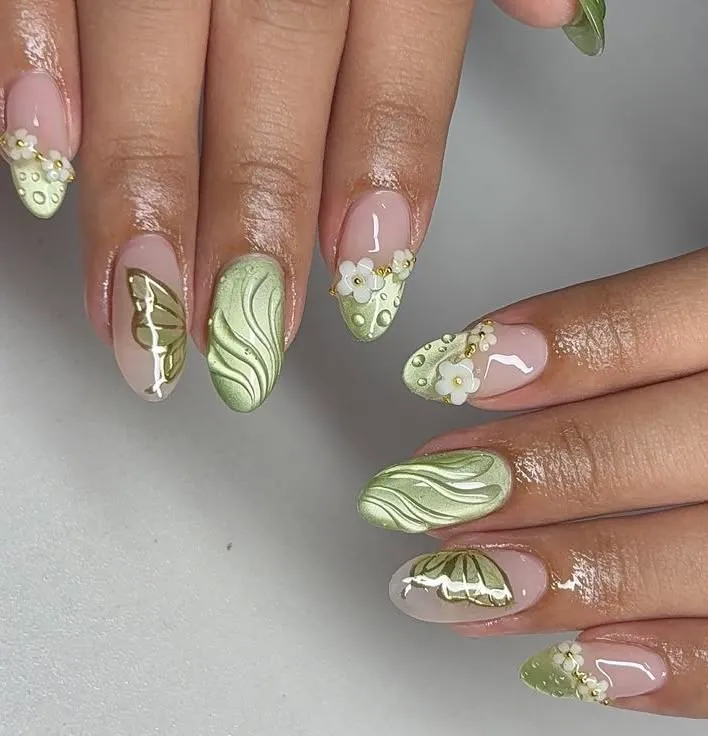
13. Peaches and Cream
Soft peach blends into a creamy white base, creating a warm, gentle gradient across the nail.
Perfect for: Brunch dates, warm weather events
Best shapes: Oval, round
Pro tip: Blend the two colors while both are still wet for a smoother transition.
Time to DIY: 30 minutes
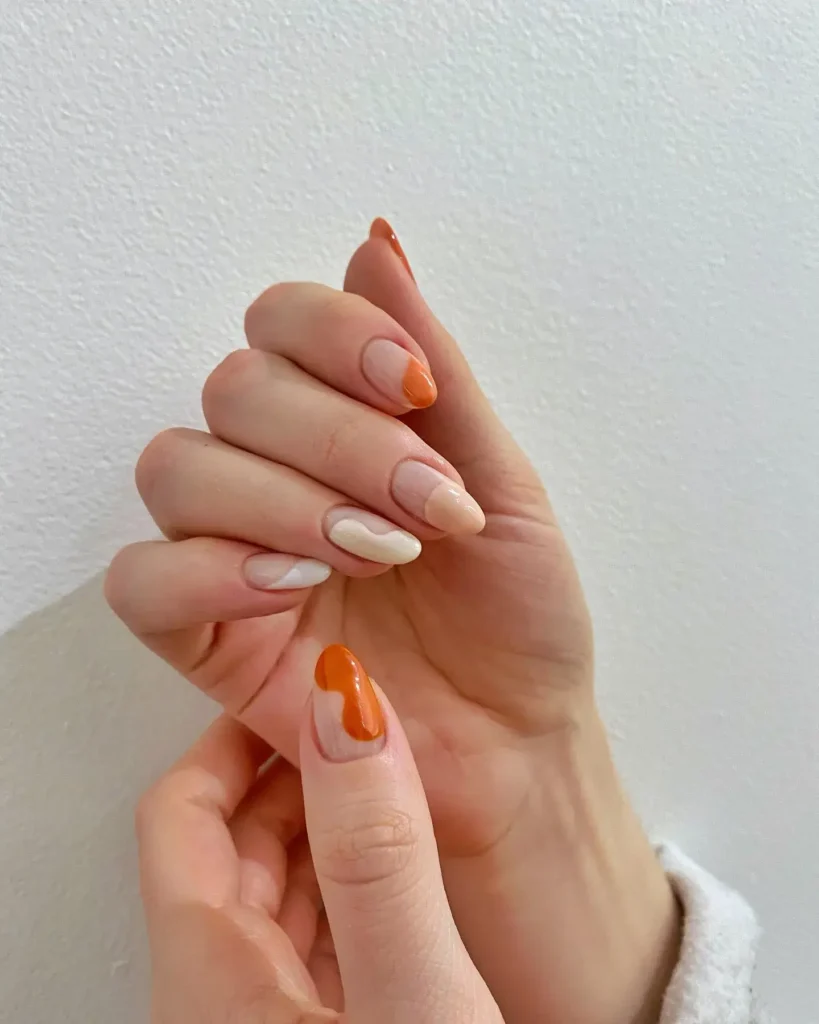
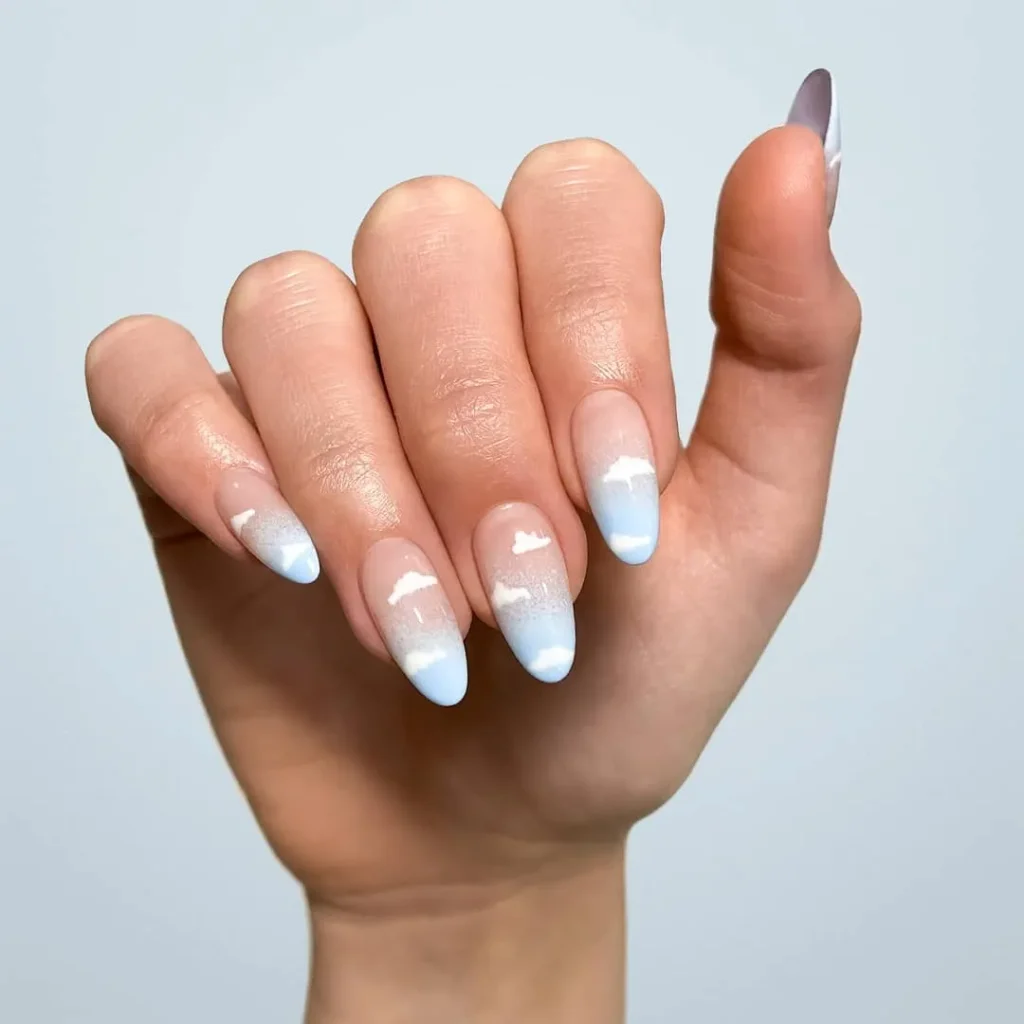
14. Baby Blue Clouds
Light blue polish gets softened with small white cloud shapes painted across one or two accent nails.
Perfect for: Vacation, playful everyday looks
Best shapes: Short oval, round
Pro tip: Use a small round brush and dab, rather than paint, to create a natural cloud texture.
Time to DIY: 35 minutes
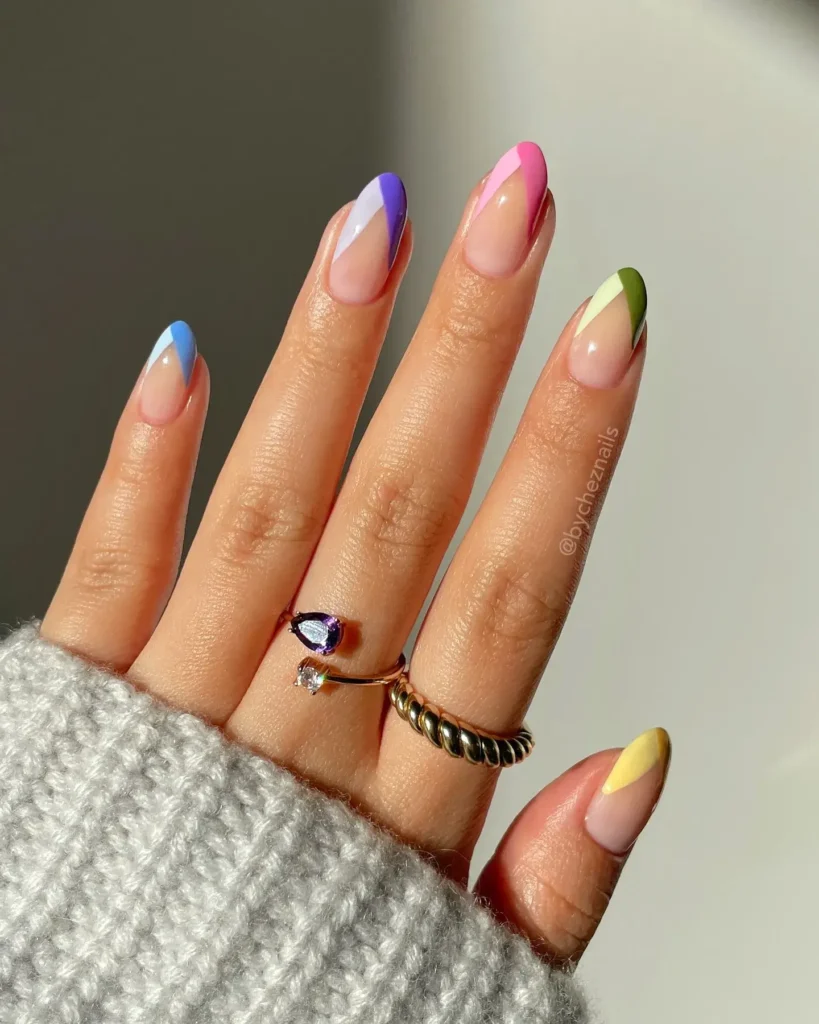
15. Pastel Rainbow French Tip
Each nail gets a French tip in a different pastel shade, turning a classic style into a playful summer set.
Perfect for: Fun without going fully bright
Best shapes: Square, almond
Pro tip: Use French tip guides to keep every line even across all ten nails.
Time to DIY: 40 minutes
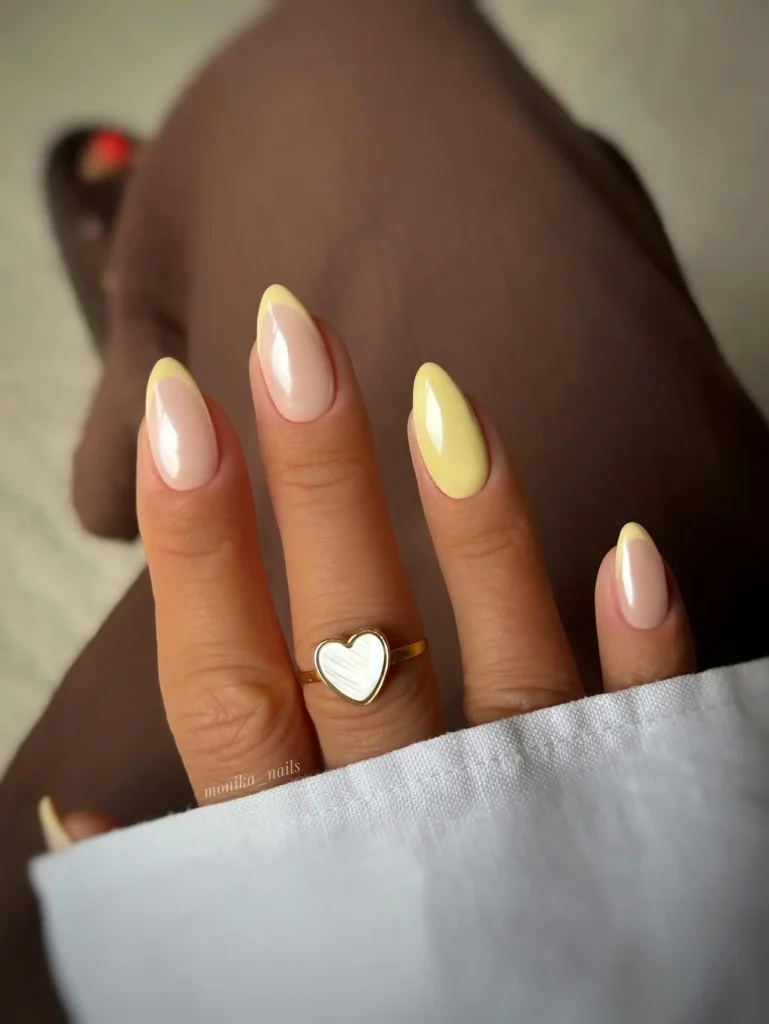
16. Butter Yellow Glazed Nails
A soft butter yellow base sits under a glossy glaze topcoat, giving the color a warm, polished shine.
Perfect for: Daily wear, warm weather styling
Best shapes: Almond, coffin
Pro tip: Apply the glaze topcoat in one smooth layer to avoid streaks on light colors.
Time to DIY: 20 minutes
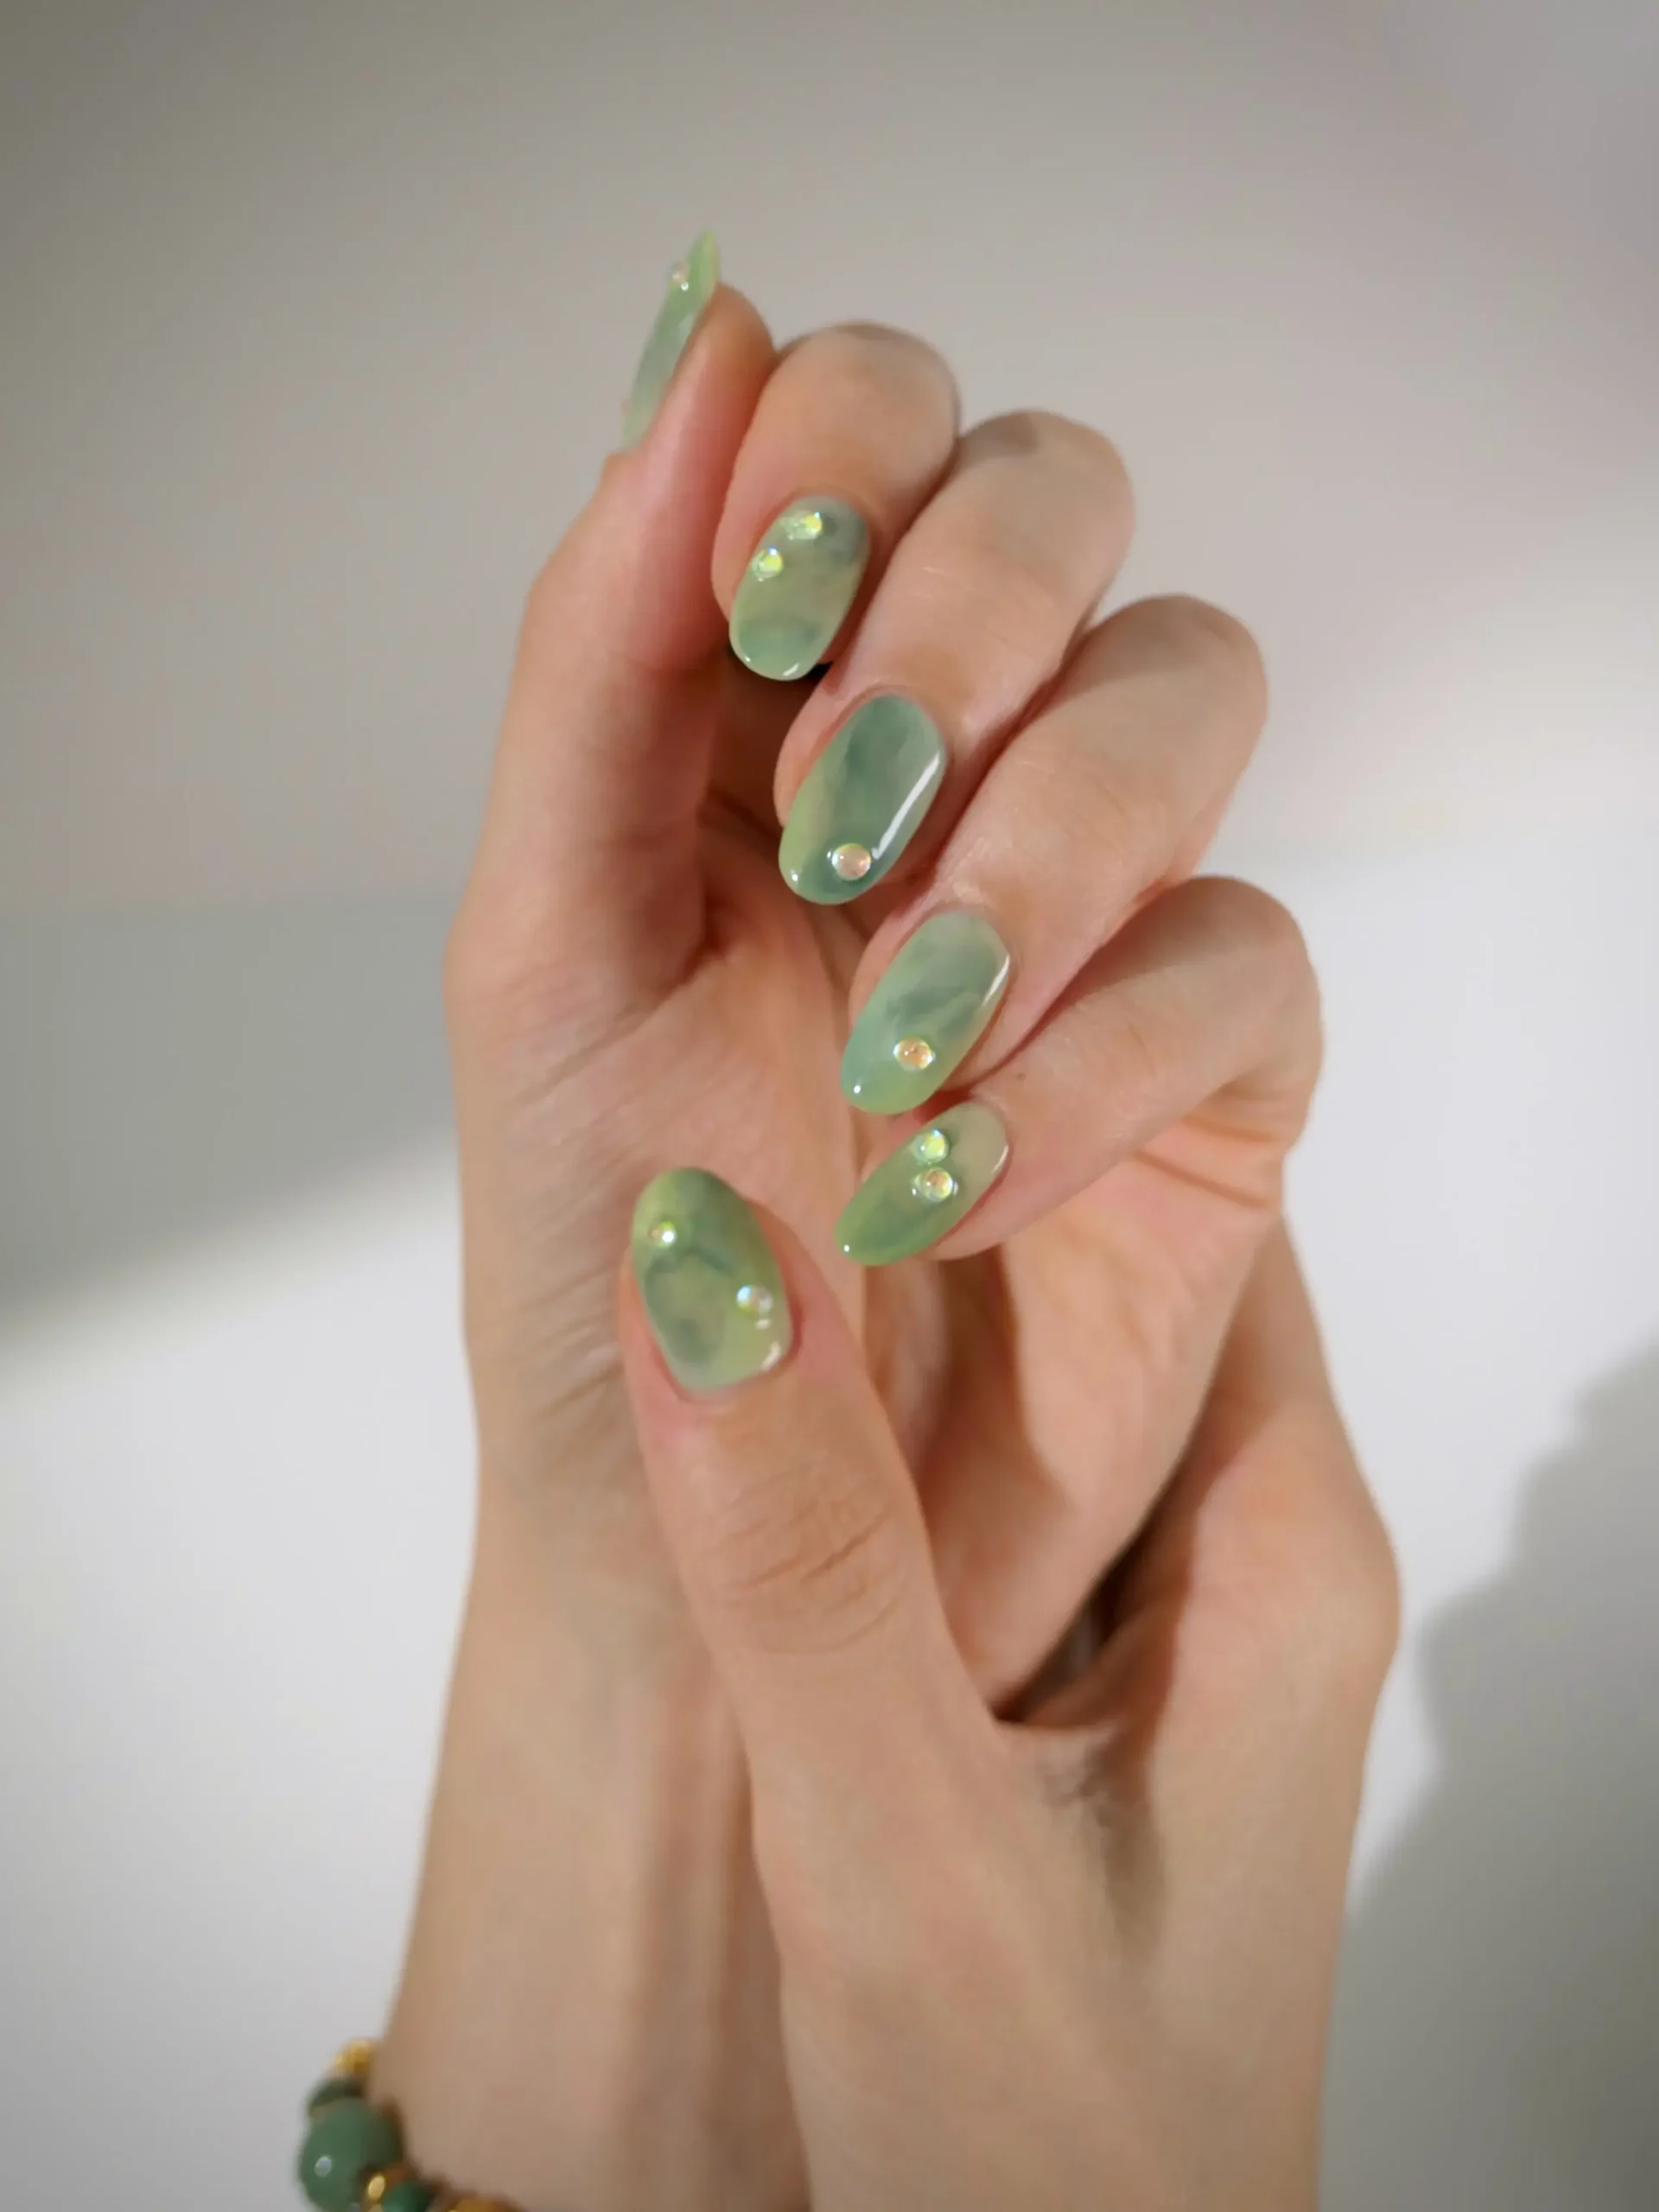
17. Pistachio Green with Glitter Accent
Pistachio green covers most nails, with one or two nails featuring a fine gold or silver glitter accent.
Perfect for: Understated color with a hint of sparkle
Best shapes: Oval, squoval
Pro tip: Dab glitter polish rather than brushing it on for more even coverage.
Time to DIY: 25 minutes
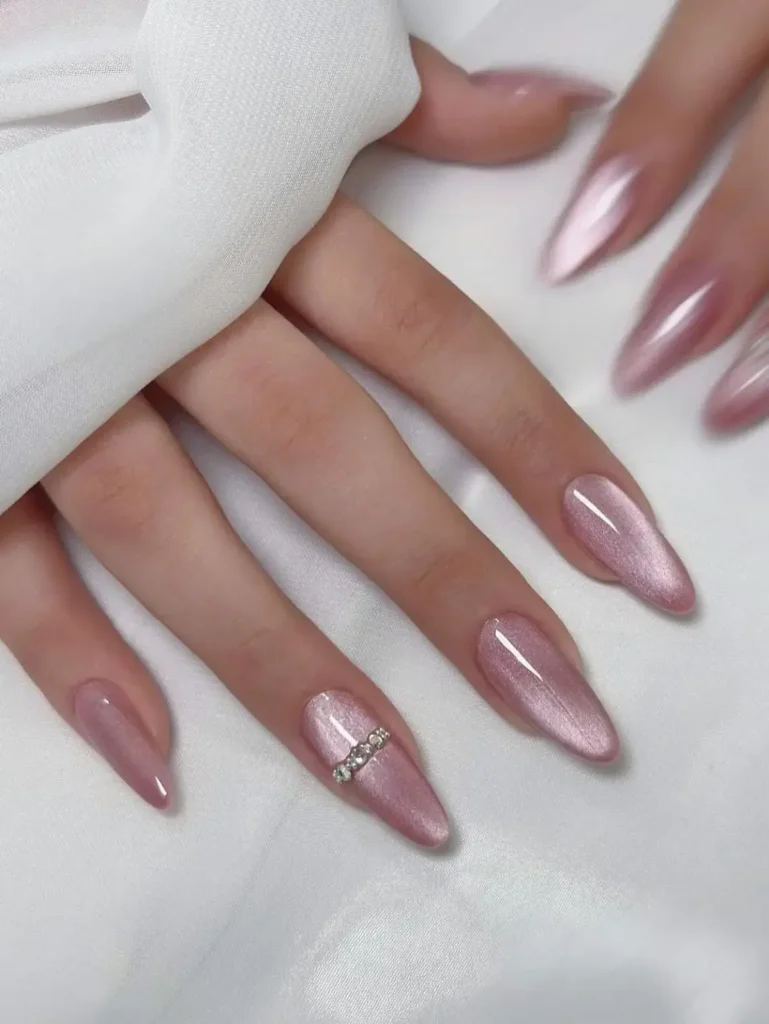
18. Soft Pink Cat-Eye Nails
A magnetic cat-eye polish in soft pink creates a subtle shimmer line that shifts as your hand moves.
Perfect for: Elegant everyday wear
Best shapes: Almond, coffin
Pro tip: Hold the magnet close to the nail without touching the wet polish for a crisp cat-eye line.
Time to DIY: 25 minutes
Chrome, Glazed & Jelly Summer Nail Ideas
Chrome, glazed, and jelly finishes bring shine and depth to summer nails. Each texture catches light in a different way, which makes this category one of the most eye-catching this season.
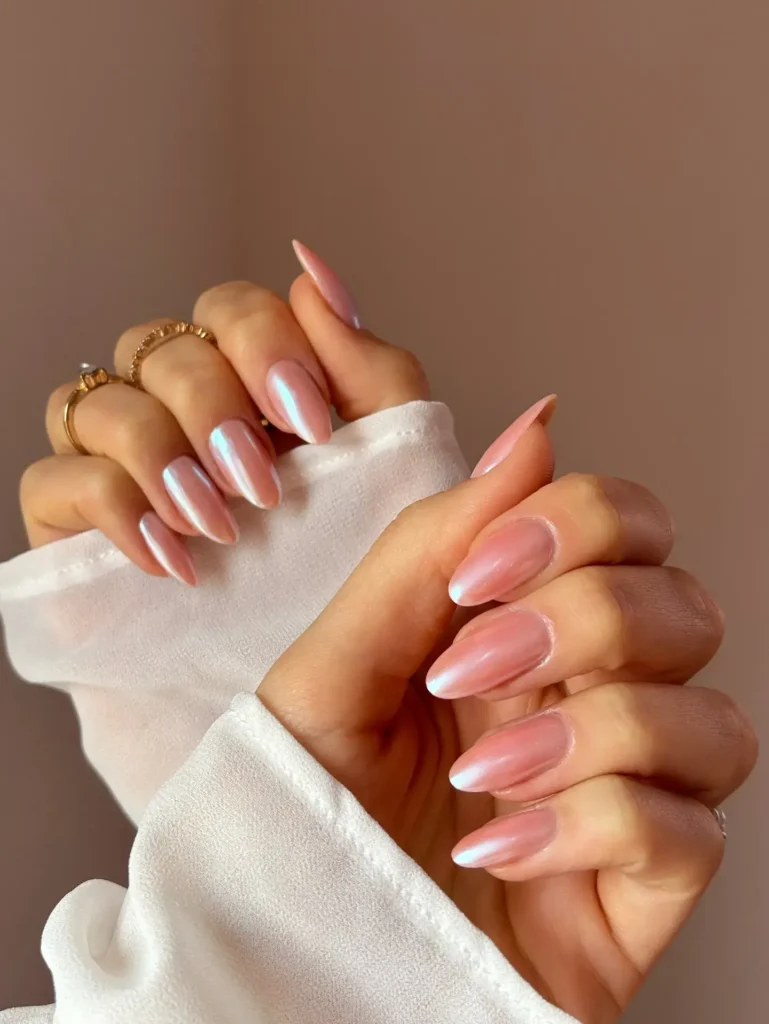
19. Mirror Chrome Gel Nails
A full chrome finish covers the nail in a high-shine, mirror-like effect. Light bounces off the surface almost like polished metal.
Perfect for: Statement looks, special occasions
Best shapes: Almond, coffin
Pro tip: Buff the gel base until it feels completely smooth before applying chrome powder, or the mirror effect will look dull.
Time to DIY: 45 minutes with a chrome kit
20. Pearl Glazed Perfection
A pearl-toned base sits under a glossy glaze topcoat, giving the nail a soft, luminous shine.
Perfect for: Weddings, elegant everyday wear
Best shapes: Oval, almond
Pro tip: Apply the glaze in thin layers to avoid dulling the pearl shimmer underneath.
Time to DIY: 25 minutes
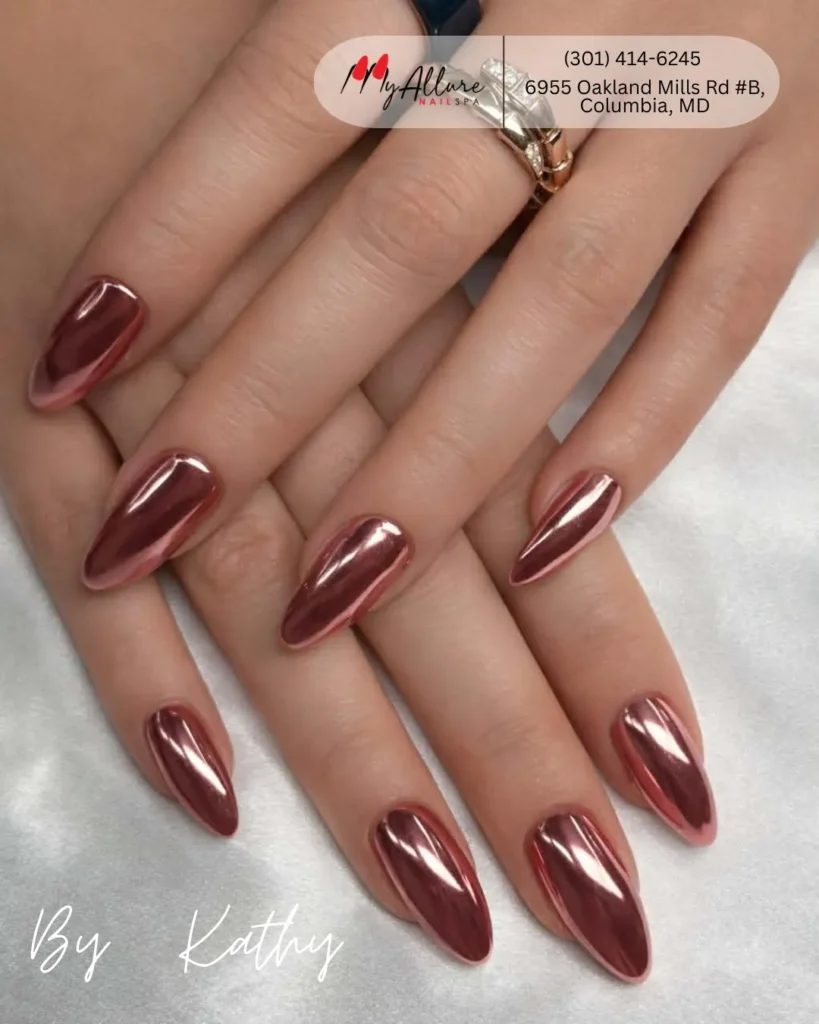
21. Rose Gold Chrome Nails
Warm rose gold chrome covers the nail in a soft metallic finish that reads as both bold and wearable.
Perfect for: Vacation, evening events
Best shapes: Coffin, almond
Pro tip: Use a soft applicator, not a brush, to rub chrome powder evenly across the nail.
Time to DIY: 40 minutes
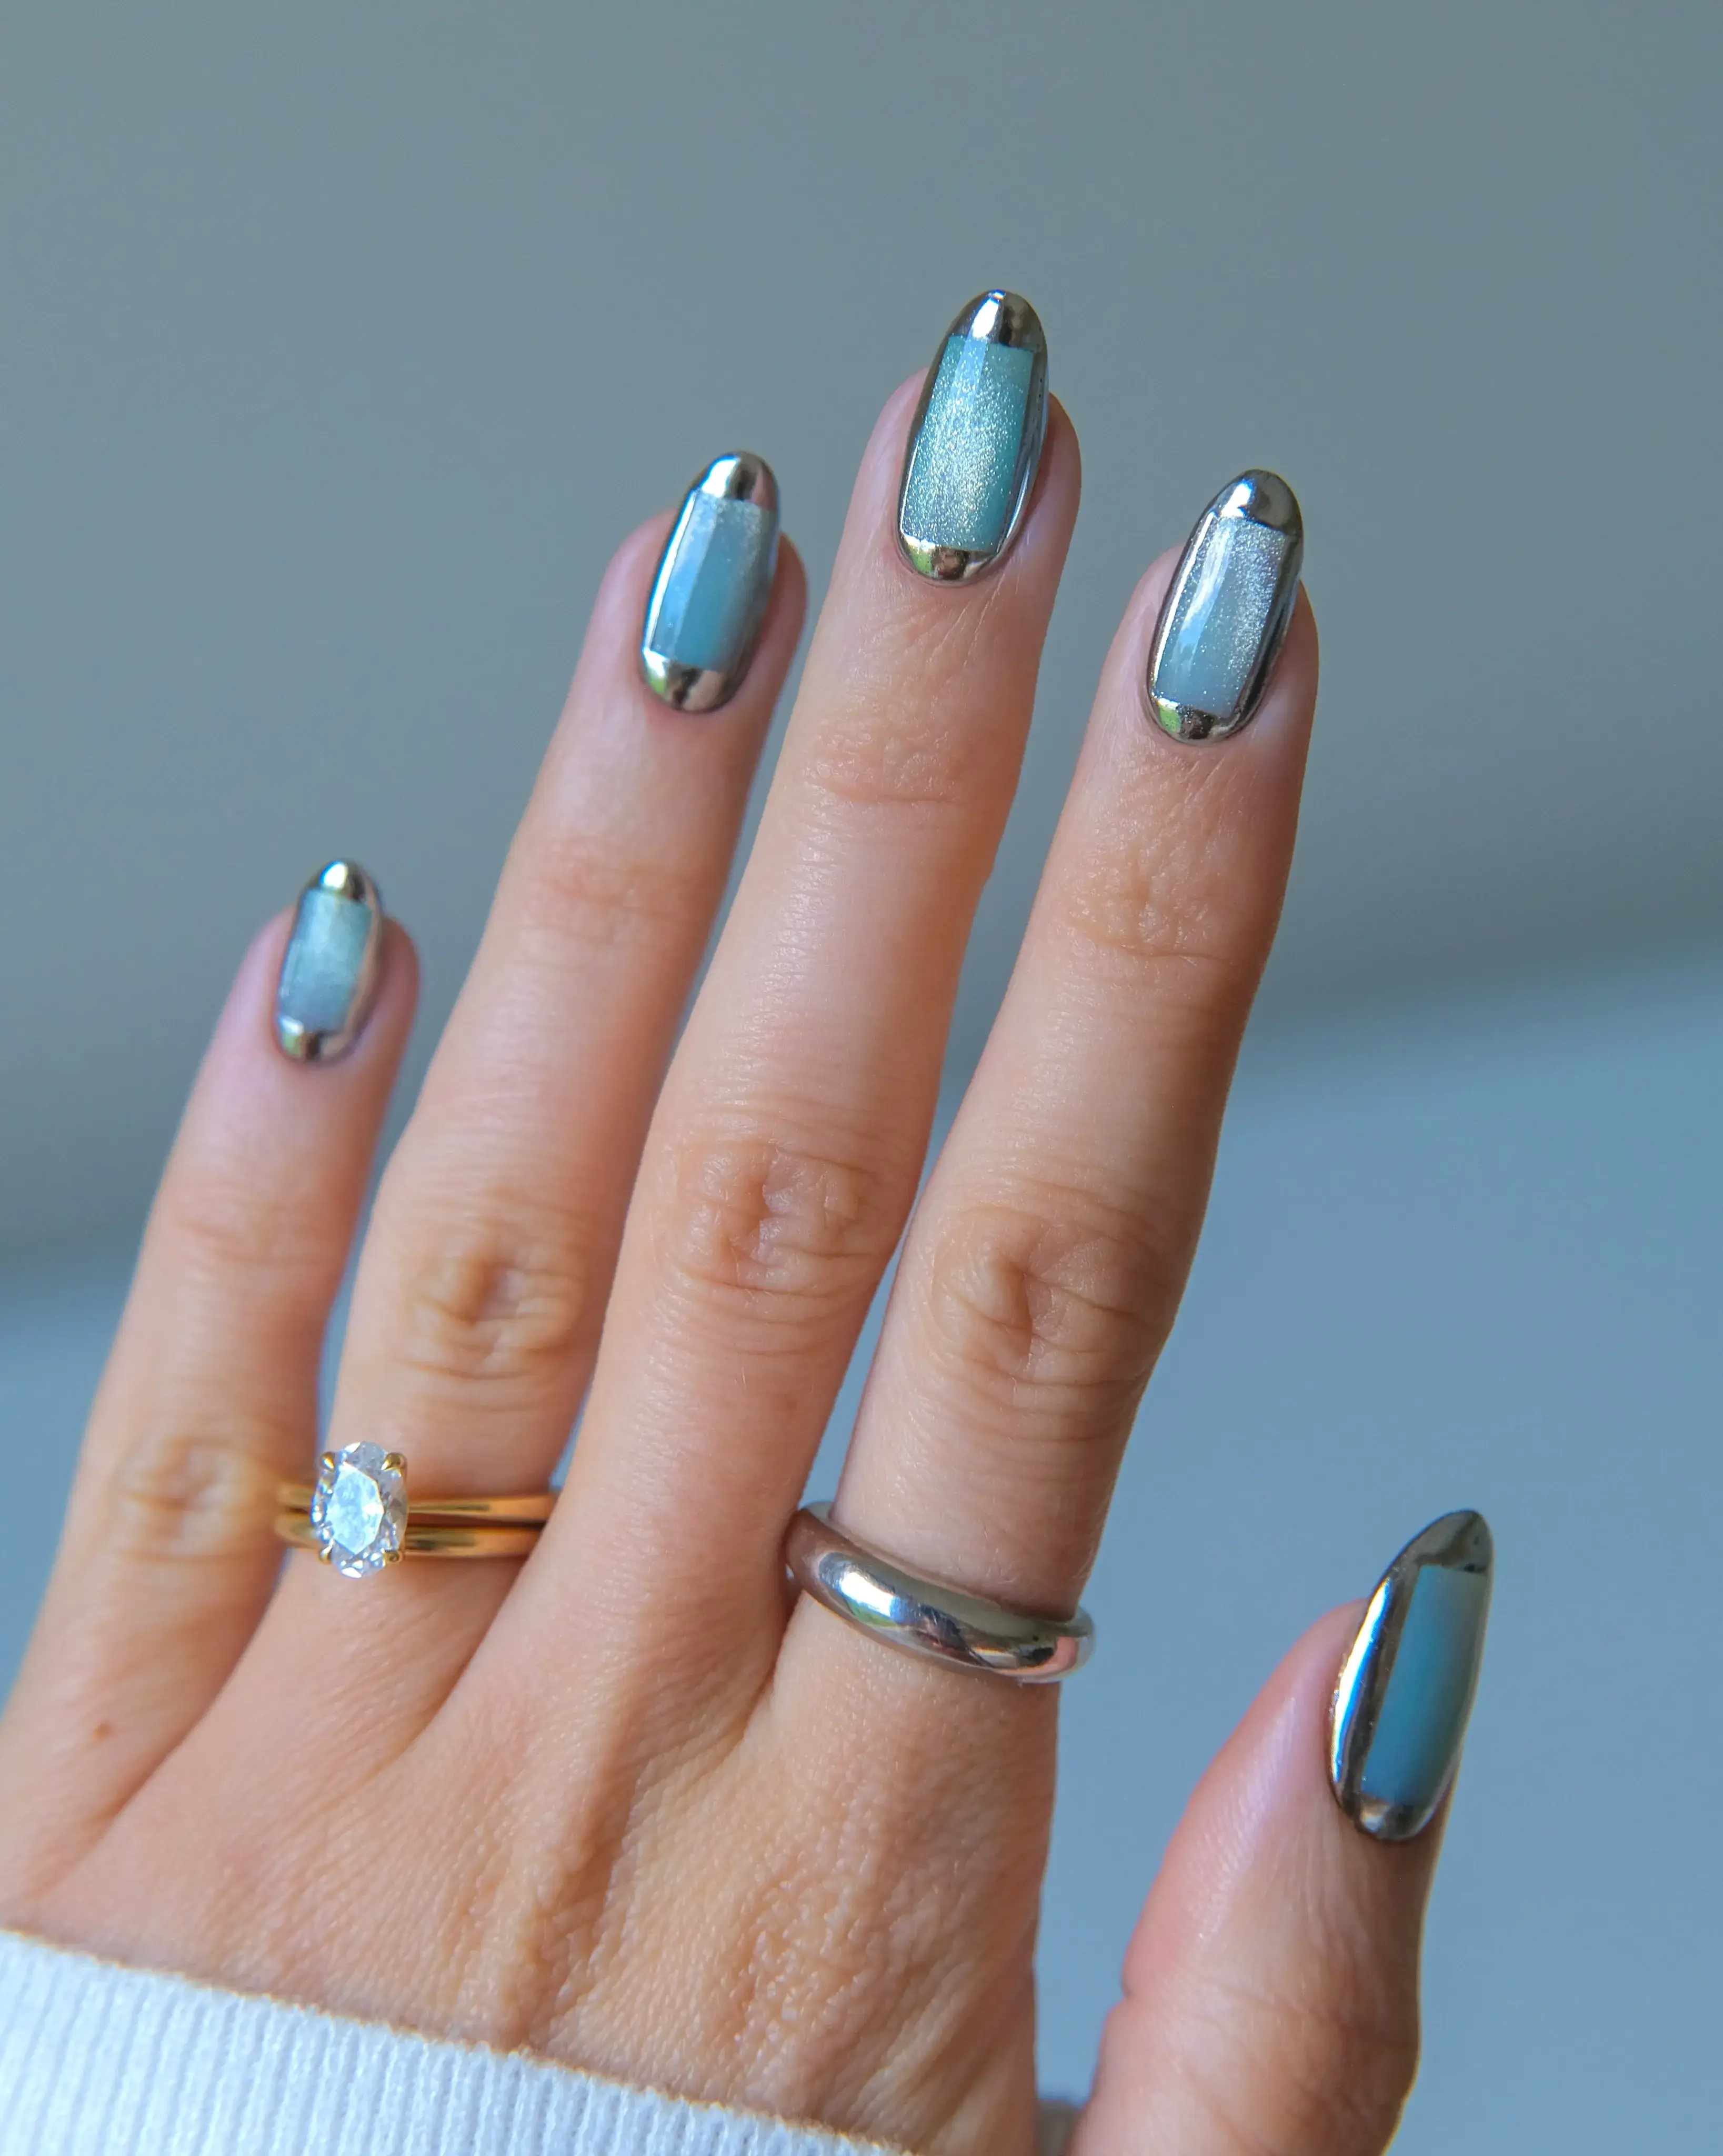
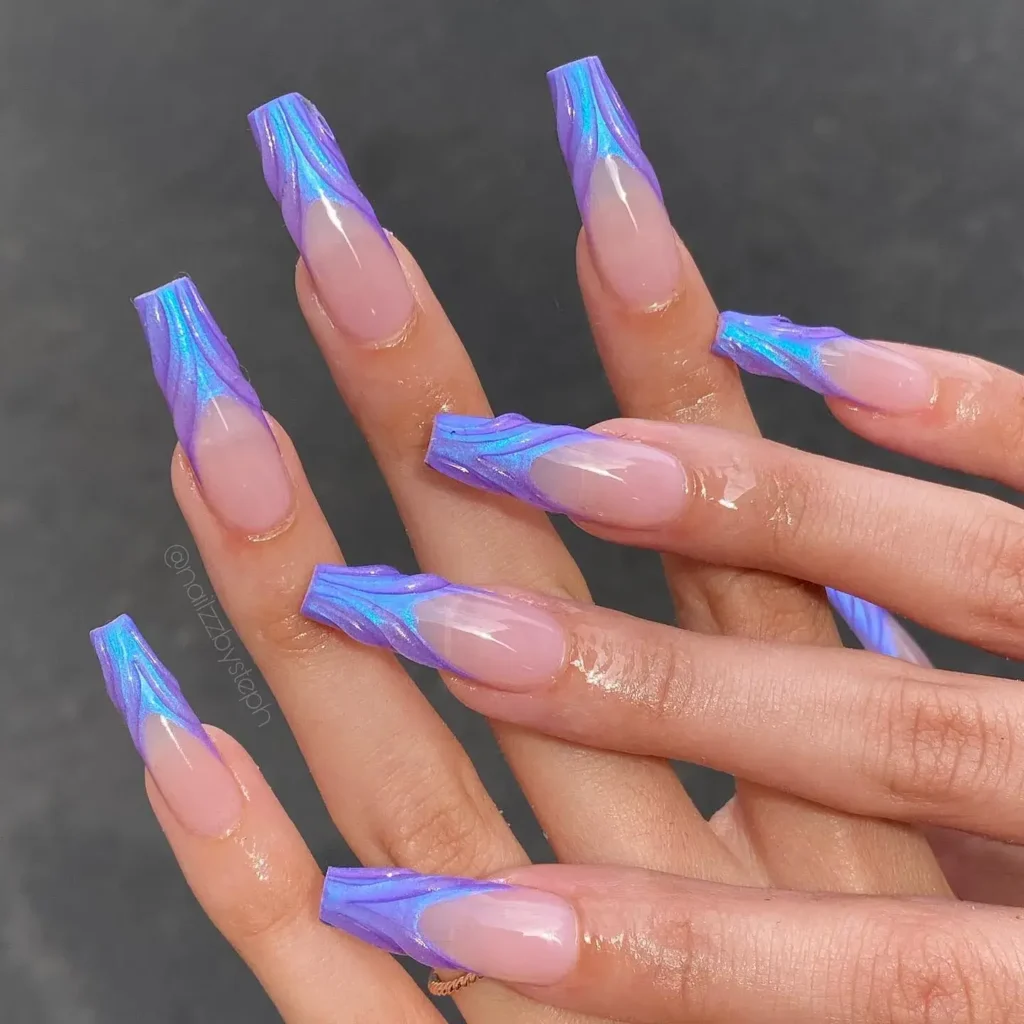
22. Iridescent Mermaid Finish
A color-shifting chrome finish moves between blue, green, and purple depending on the light and angle.
Perfect for: Beach trips, standout summer looks
Best shapes: Almond, coffin
Pro tip: Start with a black or dark base coat to make the iridescent shift more visible.
Time to DIY: 45 minutes
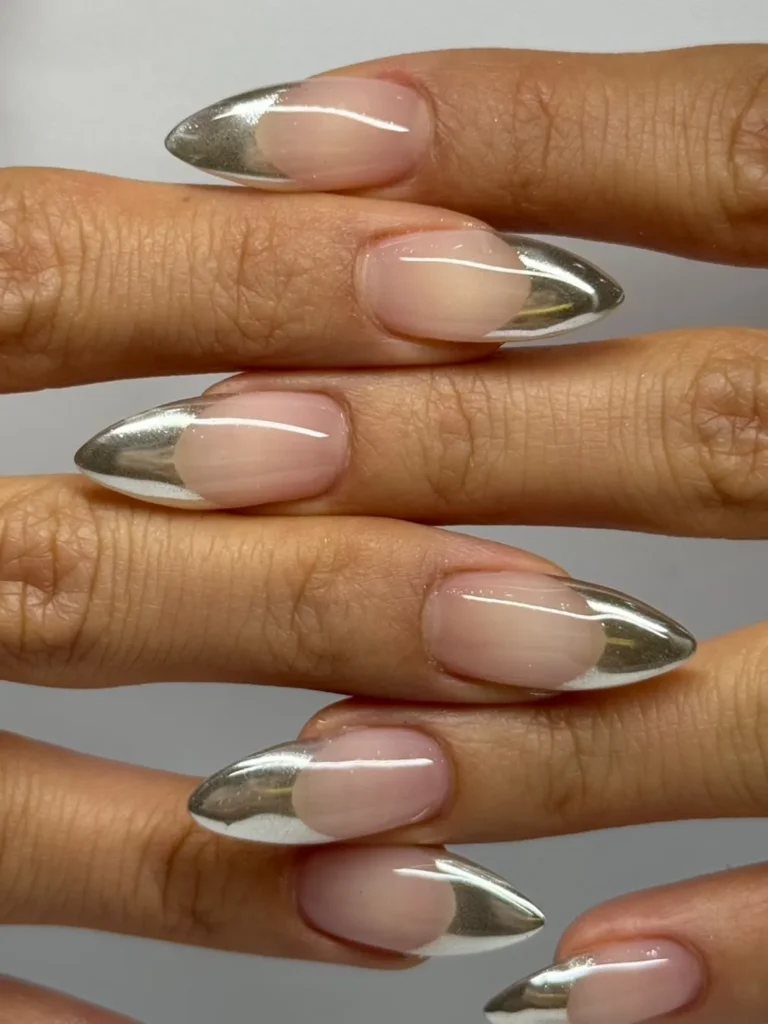
23. Silver Mirror Chrome Tips
Instead of covering the full nail, chrome is applied only to the tips over a clean, nude base.
Perfect for: Understated shine, office-friendly looks
Best shapes: Square, squoval
Pro tip: Use tape to section off the tip area for a clean, straight chrome line.
Time to DIY: 30 minutes
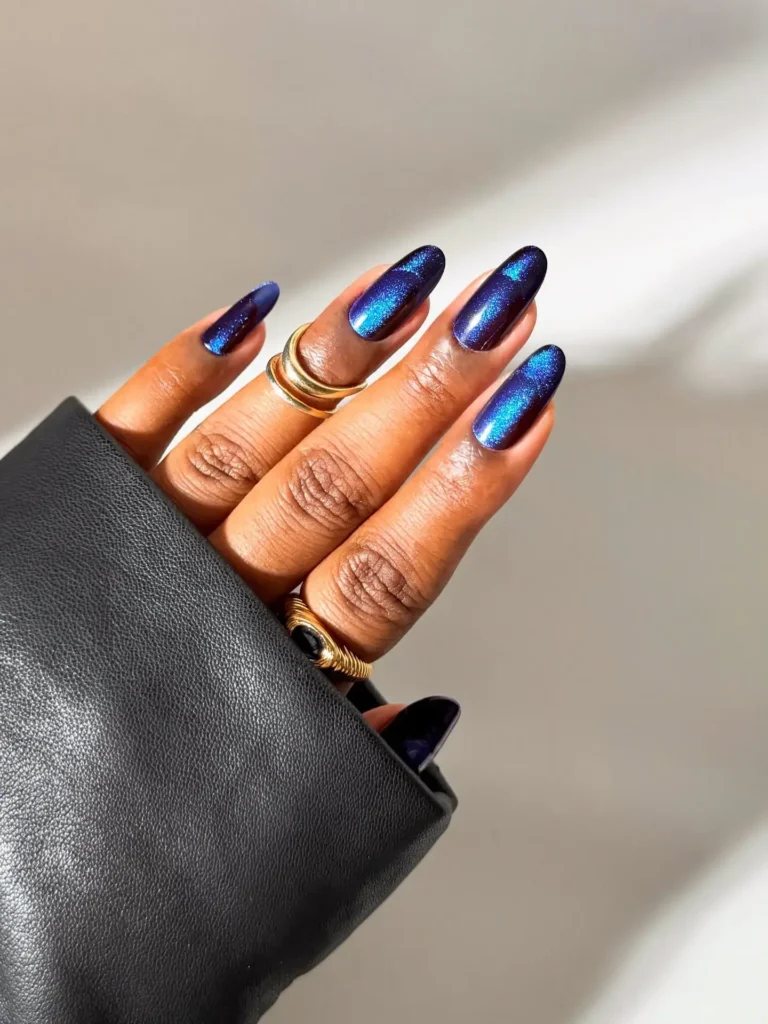
24. Velvet Chrome Coffin Nails
A matte velvet texture polish pairs with chrome accents for a finish that looks soft and shiny at the same time.
Perfect for: Fall-inspired summer looks, texture lovers
Best shapes: Coffin
Pro tip: Apply the velvet topcoat while the base is still slightly tacky for the best texture grip.
Time to DIY: 35 minutes
25. Jelly Micro-French Nails
A sheer, jelly-toned polish covers a tiny French tip, giving the classic style a soft, translucent update.
Perfect for: Short nails, minimalists
Best shapes: Short square, short oval
Pro tip: Use a nail stamper for the tip line, since jelly polish is harder to control with a brush alone.
Time to DIY: 25 minutes
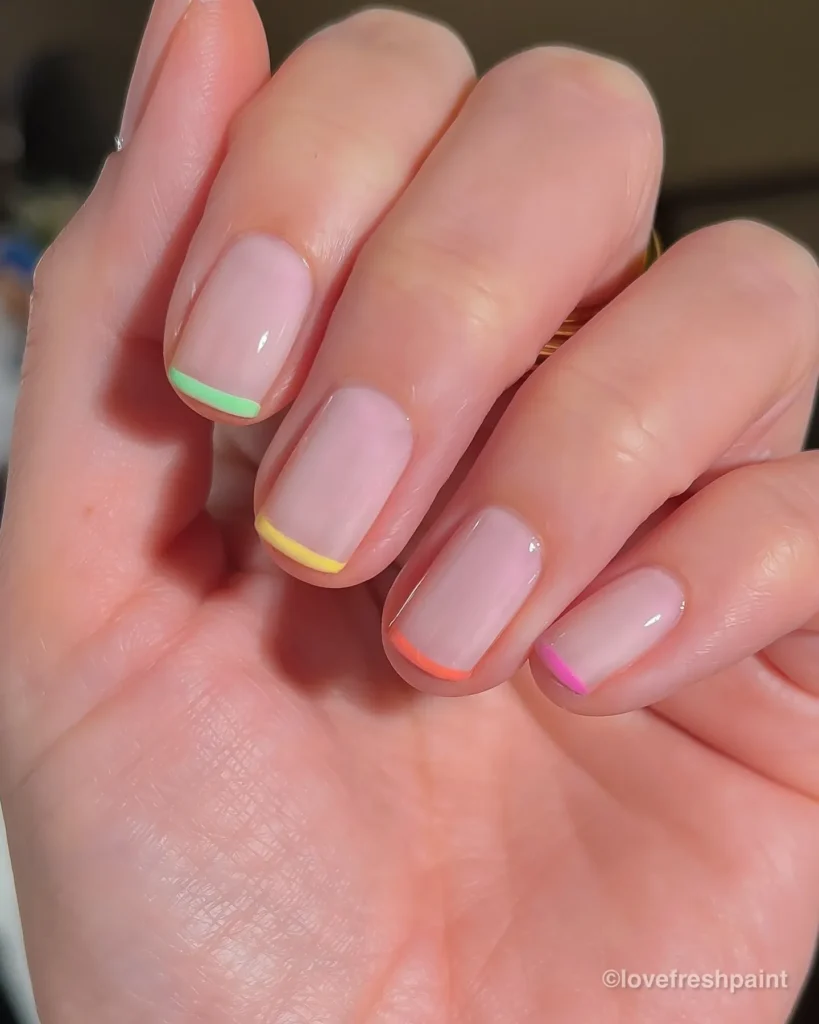
26. Glazed Donut Update
The original glazed donut nail returns with a twist. Soft pastel tones now sit underneath the glaze instead of plain white.
Perfect for: Trend followers, soft glam looks
Best shapes: Almond, oval
Pro tip: Let the base polish dry completely before applying glaze, or the finish will look cloudy instead of glossy.
Time to DIY: 25 minutes
Aura Nail Ideas
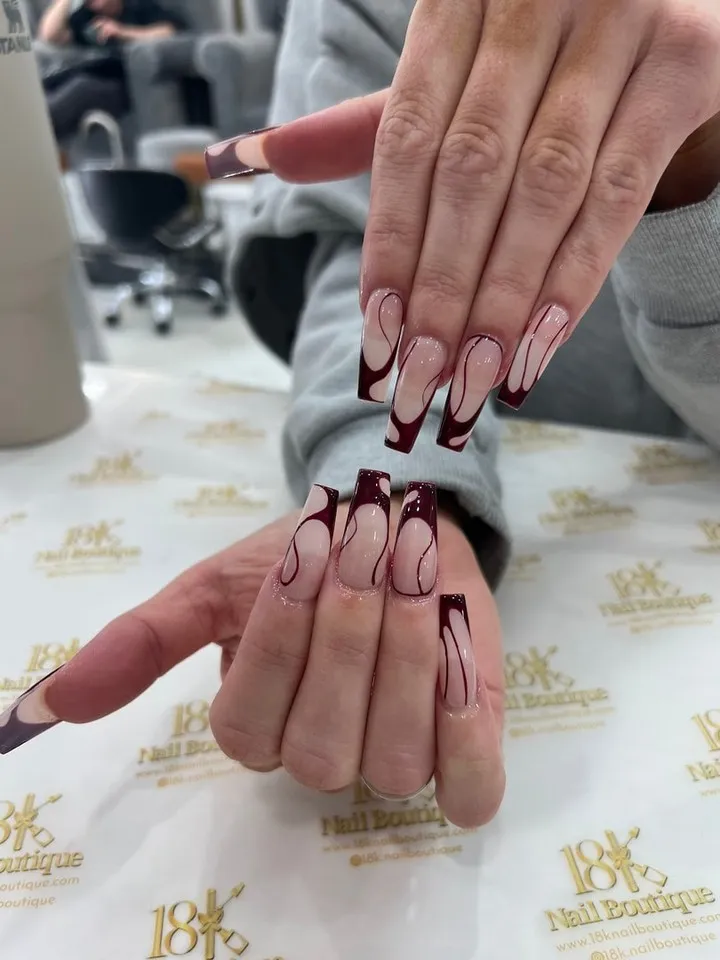
Aura nails use soft, airbrushed color that blends from the center outward. The technique creates a glowing, dreamlike effect that feels different from a standard gradient.
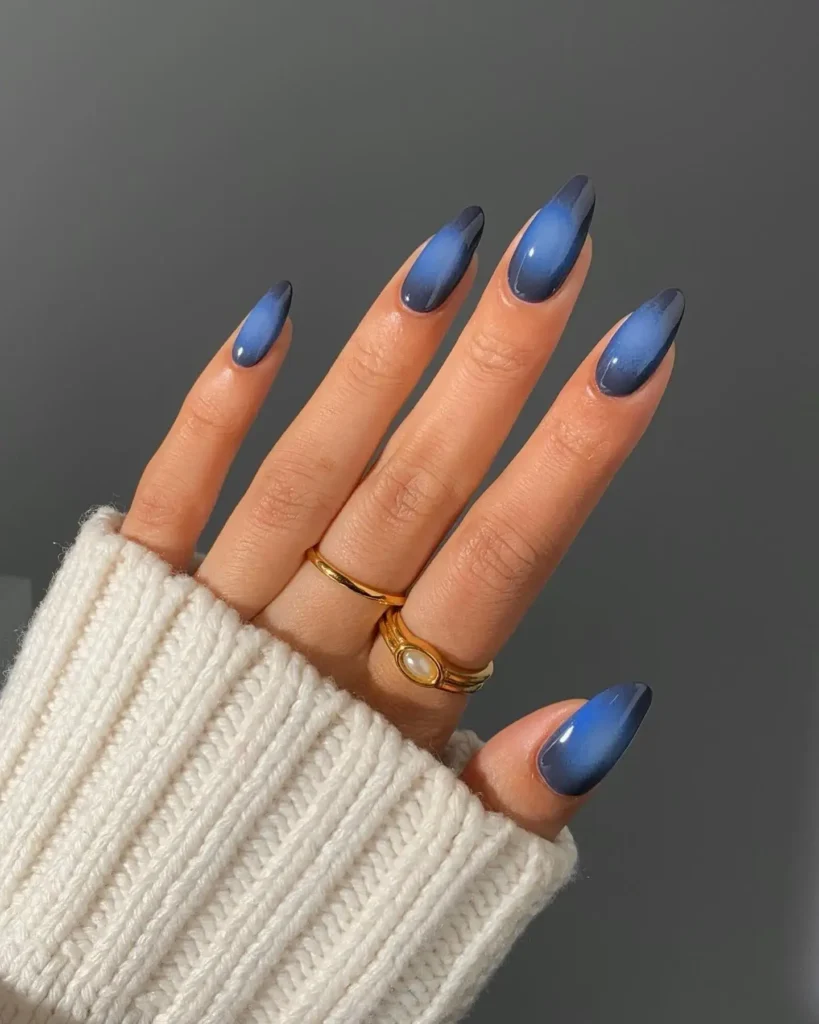
27. Sunset Aura
Warm yellow blends into orange, then fades into soft pink at the edges, mimicking the colors of a summer sunset.
Perfect for: Beach evenings, warm weather styling
Best shapes: Almond, coffin
Pro tip: Airbrush the lightest color first, then layer darker shades toward the edges for a smoother blend.
Time to DIY: 40 minutes with an airbrush kit
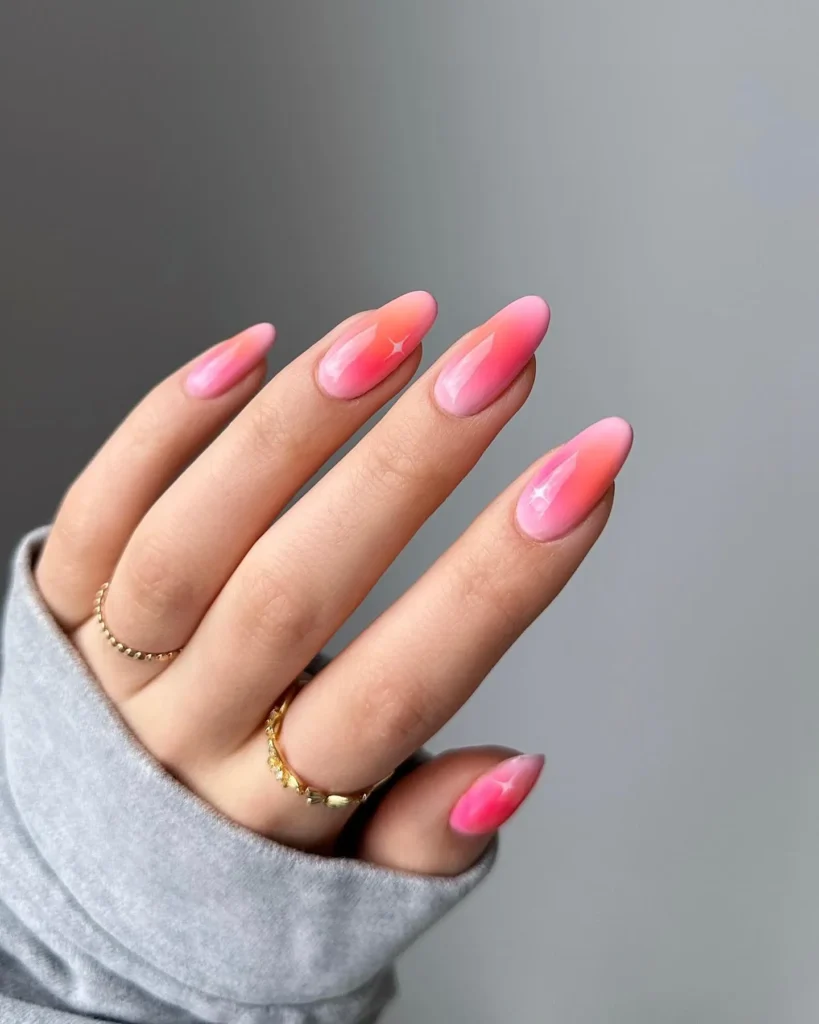
28. Chrome Aura
A soft aura design sits under a light chrome dusting, adding shimmer without covering the color blend completely.
Perfect for: Statement nails with subtle shine
Best shapes: Coffin, almond
Pro tip: Apply chrome powder lightly with a fluffy brush so the aura colors stay visible underneath.
Time to DIY: 45 minutes
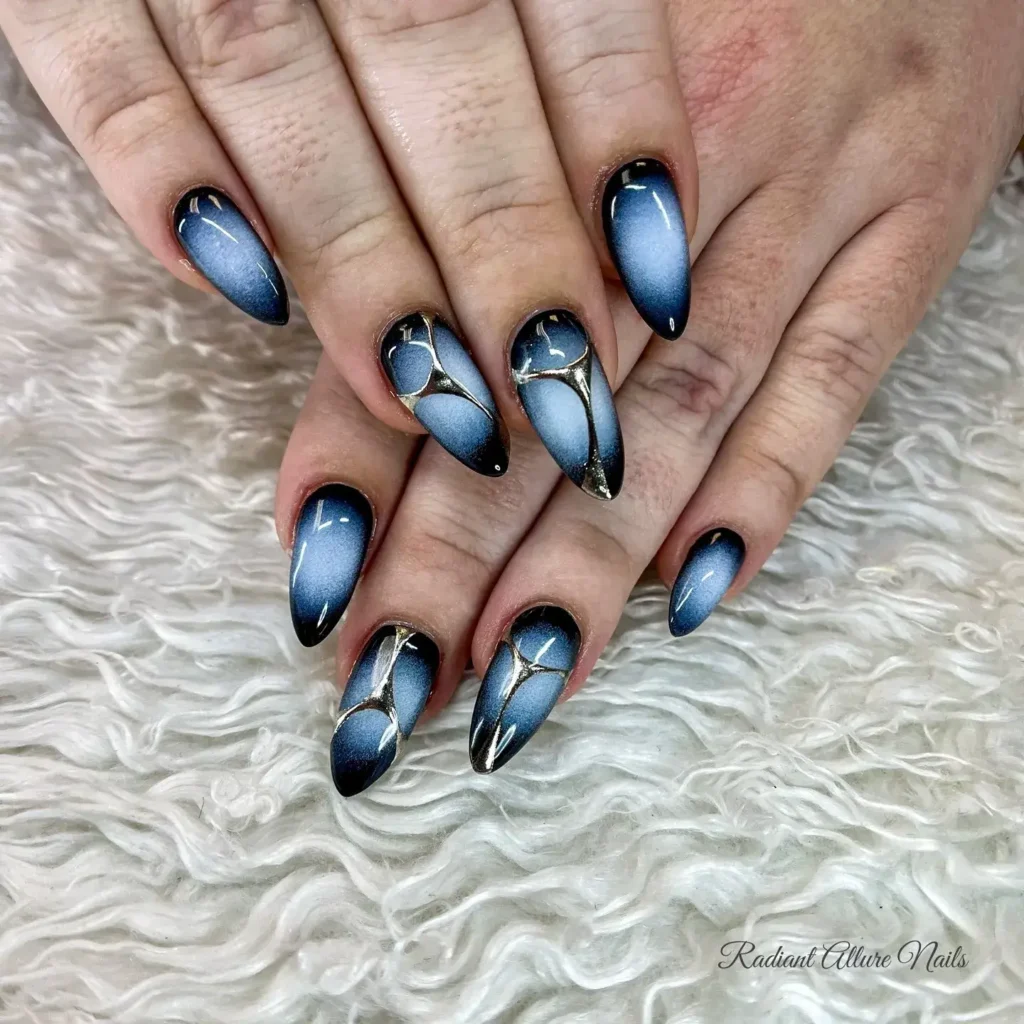
29. Mixed Aura
Multiple aura colors sit side by side across the set, with each nail featuring a different color combination.
Perfect for: Bold dressers, playful summer looks
Best shapes: Almond, oval
Pro tip: Keep one color consistent across every nail so the mixed set still feels connected.
Time to DIY: 45 minutes
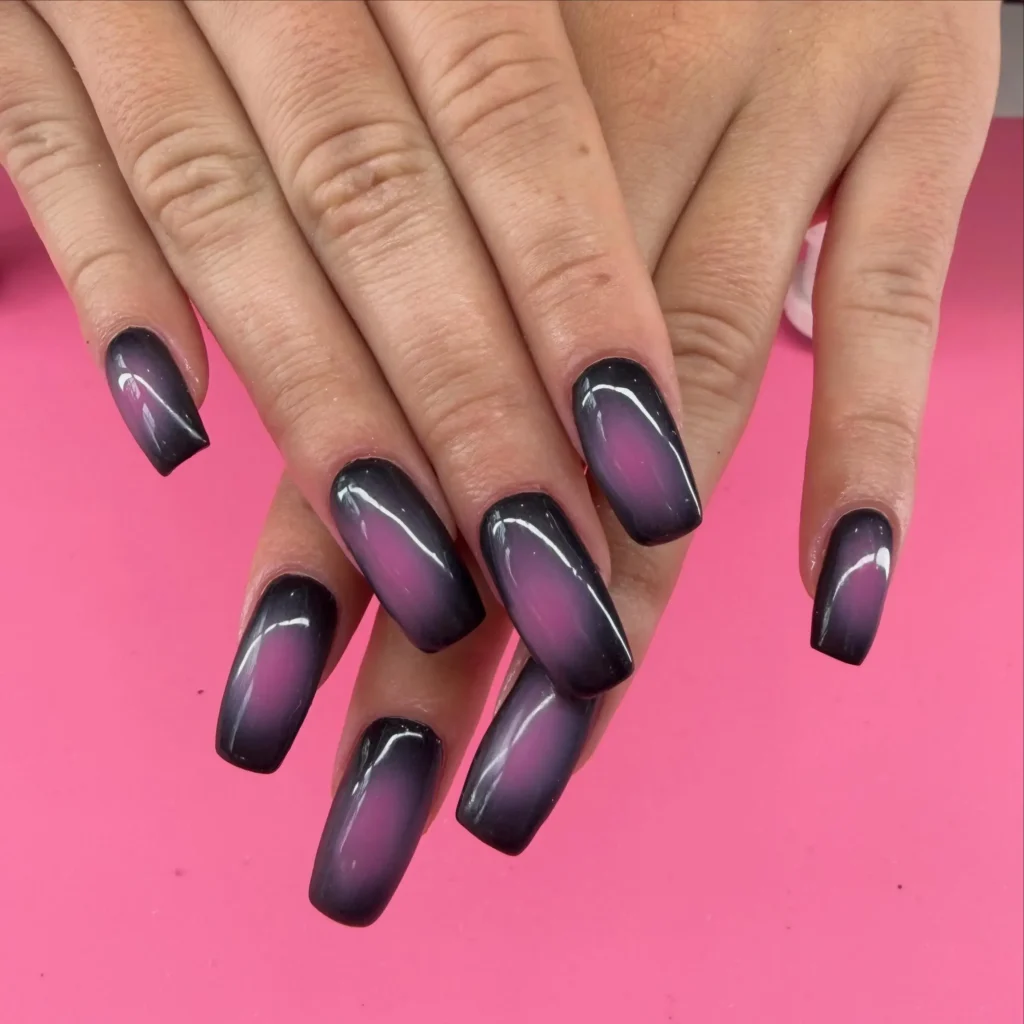
30. Fiery Aura
Deep red blends into orange and gold at the center, creating a warm, flame-like effect on the nail.
Perfect for: Evening looks, bold statement nails
Best shapes: Coffin, almond
Pro tip: Use a silver base coat underneath to make the fiery colors look more vivid.
Time to DIY: 40 minutes
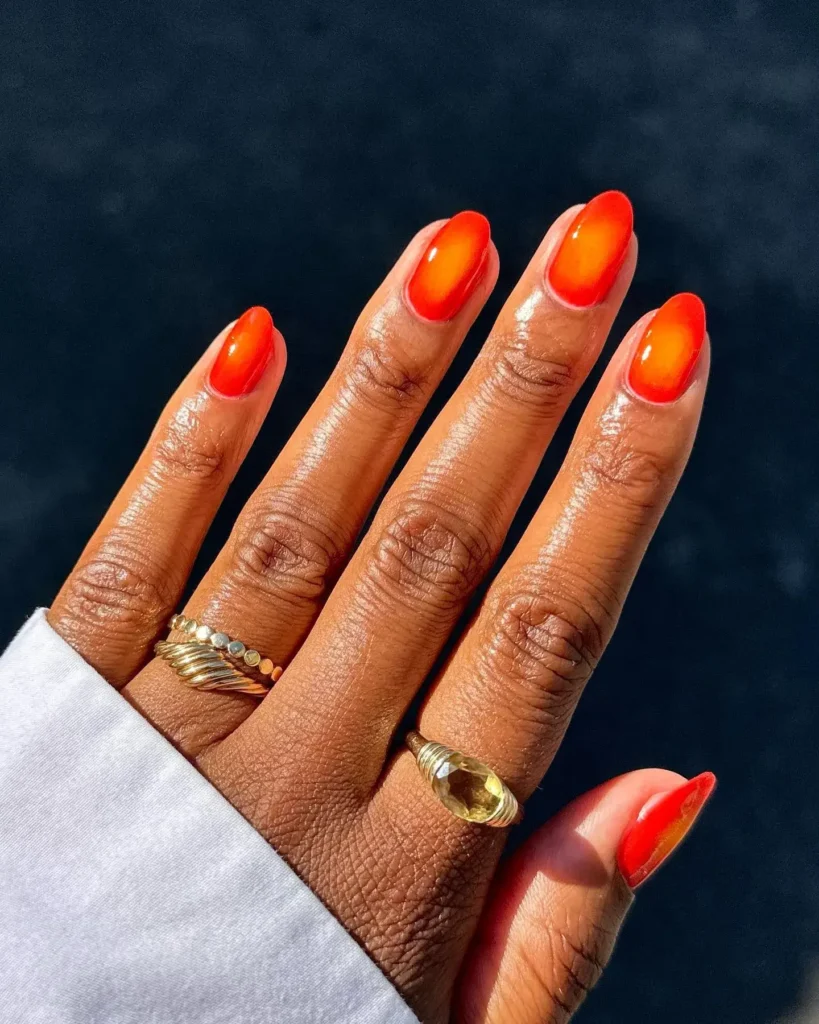
31. Oceanic Aura
Deep blue fades into a lighter aqua tone, resembling the gradient of ocean water from deep to shallow.
Perfect for: Beach trips, summer vacations
Best shapes: Almond, coffin
Pro tip: Airbrush from the cuticle outward to mimic the natural way light moves through water.
Time to DIY: 40 minutes
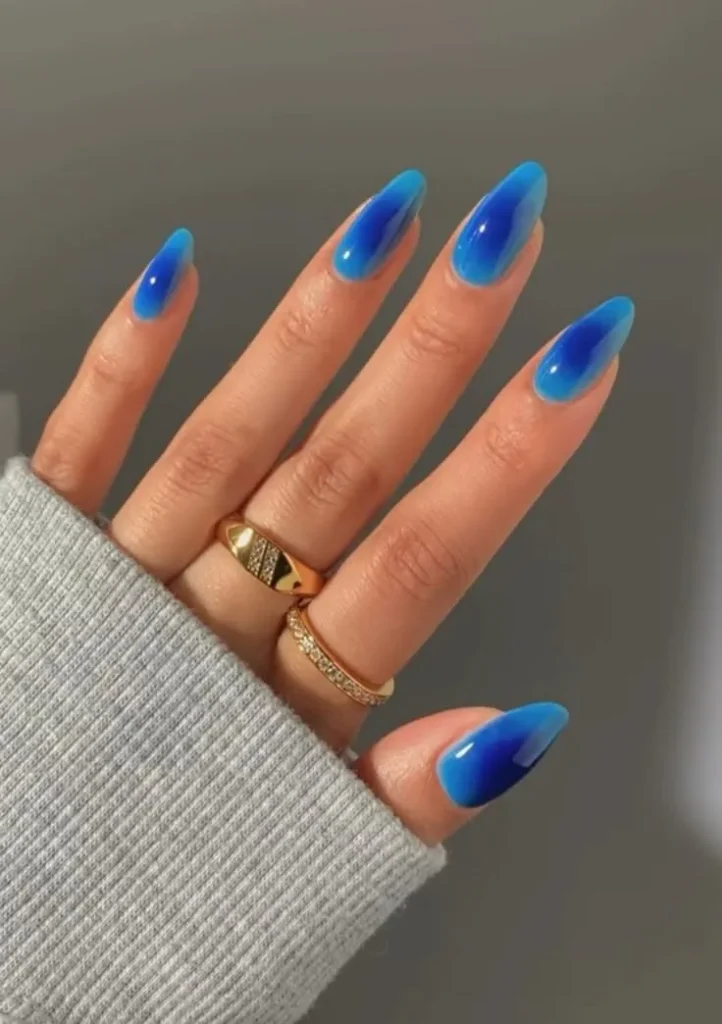
32. Y2K Airbrush Aura
Soft, diffused color sits at the center of the nail with heavy negative space left bare, echoing early 2000s nail trends.
Perfect for: Short nails, retro-inspired looks
Best shapes: Short square, short oval
Pro tip: Keep the aura color small and centered since short nails have less room for a wide blend.
Time to DIY: 30 minutes
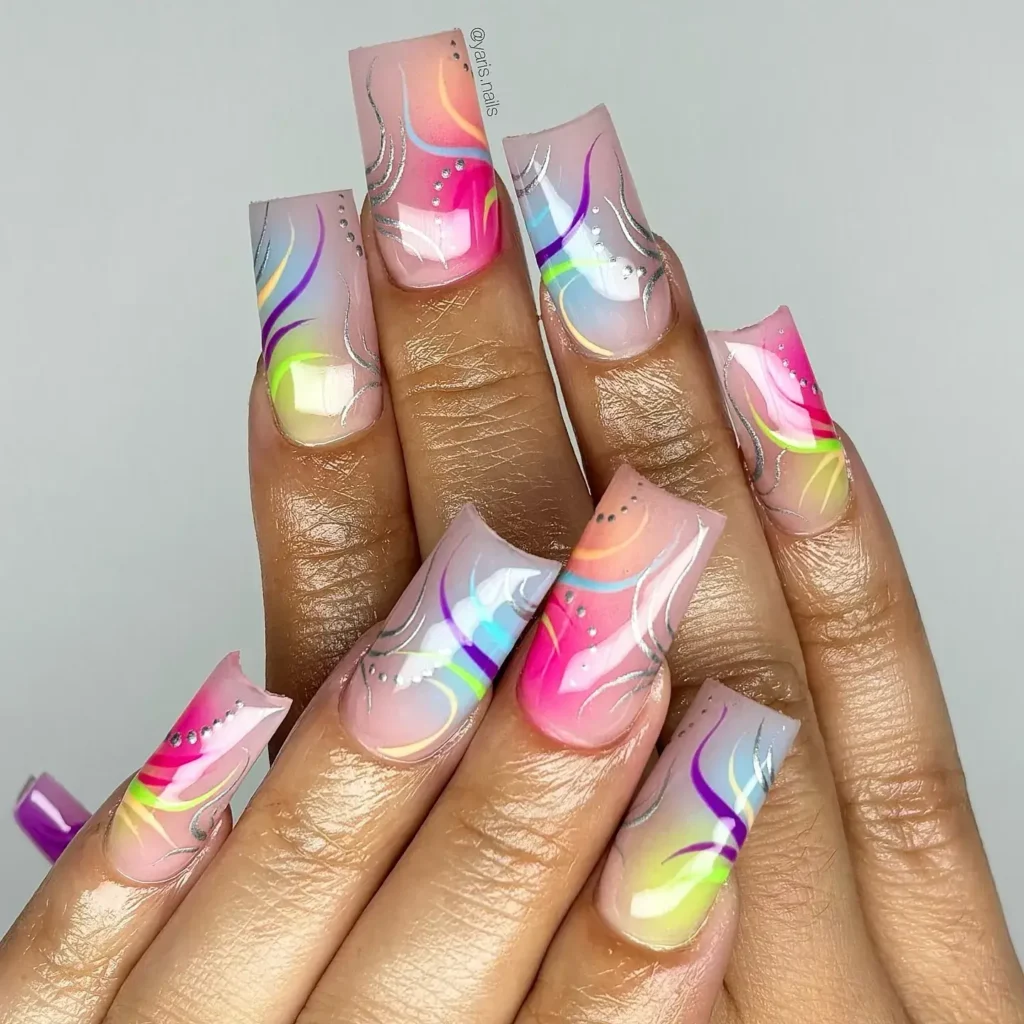
Fruit-Inspired Summer Nail Designs
Fruit nail art brings a playful, nostalgic feel to summer manicures. Small fruit details work on almost any nail shape and pair well with plain or patterned bases.
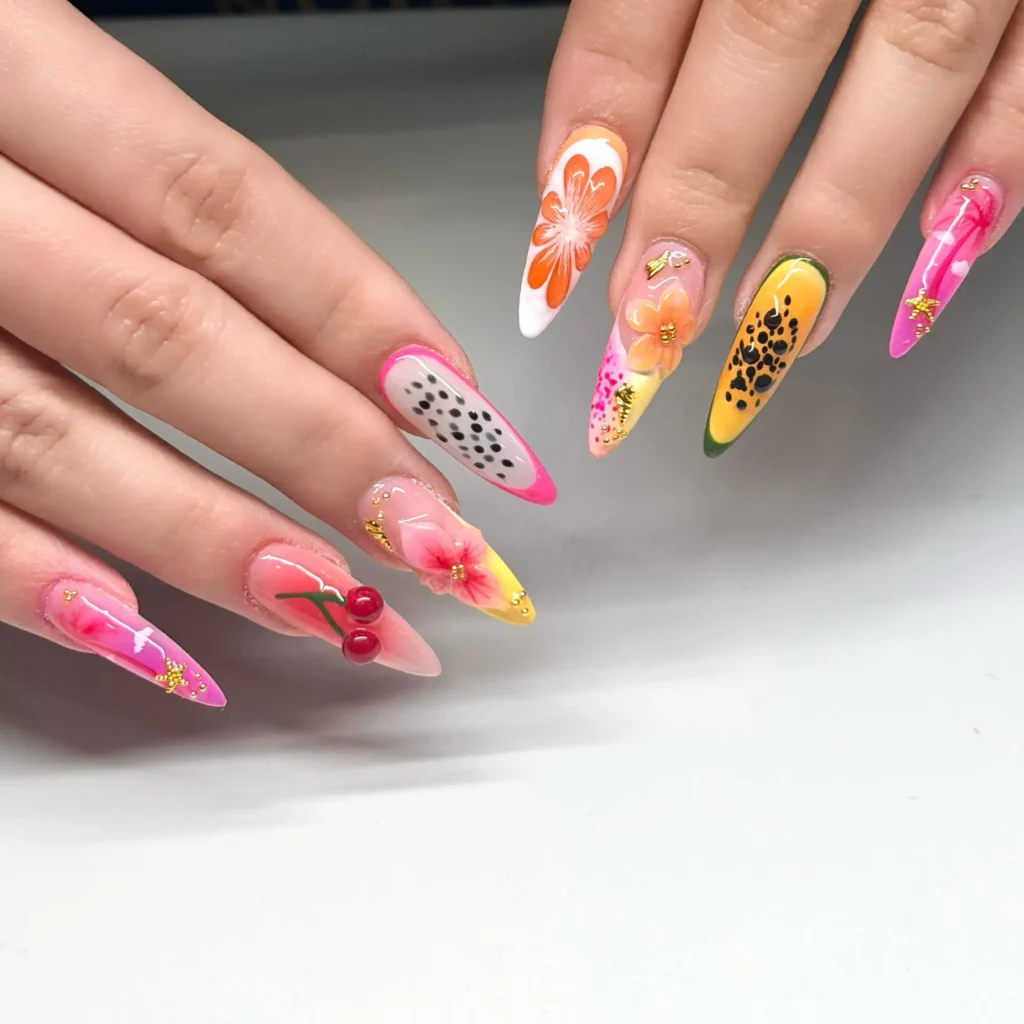
33. Watermelon Sugar Nails
A pink base meets a green tip, with tiny black seeds painted across the pink section to mimic real watermelon.
Perfect for: Beach days, playful summer looks
Best shapes: Short round, square
Pro tip: Use a fine dotting tool for the seeds so they stay small and evenly spaced.
Time to DIY: 35 minutes
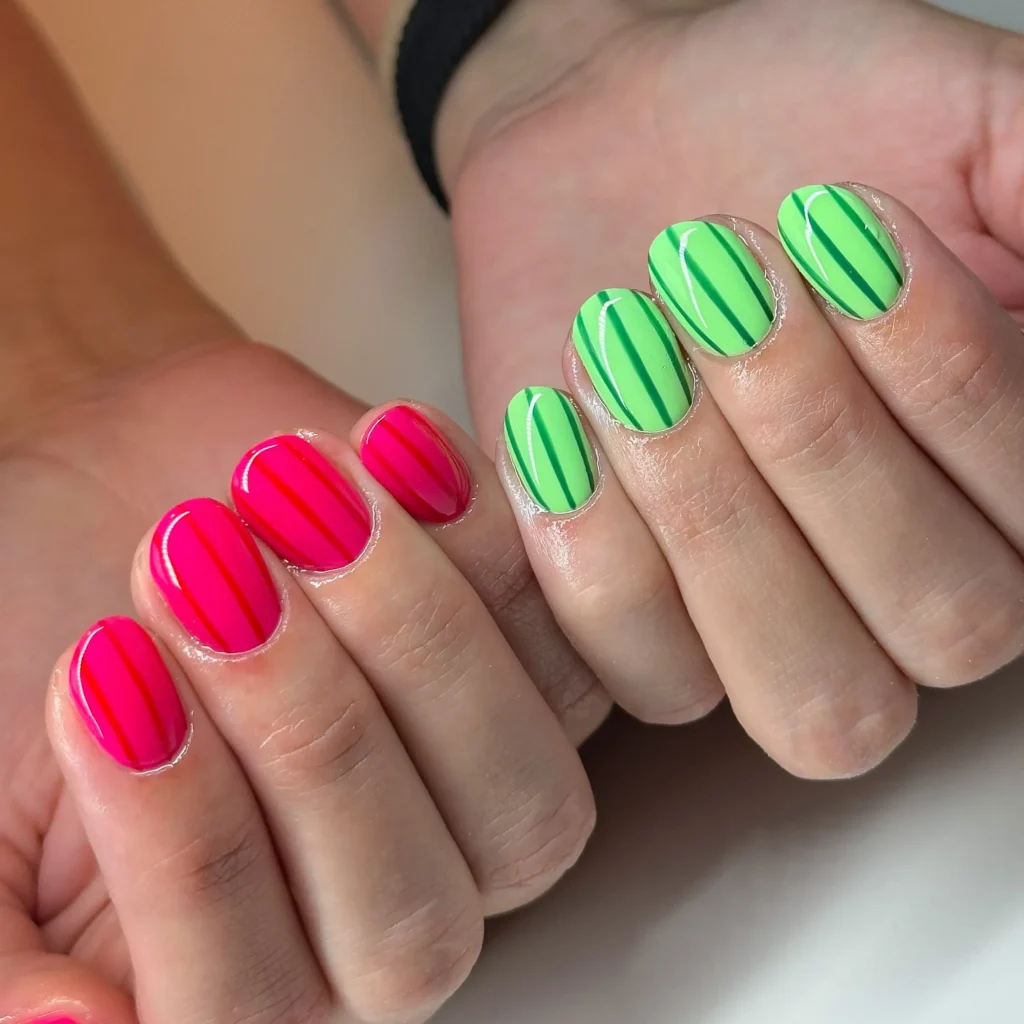
34. Citrus Slice Accents
One or two nails feature a painted citrus slice, complete with segmented lines and a white pith border.
Perfect for: Summer picnics, fresh everyday looks
Best shapes: Almond, oval
Pro tip: Paint the white pith line first, then fill in segments so the lines stay crisp.
Time to DIY: 30 minutes
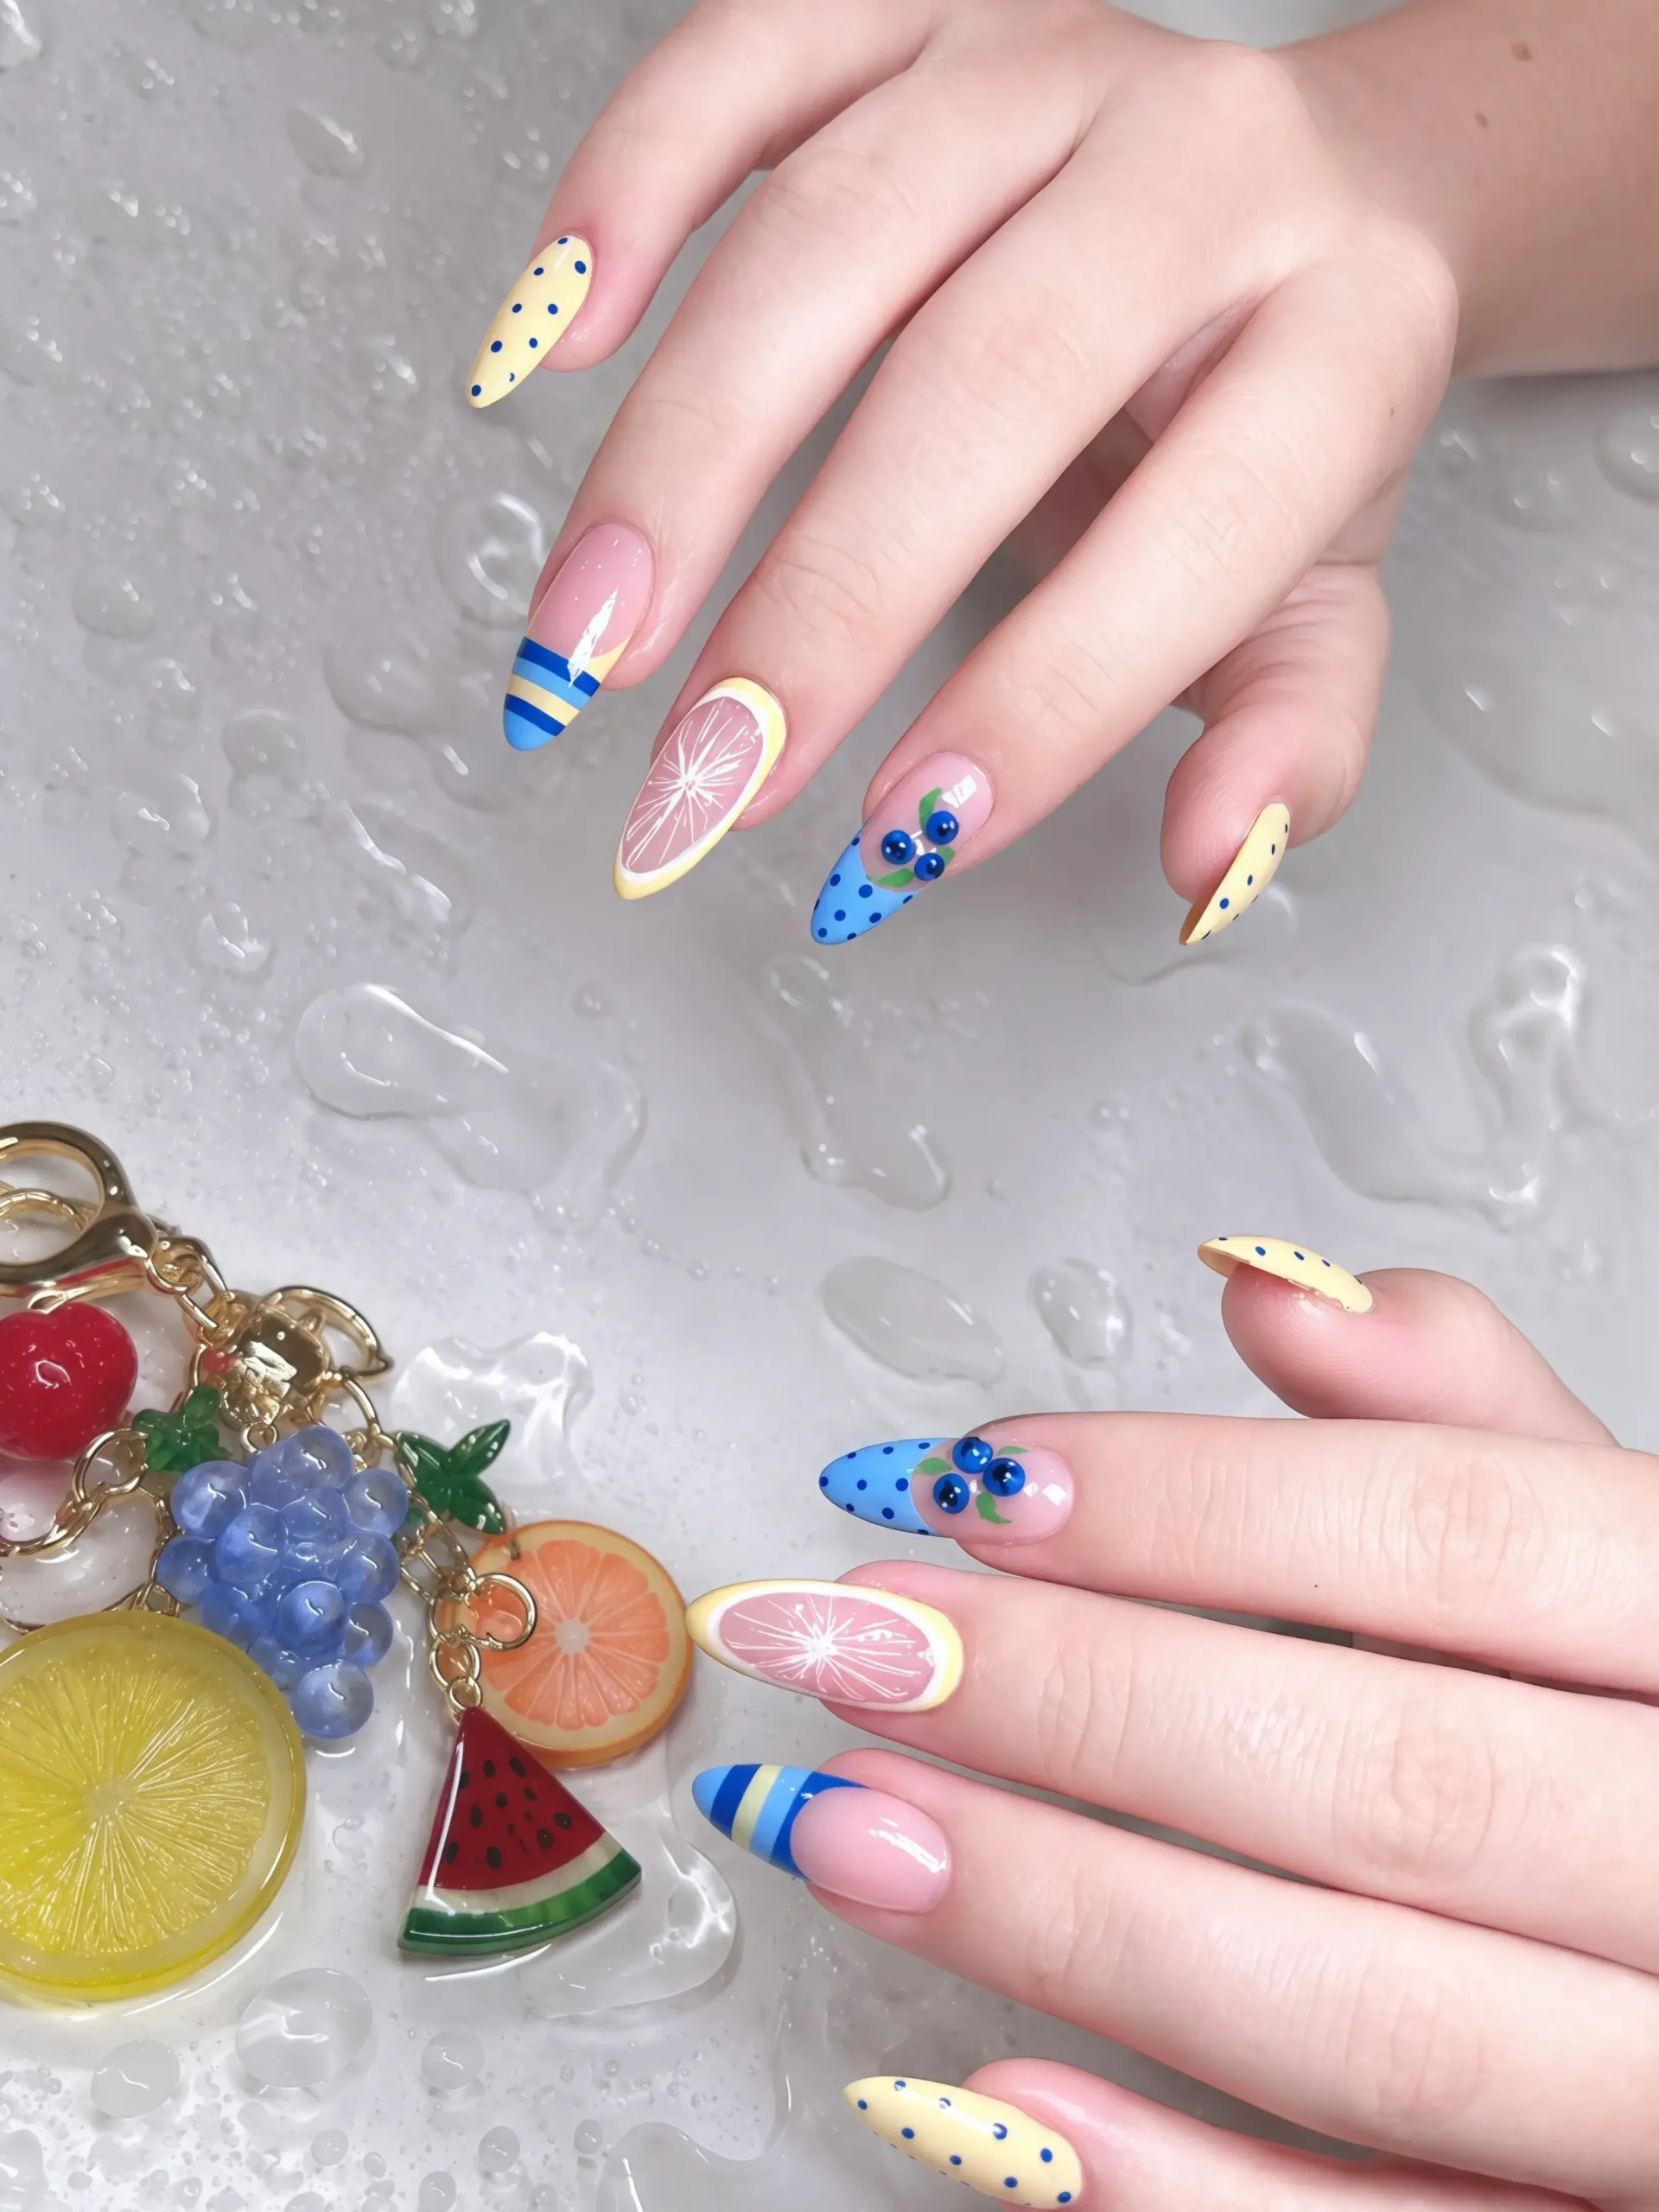
35. Cherry on Top
Two small cherries connected by a thin green stem sit on a clean, glossy base, usually as an accent nail.
Perfect for: Retro-inspired looks, short nails
Best shapes: Short square, round
Pro tip: Add a tiny white highlight dot on each cherry to give them a glossy, three-dimensional look.
Time to DIY: 25 minutes
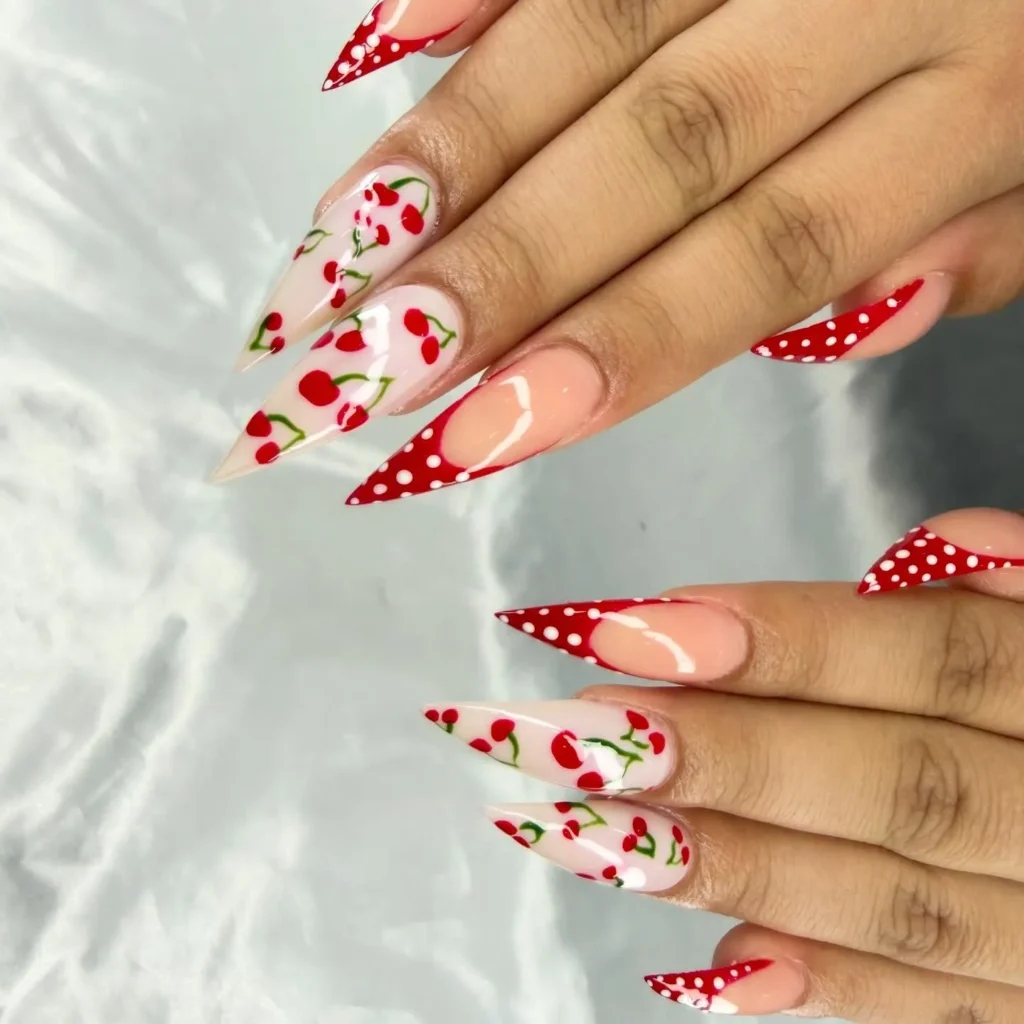
36. Strawberry Fields
Full strawberries cover the nail, complete with tiny yellow seed dots and a green leafy top.
Perfect for: Cute, cheerful summer styling
Best shapes: Short oval, round
Pro tip: Let the red base dry fully before adding seed dots, or the colors will blend together.
Time to DIY: 35 minutes
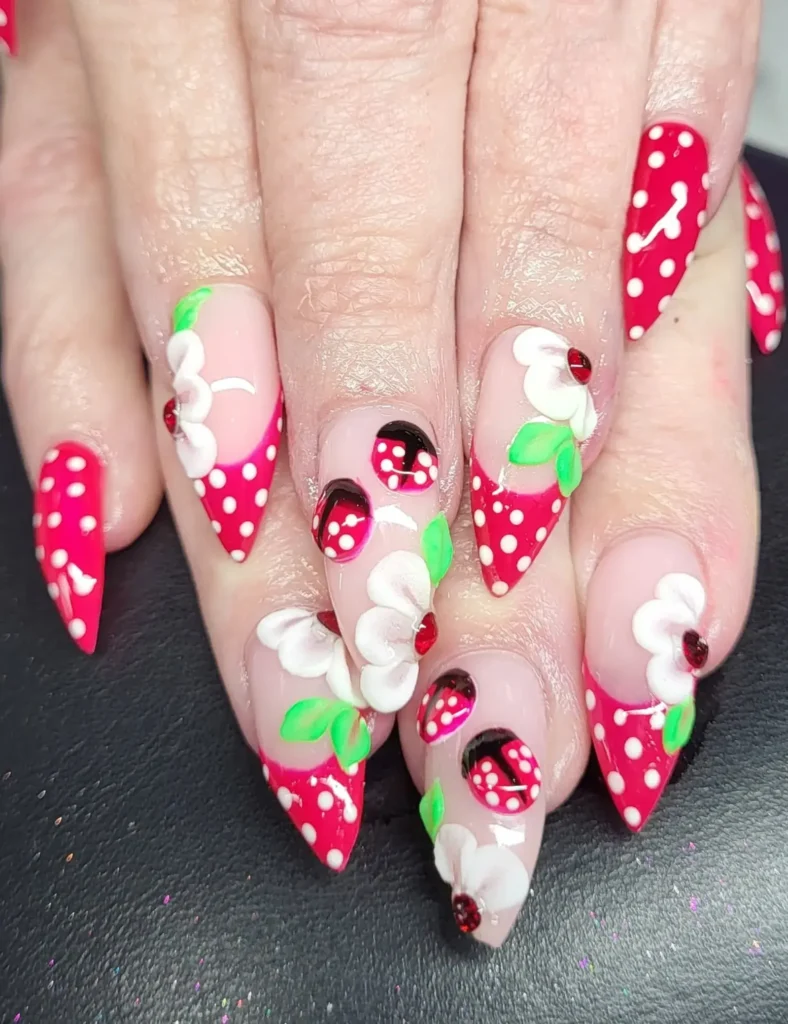
37. Mango Madness
Warm yellow, orange, and a touch of green blend together to mimic the look of ripe mango skin.
Perfect for: Vacation, tropical-themed looks
Best shapes: Almond, coffin
Pro tip: Blend the colors while wet, working from yellow to orange, for a natural mango gradient.
Time to DIY: 35 minutes
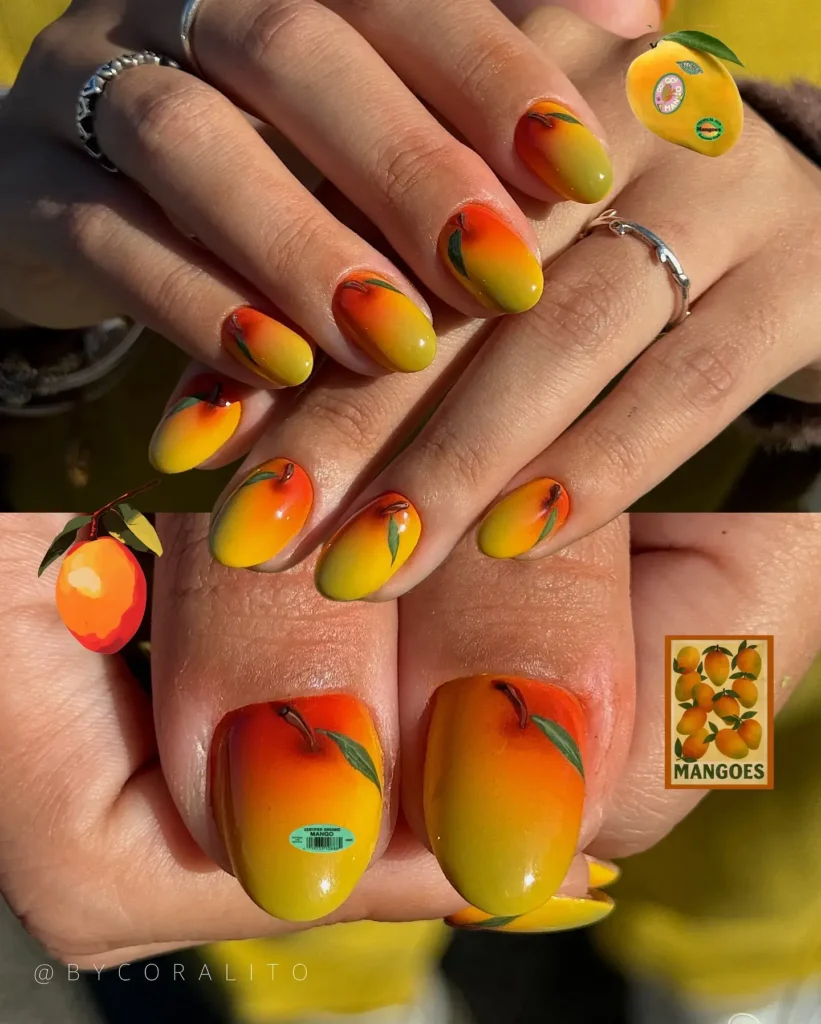
38. Micro-Fruit Nails
Tiny fruit details, smaller than a grain of rice, are placed in one corner of the nail instead of covering it fully.
Perfect for: Short nails, minimal detail lovers
Best shapes: Short square, short oval
Pro tip: Use a striping brush instead of a detail brush for the smallest fruit shapes.
Time to DIY: 25 minutes
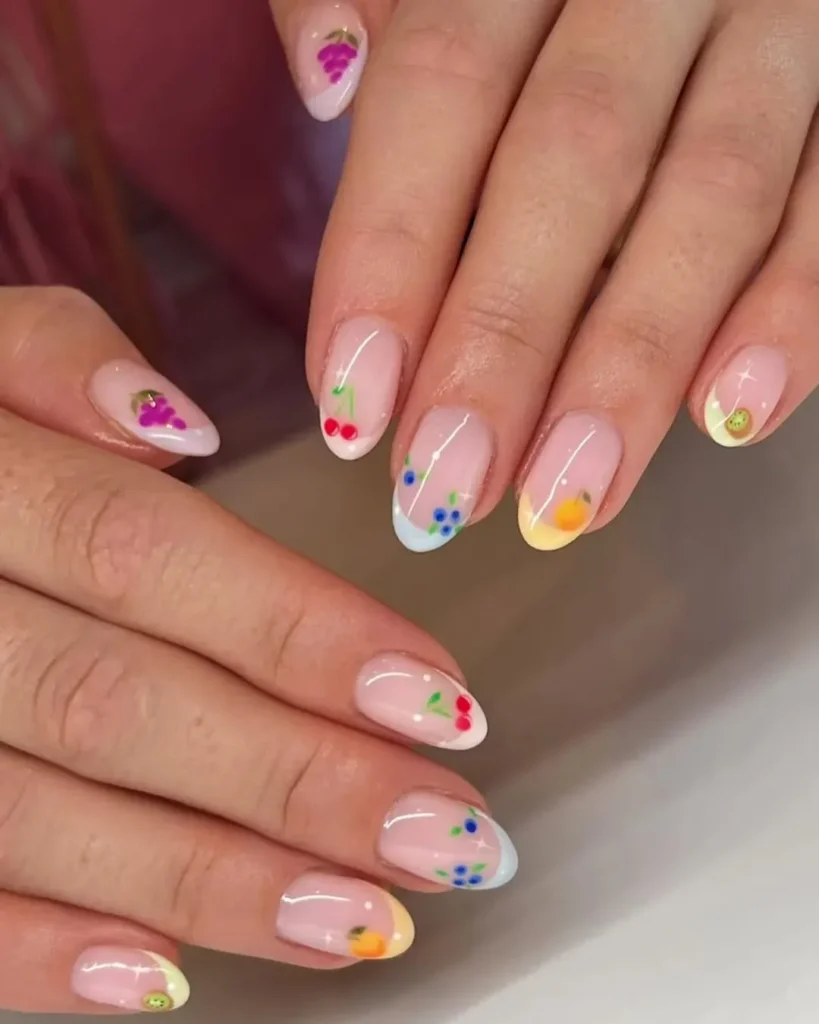
39. Fruit-and-Stripe Combo
Thin colored stripes cover most nails, with one accent nail featuring a small fruit detail like a lemon or cherry.
Perfect for: Mixed pattern lovers, vacation sets
Best shapes: Square, almond
Pro tip: Keep stripe colors limited to two or three shades so the fruit accent still stands out.
Time to DIY: 40 minutes
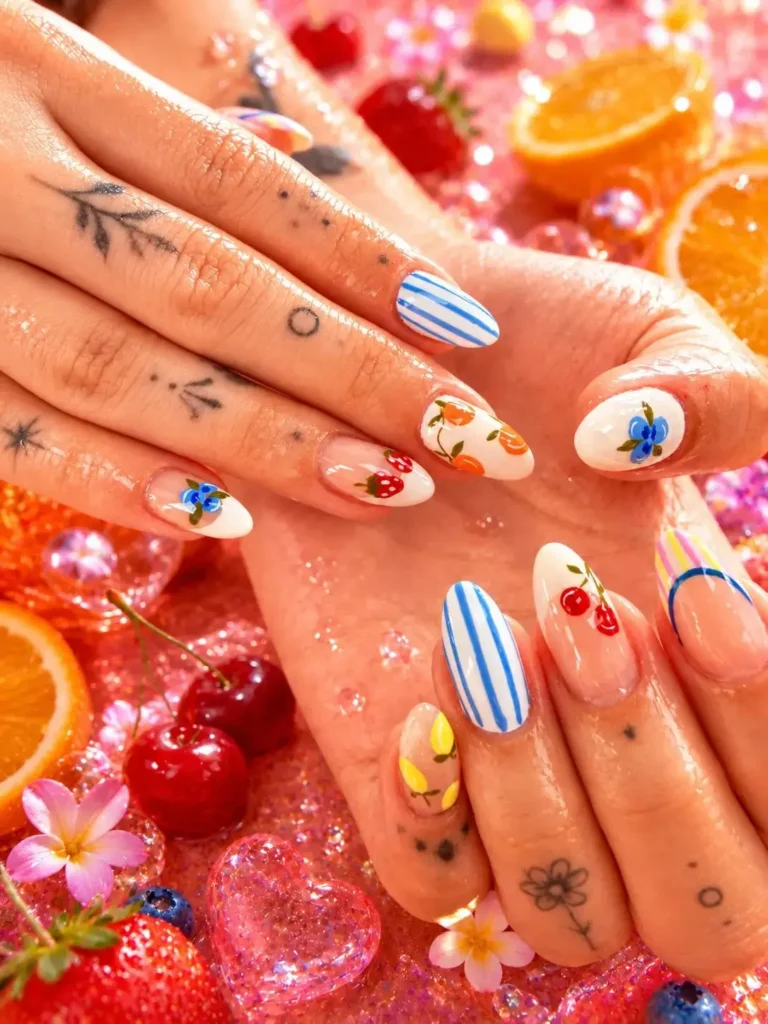
40. Pineapple 3D Nails
A raised gel pineapple sits on the nail, built up with texture to mimic the fruit’s rough, layered skin.
Perfect for: Statement nails, tropical themes
Best shapes: Coffin, almond
Pro tip: Build the texture in thin layers of gel rather than one thick layer, or it may crack when cured.
Time to DIY: 50 minutes
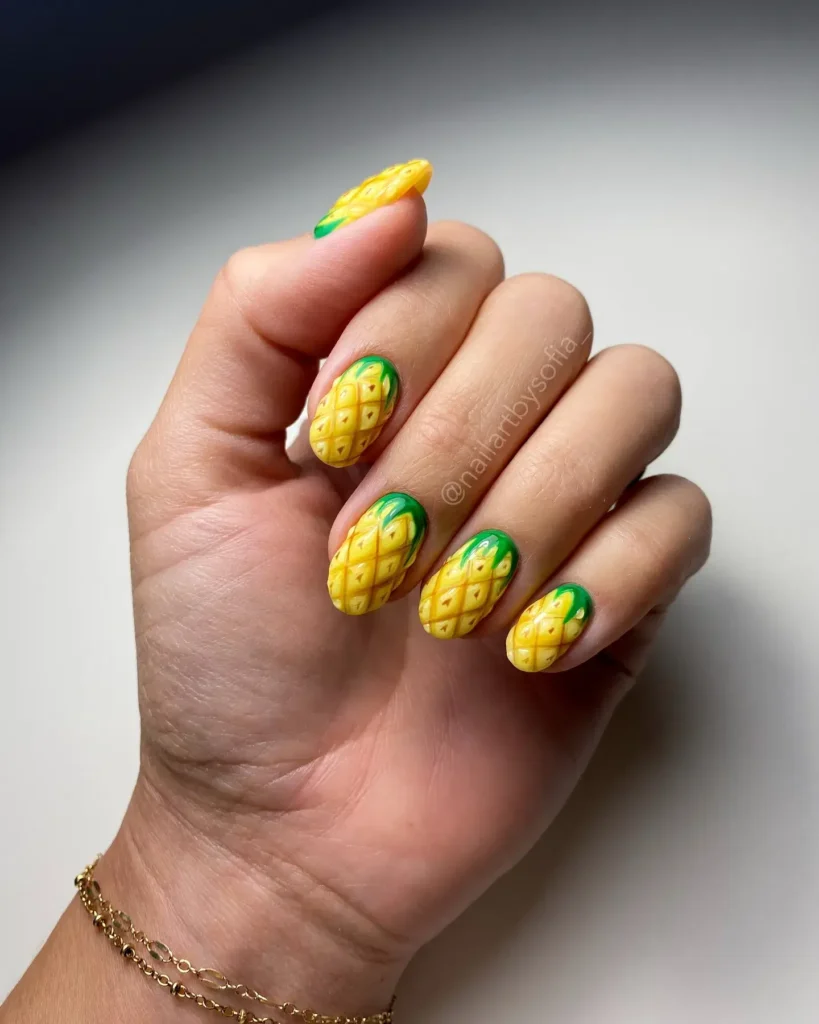
Floral Summer Nail Inspo
Floral nail art stays popular every summer, but the details keep evolving. This year favors realistic petals and softer, more natural color palettes.
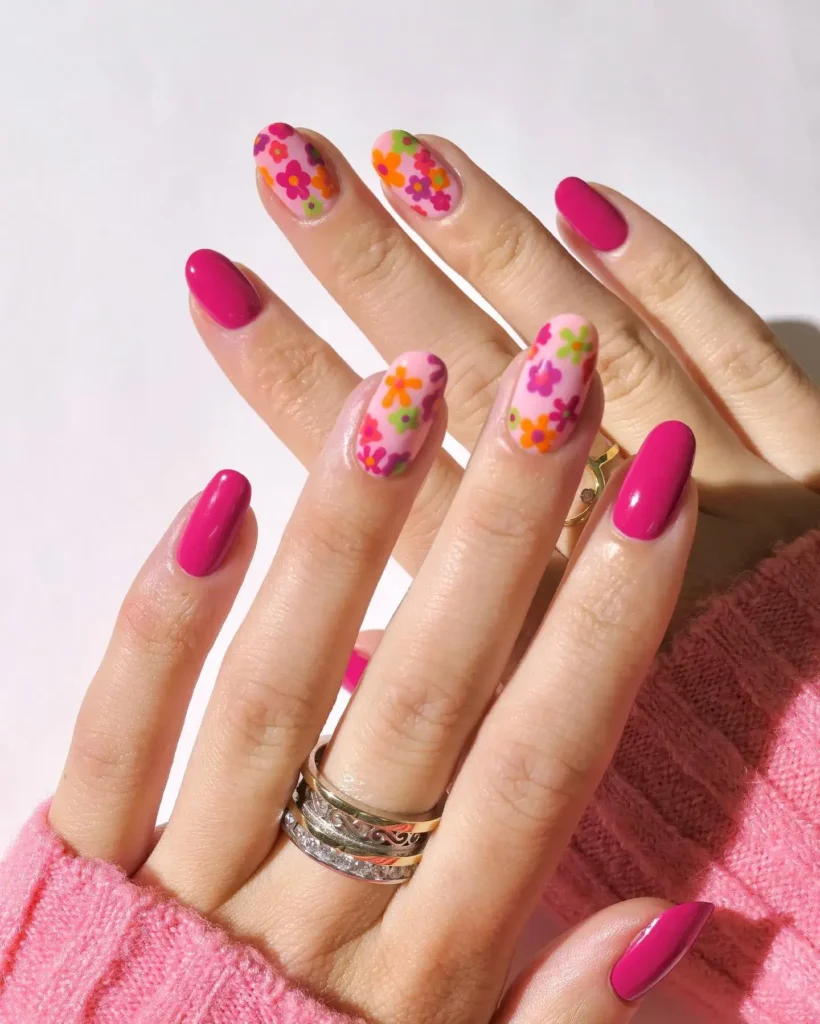
41. Botanical Realism Nails
Detailed leaves and petals are hand-painted with shading and depth, making the design look closer to real flowers than simple cartoon shapes.
Perfect for: Nature lovers, detailed statement looks
Best shapes: Almond, coffin
Pro tip: Layer light and dark shades of the same color on each petal to build realistic shading.
Time to DIY: 50 minutes
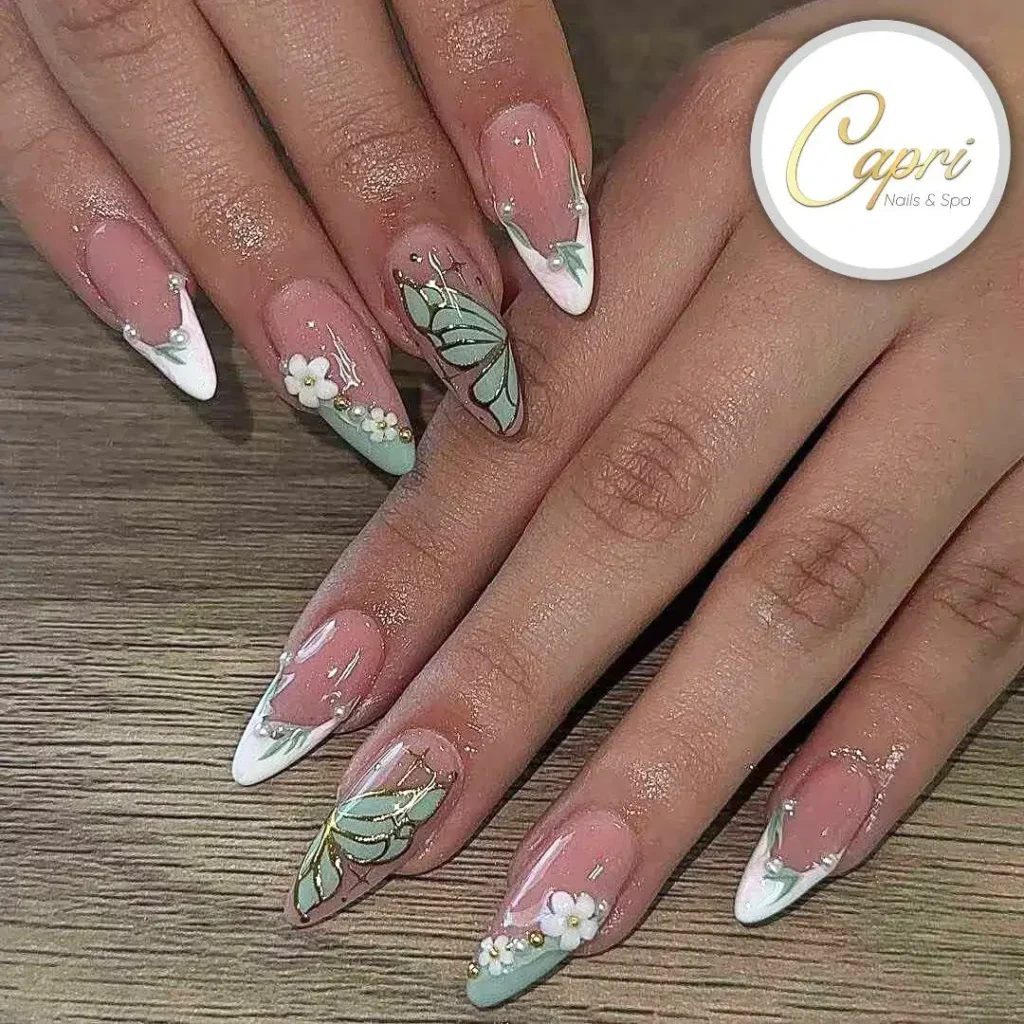
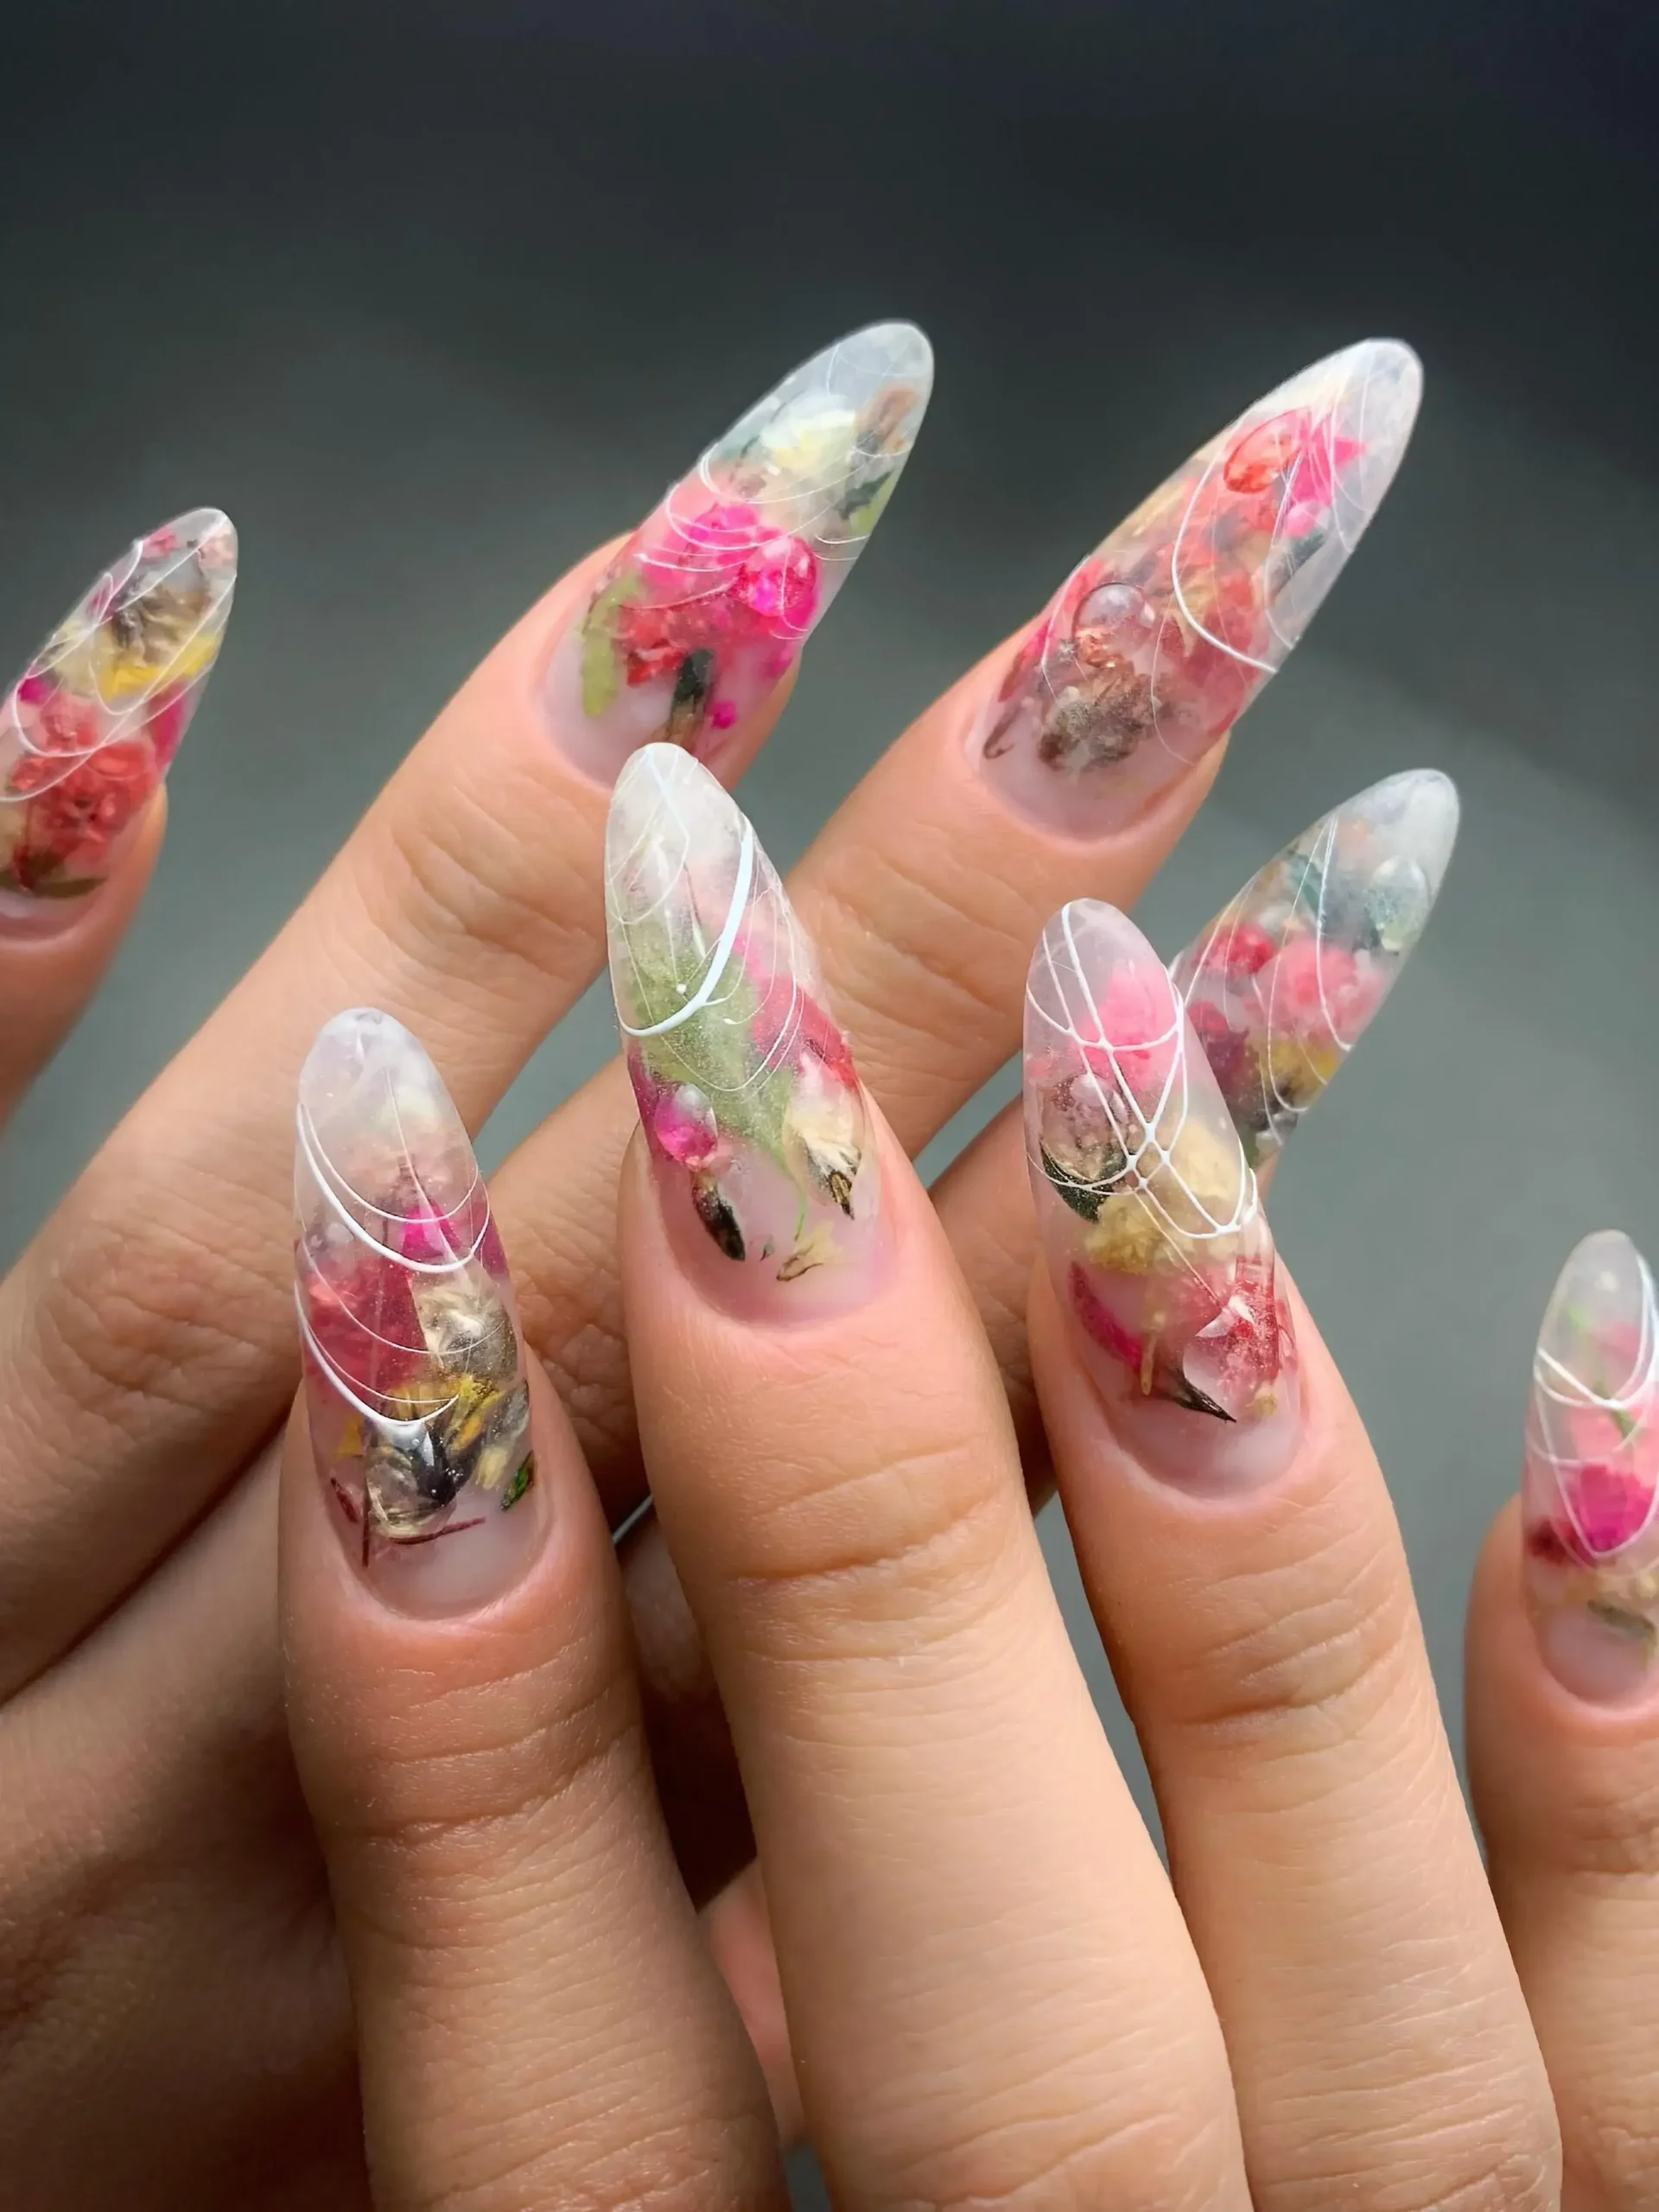
42. Pressed Flower Effect
Flat, delicate florals sit under a glossy topcoat, mimicking the look of a real pressed flower preserved in glass.
Perfect for: Soft, romantic styling
Best shapes: Oval, almond
Pro tip: Keep the petals thin and flat, since raised texture breaks the pressed flower illusion.
Time to DIY: 35 minutes
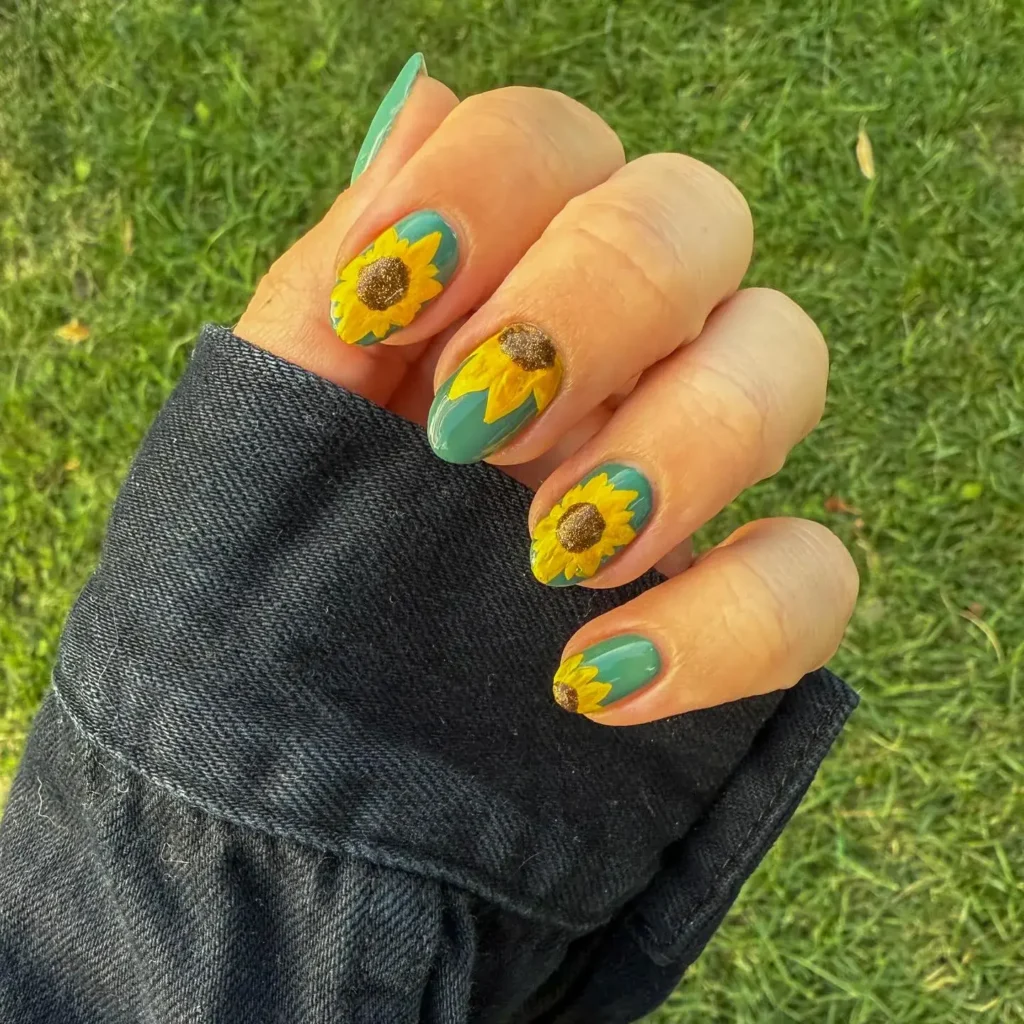
43. Sunflower Accent Nails
A single sunflower sits on one or two accent nails, with the rest of the set left in a clean, solid color.
Perfect for: Summer festivals, cheerful everyday looks
Best shapes: Square, almond
Pro tip: Paint the center dots last, once the yellow petals are fully dry, to keep the layers crisp.
Time to DIY: 30 minutes
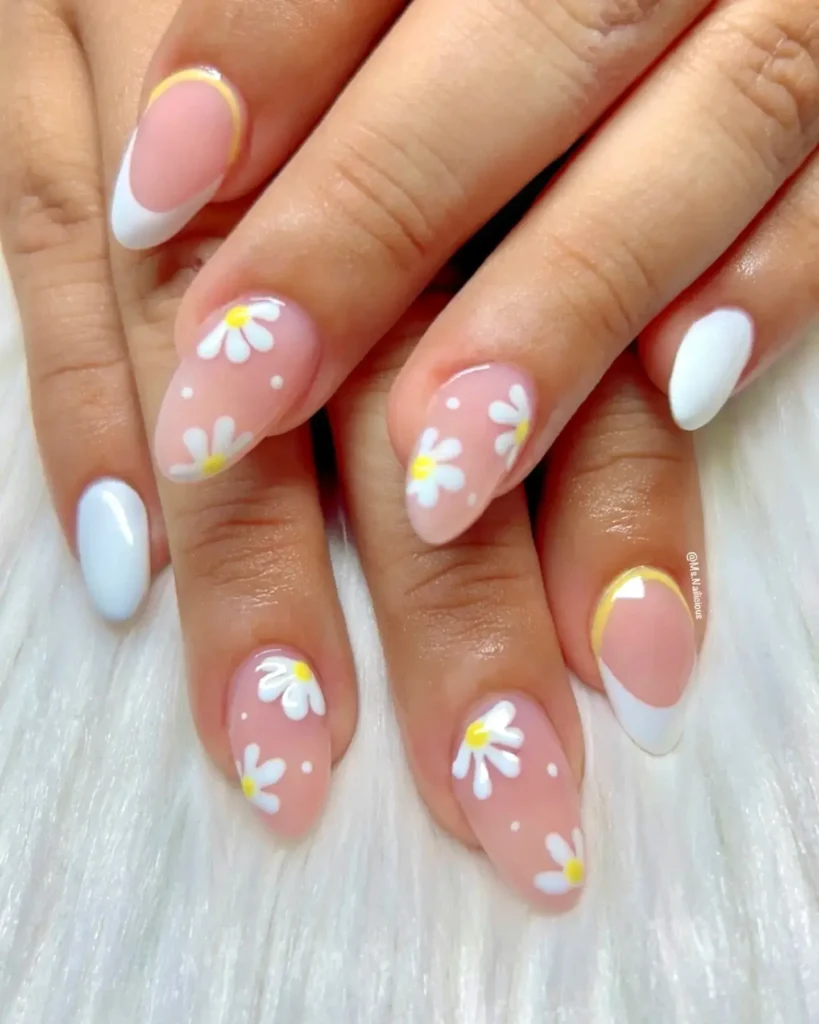
44. Micro Daisy Details
Tiny daisies, each smaller than a fingertip, are scattered across the nail instead of centered as one large flower.
Perfect for: Short nails, minimal detail lovers
Best shapes: Short square, short oval
Pro tip: Use a dotting tool for the petals since they are too small to paint with a brush.
Time to DIY: 30 minutes
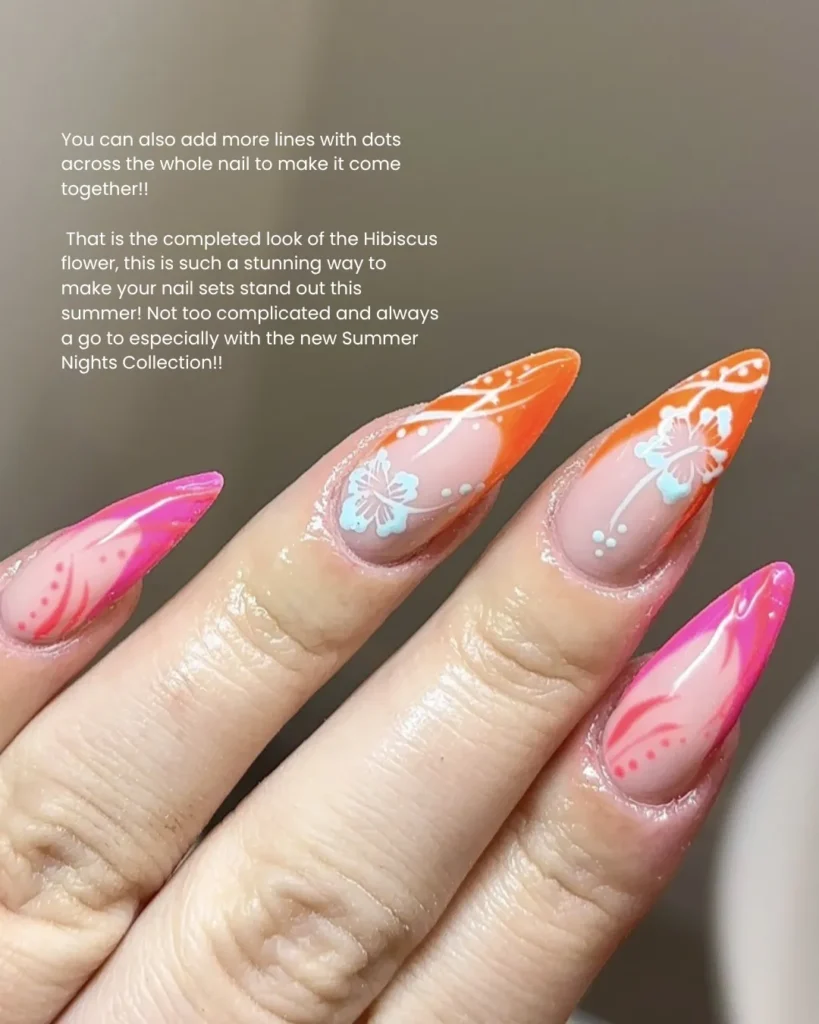
45. Tropical Hibiscus Nails
A bold hibiscus flower in pink or orange sits on a clean background, often paired with a single green leaf.
Perfect for: Vacation, tropical-themed looks
Best shapes: Coffin, almond
Pro tip: Paint the flower center in a deeper shade to add contrast against the petals.
Time to DIY: 40 minutes
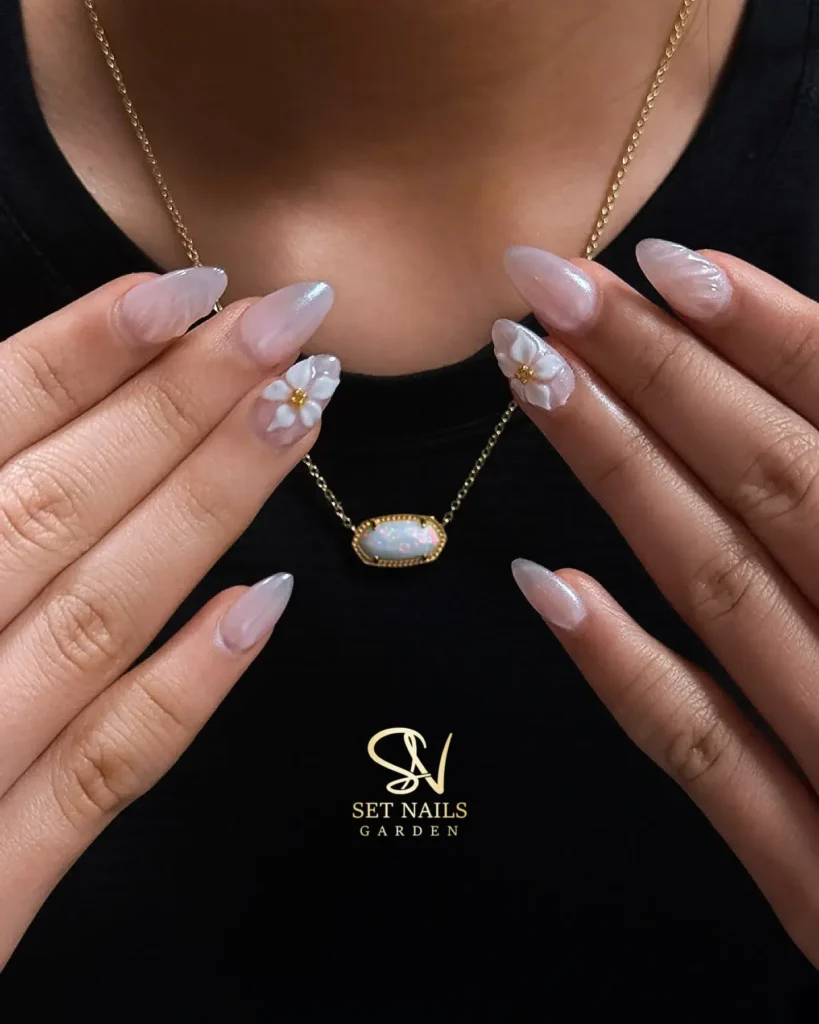
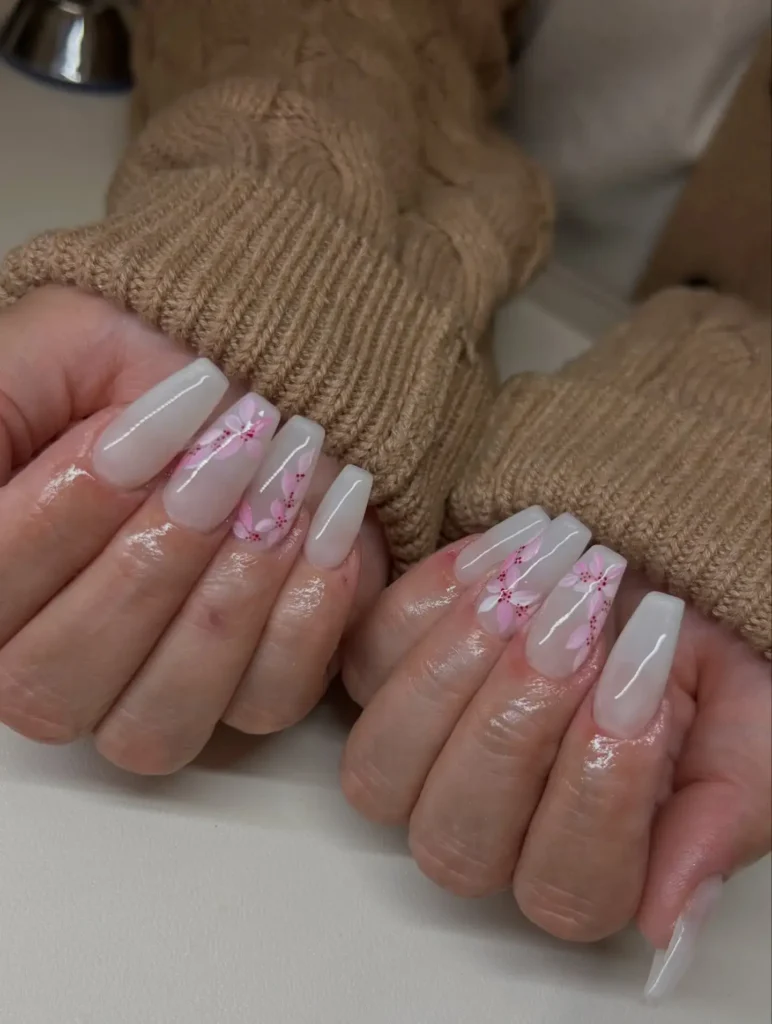
46. Milky Floral Nail Design
Soft, semi-sheer florals sit on a milky white base, giving the design a gentle, understated look.
Perfect for: Bridal nails, soft everyday styling
Best shapes: Oval, almond
Pro tip: Let the milky base dry completely before adding florals, or the colors will smear together.
Time to DIY: 35 minutes
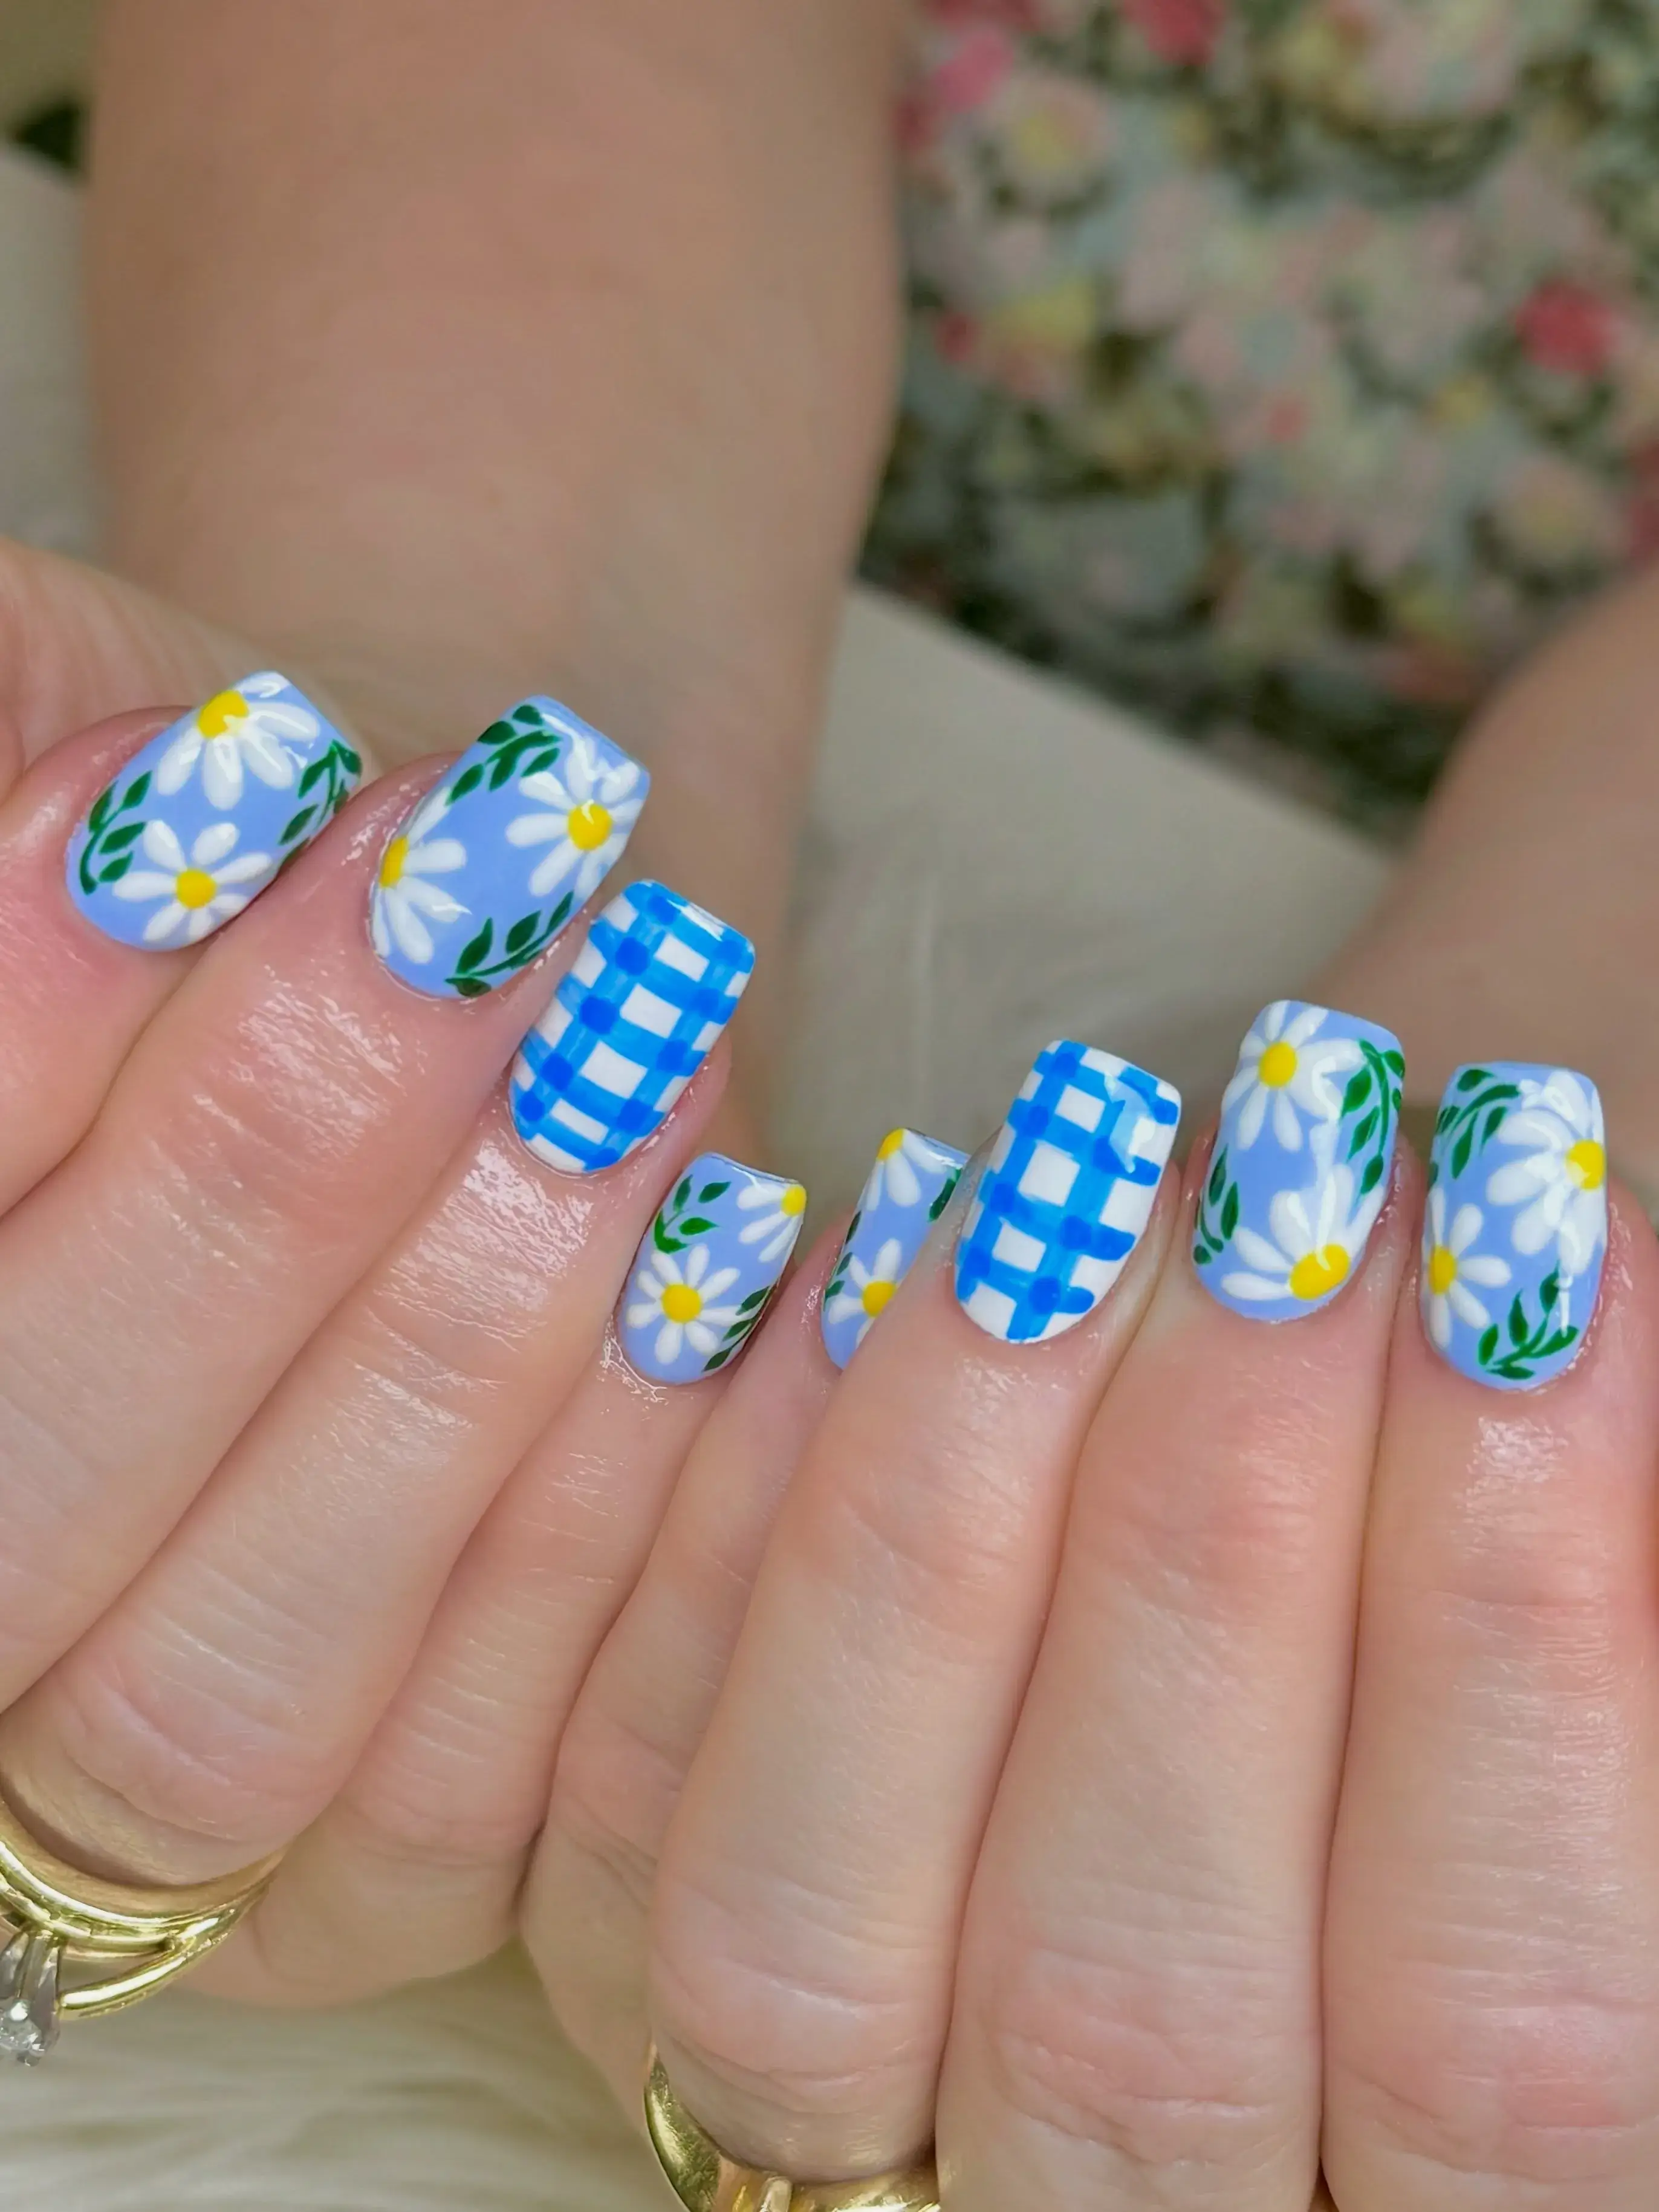
47. Blue + Green Daisy Nails
Daisies in blue and green tones replace the classic white and yellow palette for a cooler, more modern take on the design.
Perfect for: Fresh, unexpected color pairings
Best shapes: Square, squoval
Pro tip: Keep the petal color consistent across all daisies so the set feels cohesive, not random.
Time to DIY: 35 minutes
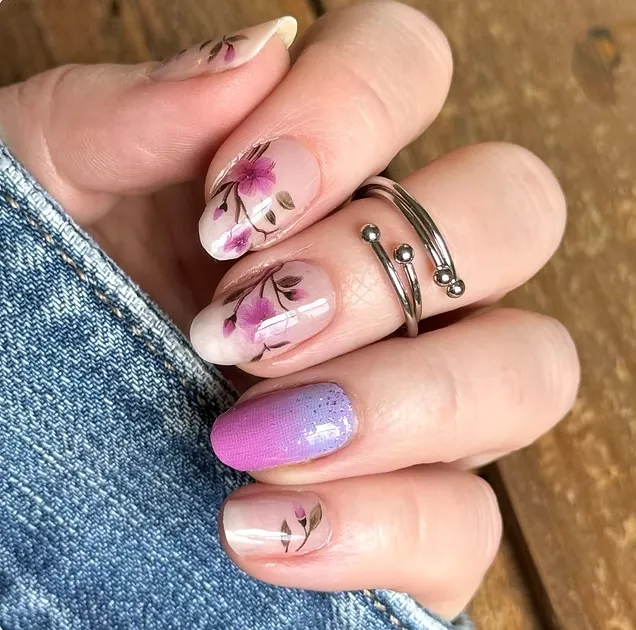
48. Orchid Oasis Nails
Detailed orchid petals in purple or pink sit alongside small dotted accents that echo the flower’s natural spotted pattern.
Perfect for: Elegant summer looks, plant lovers
Best shapes: Almond, coffin
Pro tip: Add the dotted accents after the petals dry so the dots stay defined instead of blending in.
Time to DIY: 40 minutes
Ombre & Gradient Summer Nail Inspo
Ombre nails blend two or more colors into a smooth transition. The technique works well across nearly every nail shape and length, which makes it one of the most versatile styles this summer.
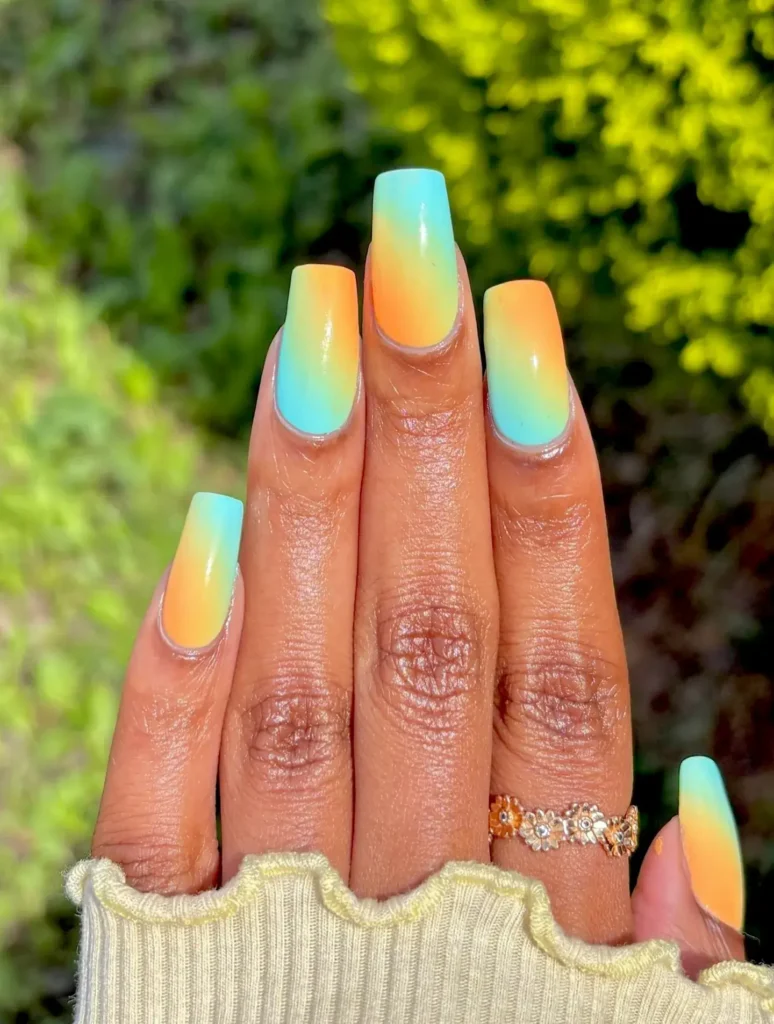
49. Sunset Gradient Nails
Yellow fades into orange, then deepens into pink or red near the tip, capturing the layered colors of a summer sunset.
Perfect for: Evening events, warm weather styling
Best shapes: Almond, coffin
Pro tip: Blend colors on a makeup sponge first, then dab onto the nail for a smoother gradient.
Time to DIY: 35 minutes
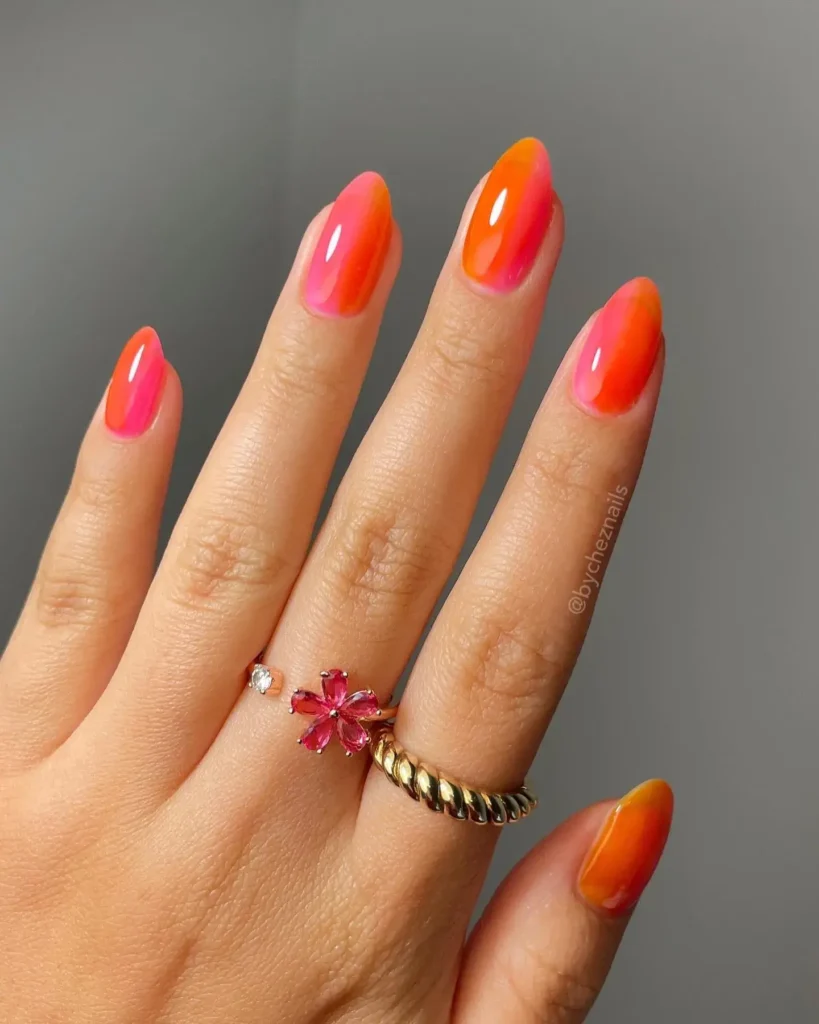
50. Coral Ombre Nails
A soft coral shade fades into white or nude at the base, keeping the look bright but still wearable for daily use.
Perfect for: Everyday summer wear, brunch outings
Best shapes: Oval, square
Pro tip: Apply the lighter color first, then sponge the coral over the tip only for a cleaner fade.
Time to DIY: 30 minutes
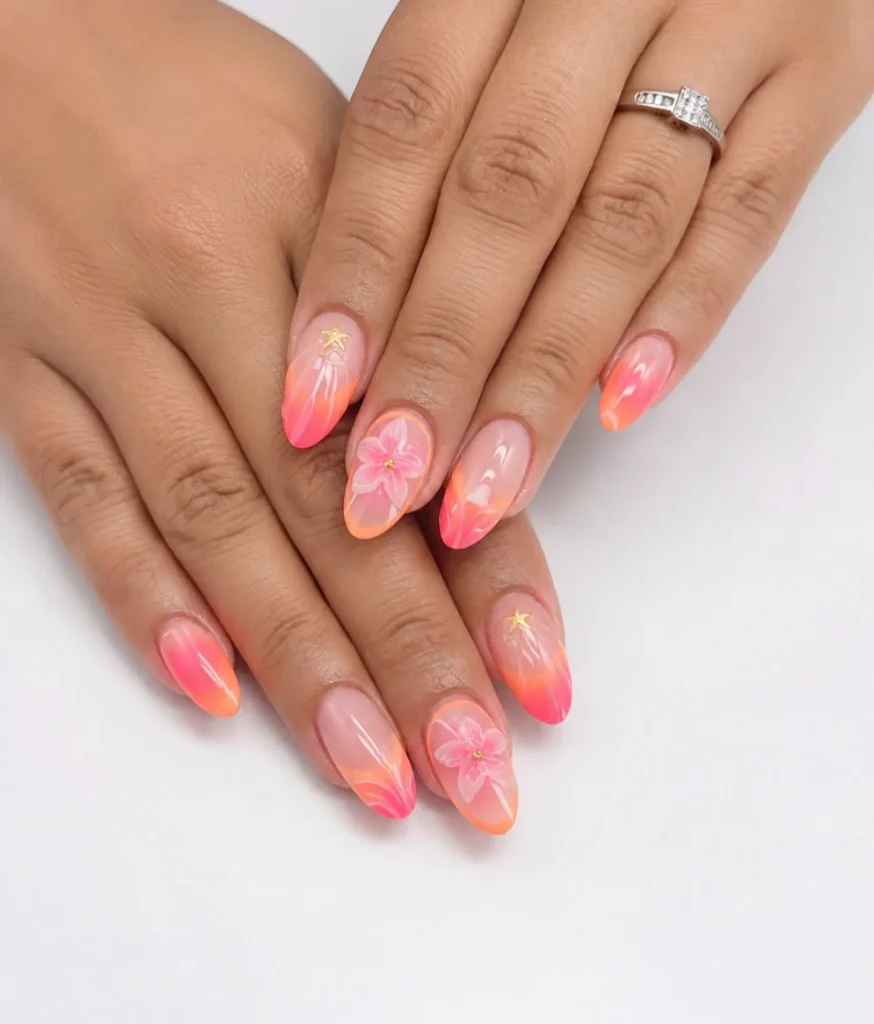
51. Pastel Rainbow Ombre
Multiple pastel shades blend together across the nail, moving through soft pink, lavender, and blue in one smooth gradient.
Perfect for: Playful looks without full brightness
Best shapes: Almond, oval
Pro tip: Work with three colors maximum, or the gradient can look muddy instead of smooth.
Time to DIY: 40 minutes
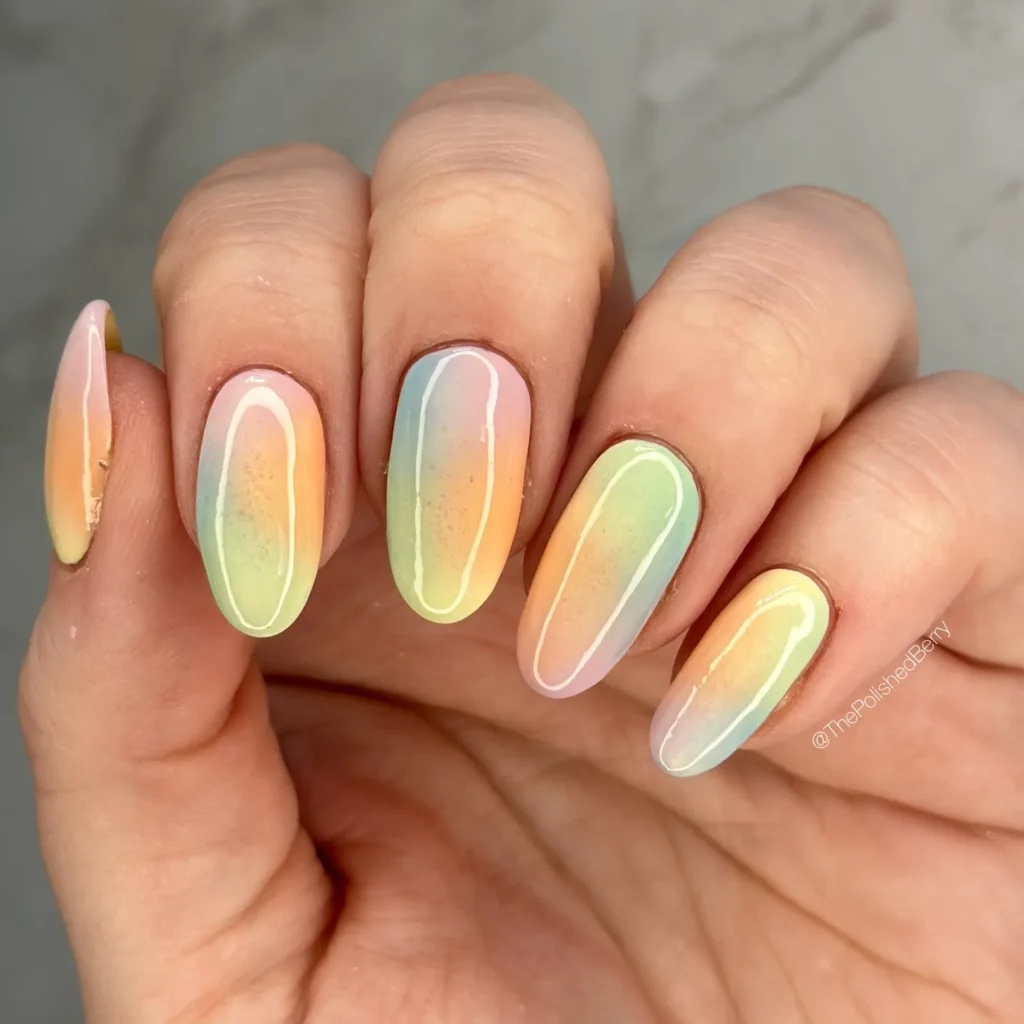
52. Lavender Ombre Nails
Light lavender fades into a deeper purple near the tip, creating a soft, moody gradient that feels calm rather than bold.
Perfect for: Understated elegance, everyday wear
Best shapes: Coffin, almond
Pro tip: Let each layer dry slightly before sponging the next shade to avoid the colors blending into gray.
Time to DIY: 30 minutes
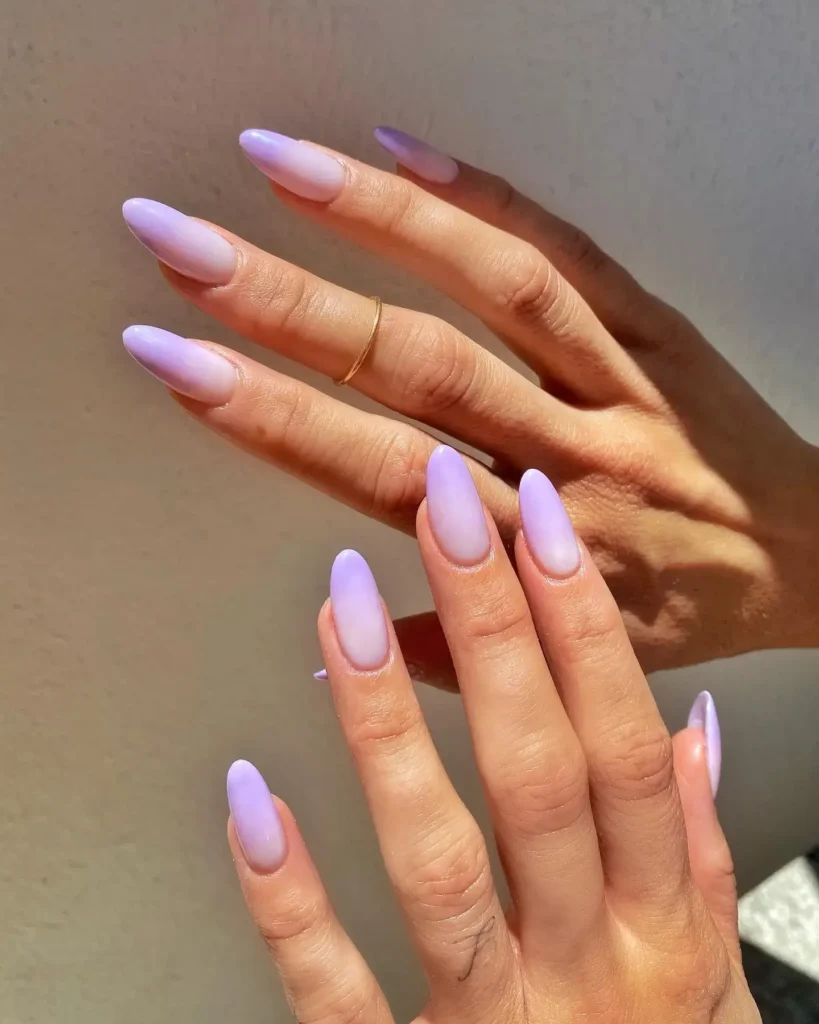
53. Neon Orange Ombre
Bright neon orange fades into white or a pale nude, softening the intensity while keeping the color eye-catching.
Perfect for: Statement looks, festival season
Best shapes: Square, squoval
Pro tip: Apply neon shades in thin layers, since bright pigments can look uneven if applied too thick.
Time to DIY: 30 minutes
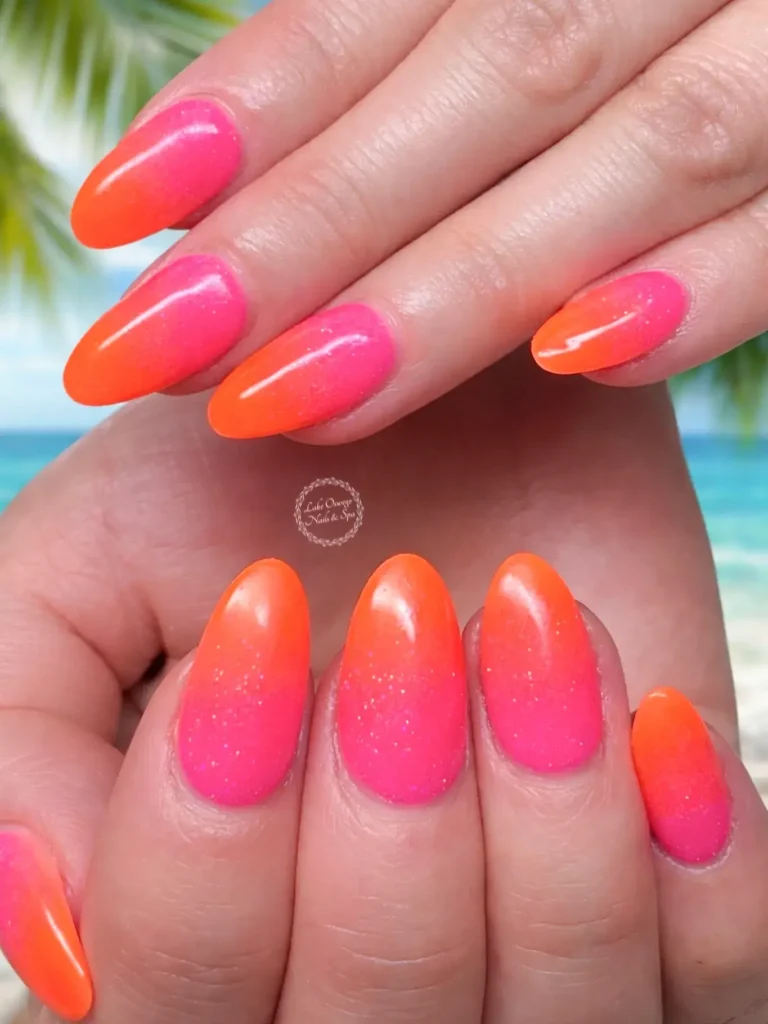
54. Purple Gradient Nails
Deep purple blends into a lighter lilac shade, creating a rich gradient that works well for both day and evening wear.
Perfect for: Versatile styling, date nights
Best shapes: Almond, coffin
Pro tip: Start with the darkest shade at the cuticle and sponge upward for the most natural fade.
Time to DIY: 35 minutes
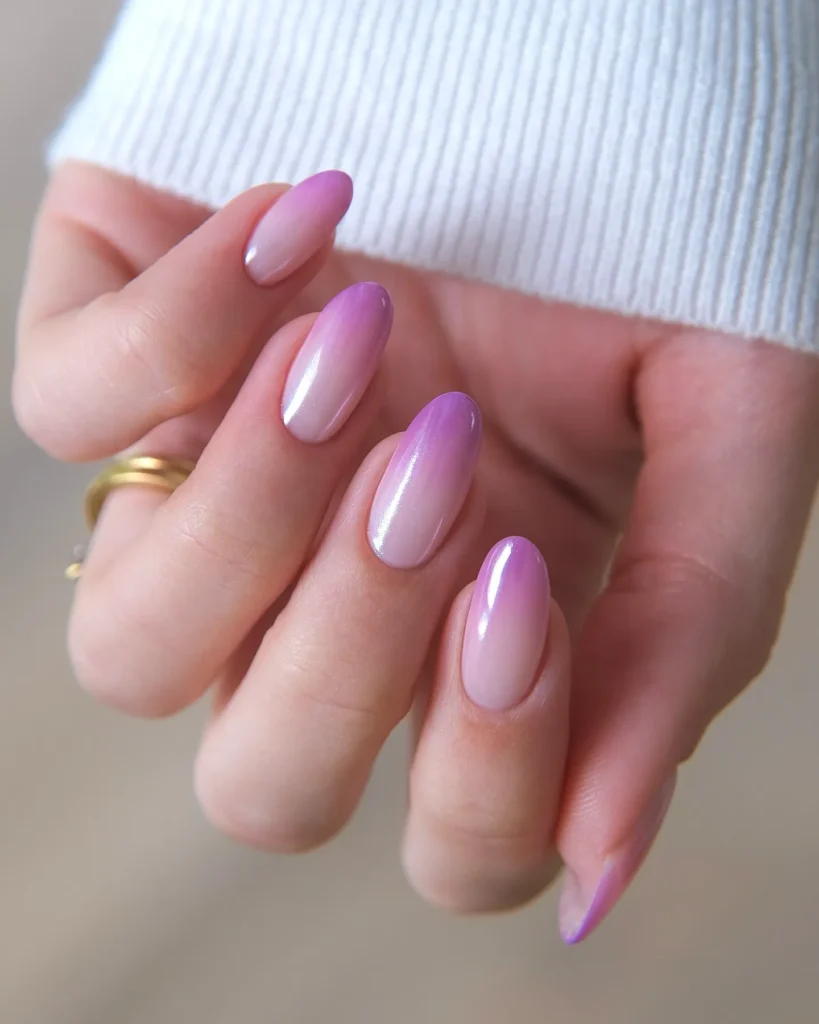
55. Watercolor Ombre Nails
Soft, blended colors mimic the look of watercolor paint, with edges that fade rather than form a clean line.
Perfect for: Artistic, soft aesthetic lovers
Best shapes: Oval, almond
Pro tip: Use a damp brush to soften color edges right after applying for a true watercolor effect.
Time to DIY: 40 minutes
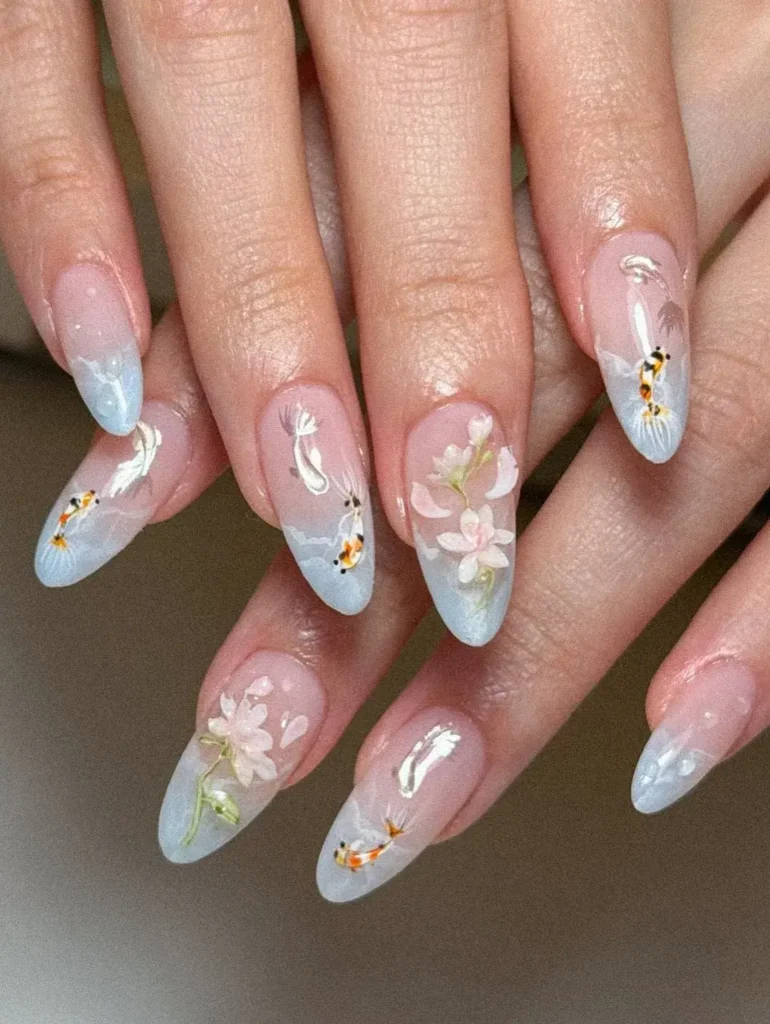
56. Reverse French Ombre
Instead of a solid tip, the reverse French line fades from color into the natural nail bed rather than forming a hard edge.
Perfect for: Modern twist on a classic style
Best shapes: Short square, short oval
Pro tip: Use a small sponge at the cuticle line only, keeping the rest of the nail bare for contrast.
Time to DIY: 25 minutes
Tropical & Beach-Inspired Nail Ideas
Tropical nail art brings vacation energy to any manicure. These designs work well for actual travel or simply for capturing that relaxed, beachy mood at home.
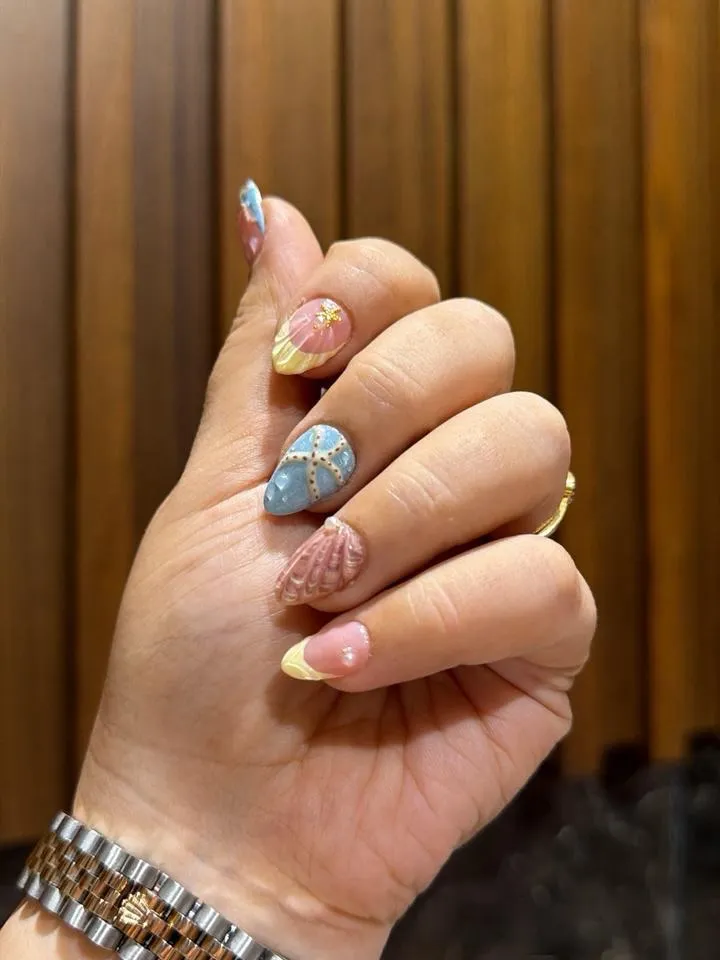
57. Seaside Set with Shell Charms
A sandy nude or pale blue base pairs with small gold shell charms placed near the cuticle of one or two nails.
Perfect for: Beach vacations, photo-ready looks
Best shapes: Almond, coffin
Pro tip: Apply charms while the topcoat is still slightly wet so they stay secure without extra glue.
Time to DIY: 35 minutes
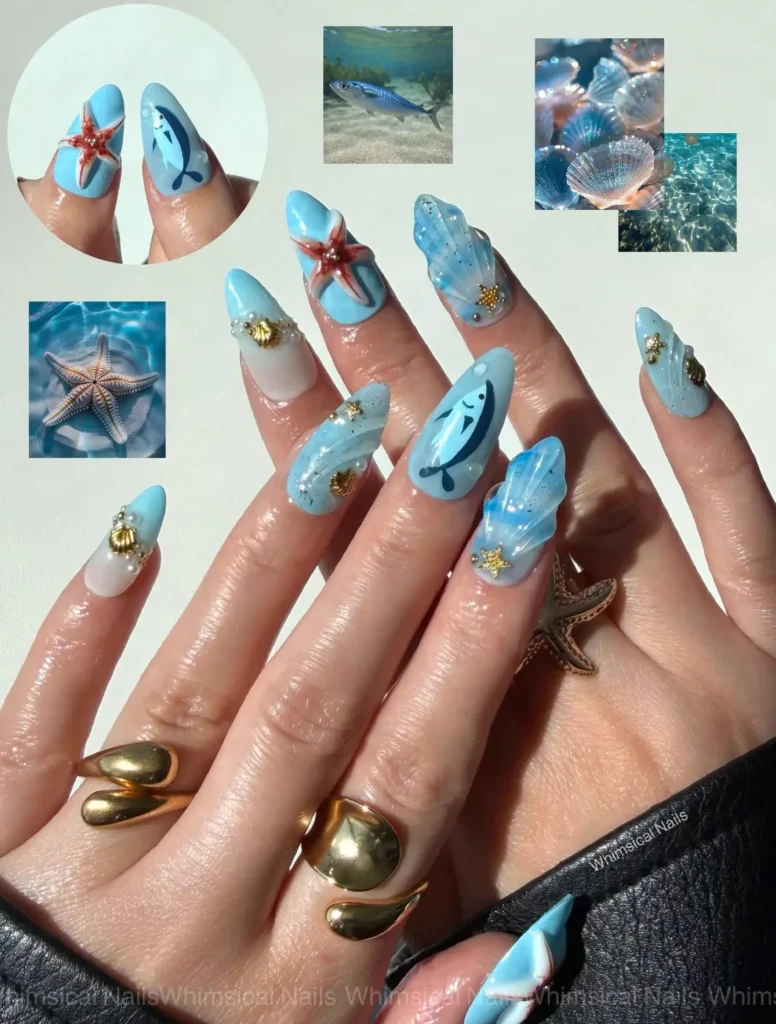
58. Palm Leaf Accent Nails
A single palm leaf, painted in deep green with visible vein lines, sits on an accent nail against a clean background.
Perfect for: Tropical vacations, statement accents
Best shapes: Coffin, almond
Pro tip: Paint the leaf shape first, then add vein lines once the base color has fully dried.
Time to DIY: 30 minutes
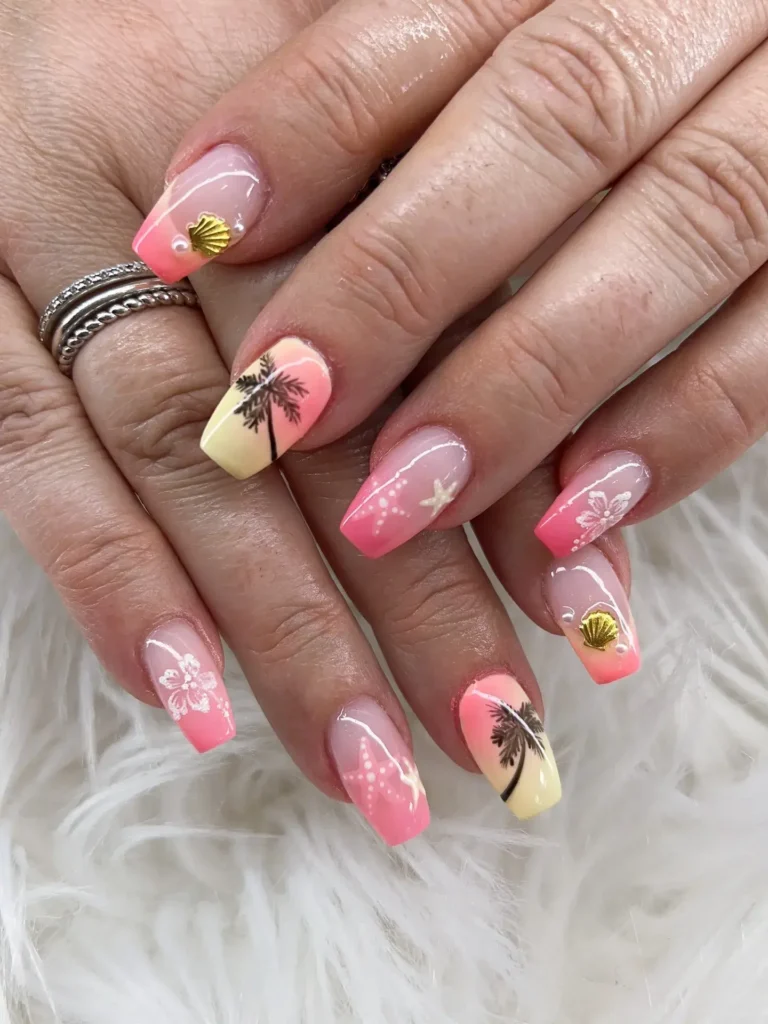
59. Turquoise Wave Tips
Wavy turquoise lines sit across the tip of the nail, mimicking the movement of ocean waves against a light base.
Perfect for: Beach trips, casual summer wear
Best shapes: Square, squoval
Pro tip: Use a thin brush and steady, curved strokes rather than straight lines for a natural wave shape.
Time to DIY: 25 minutes
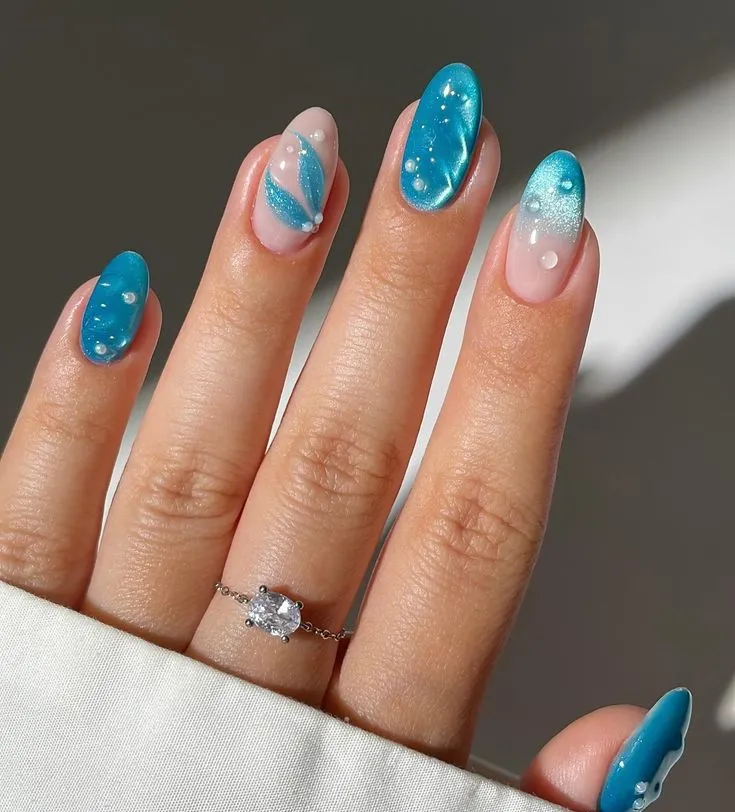
60. Mermaid Vibes Nails
Iridescent chrome or scale-like texture in blue and green tones covers the nail, creating a shimmering, underwater effect.
Perfect for: Statement nails, beach-themed events
Best shapes: Almond, coffin
Pro tip: Use a dark blue base coat first to make the iridescent shimmer stand out more clearly.
Time to DIY: 40 minutes
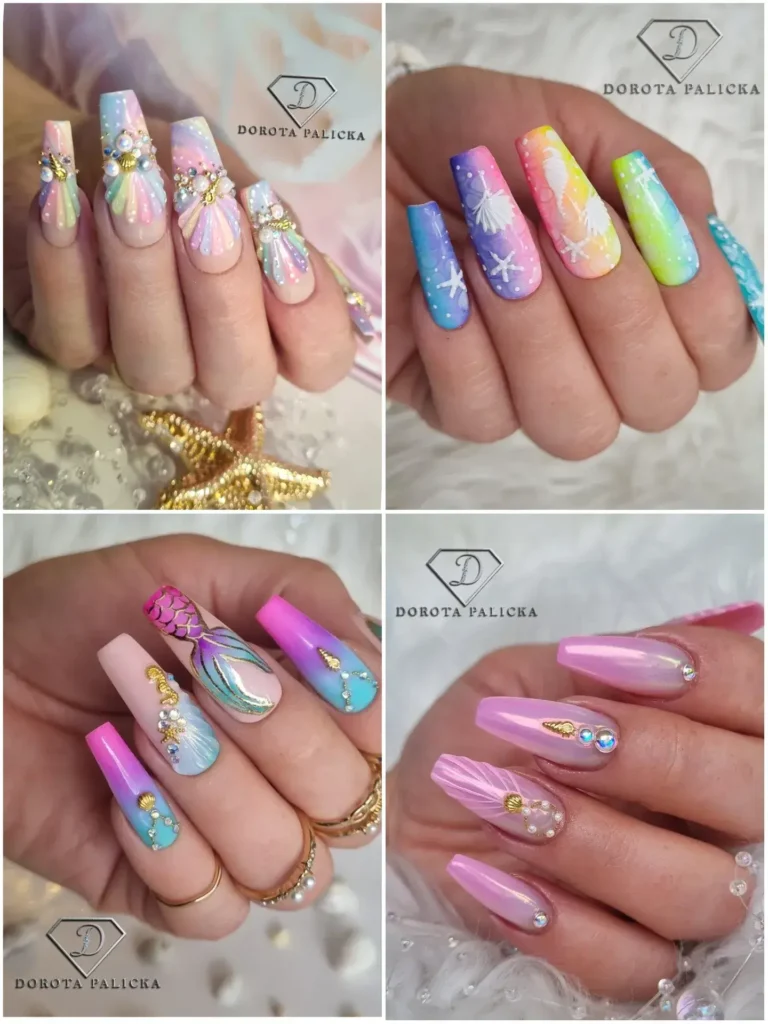
61. Seashell Embellishments
Small 3D seashells or hand-painted shell outlines decorate the nail, often paired with a soft nude or sandy base.
Perfect for: Beach vacations, textured nail lovers
Best shapes: Coffin, almond
Pro tip: Place embellishments near the cuticle rather than the tip so they stay secure longer.
Time to DIY: 35 minutes
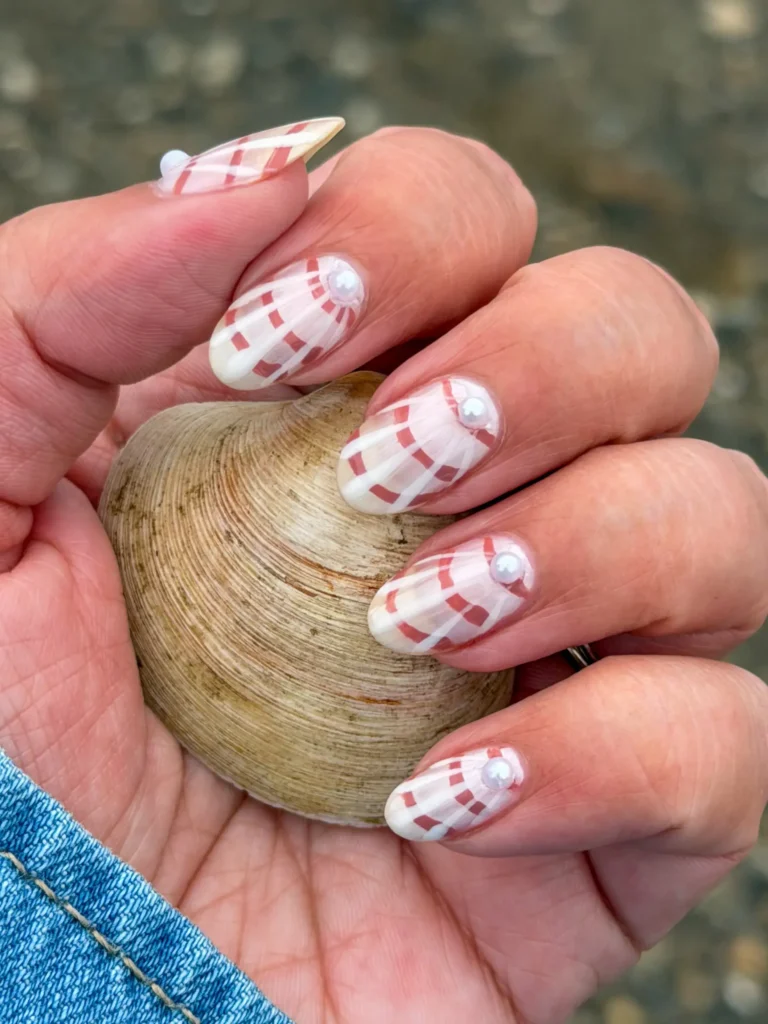
62. Island Breeze Nails
A mismatched set combines soft blues, greens, and whites, with one or two nails featuring simple tropical line art.
Perfect for: Relaxed vacation styling
Best shapes: Oval, almond
Pro tip: Choose colors from the same tonal family so the mismatched set still feels cohesive.
Time to DIY: 35 minutes
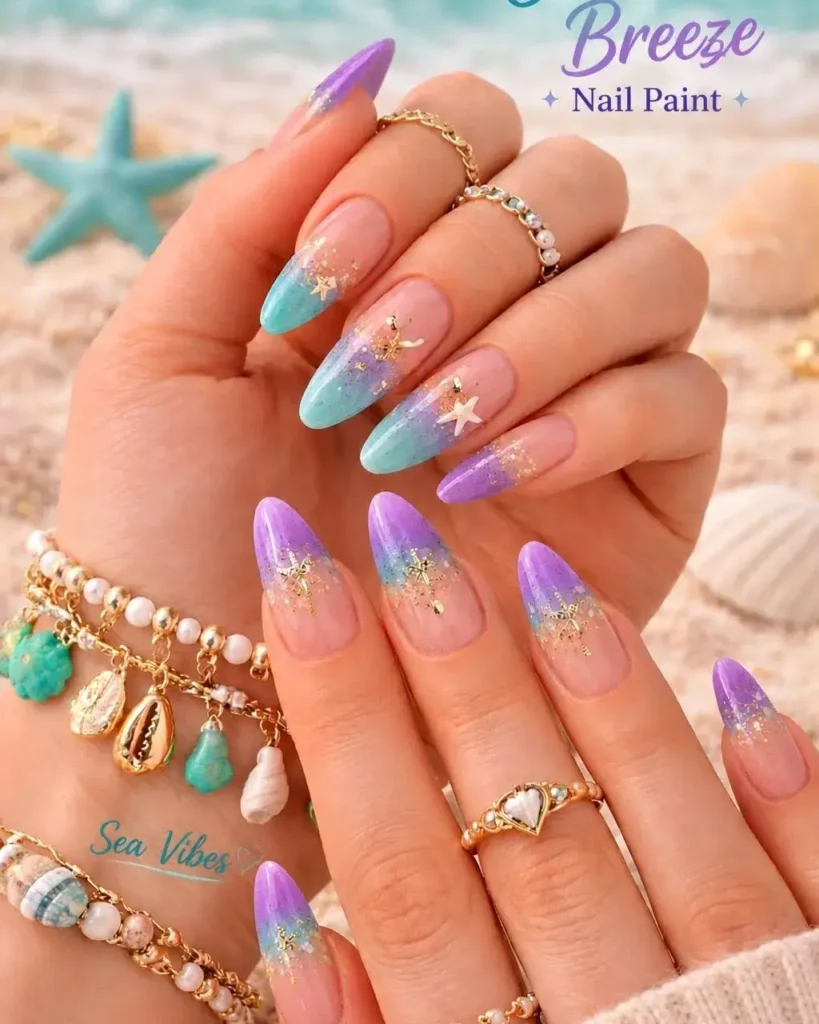
63. Mediterranean Getaway Nails
Blue and white patterns, inspired by Mediterranean tile work, cover the nail in geometric or wave-shaped designs.
Perfect for: European summer trips, classic styling
Best shapes: Square, almond
Pro tip: Sketch the pattern lightly in white first, then fill in blue sections for cleaner lines.
Time to DIY: 40 minutes
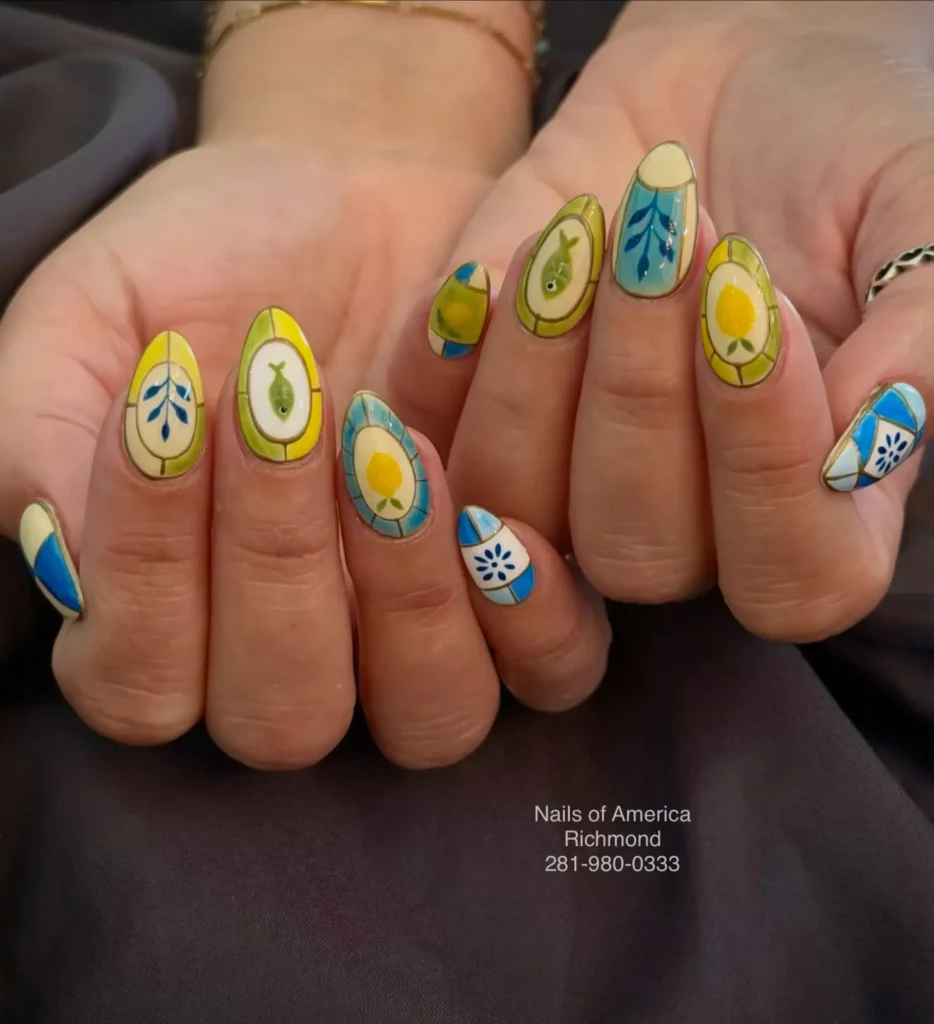
64. Amalfi Summer Stripes
Thin blue stripes run across a white base, often paired with a small lemon or citrus accent on one nail.
Perfect for: Coastal European-inspired looks
Best shapes: Square, squoval
Pro tip: Use striping tape for the blue lines to keep the spacing even across all nails.
Time to DIY: 30 minutes
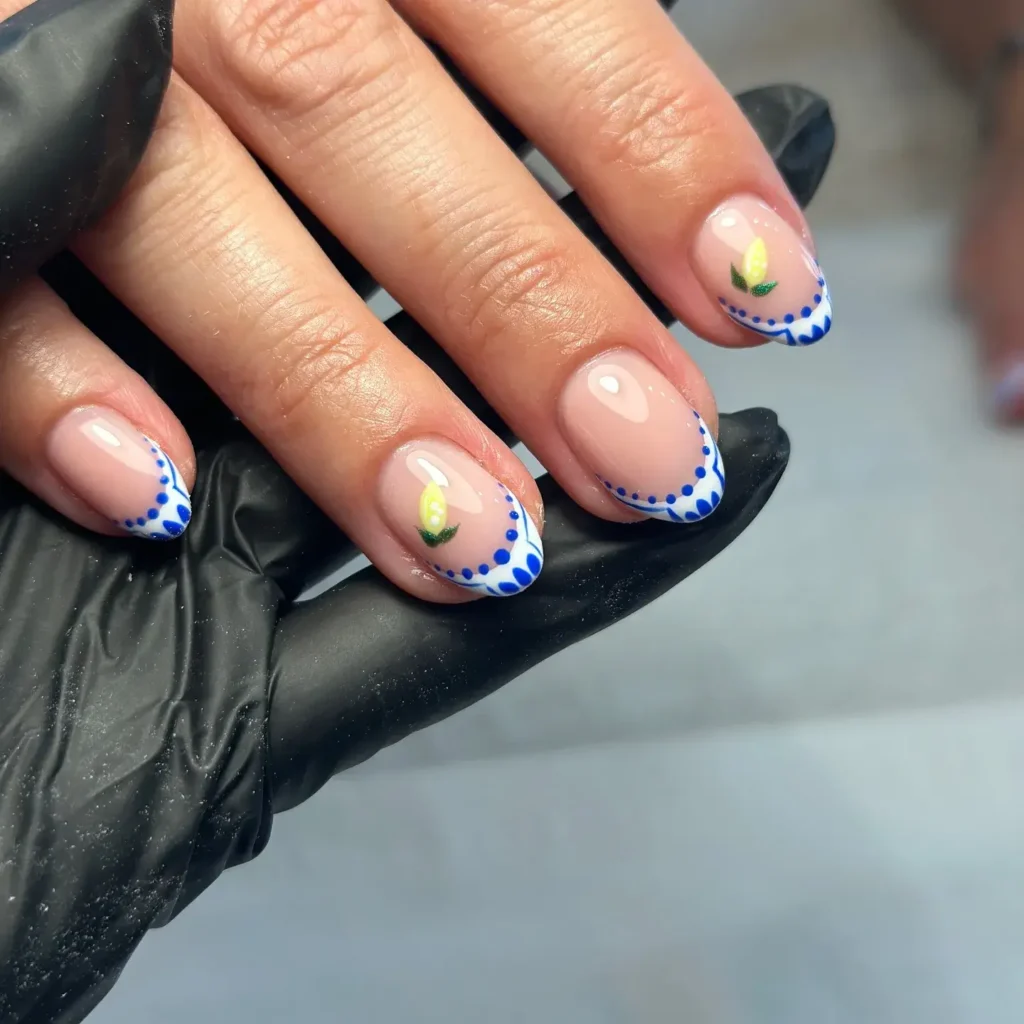
French Tip Variations for Summer
The French manicure keeps evolving every season. These updated versions keep the classic shape but swap in new colors, textures, and placement for summer 2026. If you want more designs built specifically around short French tip nails, this guide breaks down the best shapes, colors, and application methods in detail.
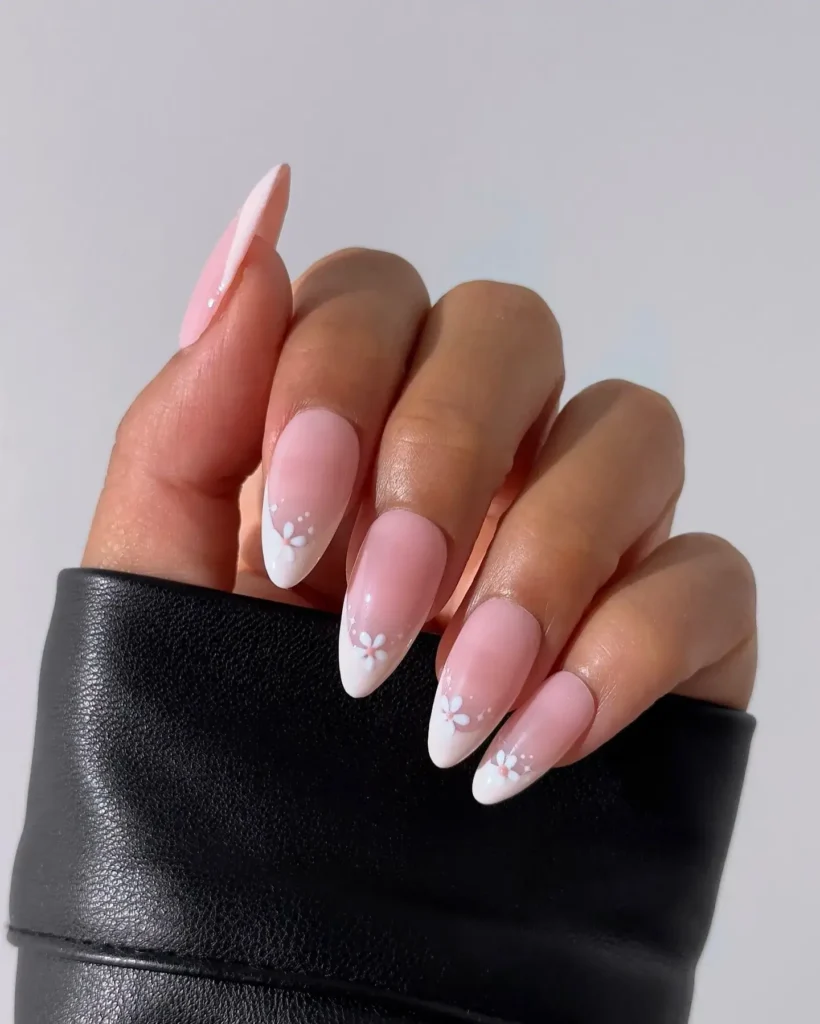
65. Reverse French Tips
Color sits at the base of the nail near the cuticle instead of the tip, flipping the traditional French placement.
Perfect for: Short nails, modern minimal styling
Best shapes: Short square, short oval
Pro tip: Use a small brush and steady hand, since the curved cuticle line is harder to control than a straight tip.
Time to DIY: 25 minutes
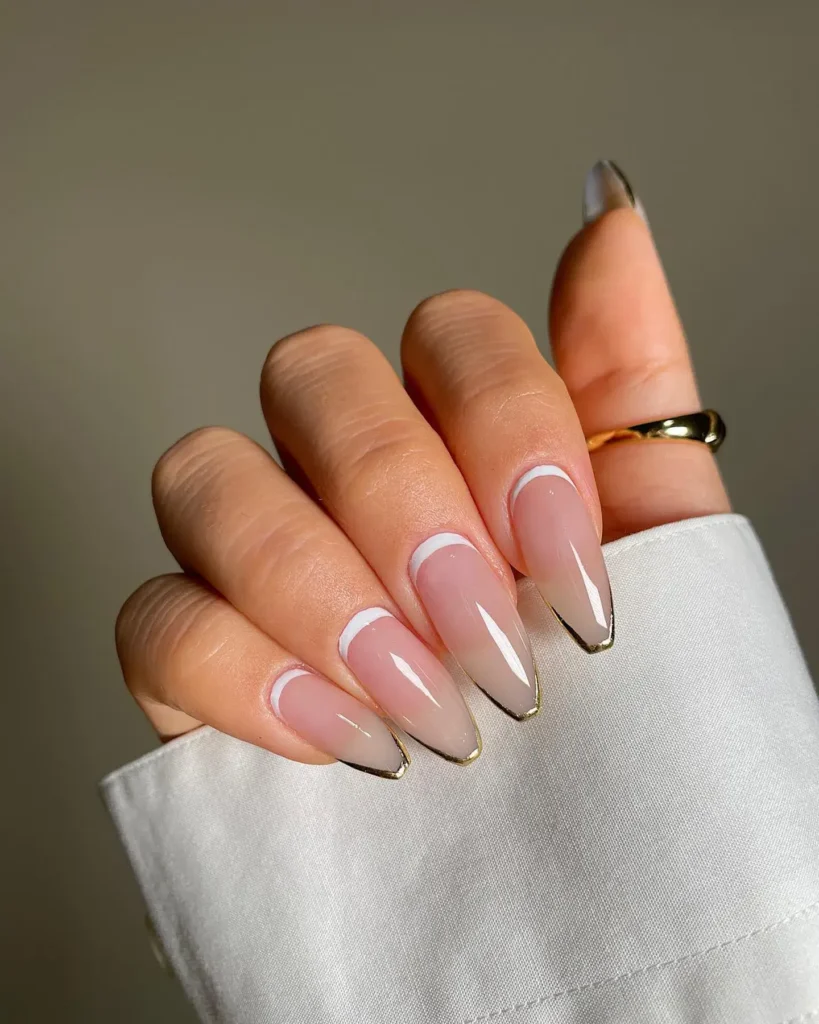
66. Colored French Tips
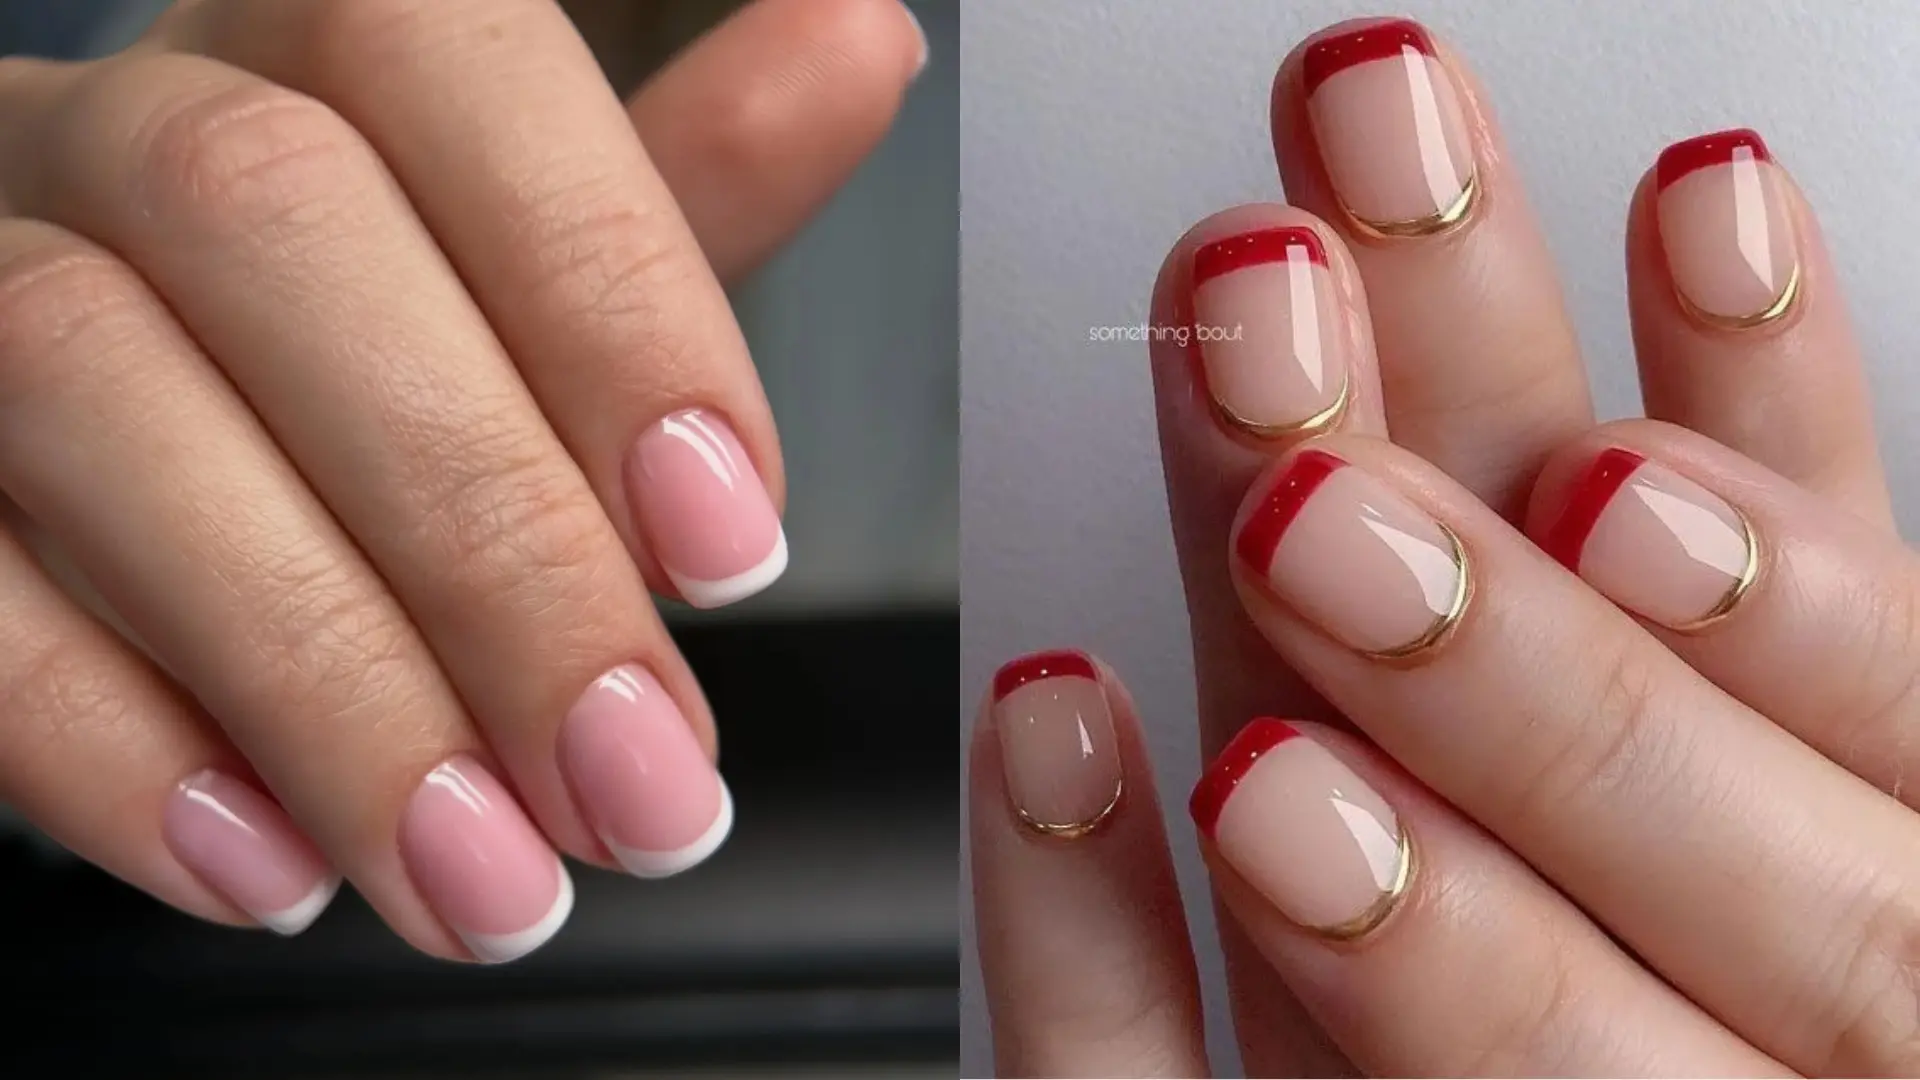
Instead of classic white, the tip is painted in a bright or pastel color over a clear or nude base. For a richer, more classic color swap, explore bold red French tip designs that put the focus directly on the tip.
Perfect for: Everyday wear, easy color swaps
Best shapes: Almond, square
Pro tip: French tip guides work well here to keep the colored line straight and even.
Time to DIY: 25 minutes
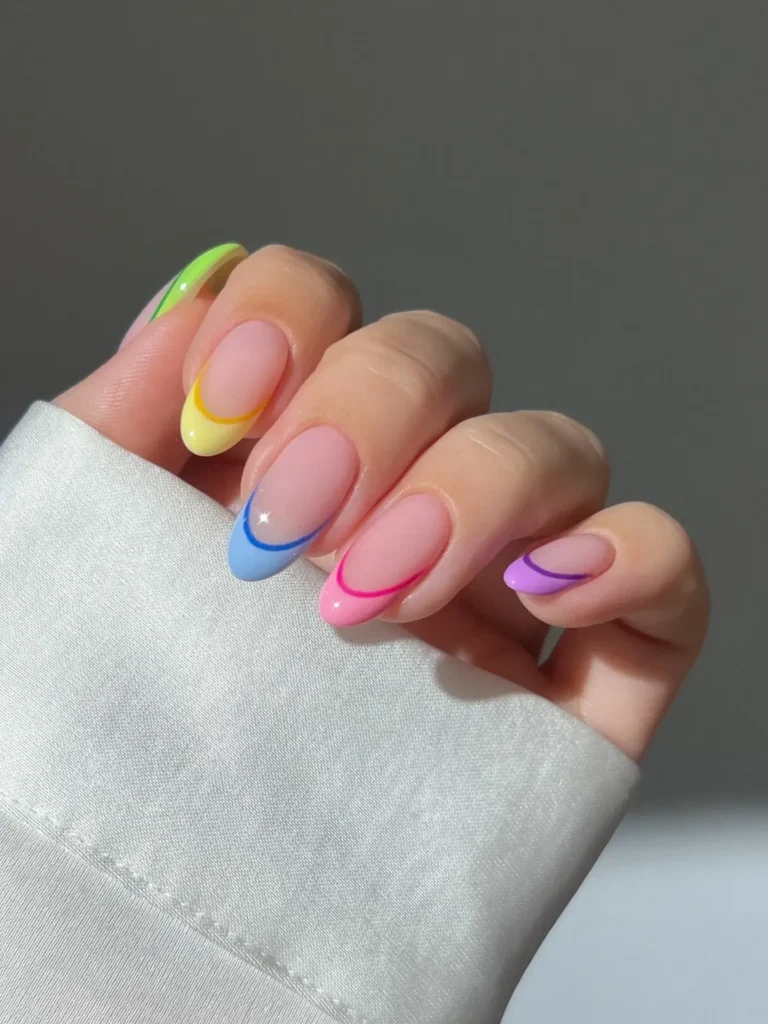
67. Micro-French Nails
A very thin white or colored line sits right at the tip edge, taking up far less space than a traditional French manicure.
Perfect for: Short nails, minimal detail lovers
Best shapes: Short square, short oval
Pro tip: A striping brush gives more control than a regular brush for this thin, precise line.
Time to DIY: 20 minutes
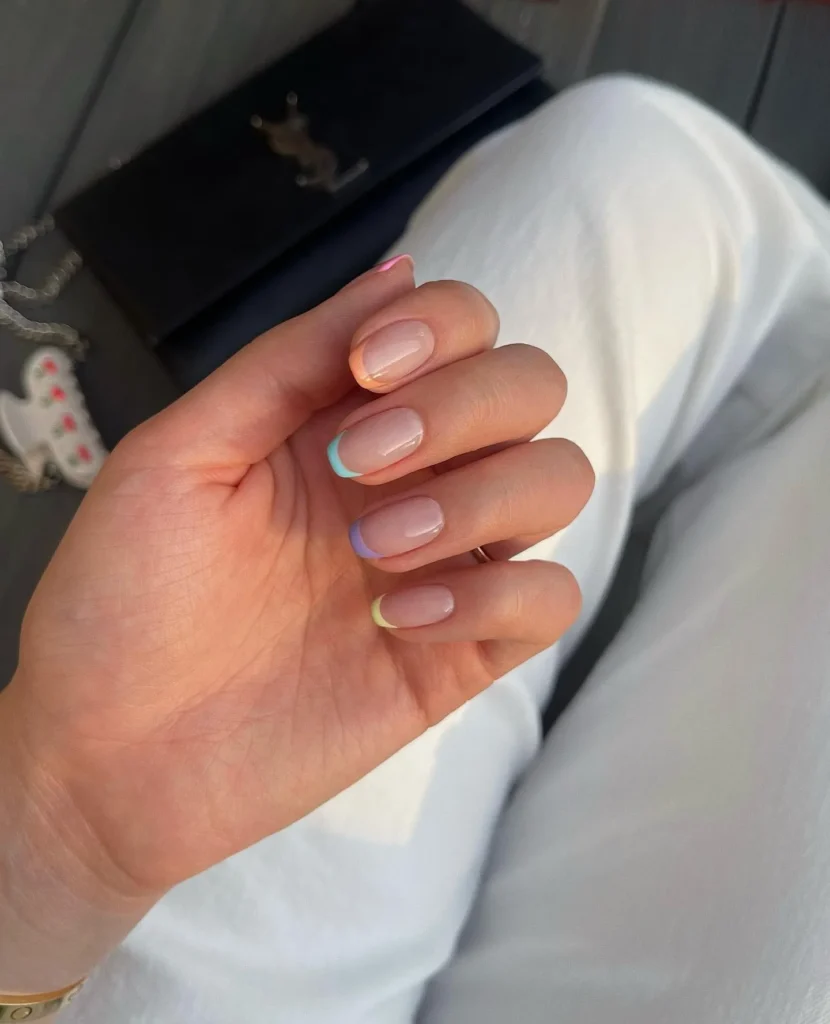
68. Pucci Print French
A swirled, multicolor pattern replaces the solid tip, inspired by silk scarf prints in pink, yellow, and turquoise.
Perfect for: Statement looks, pattern lovers
Best shapes: Almond, coffin
Pro tip: Work with wet polish so the swirl colors blend smoothly instead of forming hard lines.
Time to DIY: 40 minutes
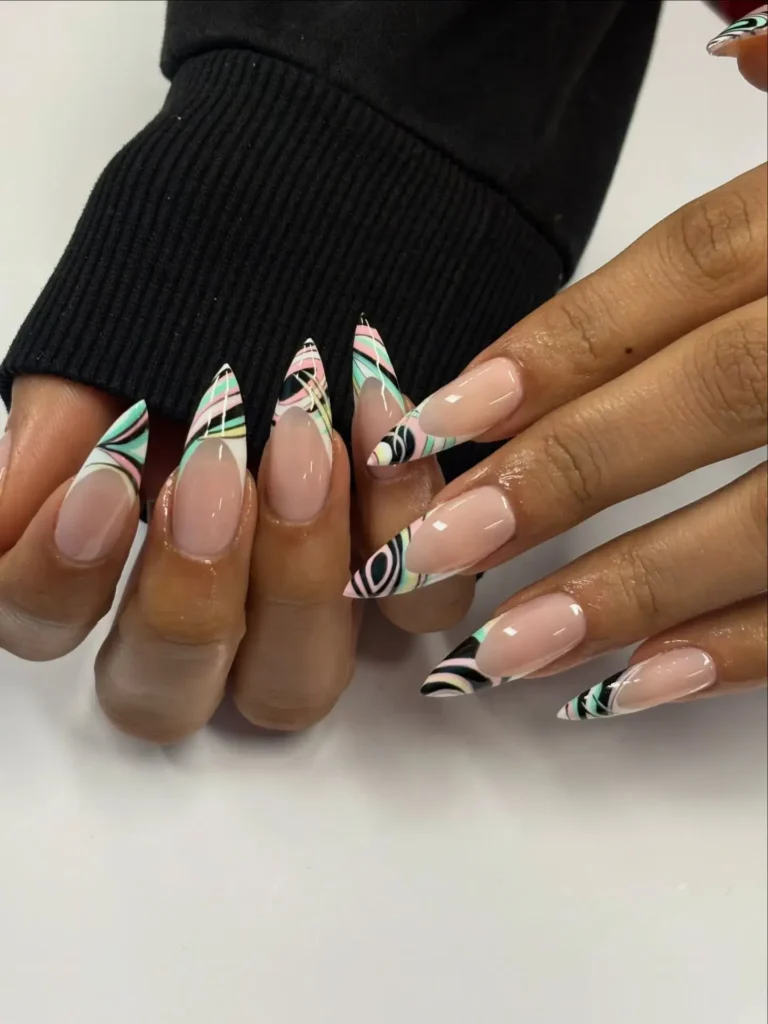
69. Double-Line French Tips
Two thin lines, often in different colors, run parallel across the tip instead of one solid band.
Perfect for: Modern updates to a classic style
Best shapes: Square, squoval
Pro tip: Let the first line dry fully before adding the second, or the colors will bleed together.
Time to DIY: 30 minutes
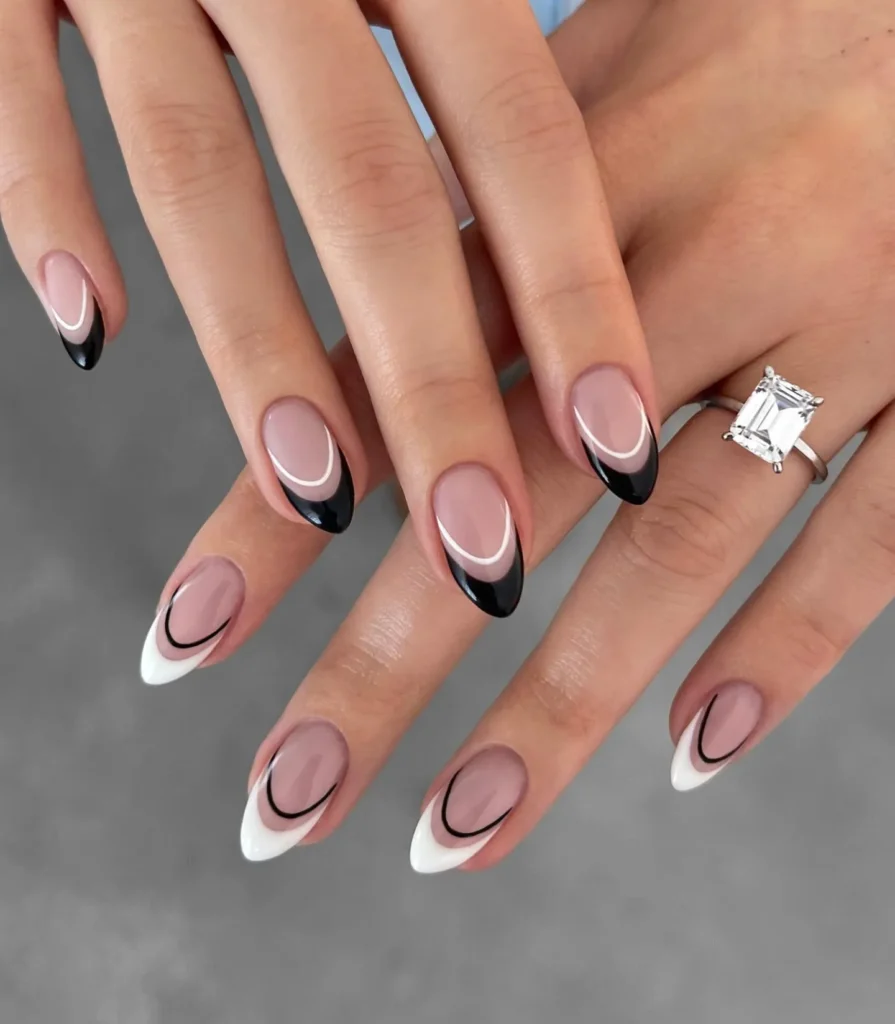
70. Tortoiseshell French Manicure
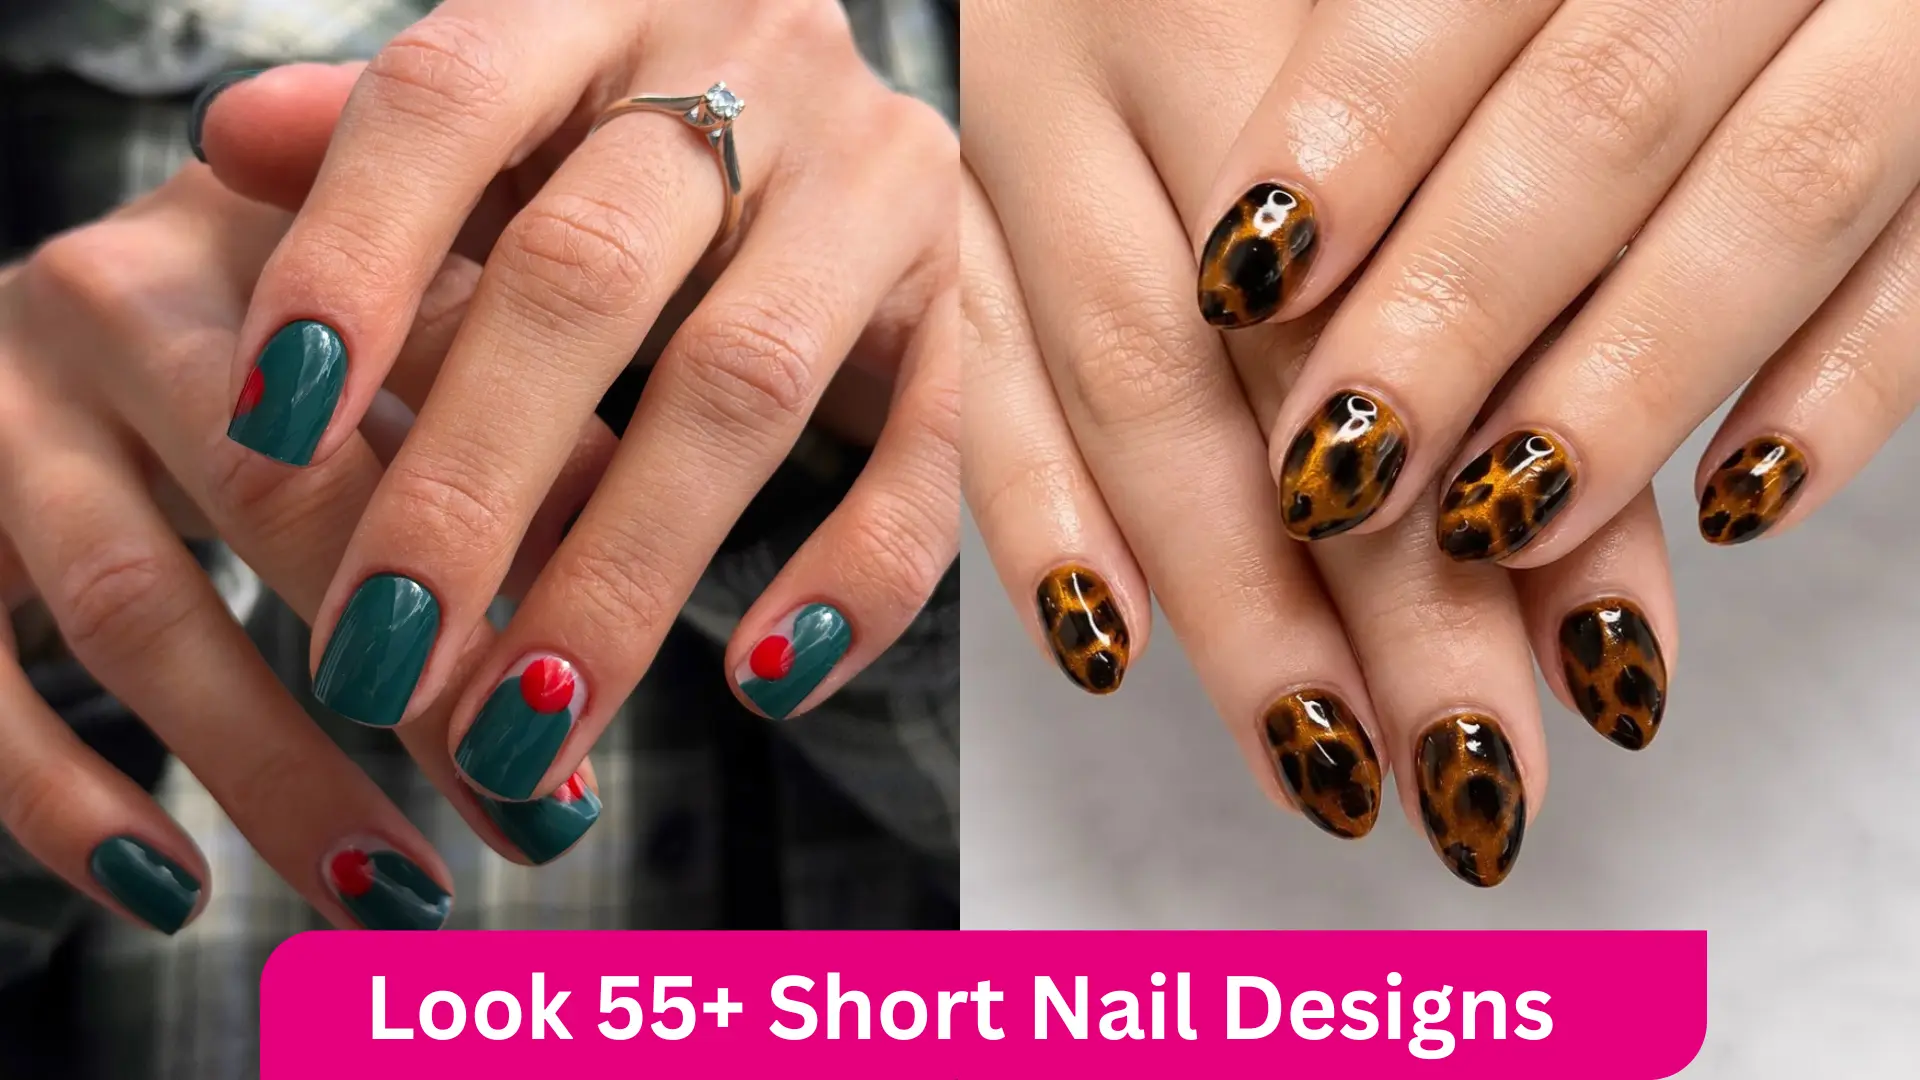
A warm, mottled brown and amber pattern fills the tip, resembling the natural look of tortoiseshell material.
Perfect for: Fall-inspired summer looks, neutral lovers
Best shapes: Almond, coffin
Pro tip: Dab two or three brown tones together while wet to build the mottled texture naturally.
Time to DIY: 35 minutes
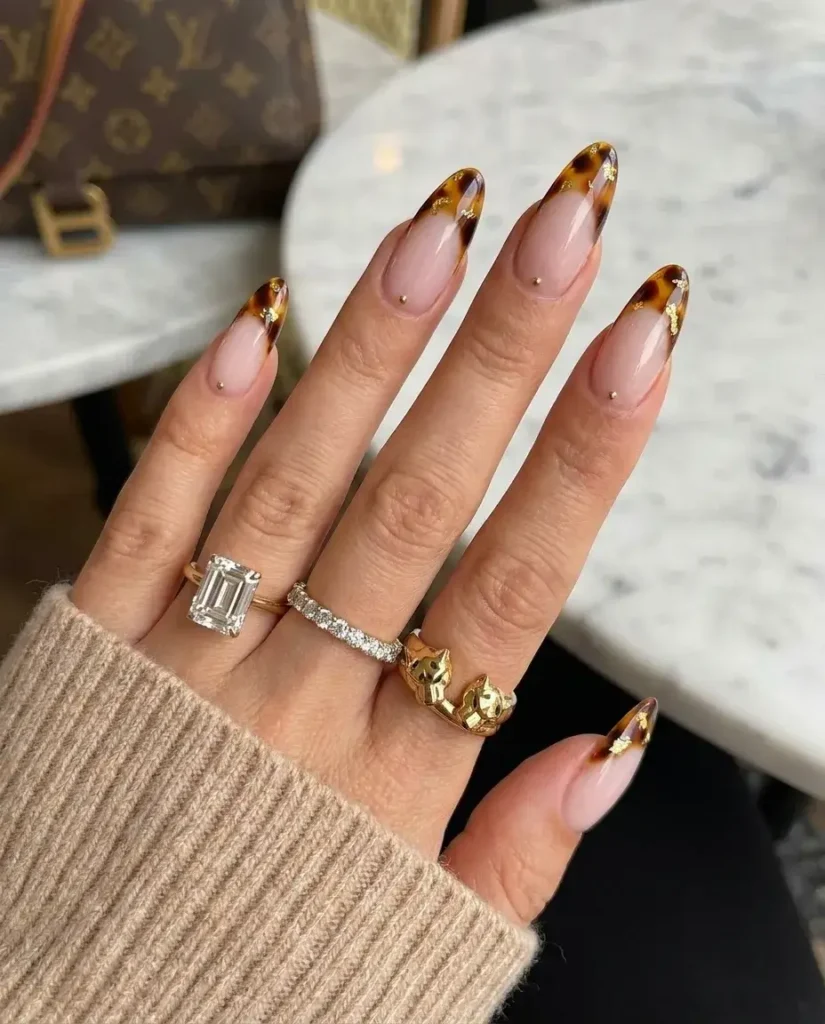
71. Metallic Micro-French
A thin metallic gold or silver line replaces the classic white tip, adding shine without much surface coverage.
Perfect for: Elegant everyday wear
Best shapes: Short square, oval
Pro tip: Metallic polish can look streaky in one coat, so plan for two thin layers.
Time to DIY: 25 minutes
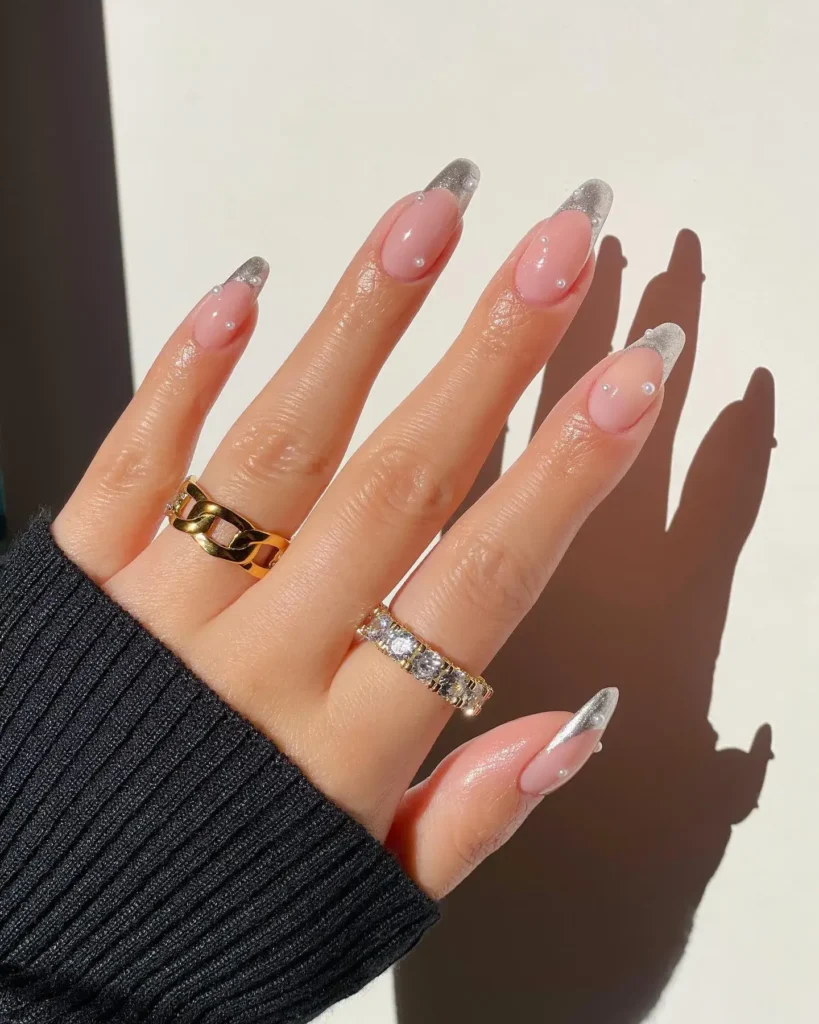
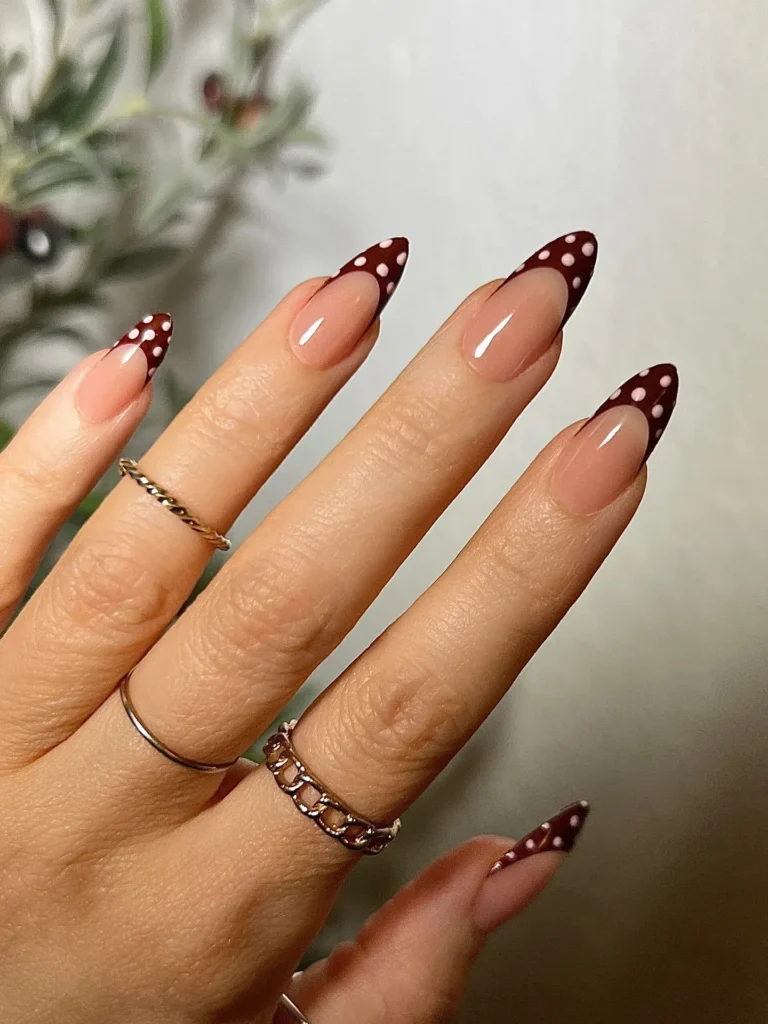
72. Polka Dot French Tips
Instead of a solid line, small dots in a matching or contrasting color form the shape of the tip.
Perfect for: Playful, detail-focused looks
Best shapes: Square, almond
Pro tip: Use a dotting tool in one consistent size so the dots line up evenly across the tip.
Time to DIY: 35 minutes
Minimalist & Quiet Luxury Summer Nail Designs
Not every summer nail needs bold color or heavy detail. This category focuses on soft, understated looks that still feel intentional and polished.
73. Soap Nails
A milky, semi-opaque polish creates a soft glow that mimics the look of a bar of soap, with a subtle shimmer underneath.
Perfect for: Clean, effortless everyday wear
Best shapes: Almond, oval
Pro tip: Buff the natural nail before applying polish, since soap nails rely on a smooth base to look glossy.
Time to DIY: 20 minutes
74. Milk Nails
A sheer, milky white polish covers the nail in one soft, opaque layer, giving a clean look without full white coverage.
Perfect for: Bridal nails, minimal daily styling
Best shapes: Square, squoval
Pro tip: Two thin coats give better coverage than one thick coat, which can look chalky.
Time to DIY: 20 minutes
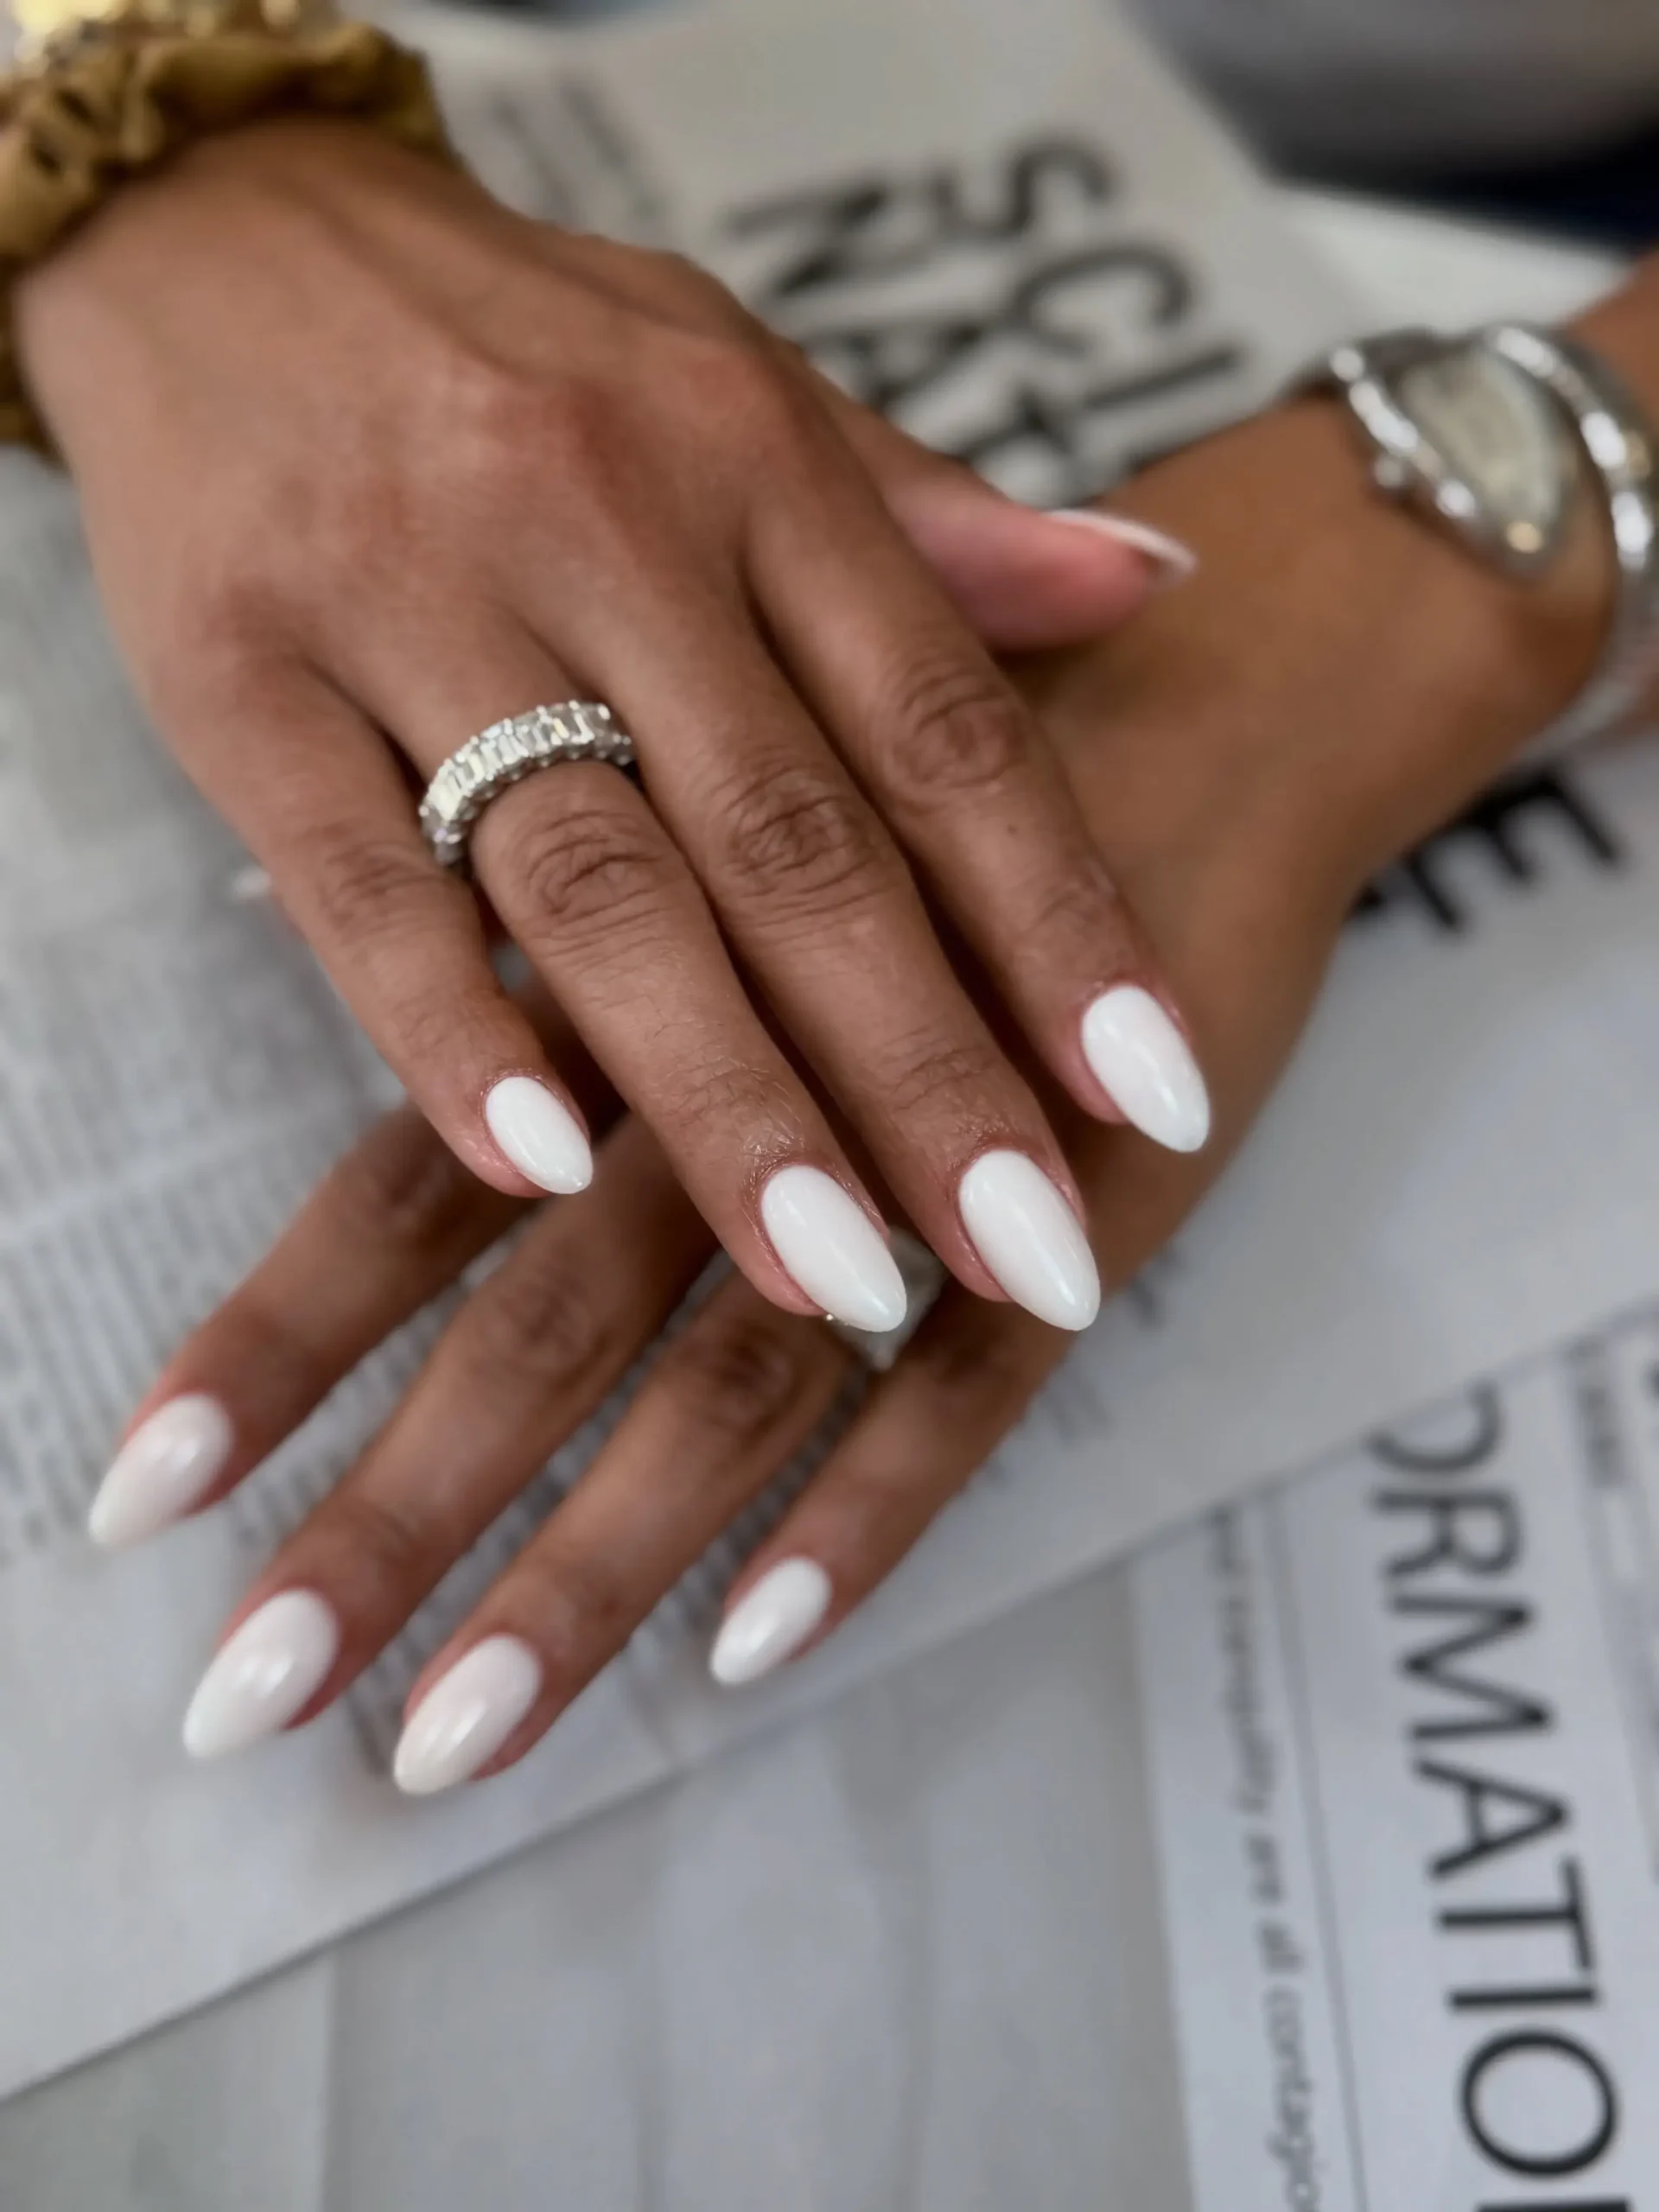
75. Sheer Glaze Nails
A clear or barely tinted glaze sits over the natural nail, adding shine without changing the color much at all.
Perfect for: Office settings, no-makeup makeup style nails
Best shapes: Oval, round
Pro tip: Push cuticles back before applying so the glaze sits evenly across the full nail surface.
Time to DIY: 15 minutes
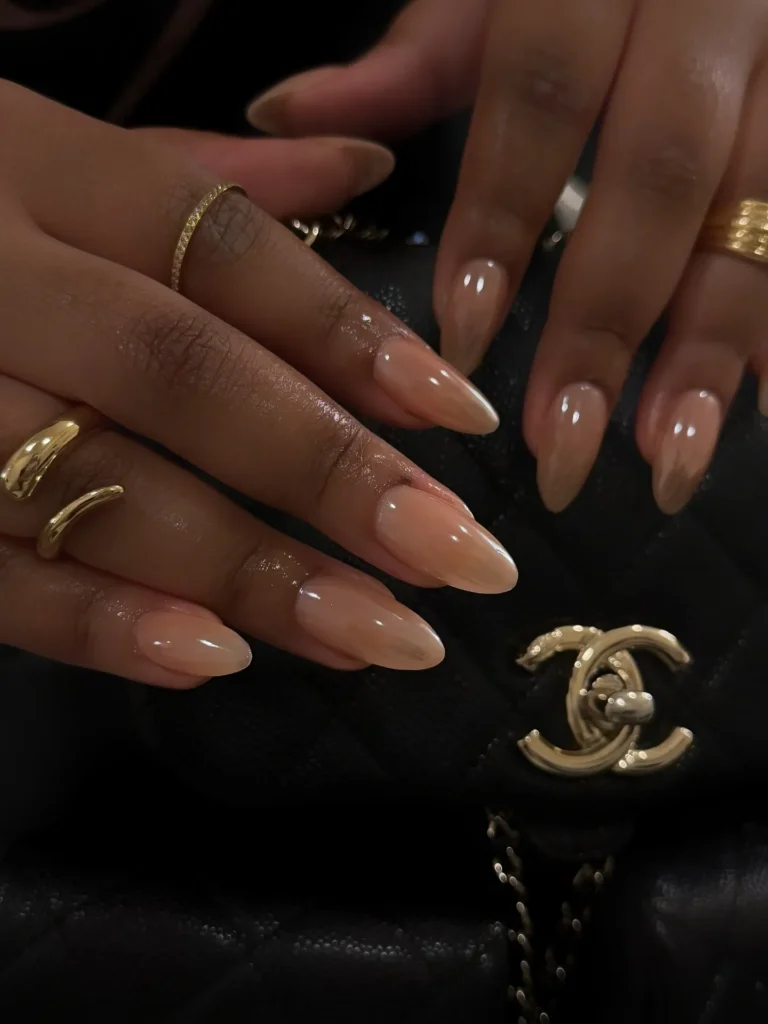
76. Negative Space Waves
Thin, wavy lines are painted across the nail, leaving most of the natural nail bare in between.
Perfect for: Artistic minimal looks
Best shapes: Almond, square
Pro tip: Sketch the wave shape lightly in pencil first if your hand is not steady with a brush.
Time to DIY: 25 minutes
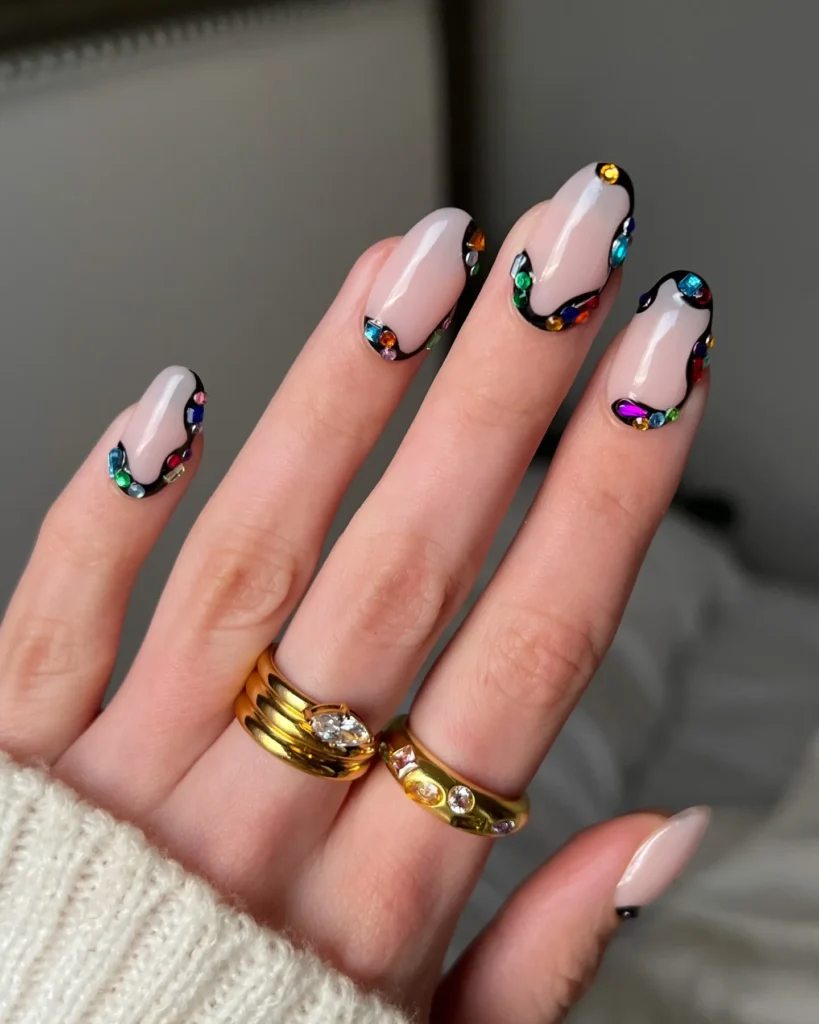
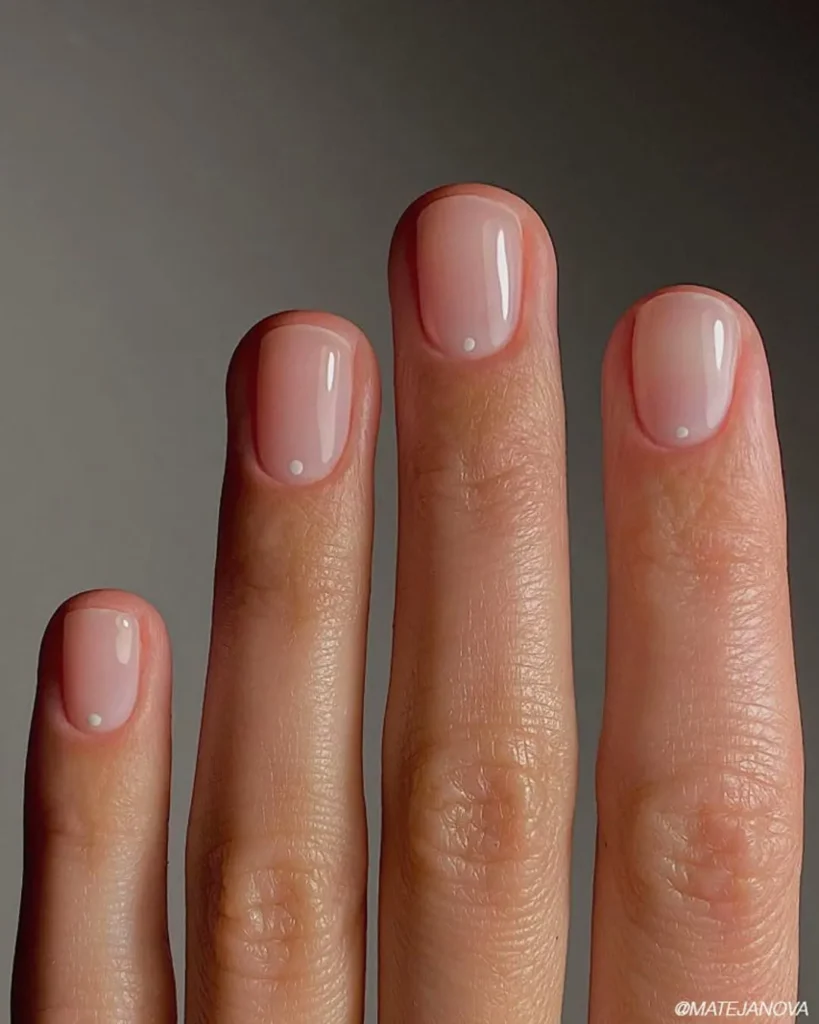
77. Single Dot Accent Nails
One small dot sits near the base of the nail, usually in a color that contrasts gently with a nude or sheer base.
Perfect for: Understated detail, short nails
Best shapes: Short square, short oval
Pro tip: A toothpick works better than a brush for a single, precise dot.
Time to DIY: 15 minutes
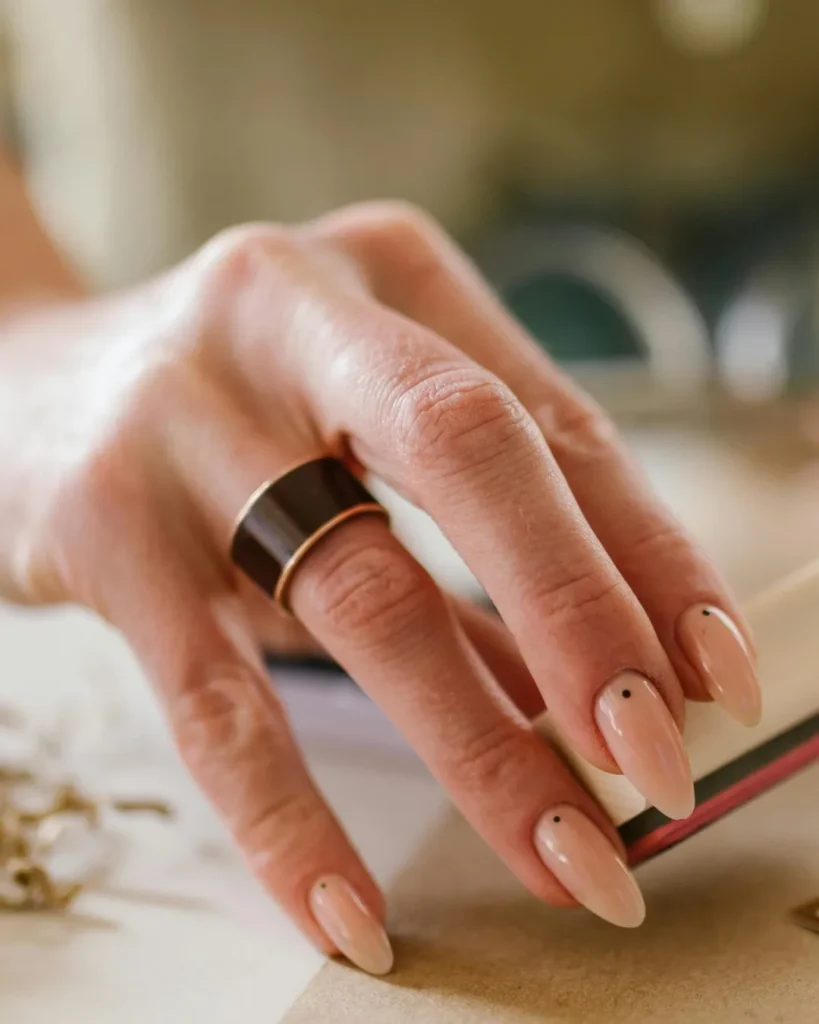
78. Matte Nude Nails
A flat matte topcoat sits over a nude polish, removing shine for a soft, velvety finish.
Perfect for: Work settings, subtle styling
Best shapes: Square, oval
Pro tip: Apply matte topcoat only once the base color is fully dry, or the finish can look uneven.
Time to DIY: 20 minutes
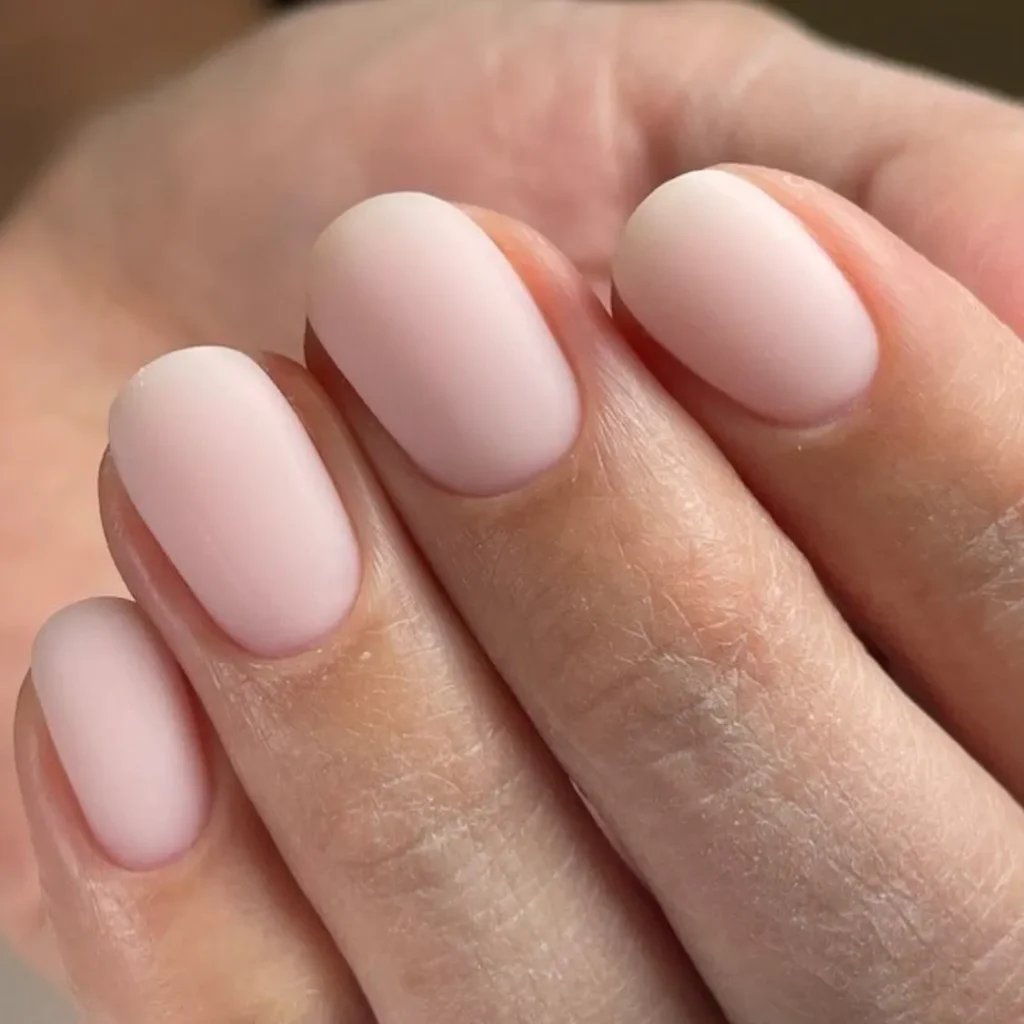
79. Thin Colored French
A very fine line of color sits right at the tip, thinner than a standard French manicure line.
Perfect for: Subtle color without full coverage
Best shapes: Almond, squoval
Pro tip: Use a striping brush loaded with a small amount of polish for the thinnest possible line.
Time to DIY: 20 minutes
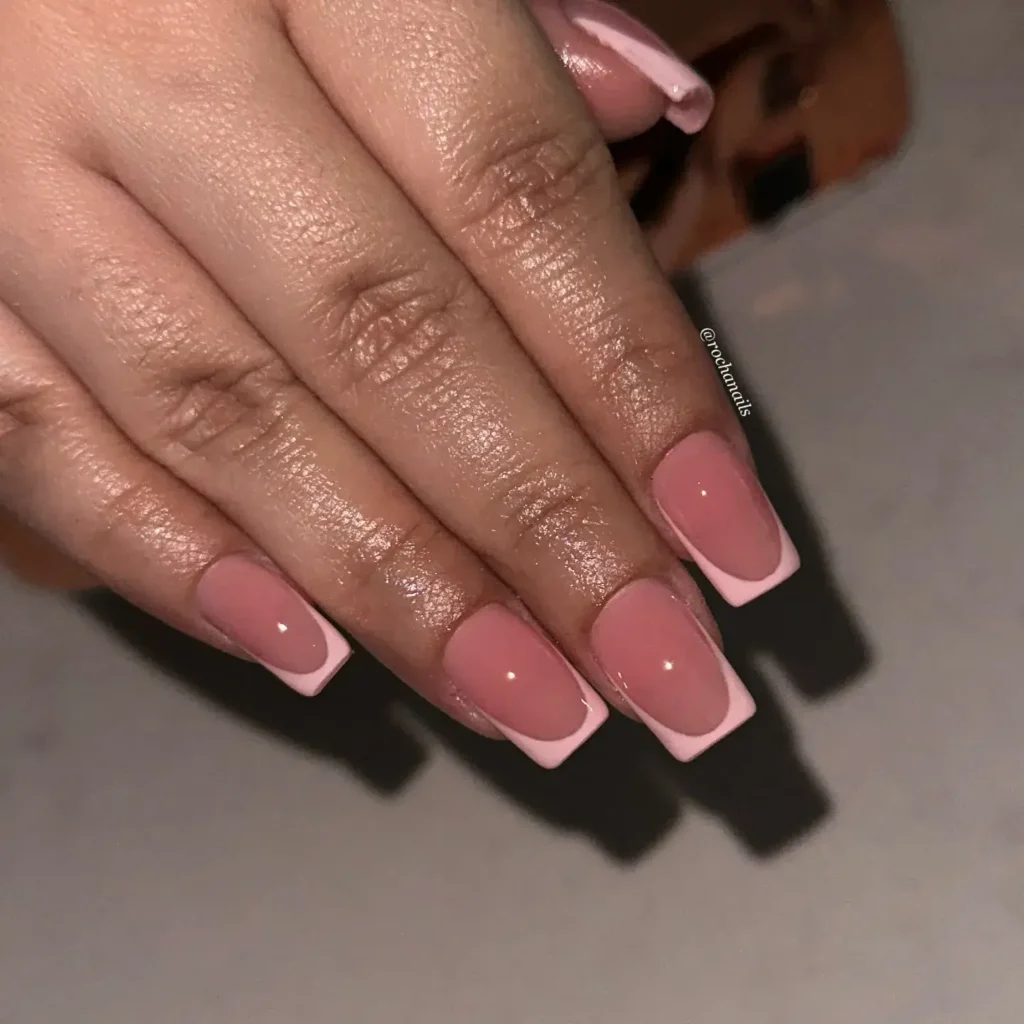
80. Mother-of-Pearl Nails
A soft, iridescent polish mimics the shifting shine of mother-of-pearl, shifting between pink, blue, and silver in the light.
Perfect for: Elegant, soft glam looks
Best shapes: Almond, coffin
Pro tip: Apply over a white or pale base to make the iridescent shift more visible.
Time to DIY: 25 minutes
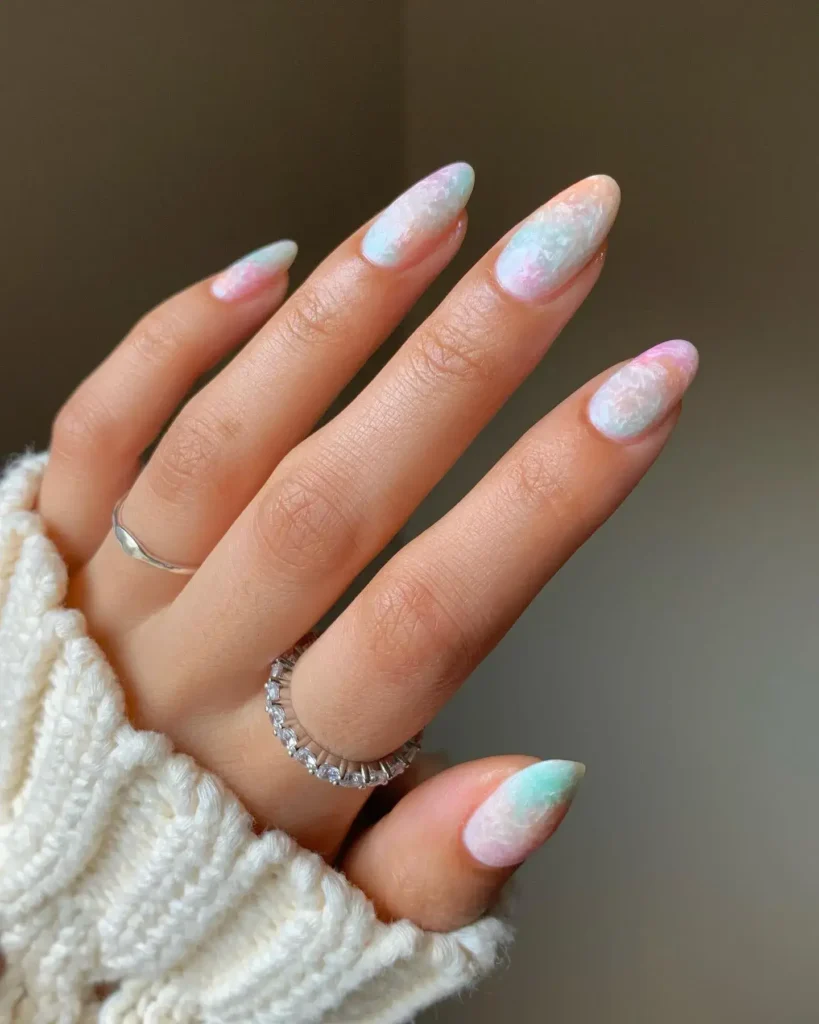
Short Summer Nail Ideas
Why Short Nails Are Trending This Summer
Short nails have grown more popular this year, especially for people who spend summer swimming, traveling, or working with their hands. Long extensions can feel impractical at the beach or water park.
Nail artists report more clients asking for detailed designs on natural-length nails. People want their short nails to feel just as intentional as a long acrylic set.
Short nails also tend to hold up better in summer heat and humidity. Less surface area means less room for gel to lift or chip.
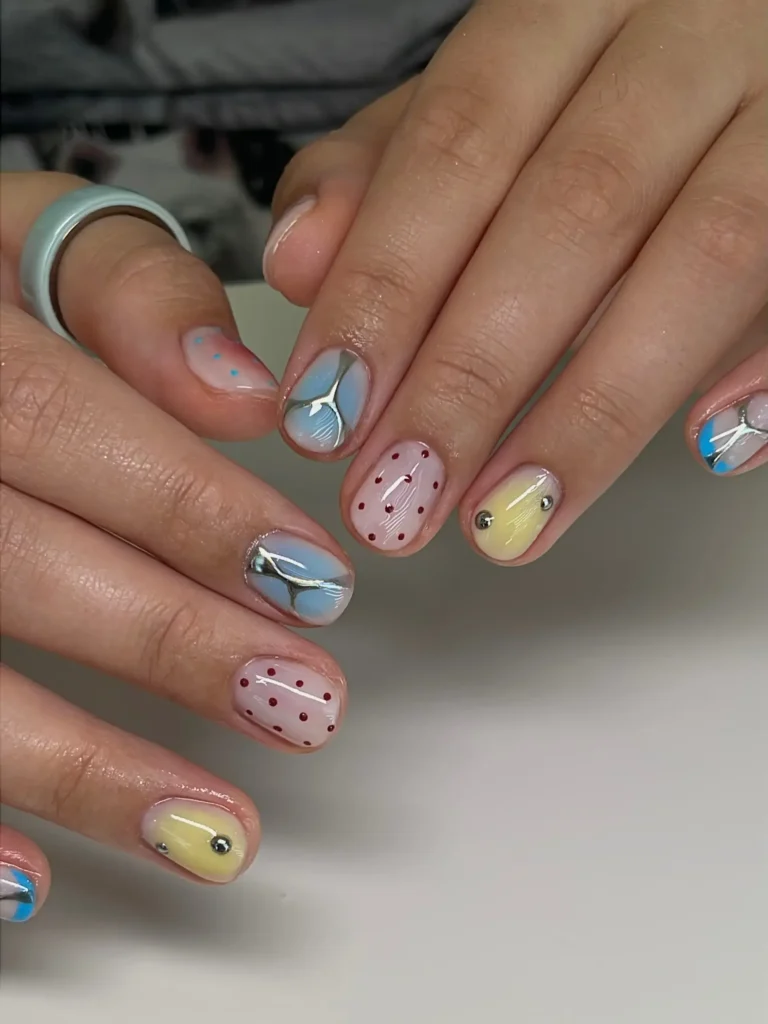
81. Airbrush Short Nails
Soft, diffused color is airbrushed across the center of the nail, leaving the edges lighter for a subtle gradient effect.
Perfect for: Modern, low-effort styling
Best shapes: Short square, short oval
Pro tip: Keep the airbrushed color small and centered, since short nails have less room for a wide blend.
Time to DIY: 30 minutes with an airbrush kit
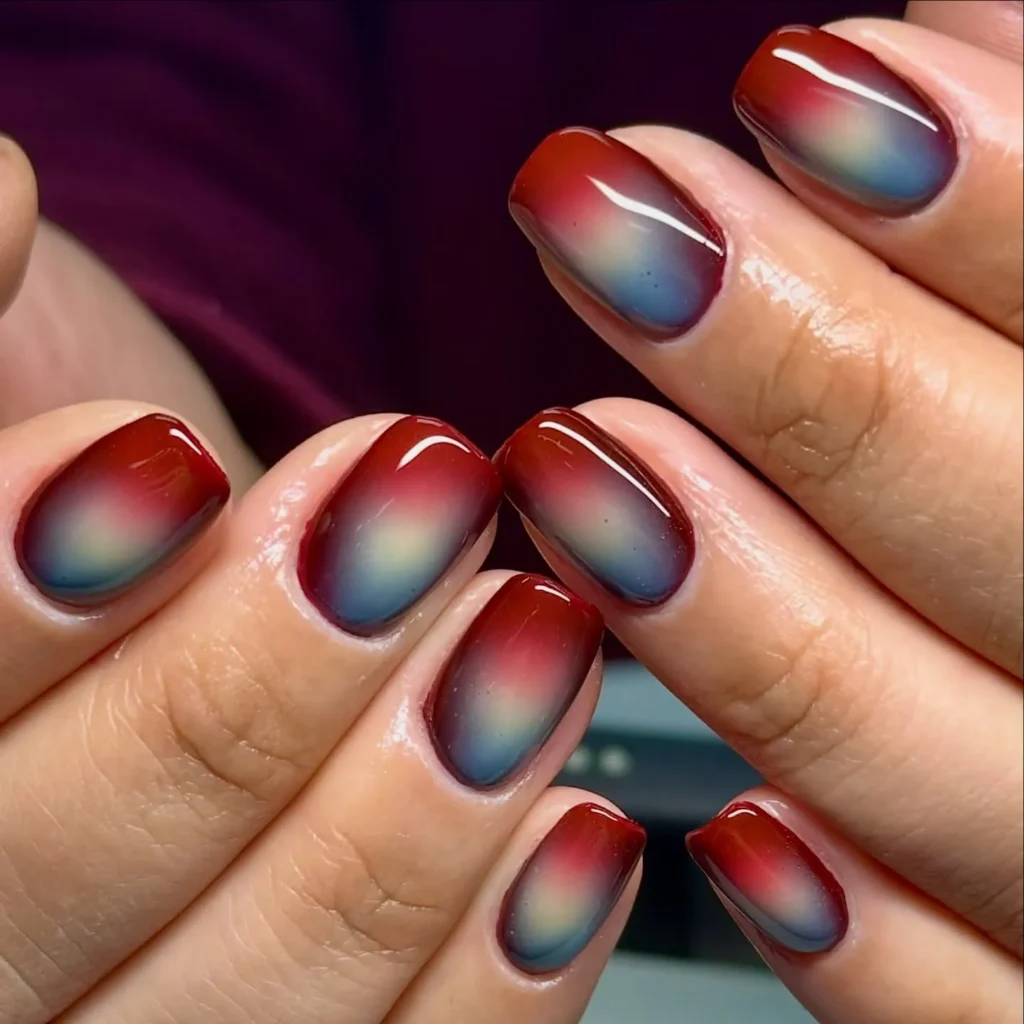
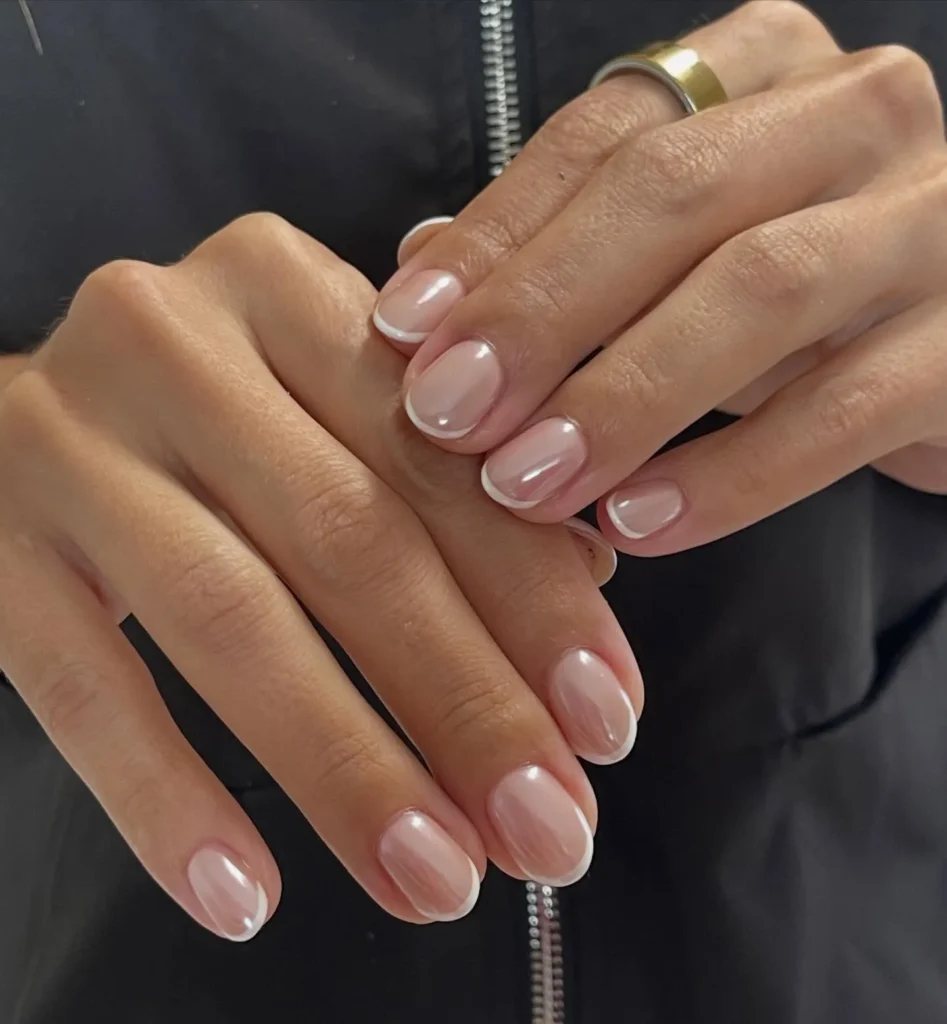
82. Micro-French on Short Nails
A very thin white or colored line sits at the tip, scaled down to suit a smaller nail bed.
Perfect for: Classic style on natural nails
Best shapes: Short square, short round
Pro tip: Thin nails need thin lines. A regular French tip guide often looks too wide for short nails.
Time to DIY: 20 minutes
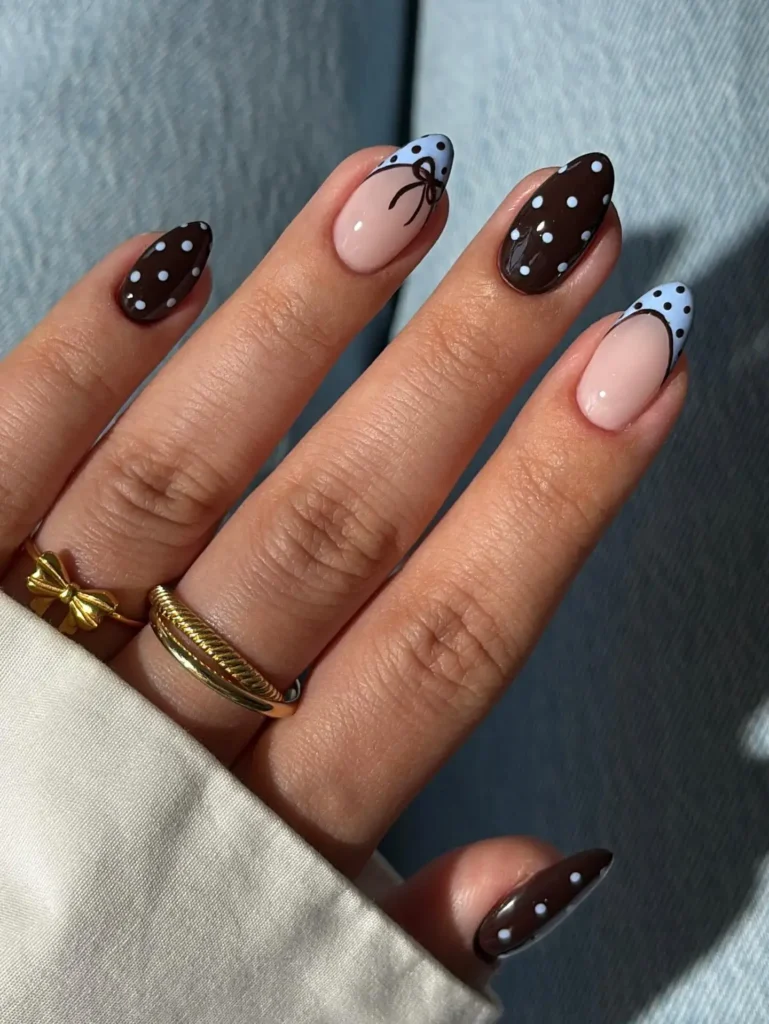
83. Teeny Polka Dots
Tiny dots, smaller than a standard polka dot, cover part or all of the nail in a playful, scattered pattern.
Perfect for: Short nails with big personality
Best shapes: Short square, short oval
Pro tip: Use the smallest end of a dotting tool, since short nails show less contrast with larger dots.
Time to DIY: 25 minutes
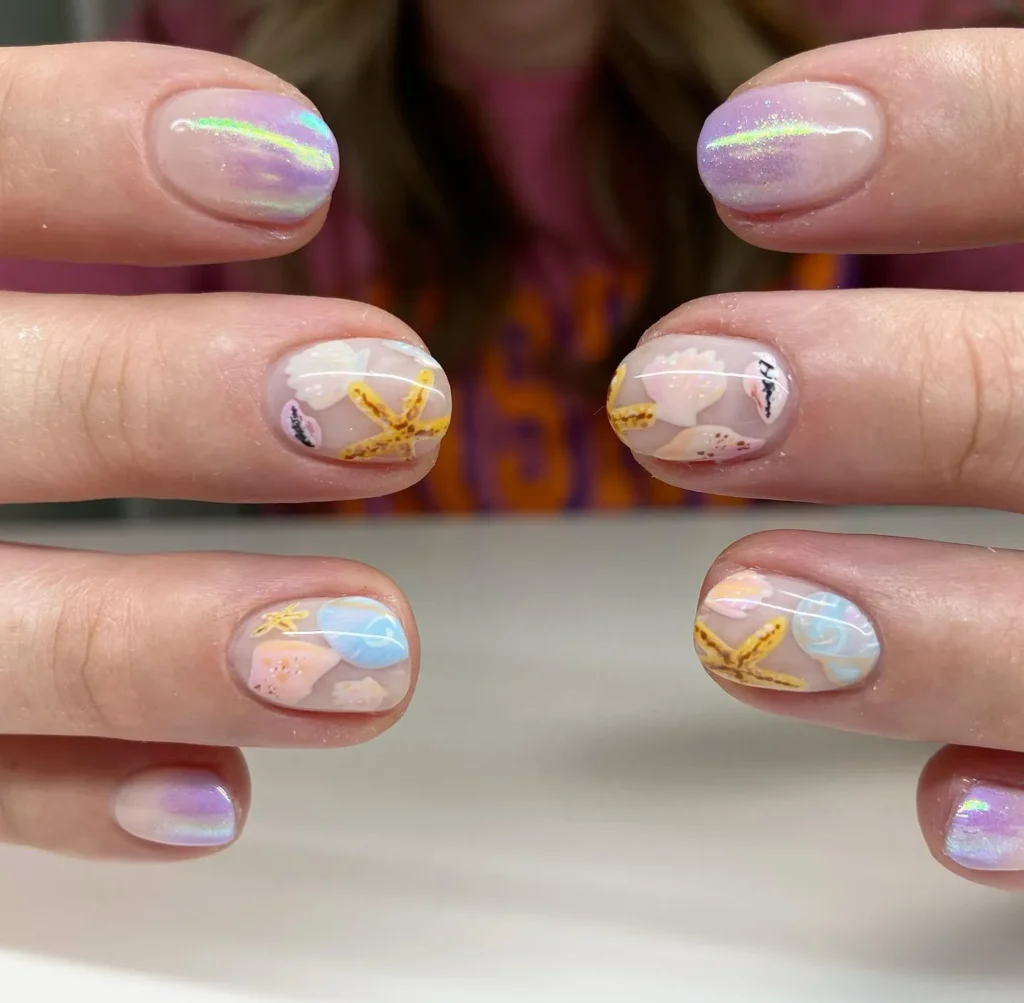
84. Seashell on Short Nails
A single, simplified seashell design sits on one accent nail, scaled down to fit a smaller canvas.
Perfect for: Beach trips, minimal detail lovers
Best shapes: Short round, short oval
Pro tip: Horizontal ridge lines make short nails look more elongated than vertical shell details.
Time to DIY: 25 minutes
85. Single-Flower Accent Nails
One small flower sits near the base of a single nail, while the rest of the set stays a solid, clean color.
Perfect for: Subtle detail on natural nails
Best shapes: Short square, short oval
Pro tip: Keep the flower small and place it near the cuticle rather than centered on the nail.
Time to DIY: 20 minutes
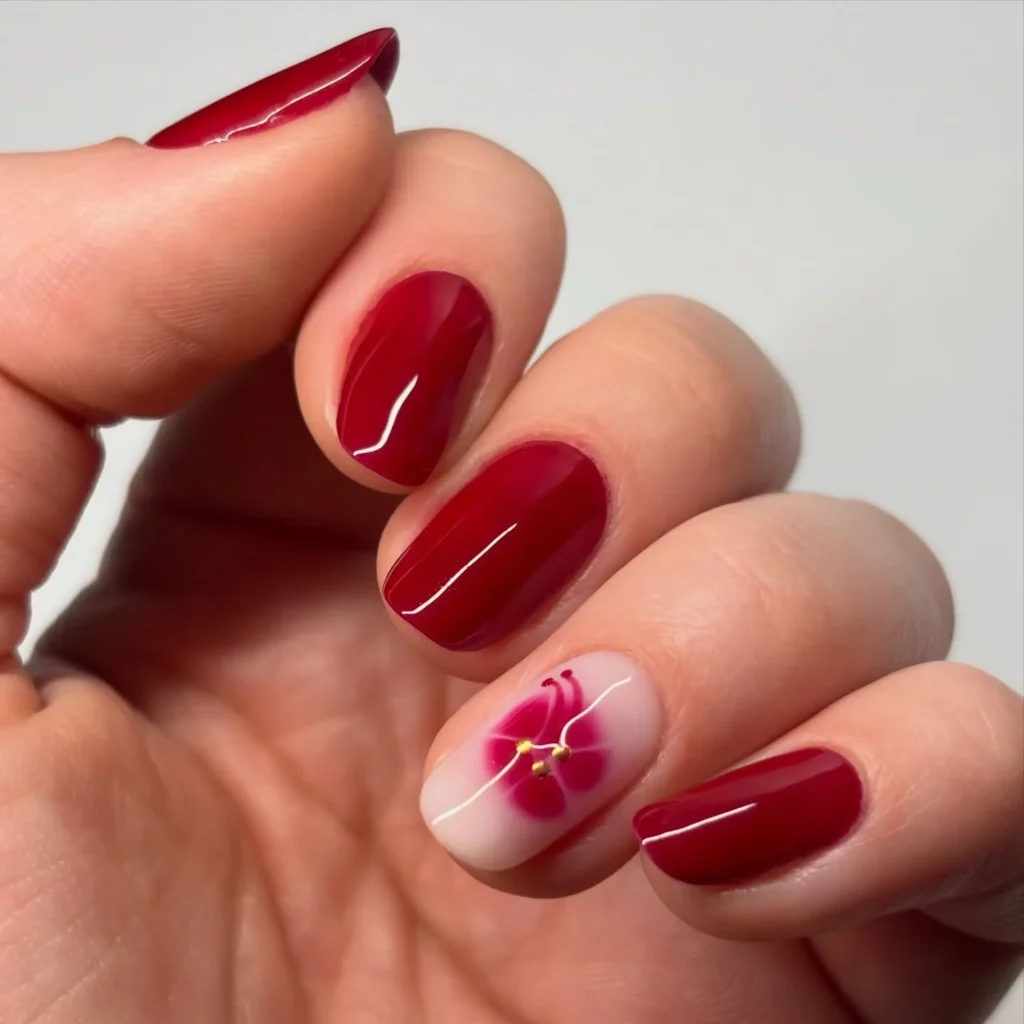
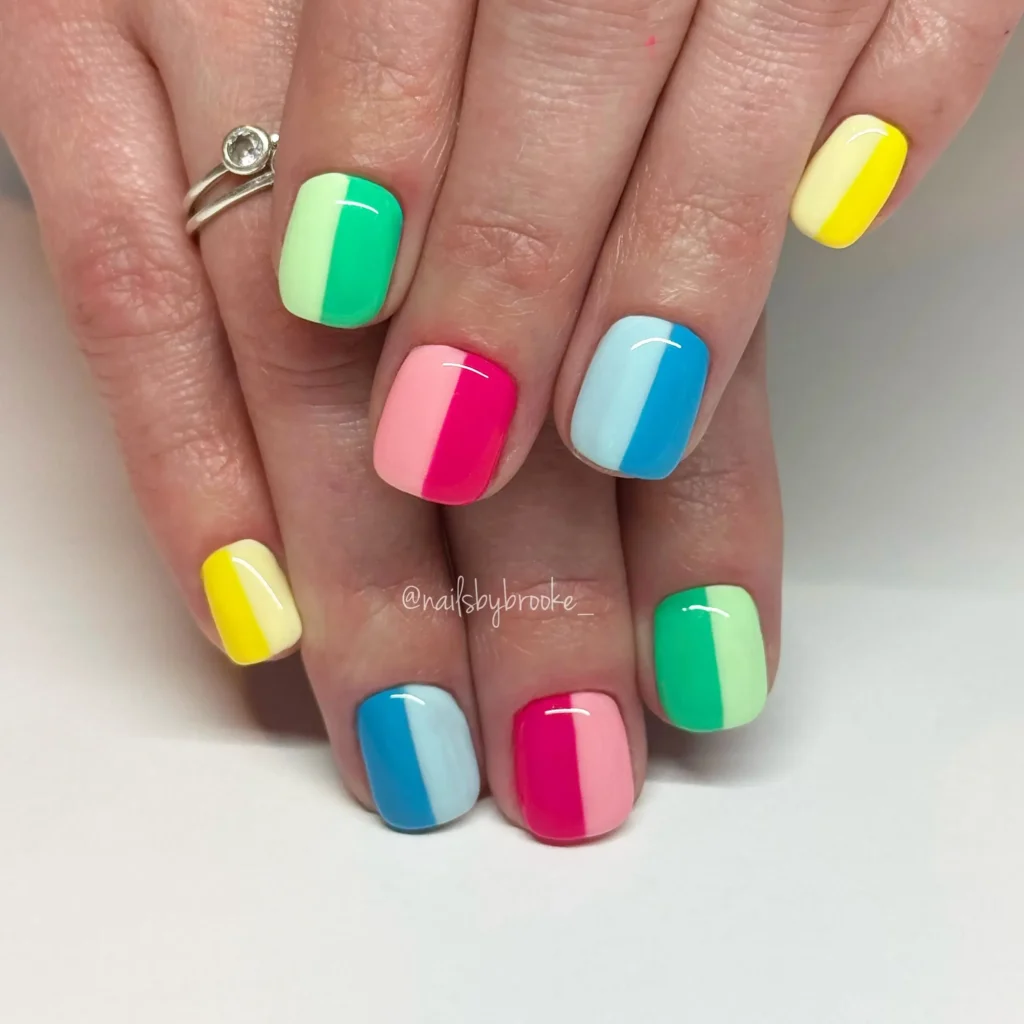
86. Color-Blocked Brights
Two bold colors split the nail down the middle or across a diagonal line, creating a clean, graphic look.
Perfect for: Bold color without much detail work
Best shapes: Short square, squoval
Pro tip: Use striping tape to keep the color block line sharp and straight.
Time to DIY: 20 minutes
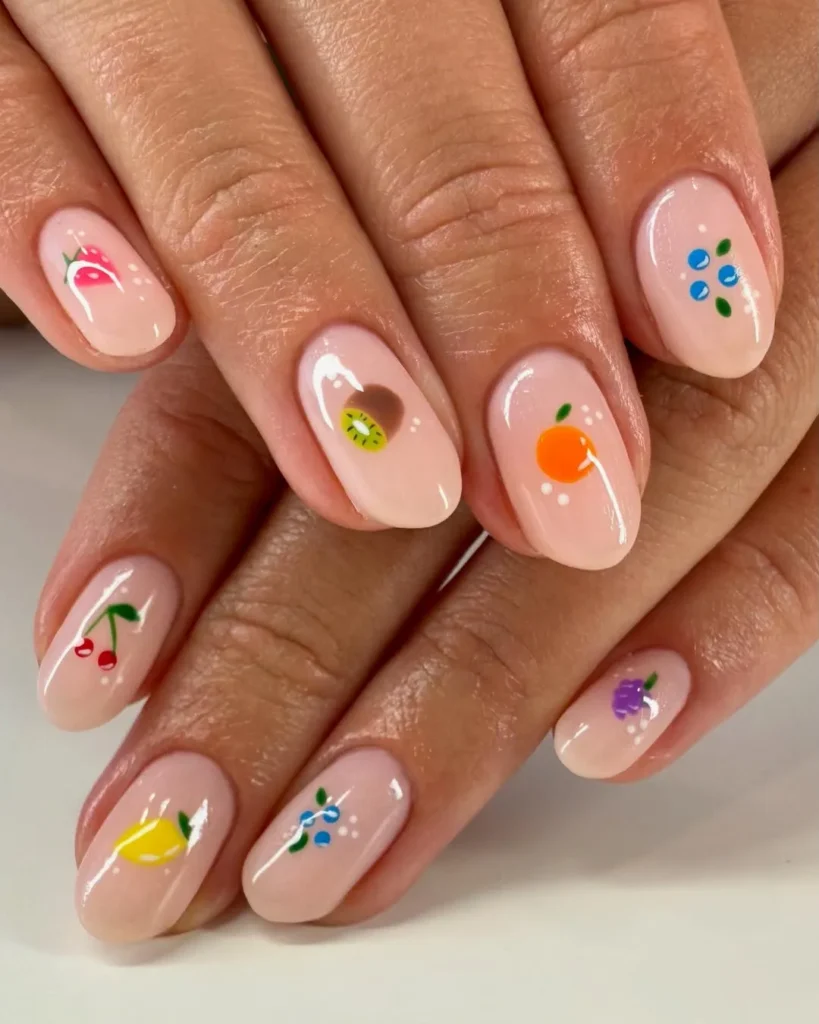
87. Micro-Fruit on Short Nails
A single tiny fruit detail, like a strawberry or lemon slice, sits in one corner of the nail instead of covering it fully.
Perfect for: Playful accents on natural nails
Best shapes: Short square, short round
Pro tip: Cover the whole nail with one fruit shape rather than clustering several small ones, since short nails have limited space.
Time to DIY: 20 minutes
Placement Tips That Make Short Nails Look Longer
Where you place a design matters more than most people realize. A small accent near the cuticle draws the eye downward, which makes the nail bed look longer.
Avoid placing heavy detail right at the tip. This tends to shorten the visual length of the nail instead of extending it.
Vertical lines, even thin ones, create a subtle lengthening effect. Horizontal lines or wide bands tend to do the opposite.
A pearl or small dot placed close to the base is a simple trick that adds a sense of length without any complex nail art.
Coffin-Shaped Summer Nail Designs
Coffin nails offer a long, tapered shape with a flat tip. The extra surface area makes this shape ideal for detailed art, bold color pairings, and textured finishes.
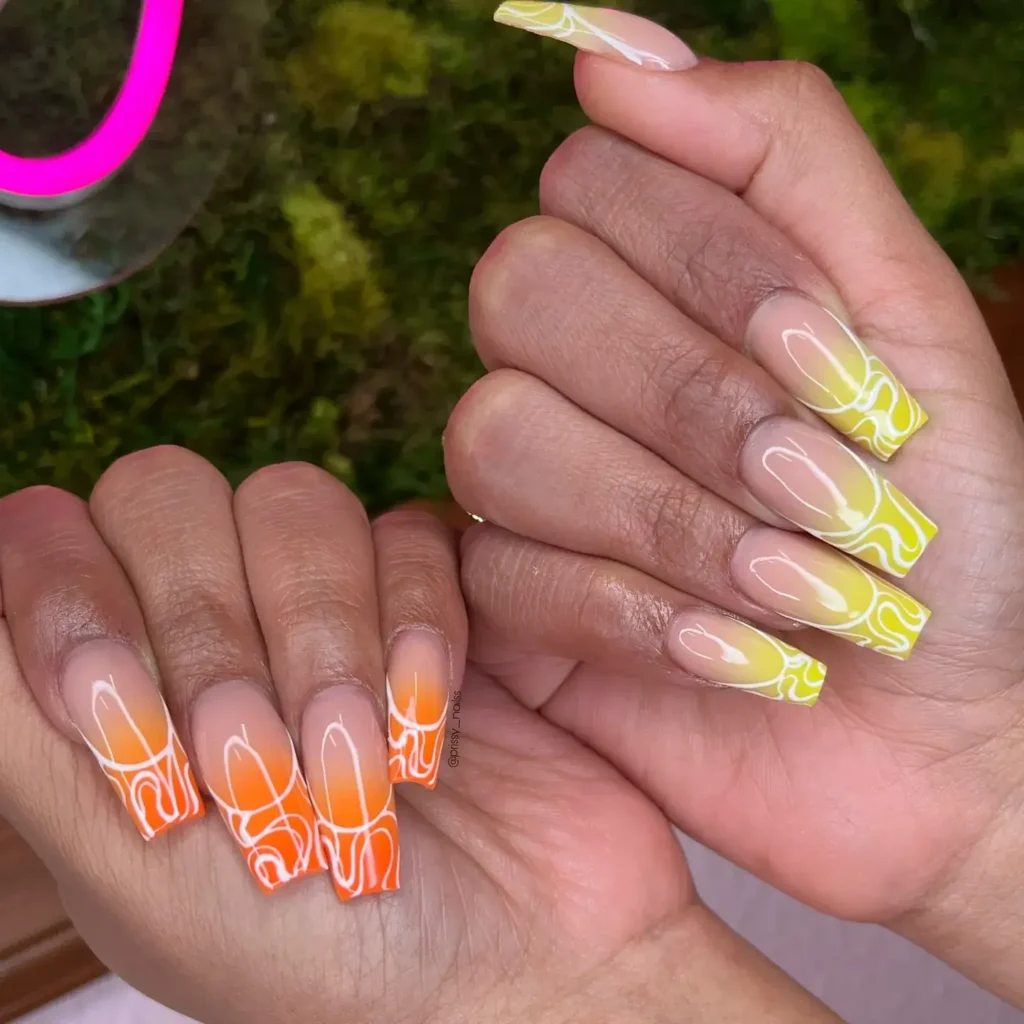
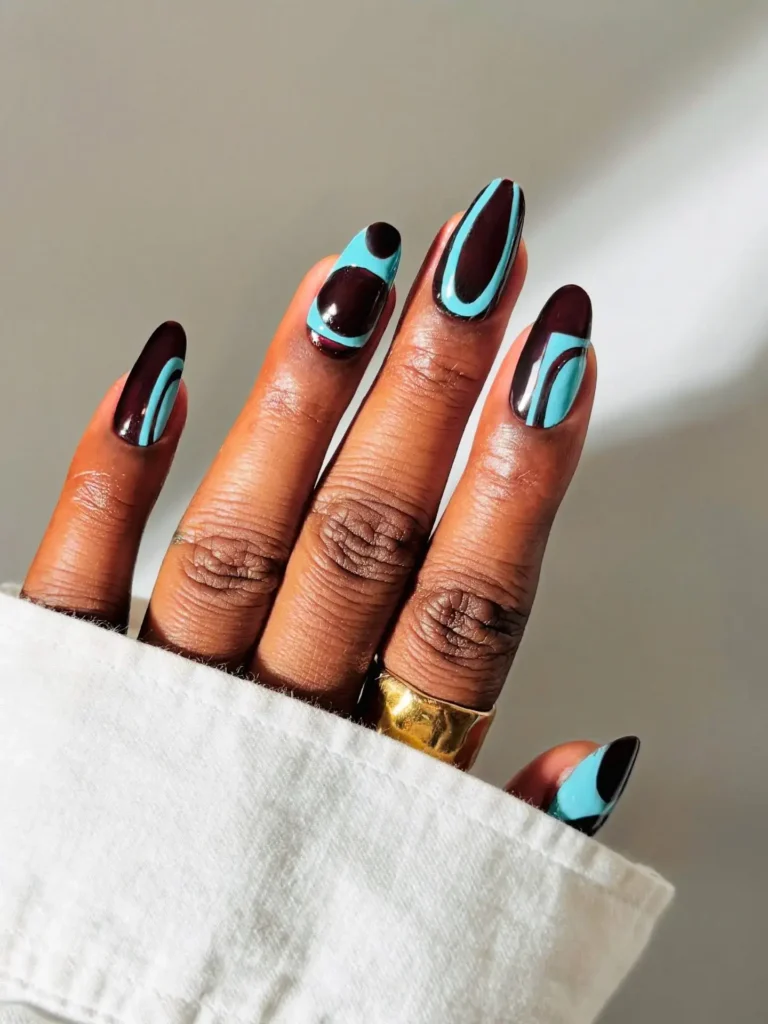
88. Chocolate Brown & Teal Mismatched Coffin
Rich chocolate brown covers some nails while deep teal covers the rest, creating an unexpected but balanced color pairing.
Perfect for: Bold color mixing, fall-inspired summer looks
Best shapes: Coffin
Pro tip: Keep the finish consistent across both colors, either both glossy or both matte, so the mismatch feels intentional.
Time to DIY: 30 minutes
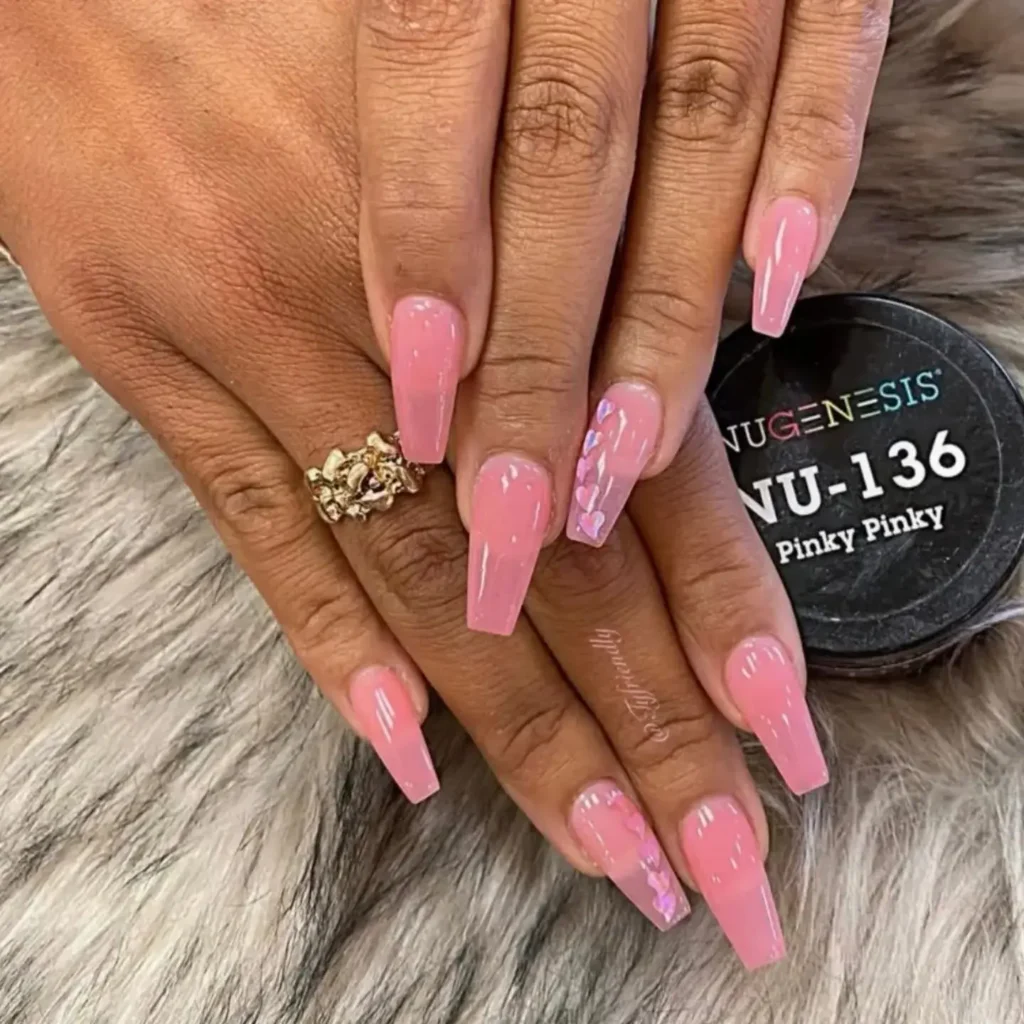
89. Pearlcore Pink Coffin Nails
A soft pink base gets a pearl finish topcoat, giving the nail a gentle shimmer that shifts in the light.
Perfect for: Elegant everyday wear
Best shapes: Coffin
Pro tip: Apply the pearl topcoat in thin layers to avoid a cloudy finish over the pink base.
Time to DIY: 25 minutes
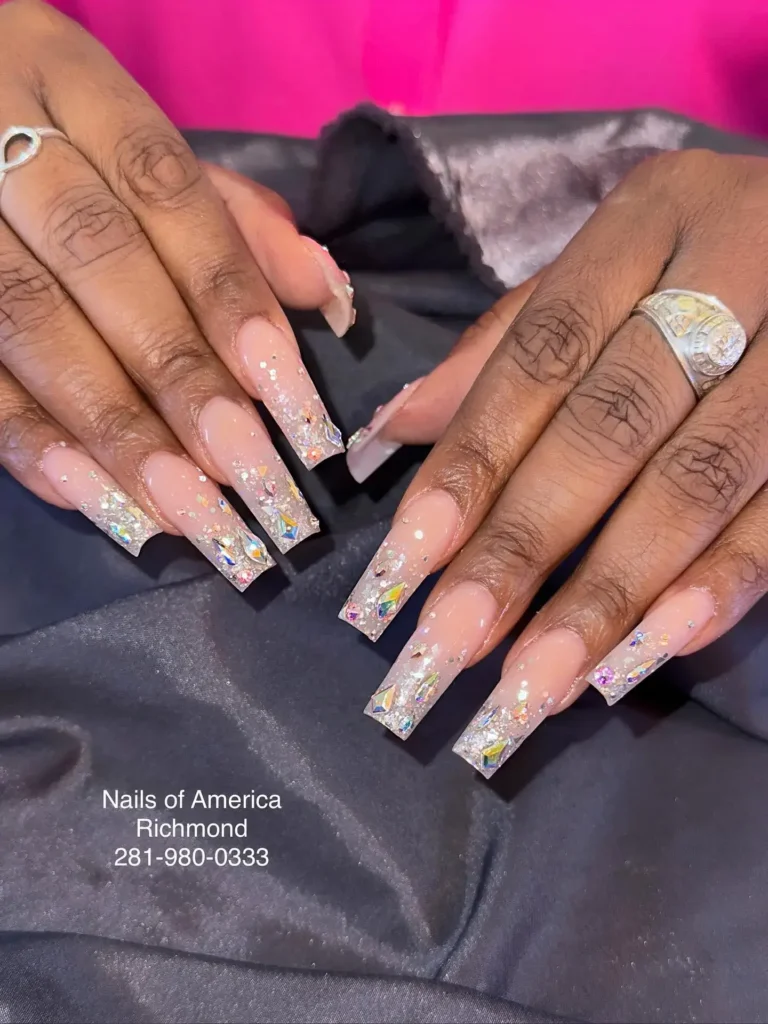
90. Confetti Glitter Coffin Mani
Multicolor glitter pieces are scattered across a clear or nude base, resembling confetti caught in the polish.
Perfect for: Celebrations, playful statement looks
Best shapes: Coffin
Pro tip: Place glitter pieces with a toothpick for even spacing rather than dumping loose glitter on the nail.
Time to DIY: 30 minutes
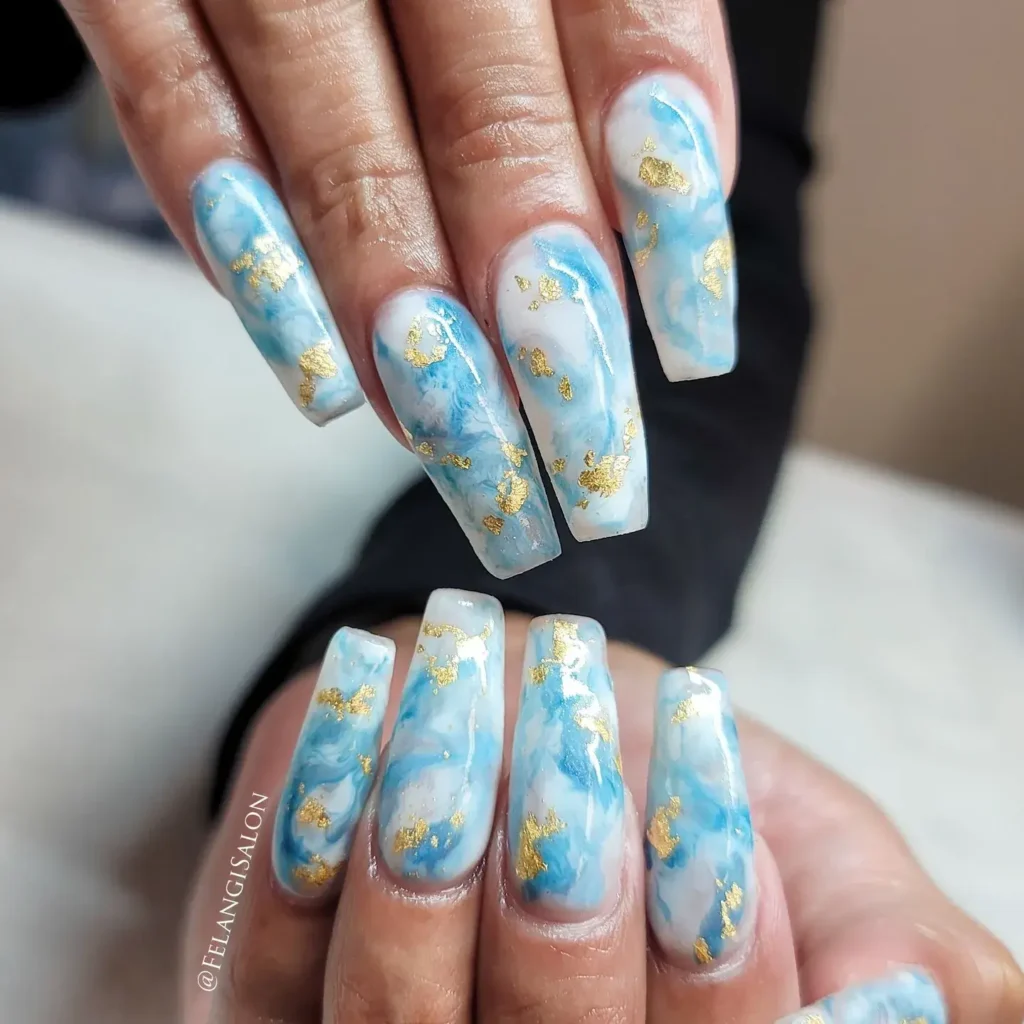
91. Marbled Gold Foil Coffin Nails
Swirled marble patterns in white and nude are paired with small flecks of gold foil for added texture and shine.
Perfect for: Elevated everyday looks
Best shapes: Coffin
Pro tip: Add foil pieces while the topcoat is still tacky so they stick without needing extra glue.
Time to DIY: 35 minutes
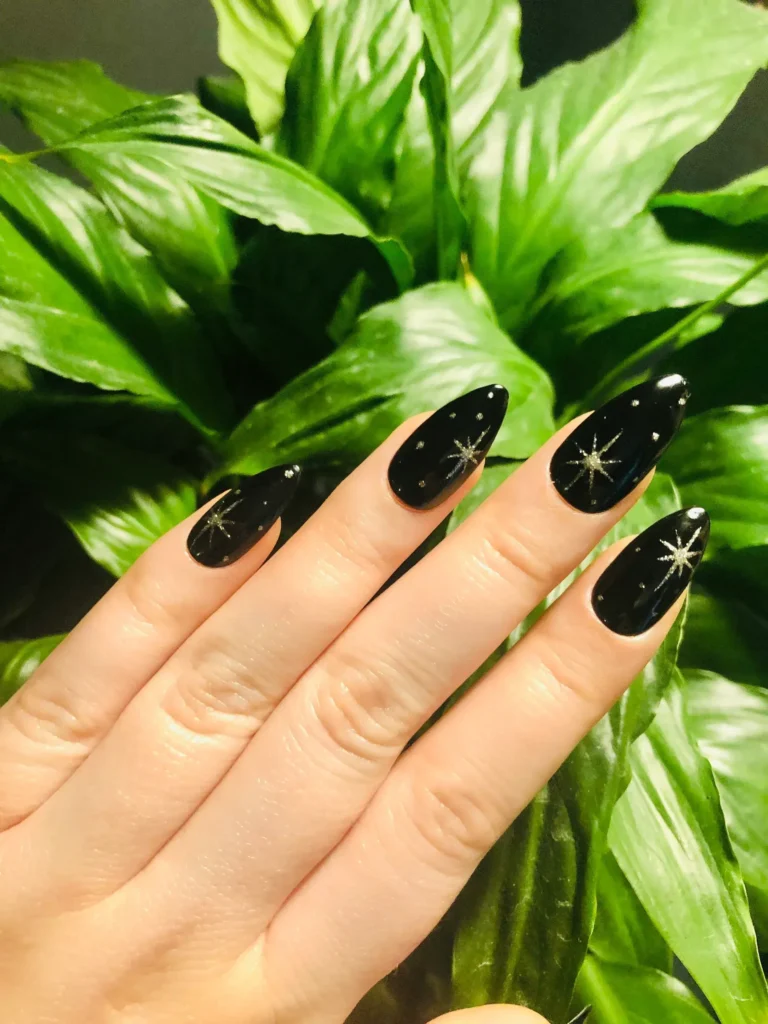
92. Starry Night Coffin Nails
A deep navy or black base is dotted with small white and silver stars, mimicking a clear night sky.
Perfect for: Evening events, bold statement nails
Best shapes: Coffin
Pro tip: Vary the dot sizes slightly for the stars, since uniform dots look less natural than a scattered pattern.
Time to DIY: 30 minutes
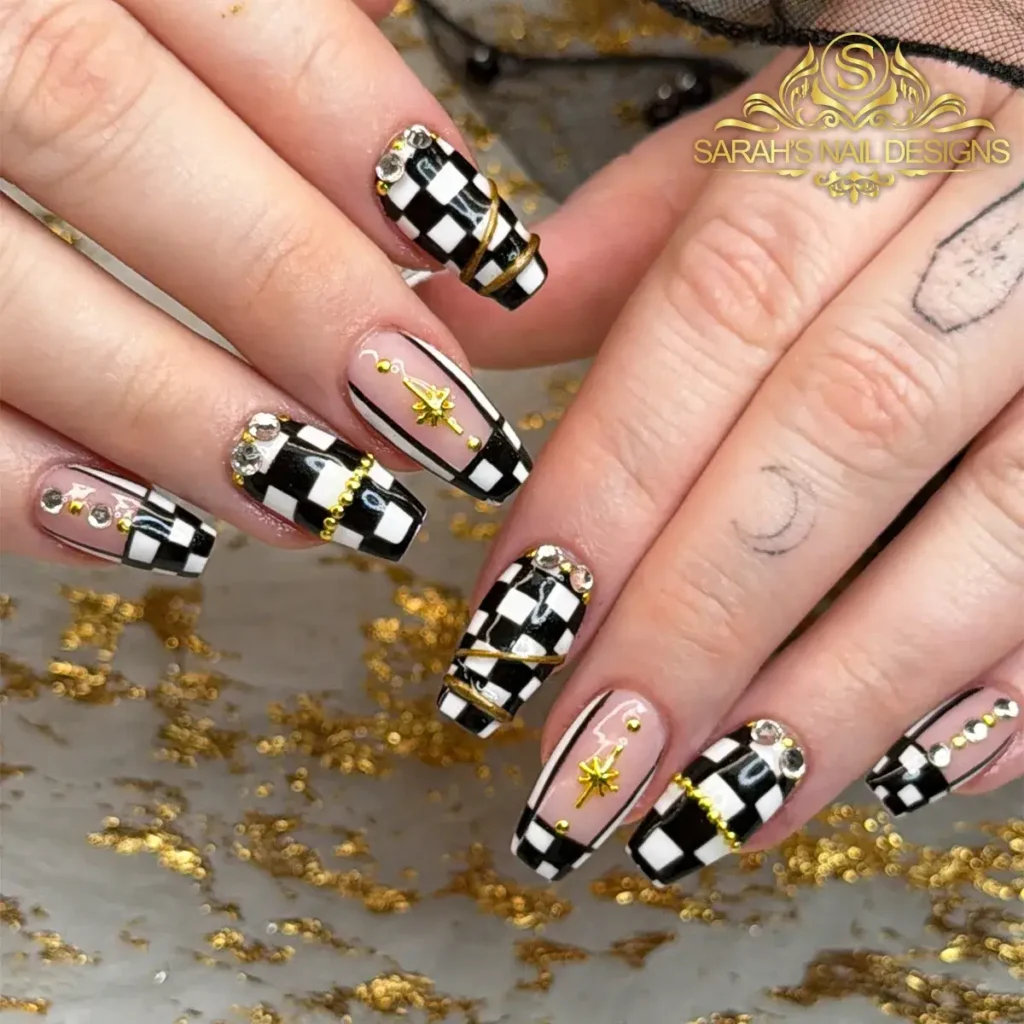
93. Checkerboard Coffin Set
A classic checkerboard pattern in two contrasting colors covers the nail in a clean, graphic grid.
Perfect for: Retro-inspired, bold graphic looks
Best shapes: Coffin
Pro tip: Use striping tape to section off squares before filling in every other one with the second color.
Time to DIY: 40 minutes
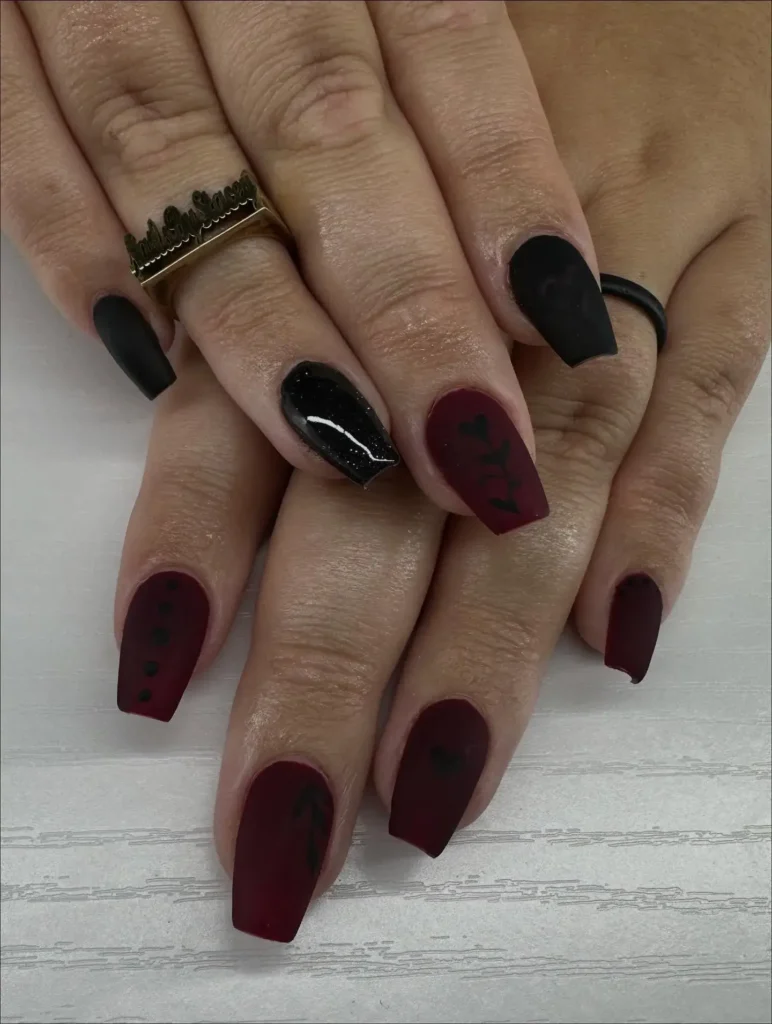
94. Velvet Matte Coffin Nails
A matte velvet topcoat sits over a rich, solid color, giving the nail a soft, textured finish instead of shine.
Perfect for: Fall-inspired summer looks, texture lovers
Best shapes: Coffin
Pro tip: Apply the velvet topcoat while the base color is still slightly tacky for the best texture grip.
Time to DIY: 25 minutes
95. Line-Art Coffin Nails
Simple black line drawings, like faces or abstract shapes, are painted over a clean nude or white base.
Perfect for: Minimalist art lovers, statement accents
Best shapes: Coffin
Pro tip: Use a fine detail brush and steady, slow strokes rather than quick lines for cleaner art.
Time to DIY: 35 minutes
Almond-Shaped Summer Nail Designs
Almond nails taper into a rounded point, offering a shape that feels elegant without the sharp edge of a stiletto. This shape suits nearly every design style, from soft and simple to bold and detailed.
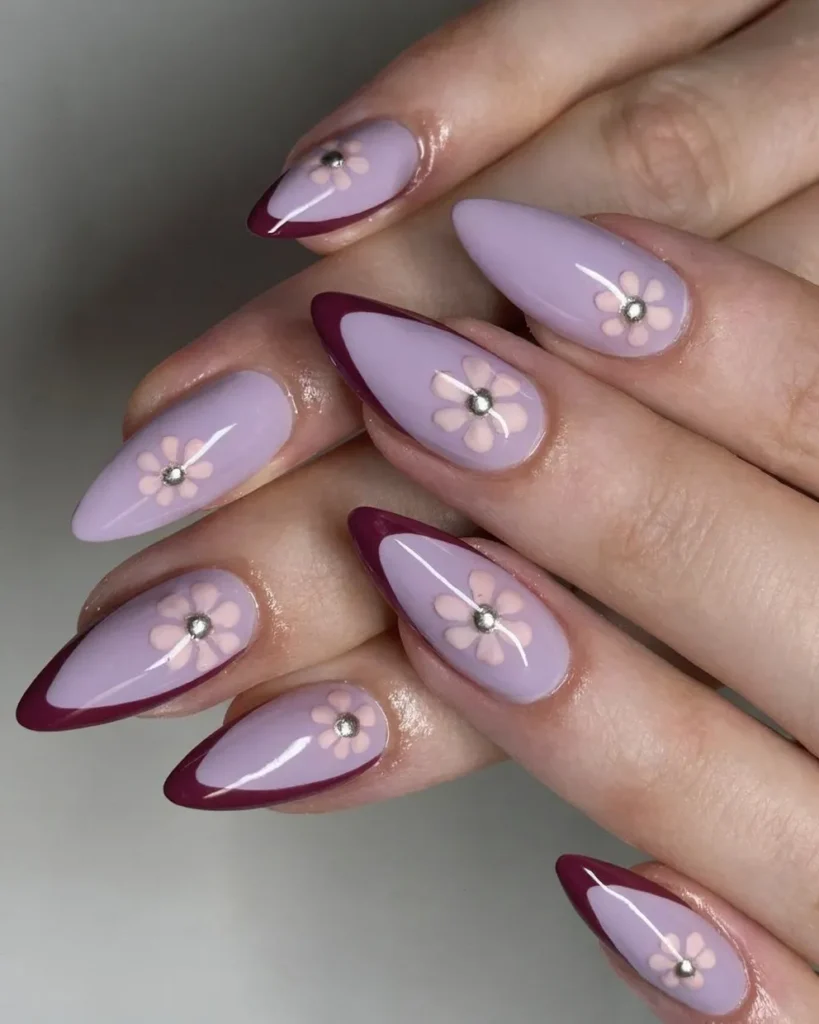
96. Mango Ombre Almond Nails
Warm yellow blends into orange along the length of the nail, capturing the same gradient found on ripe mango skin.
Perfect for: Vacation, tropical-inspired looks
Best shapes: Almond
Pro tip: Blend the two colors while both are still wet for a smooth, natural gradient.
Time to DIY: 30 minutes
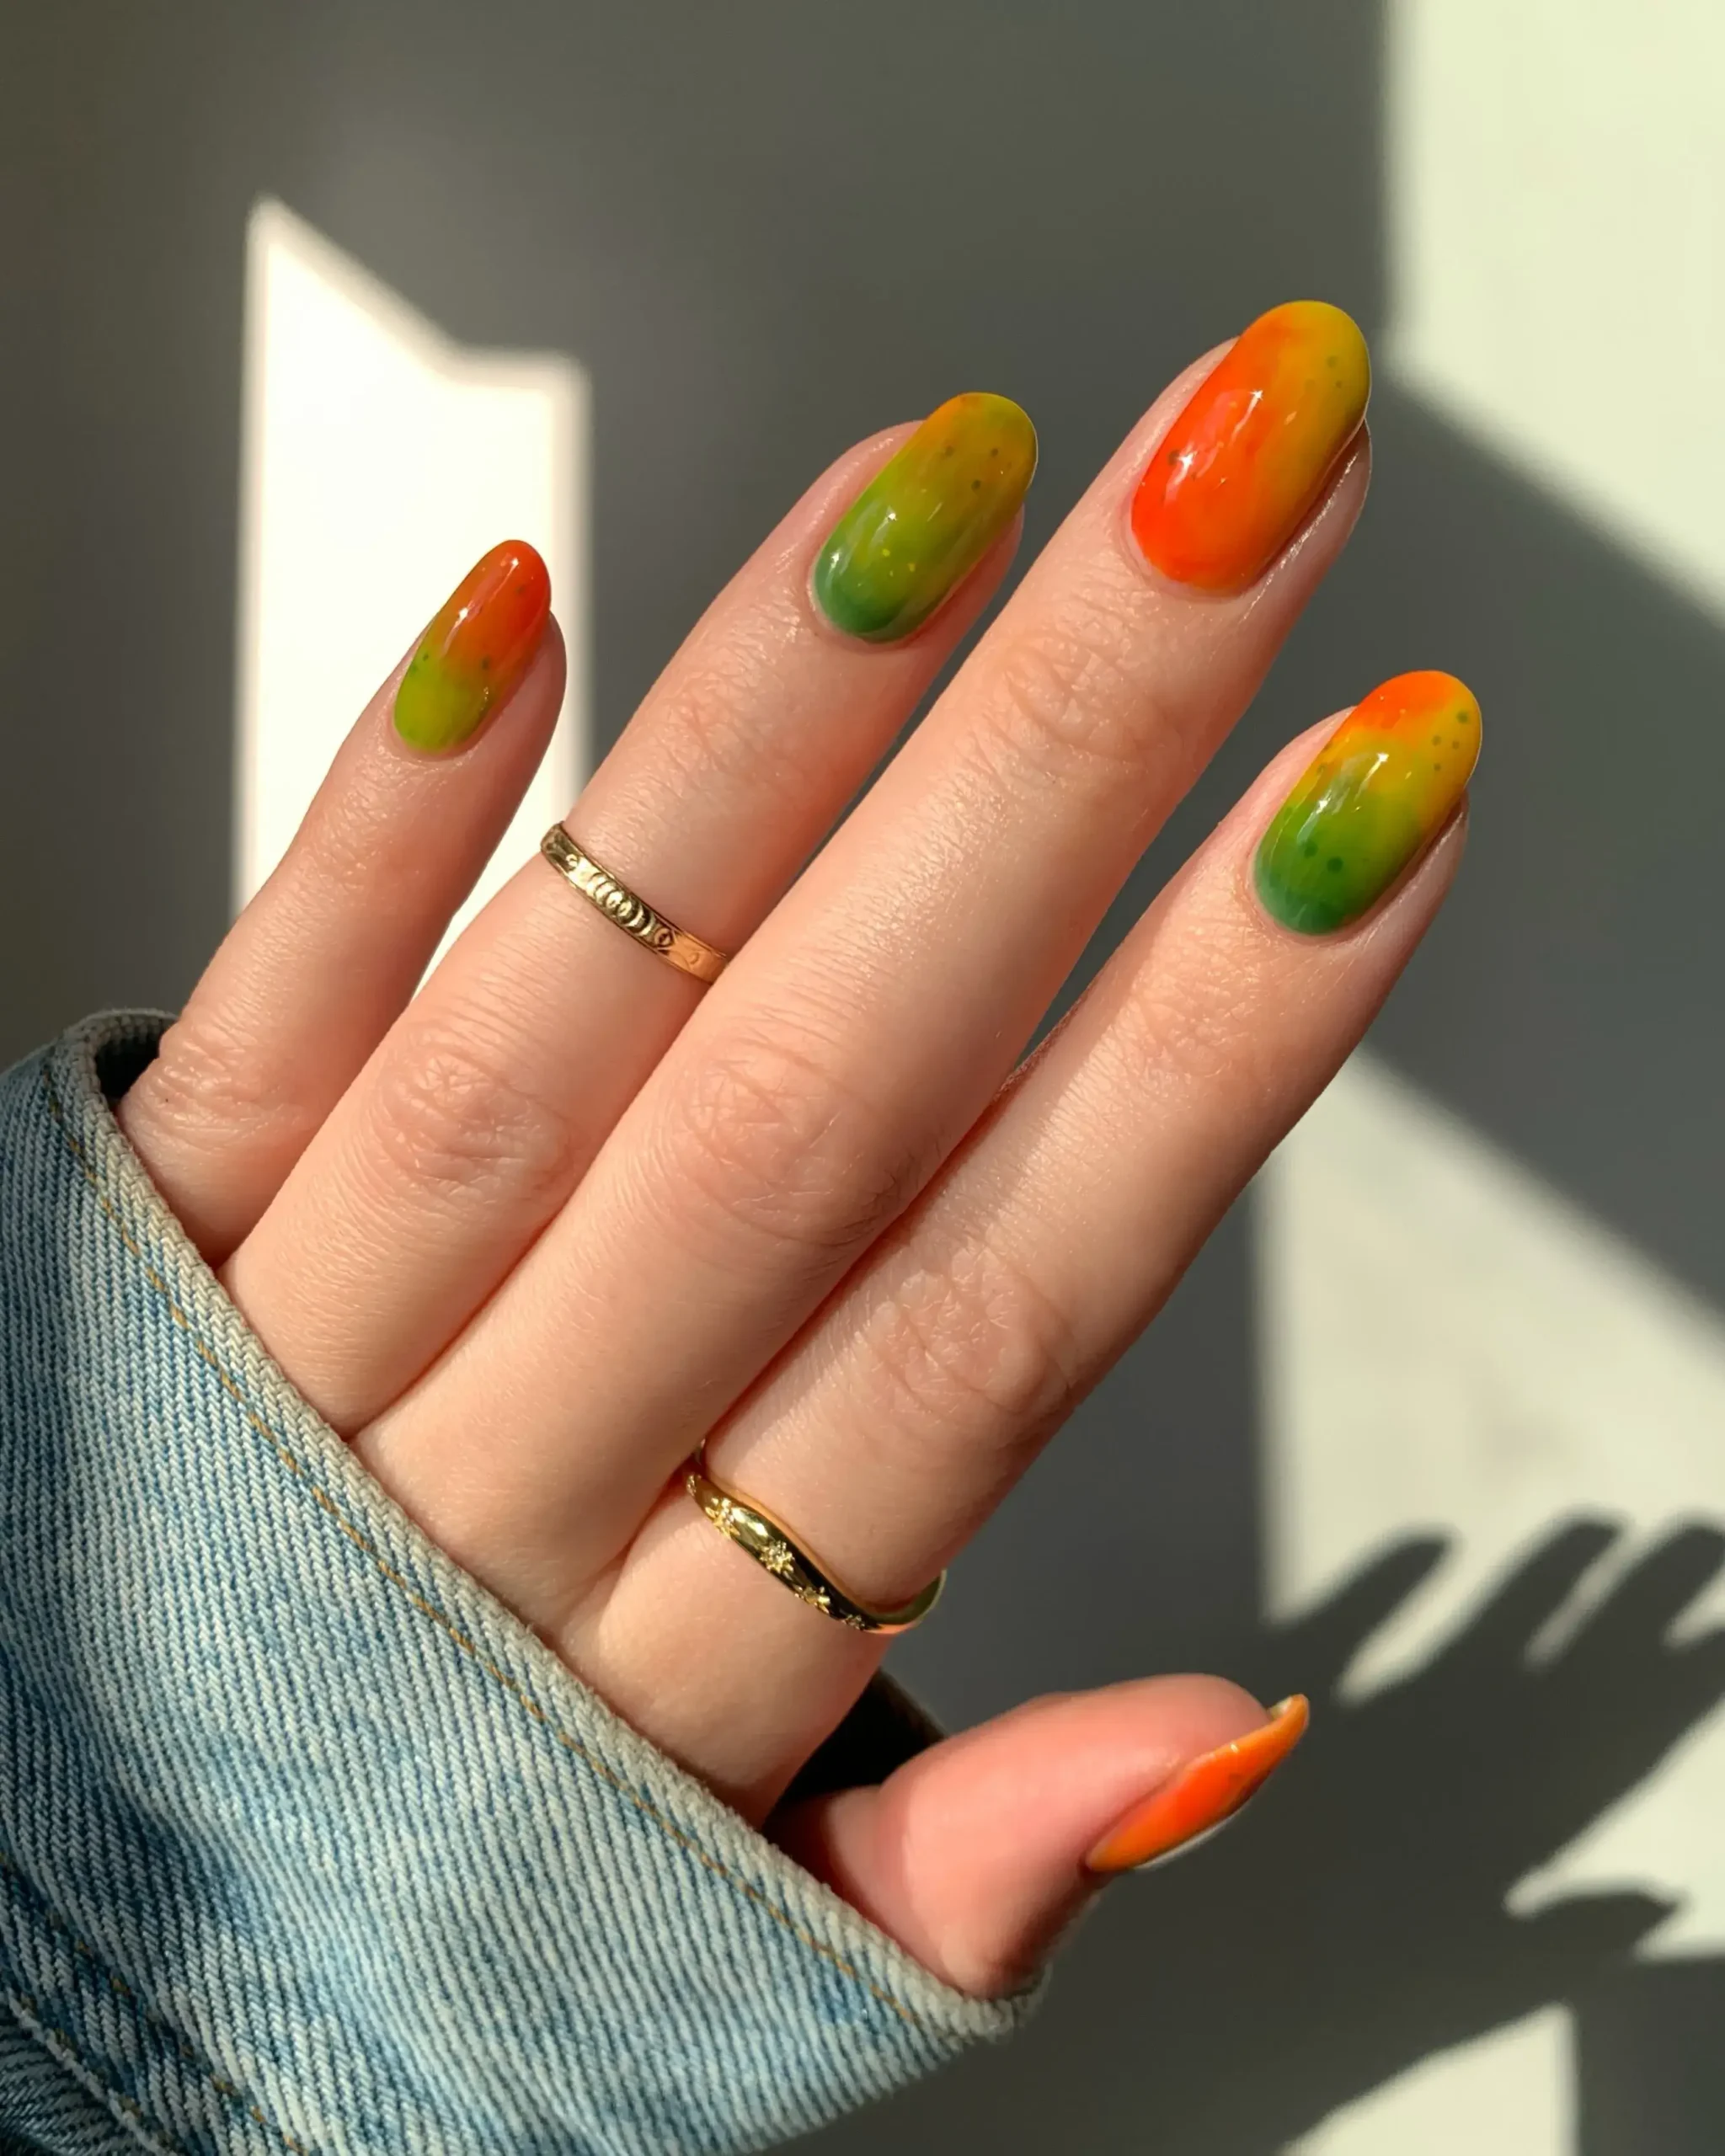
97. Rainbow Sparkle Almond Nails
Multicolor glitter polish covers the nail in a full rainbow blend, catching light from every angle.
Perfect for: Bold, celebratory looks
Best shapes: Almond
Pro tip: Apply glitter polish in thin layers and let each one dry before adding the next to avoid clumping.
Time to DIY: 30 minutes
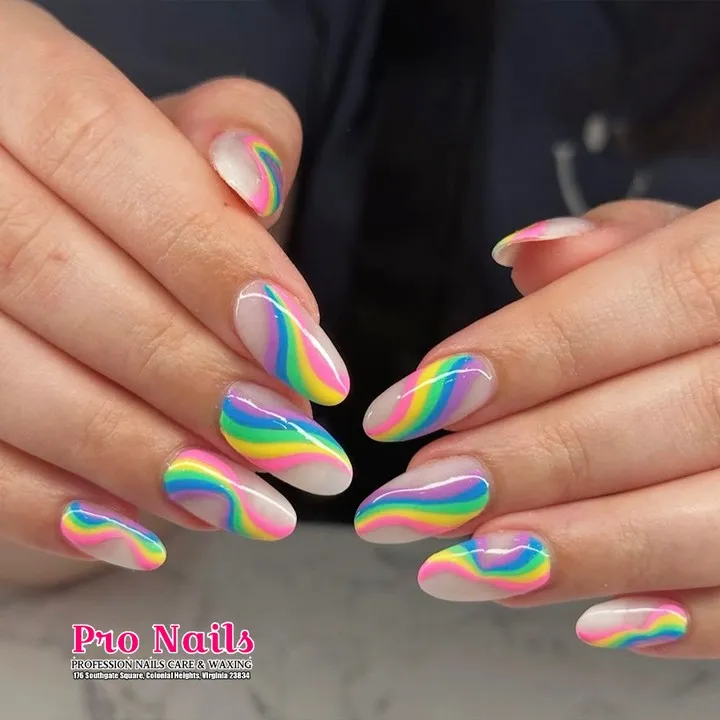
98. Elegant Nude Almond French
A soft nude base pairs with a thin, classic white tip, keeping the almond shape looking polished and refined.
Perfect for: Work settings, timeless everyday wear
Best shapes: Almond
Pro tip: French tip guides help keep the tip line even along the almond’s curved edge.
Time to DIY: 25 minutes
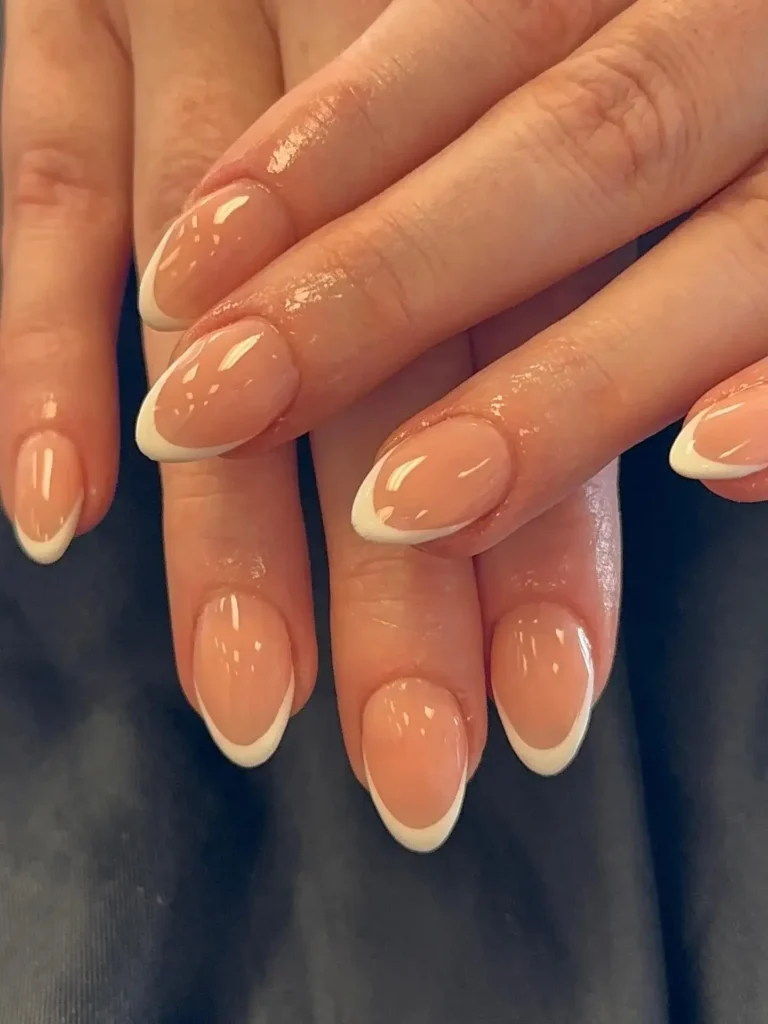
99. Watercolor Almond Nails
Soft, blended colors spread across the nail with feathered edges, mimicking the look of watercolor paint on paper.
Perfect for: Artistic, soft aesthetic lovers
Best shapes: Almond
Pro tip: Use a damp brush to soften color edges right after applying for a true watercolor effect.
Time to DIY: 35 minutes
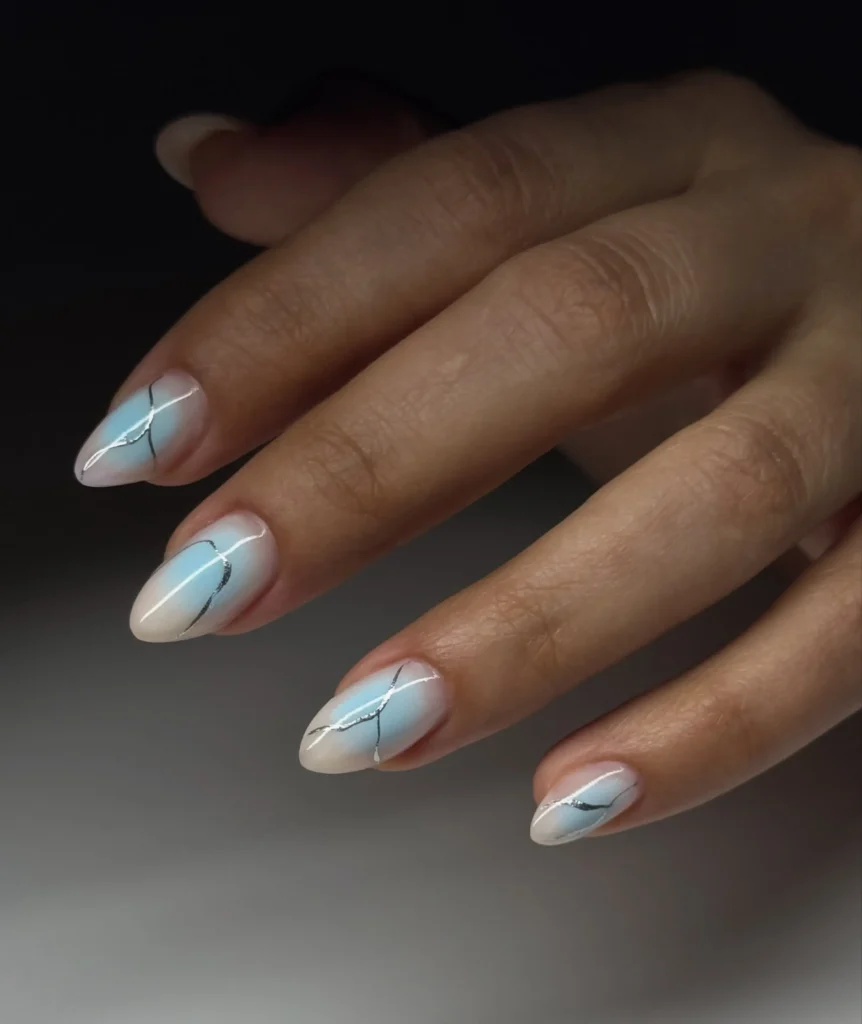
100. Gradient Sunset Almond Set
Pink, orange, and yellow blend together along the nail, following the natural taper of the almond shape.
Perfect for: Warm weather styling, evening events
Best shapes: Almond
Pro tip: Apply the lightest color at the cuticle and work outward for a fade that follows the shape naturally.
Time to DIY: 35 minutes
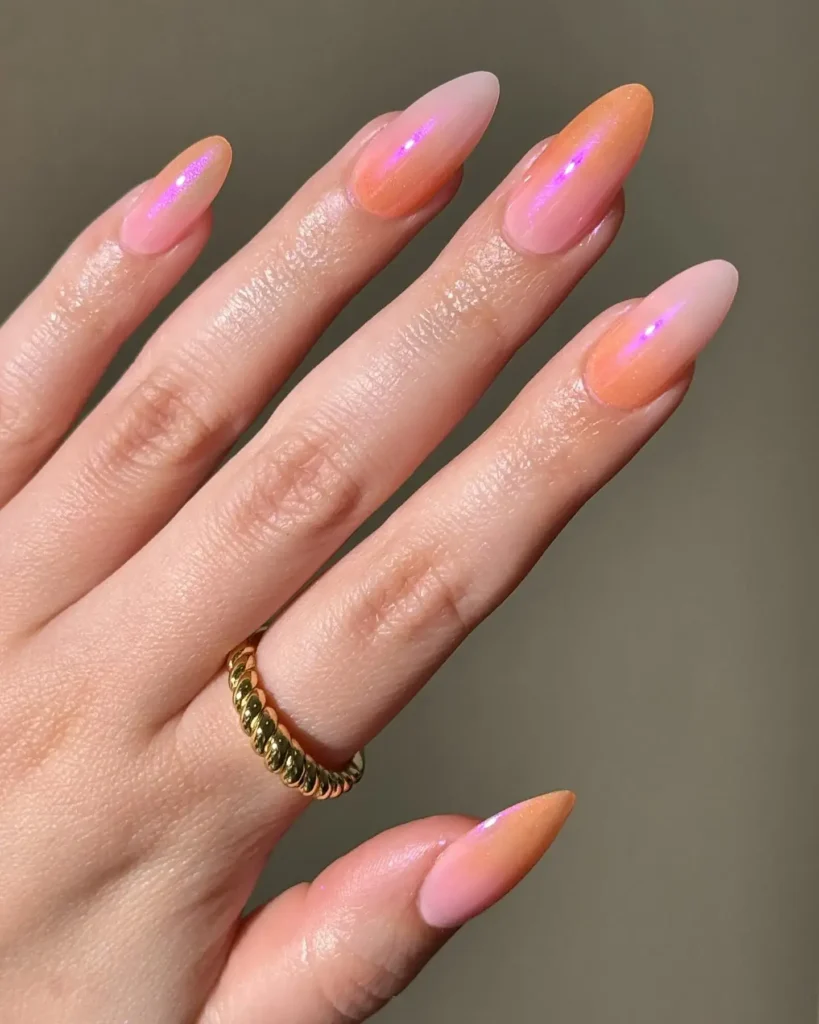
101. Almond Cat-Eye Shimmer
A magnetic cat-eye polish creates a shifting line of shimmer that moves along the curve of the almond shape.
Perfect for: Elegant, low-maintenance styling
Best shapes: Almond
Pro tip: Hold the magnet close without touching the wet polish for a crisp, defined cat-eye line.
Time to DIY: 25 minutes
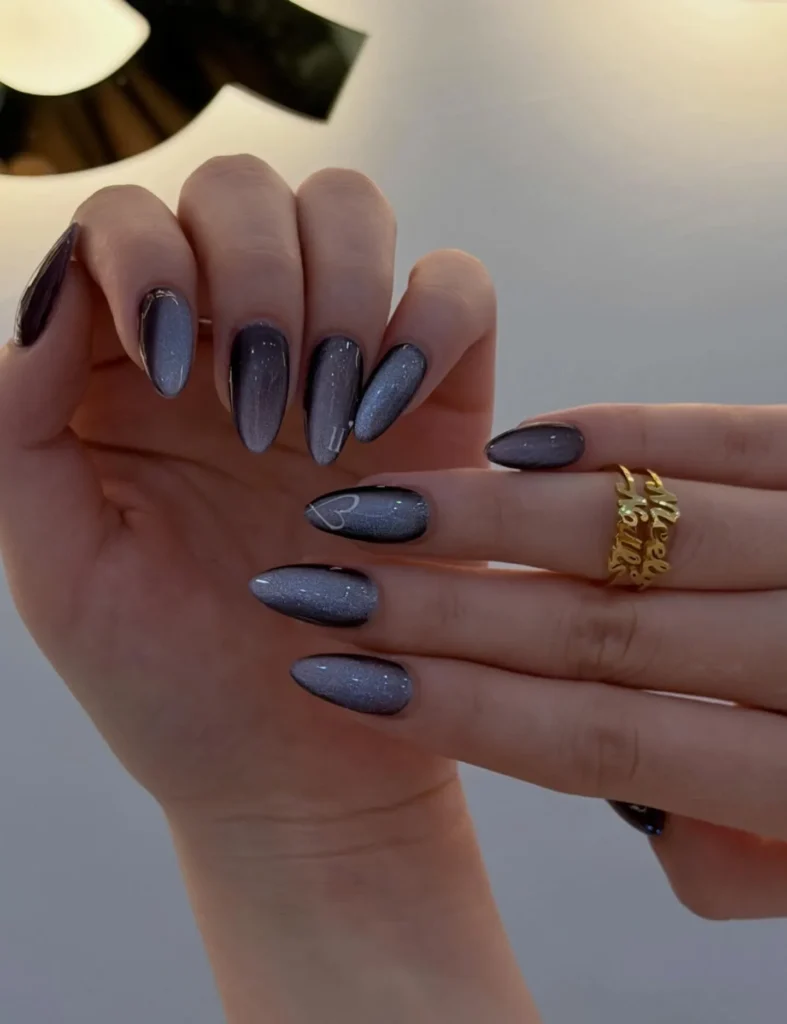
102. Painterly Floral Almond Nails
Loose, brushstroke-style flowers cover the nail, giving the design a hand-painted, artistic feel rather than a precise pattern.
Perfect for: Creative, expressive looks
Best shapes: Almond
Pro tip: Use a flat brush and light pressure to create soft, painterly petal shapes.
Time to DIY: 40 minutes
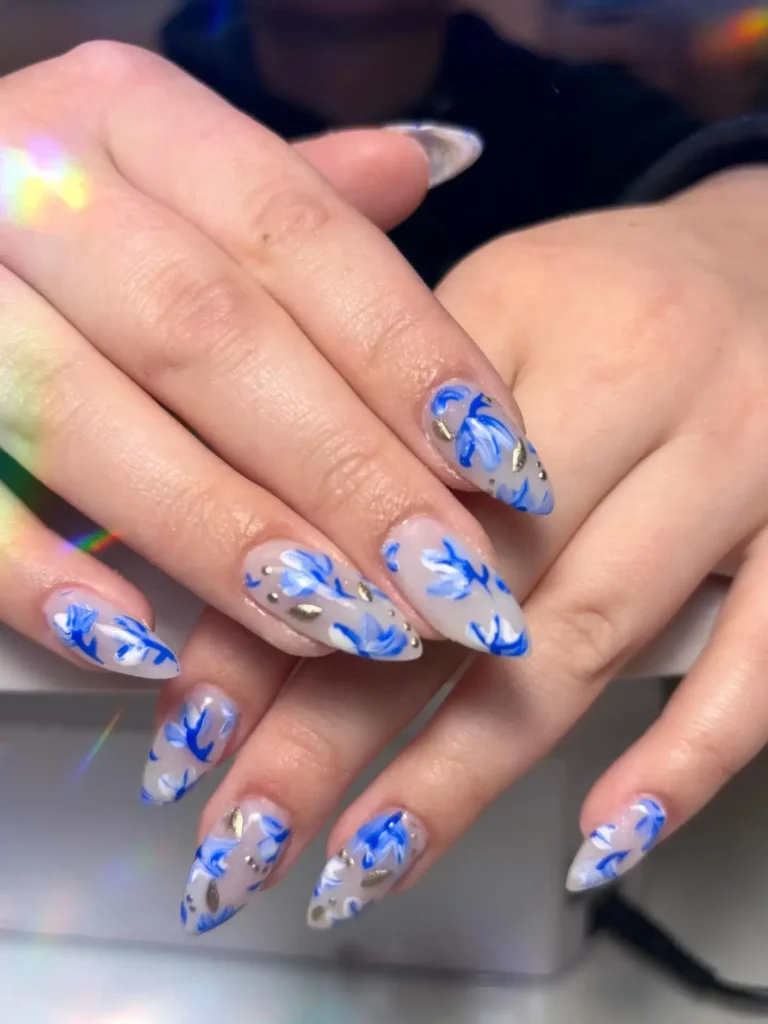
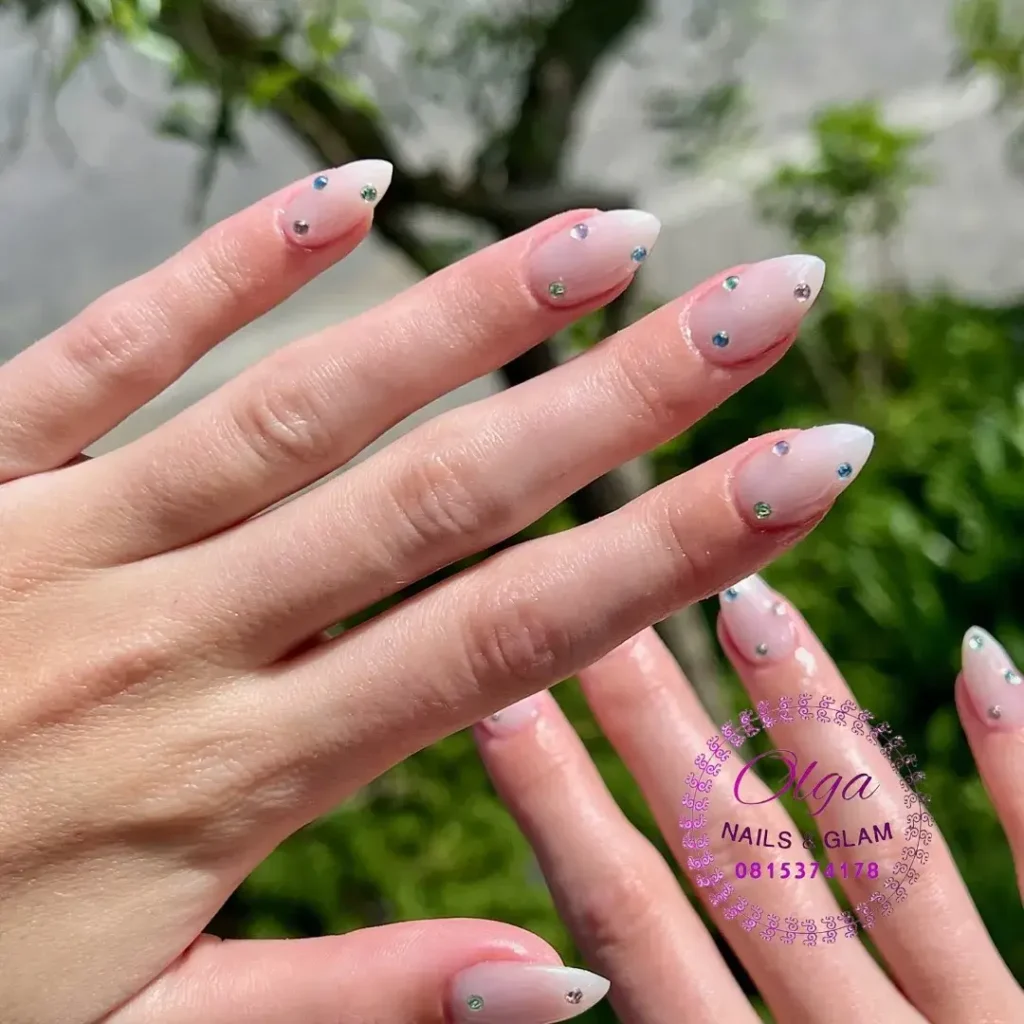
103. Diamond Accent Almond Nails
Small rhinestones are placed near the base of one or two nails, adding sparkle without covering the whole nail.
Perfect for: Special occasions, subtle glam
Best shapes: Almond
Pro tip: Apply rhinestones with a wax pencil for precise placement instead of tweezers.
Time to DIY: 20 minutes
Square & Squoval Summer Nail Designs
Square and squoval shapes offer clean, straight edges that suit bold graphic patterns and simple color work equally well. The flat tip gives designs a crisp, structured look.
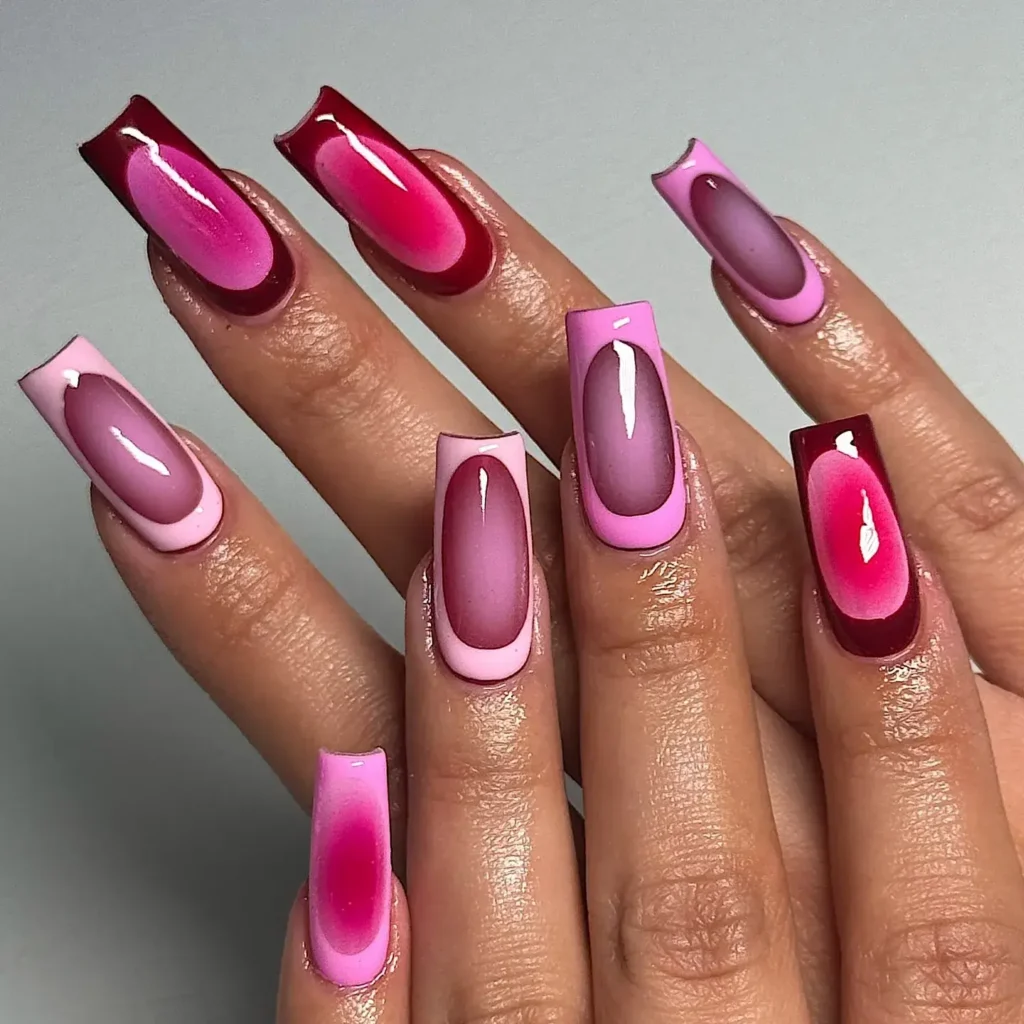
104. Color-Blocked Square Nails
Two or three solid colors divide the nail into clean sections, creating a bold, graphic look with sharp lines.
Perfect for: Bold color without detailed art
Best shapes: Square
Pro tip: Use striping tape to mask off sections before applying each color for the cleanest lines.
Time to DIY: 25 minutes
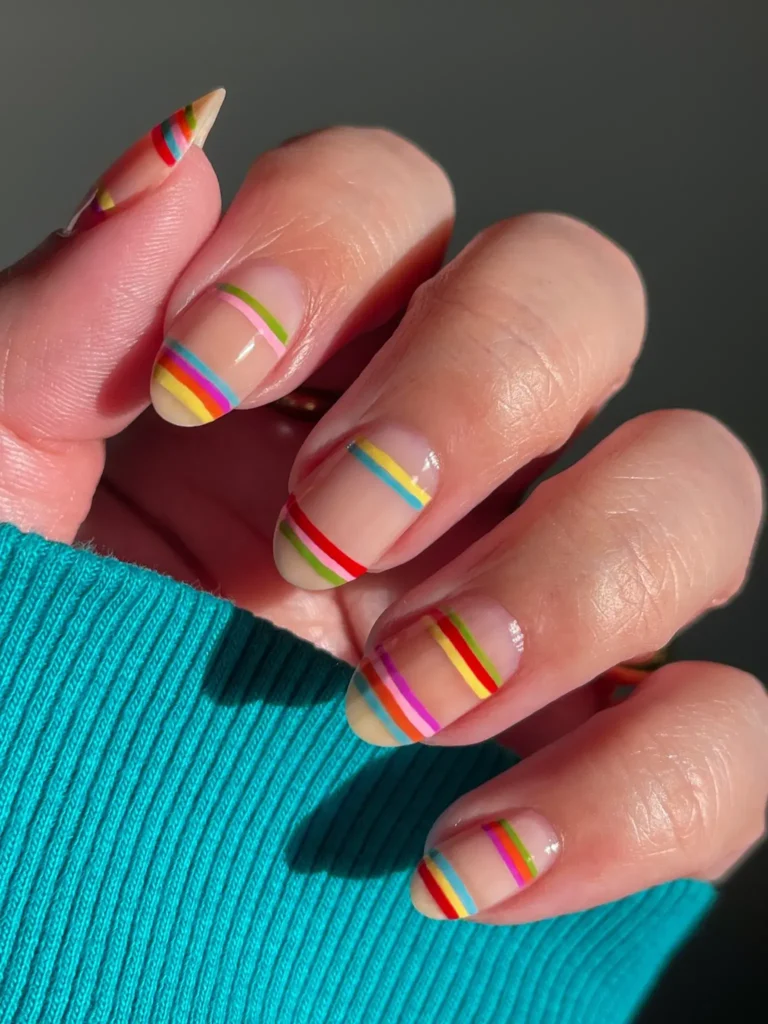
105. Squoval Negative Space Stripes
Thin painted stripes leave most of the natural nail bare, creating a minimal design with visible negative space.
Perfect for: Understated, artistic minimal looks
Best shapes: Squoval
Pro tip: Sketch stripe placement lightly in pencil first if your hand needs extra guidance.
Time to DIY: 25 minutes
106. Bright Pink Square French
A vivid pink French tip replaces the classic white line, keeping the structured square shape but adding a bold pop of color.
Perfect for: Everyday color with a classic silhouette
Best shapes: Square
Pro tip: French tip guides work especially well on square nails since the tip edge is already straight.
Time to DIY: 25 minutes
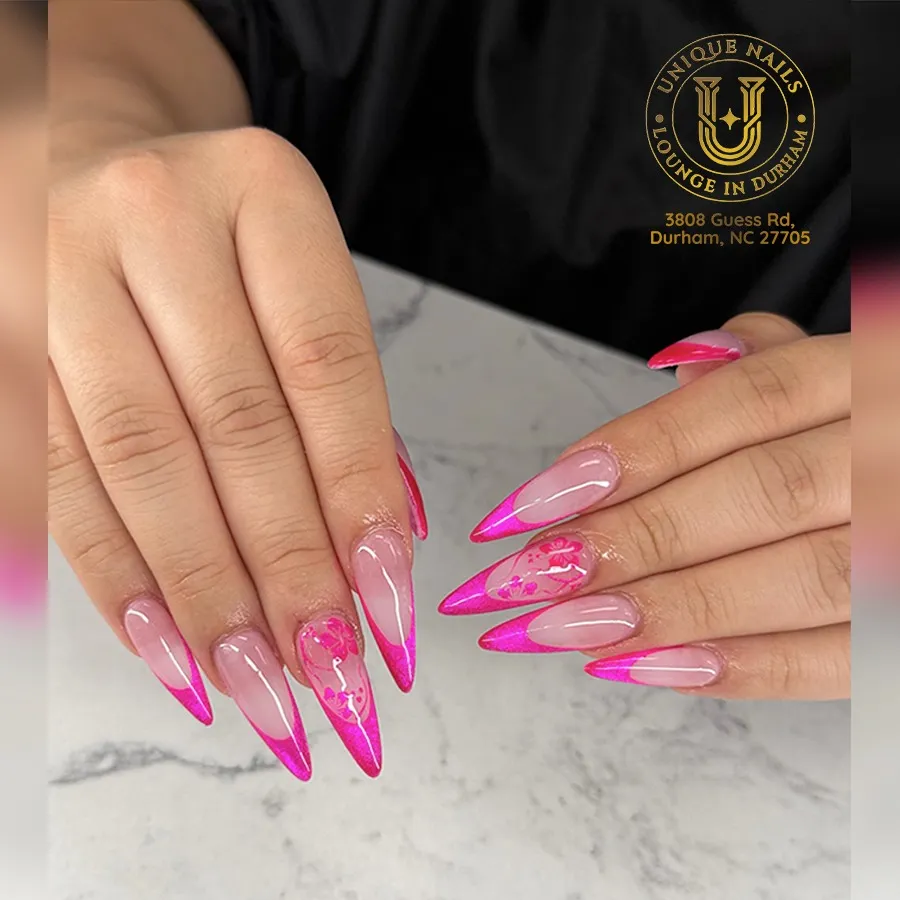
107. White Square Vacation Nails
A crisp, solid white base covers the nail completely, giving a clean and bright look that pairs well with any vacation outfit.
Perfect for: Beach trips, minimal styling
Best shapes: Square
Pro tip: White polish often needs three thin coats for full, even coverage without streaks.
Time to DIY: 20 minutes
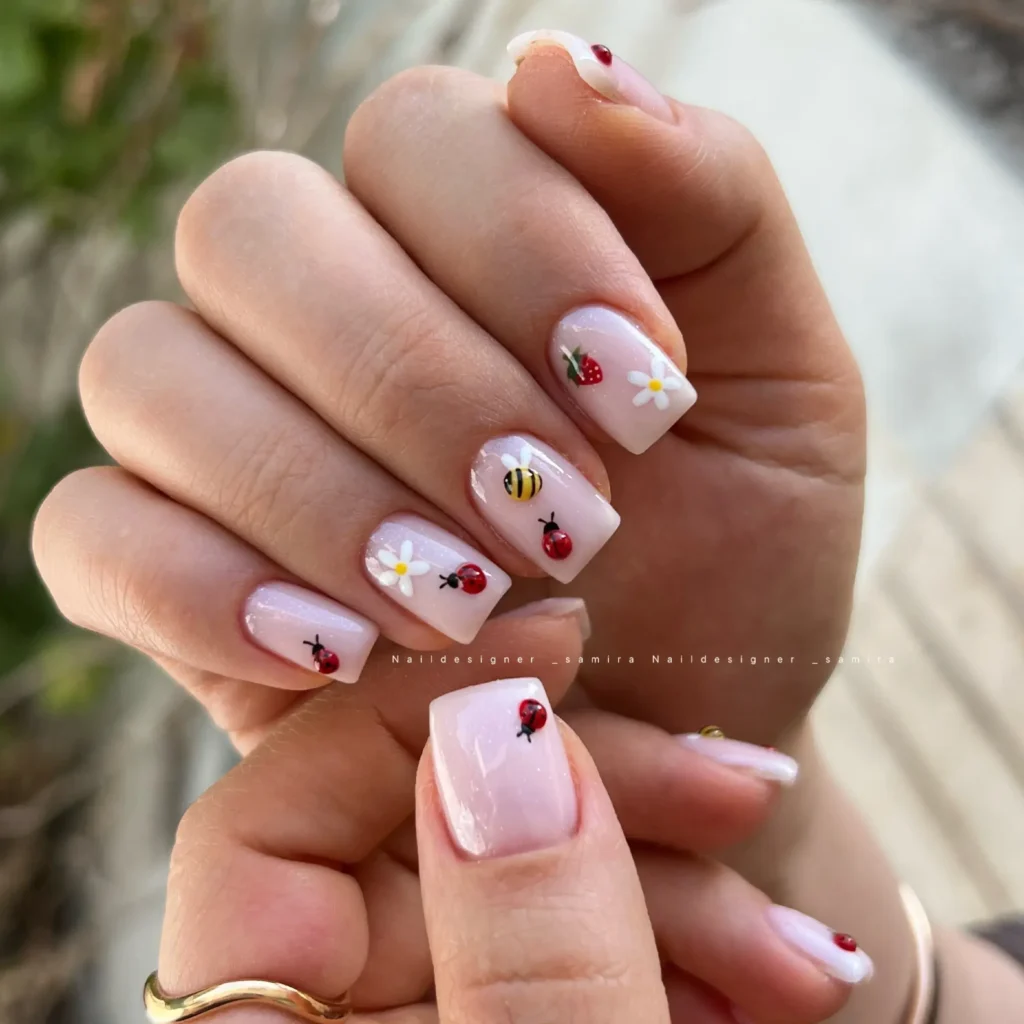
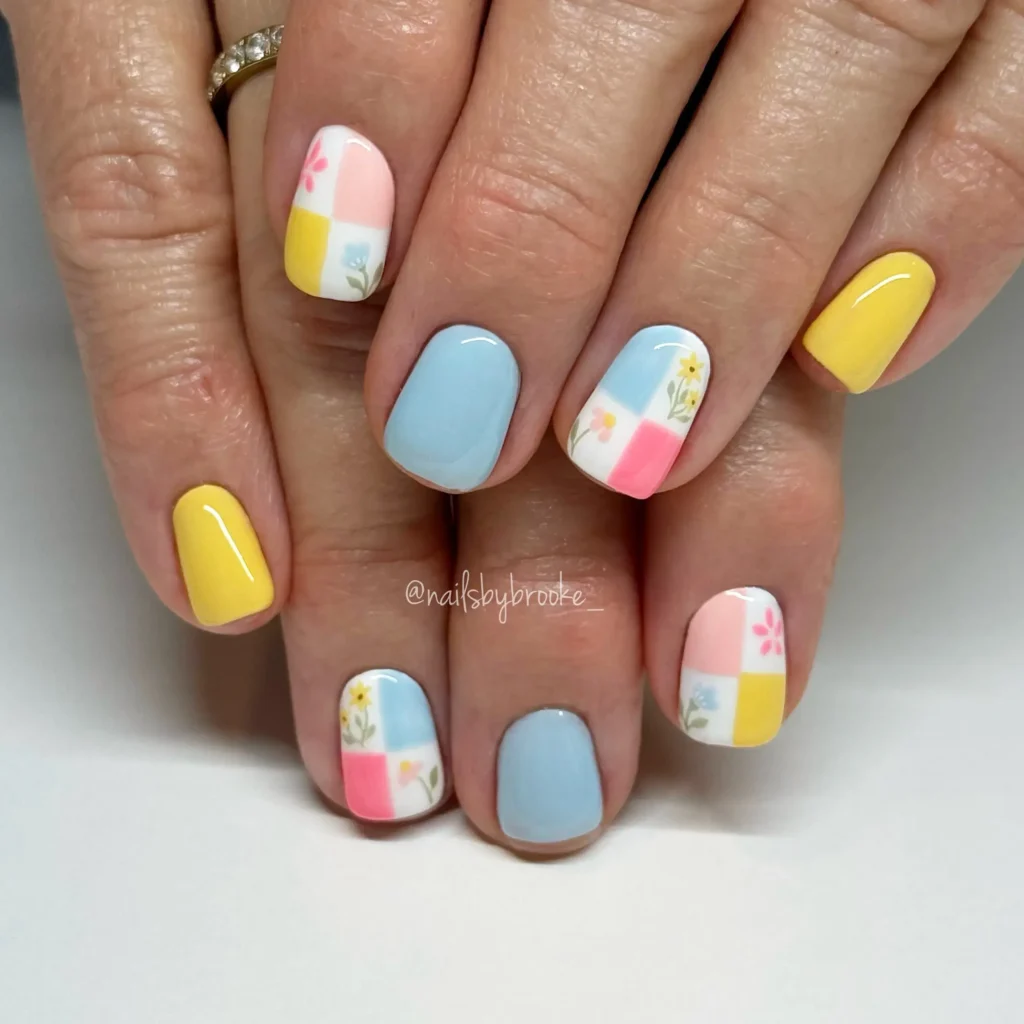
108. Square Tip Checkered Florals
A small checkerboard pattern covers part of the nail, paired with a single hand-painted flower on an accent nail.
Perfect for: Mixed pattern lovers, playful looks
Best shapes: Square
Pro tip: Complete the checkerboard pattern first, then add the floral accent once it has fully dried.
Time to DIY: 40 minutes
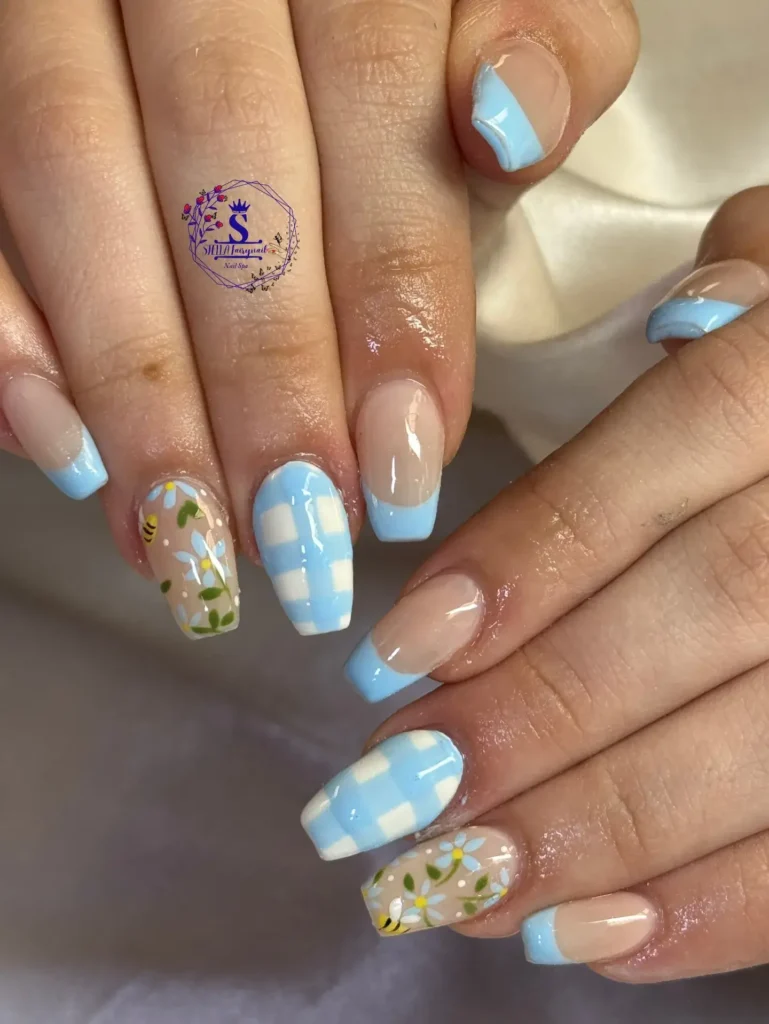
109. Squoval Pinstripe Nails
Thin, evenly spaced pinstripes run vertically across the nail, creating a subtle, structured pattern.
Perfect for: Clean, minimal detail work
Best shapes: Squoval
Pro tip: A striping brush loaded with a small amount of polish creates thinner, more even lines than a regular brush.
Time to DIY: 30 minutes
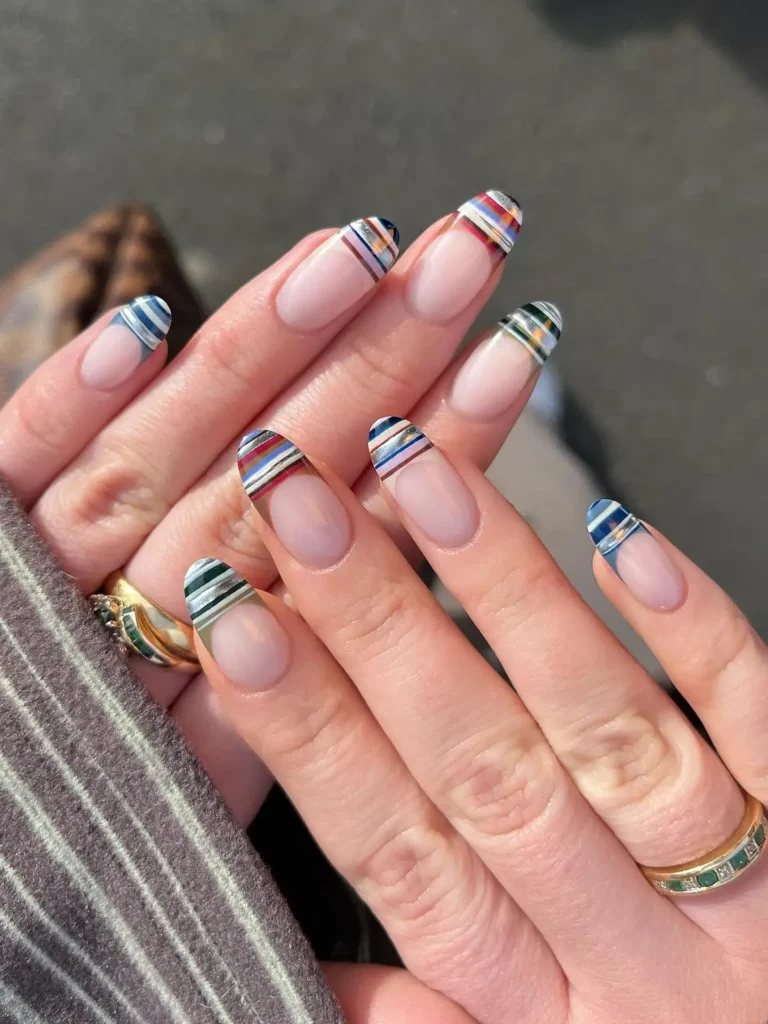
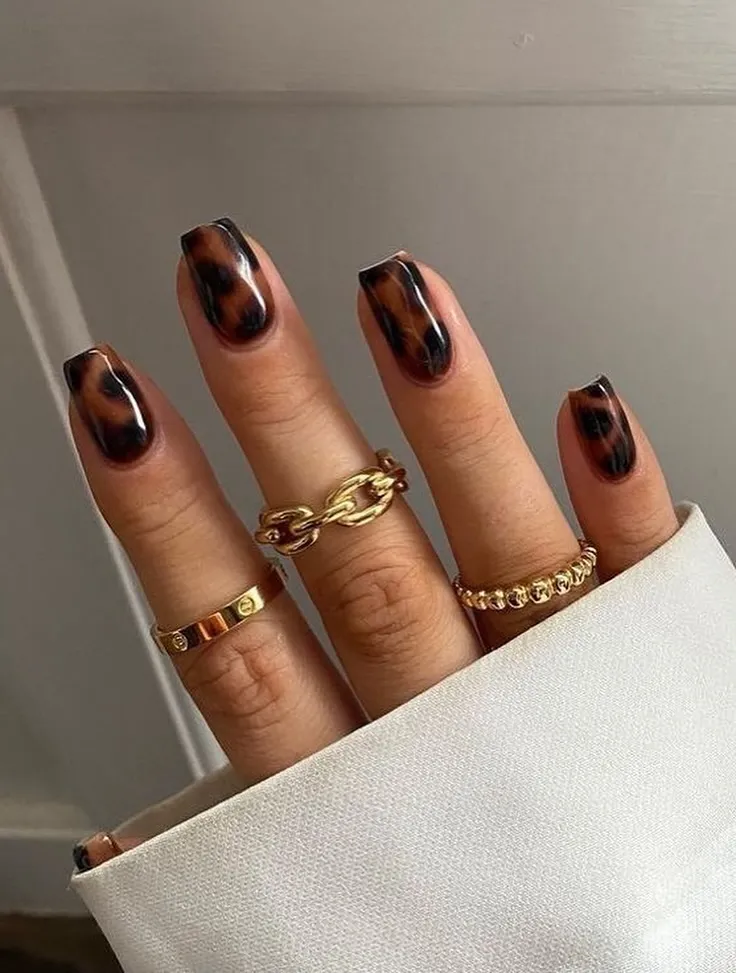
110. Square Tortoiseshell Accent
A mottled brown and amber tortoiseshell pattern covers one or two accent nails, paired with a plain nude base on the rest.
Perfect for: Warm neutral styling
Best shapes: Square
Pro tip: Dab two or three brown tones together while wet to build the mottled texture naturally.
Time to DIY: 30 minutes
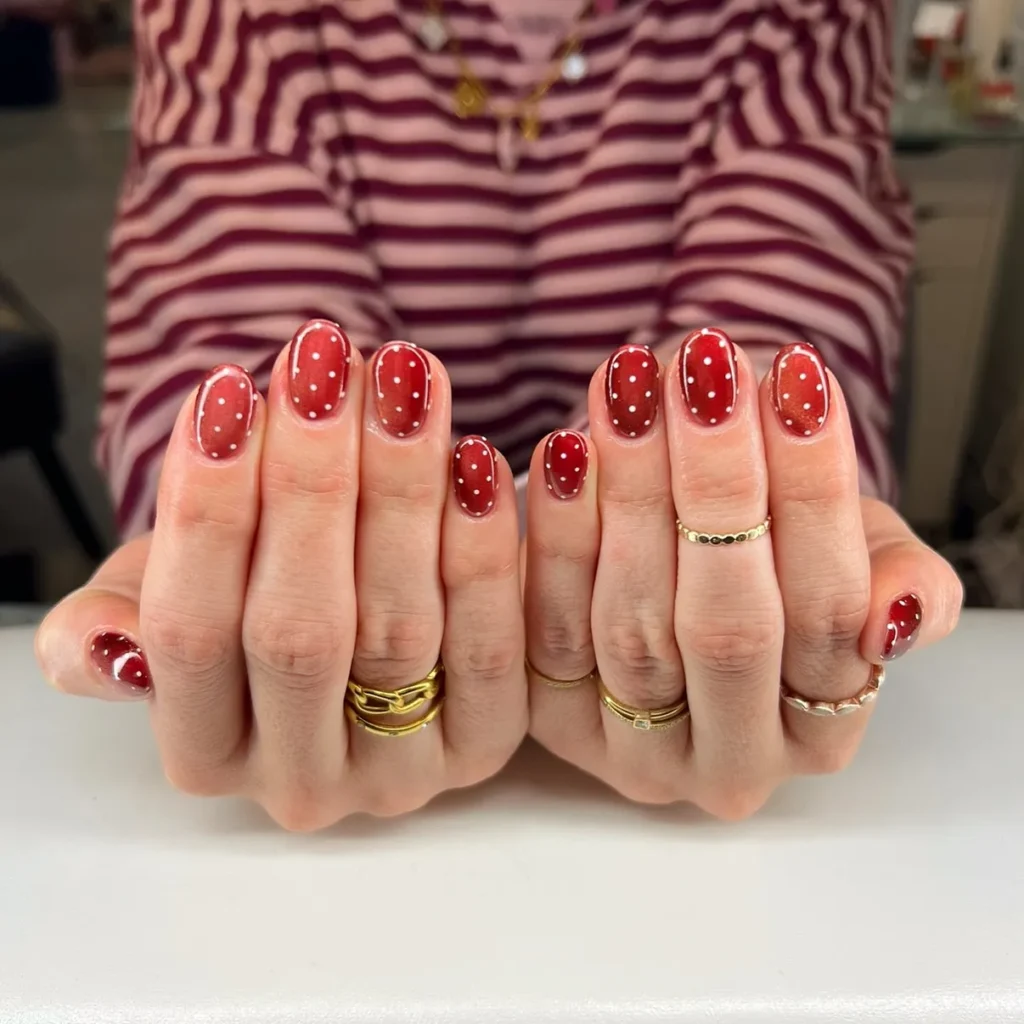
111. Squoval Polka Dot Mani
Evenly spaced polka dots in one or two colors cover the nail over a clean, solid background.
Perfect for: Playful, classic patterns
Best shapes: Squoval
Pro tip: Use a dotting tool in one consistent size so the dots line up evenly across every nail.
Time to DIY: 30 minutes
Rainbow & Multi-Color Summer Nail Inspo
Rainbow nails bring together multiple colors in one set, either blended smoothly or kept bold and distinct. This category works well for anyone who wants their manicure to feel playful and expressive.
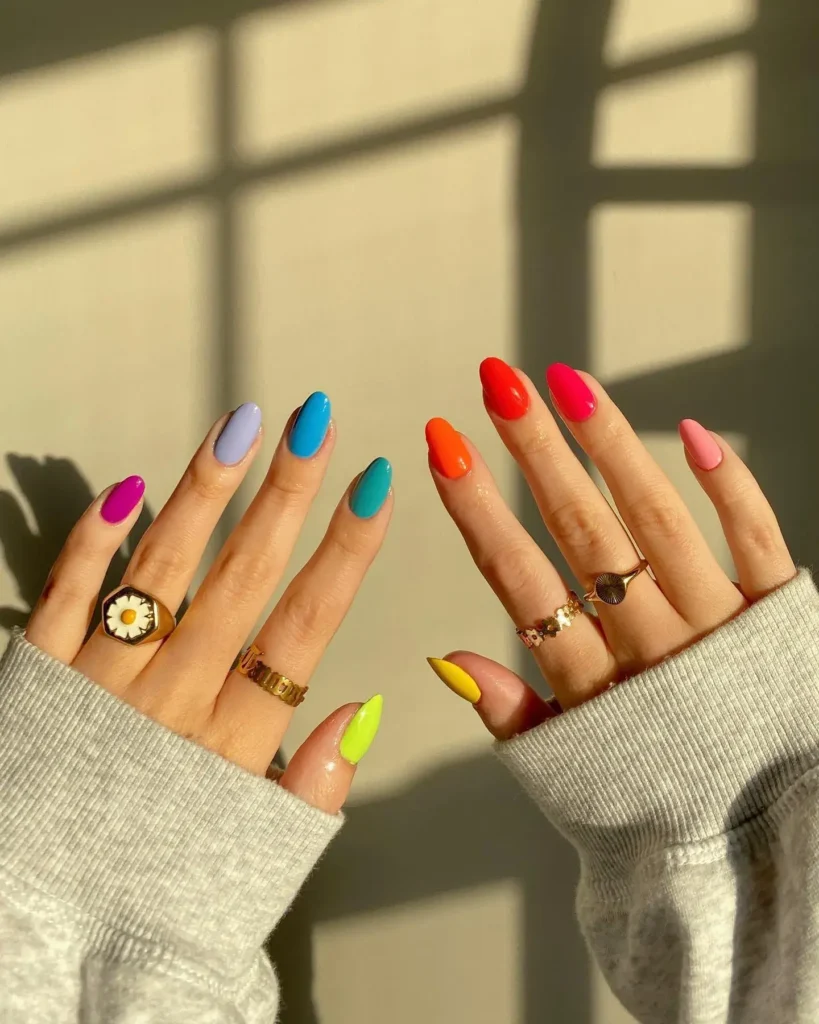
112. Skittle Nails (Mismatched Rainbow Set)
Each nail is painted a different solid color, creating a mismatched set that reads as one cohesive rainbow look.
Perfect for: Bold color lovers, playful everyday wear
Best shapes: Almond, square
Pro tip: Keep the finish consistent across all colors, either fully glossy or fully matte, so the mismatch feels intentional.
Time to DIY: 25 minutes
113. Rainbow Gradient Nails
Multiple colors blend together across the nail in one smooth gradient, moving through the full color spectrum.
Perfect for: Statement looks, festival season
Best shapes: Coffin, almond
Pro tip: Blend colors on a sponge before applying to the nail for a smoother transition between shades.
Time to DIY: 40 minutes
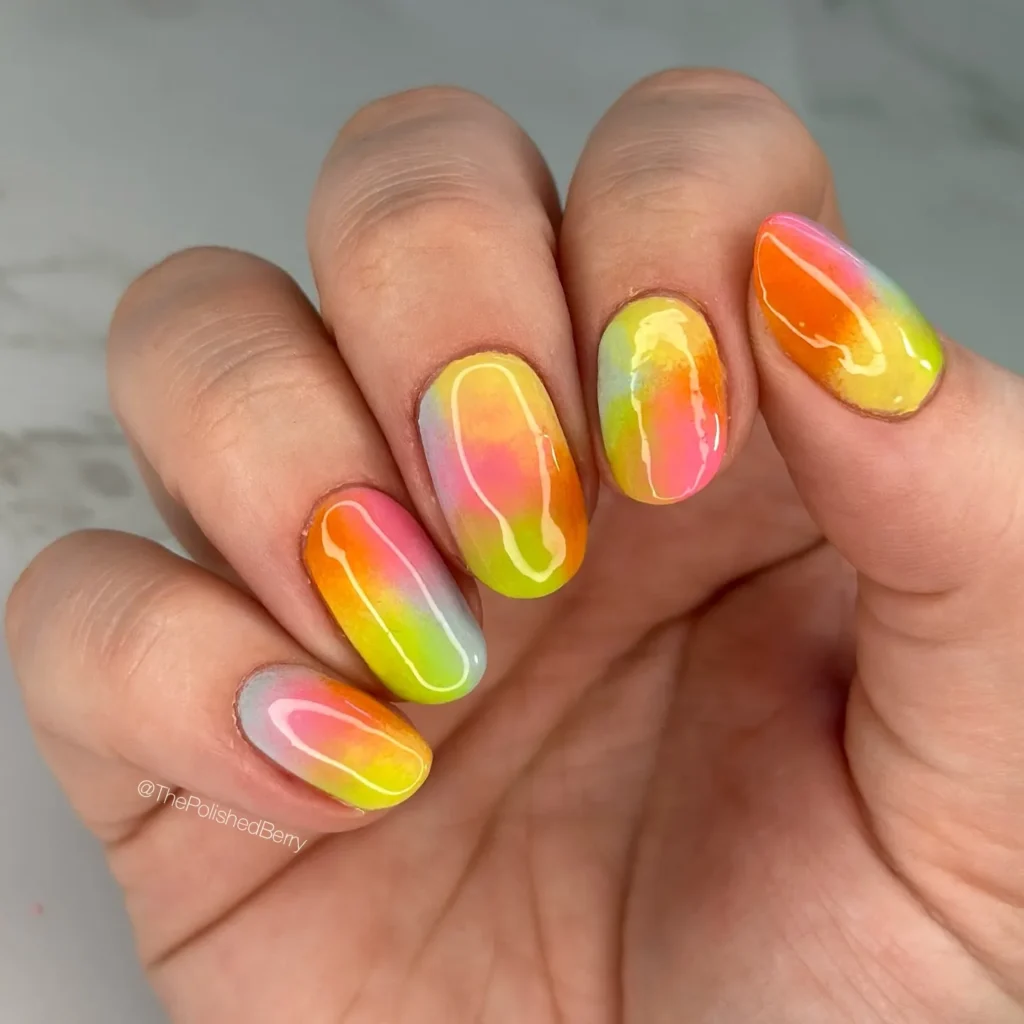
114. Pastel Rainbow Swirl Nails
Soft pastel colors swirl together across the nail, creating a marbled effect instead of distinct bands of color.
Perfect for: Soft, artistic styling
Best shapes: Almond, oval
Pro tip: Work with wet polish only, since dried colors will not swirl or blend together.
Time to DIY: 40 minutes
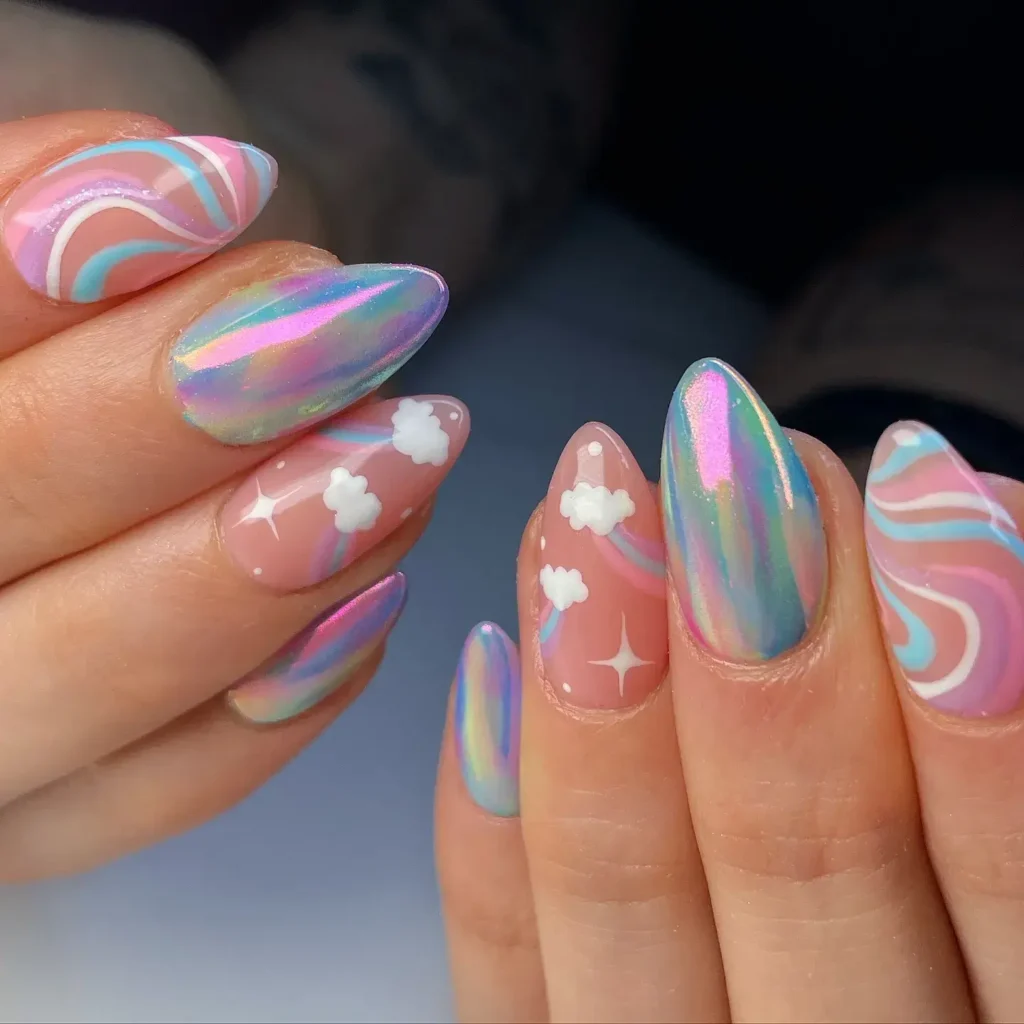
115. Rainbow Almond Set
Each almond-shaped nail features a different bright color, following the natural curve of the shape from base to tip.
Perfect for: Bold color on an elegant shape
Best shapes: Almond
Pro tip: Apply two coats of each color for full opacity, since some bright shades can look sheer with just one.
Time to DIY: 30 minutes
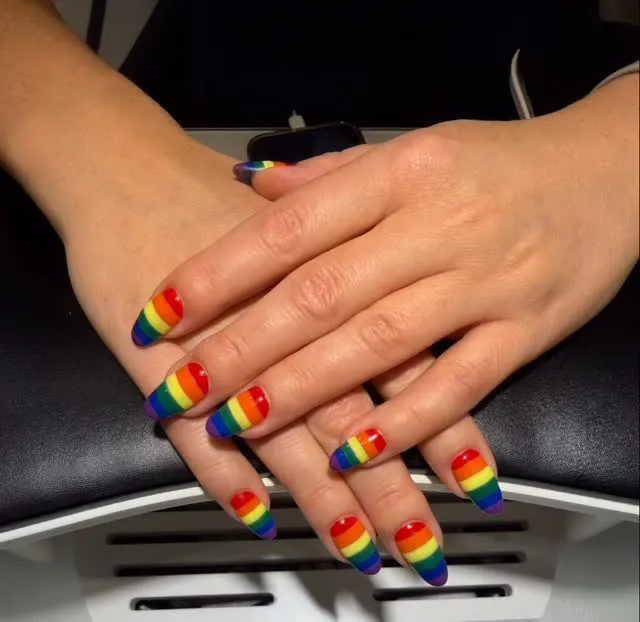
116. Colorful Abstract Mani
Loose shapes and lines in multiple bright colors cover the nail in a freeform, artistic pattern with no set structure.
Perfect for: Creative expression, maximalist styles
Best shapes: Coffin, almond
Pro tip: Use various sized brushes for the details, since one brush size limits the range of shapes you can create.
Time to DIY: 45 minutes
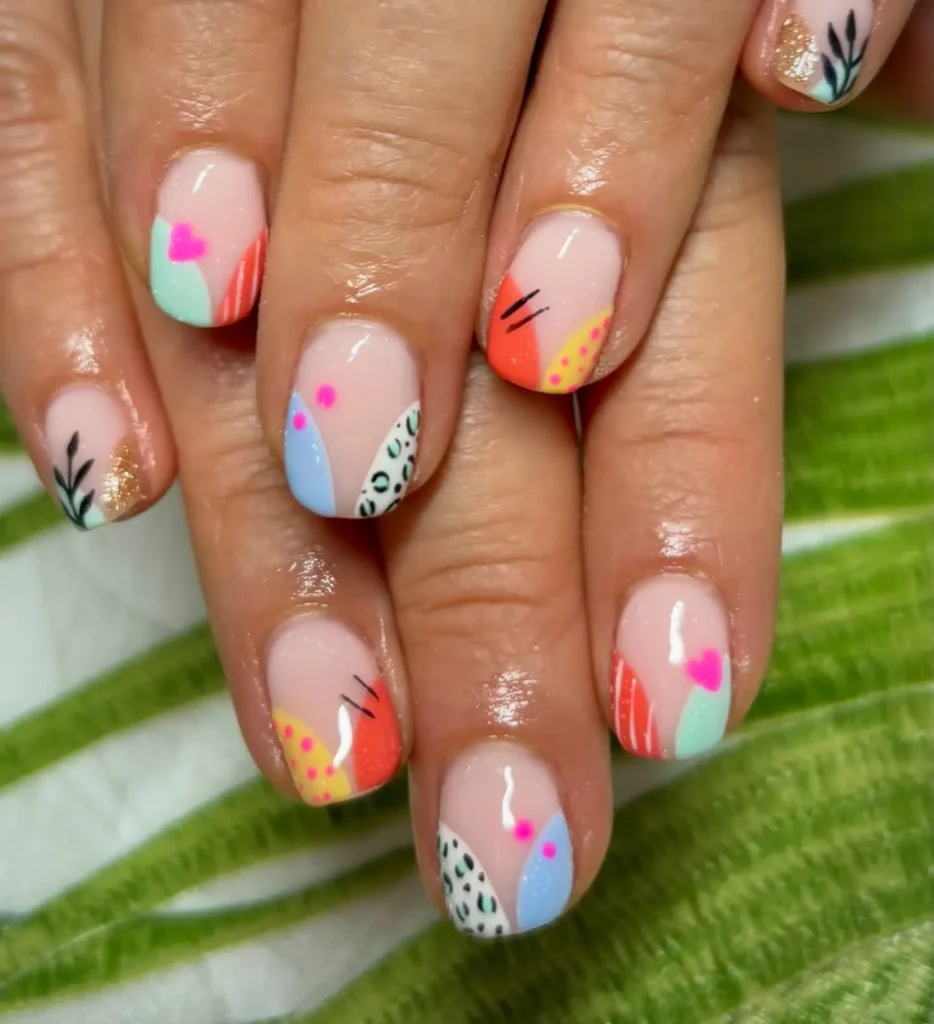
117. Rainbow Stripe Nails
Thin stripes in multiple colors run across the nail, either vertically or diagonally, for a clean, structured rainbow look.
Perfect for: Graphic, bold patterns
Best shapes: Square, squoval
Pro tip: Striping tape keeps each colored line sharp and evenly spaced.
Time to DIY: 35 minutes
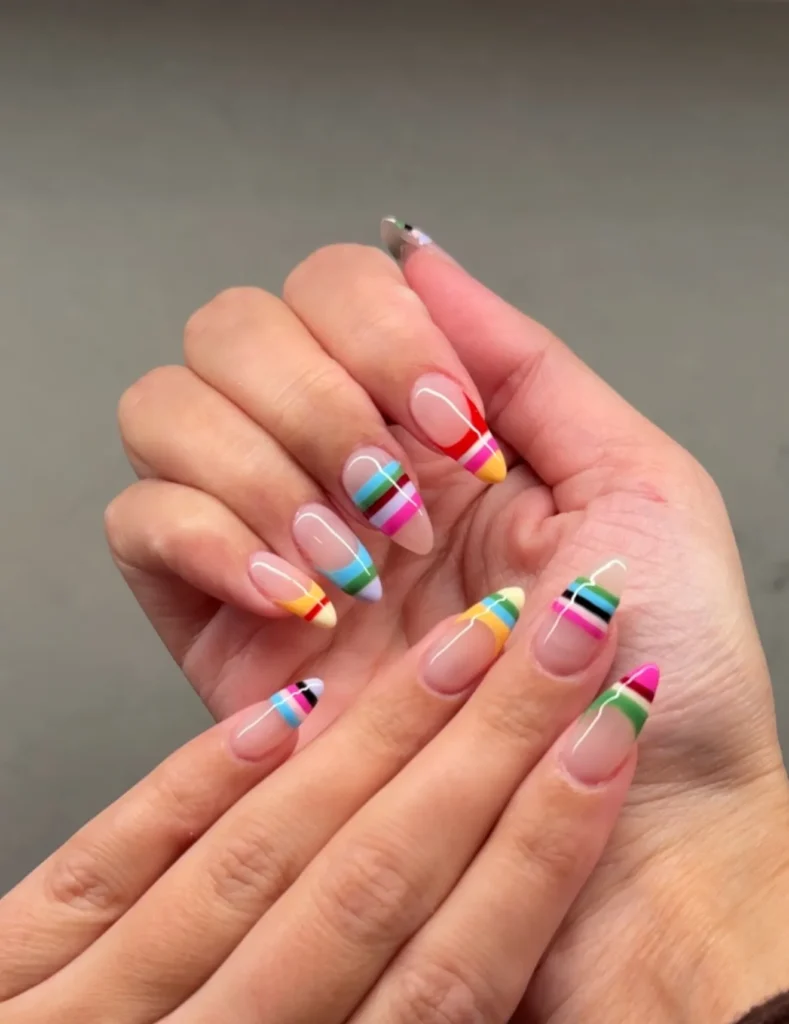
118. Multi-Color Dot Nails
Dots in several different colors cover the nail in a scattered or evenly spaced pattern over a neutral base.
Perfect for: Playful, detail-focused looks
Best shapes: Short square, round
Pro tip: Clean the dotting tool between colors to keep each dot crisp and prevent muddy blending.
Time to DIY: 30 minutes
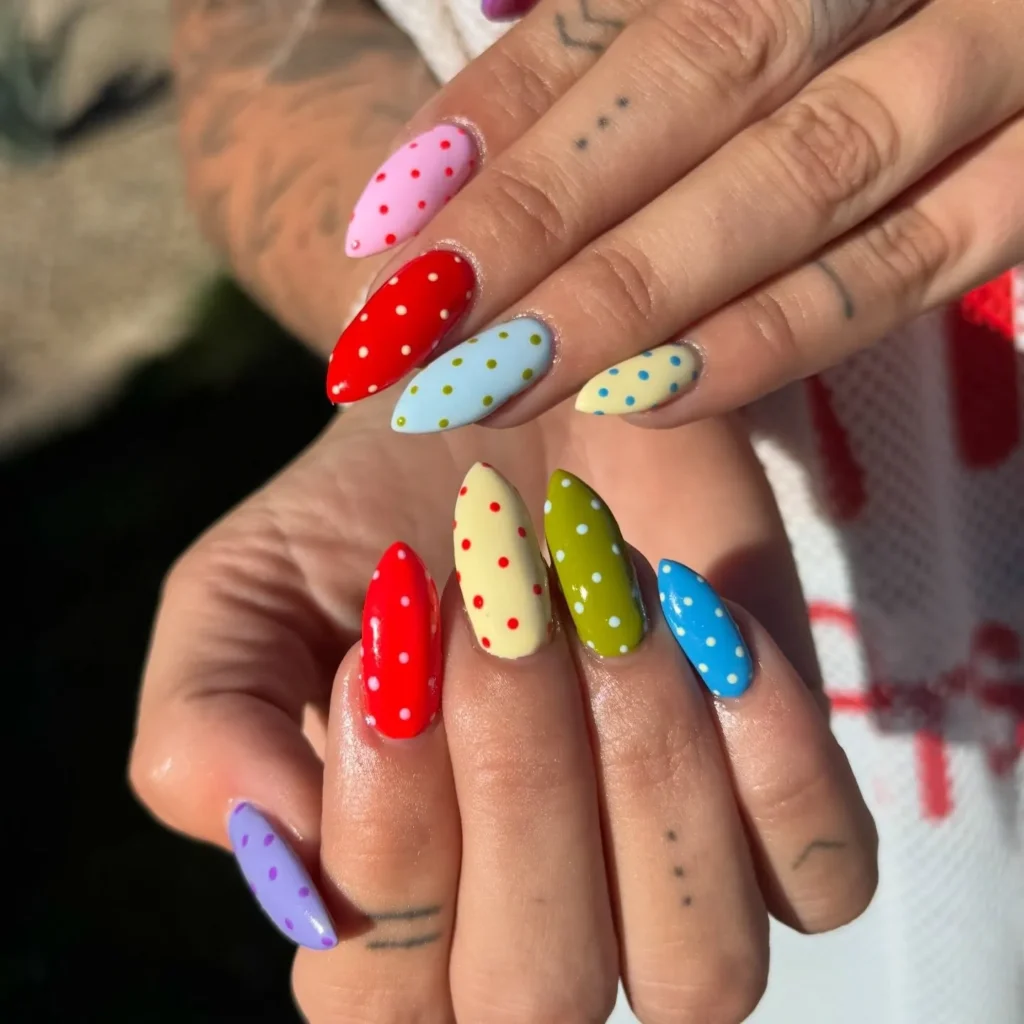
119. Rainbow Chevron Nails
Angled stripes in multiple colors form a chevron pattern across the nail, creating a bold, geometric look.
Perfect for: Statement nails, graphic pattern lovers
Best shapes: Square, almond
Pro tip: Mask off the angled lines with tape before painting for the cleanest chevron shape.
Time to DIY: 40 minutes
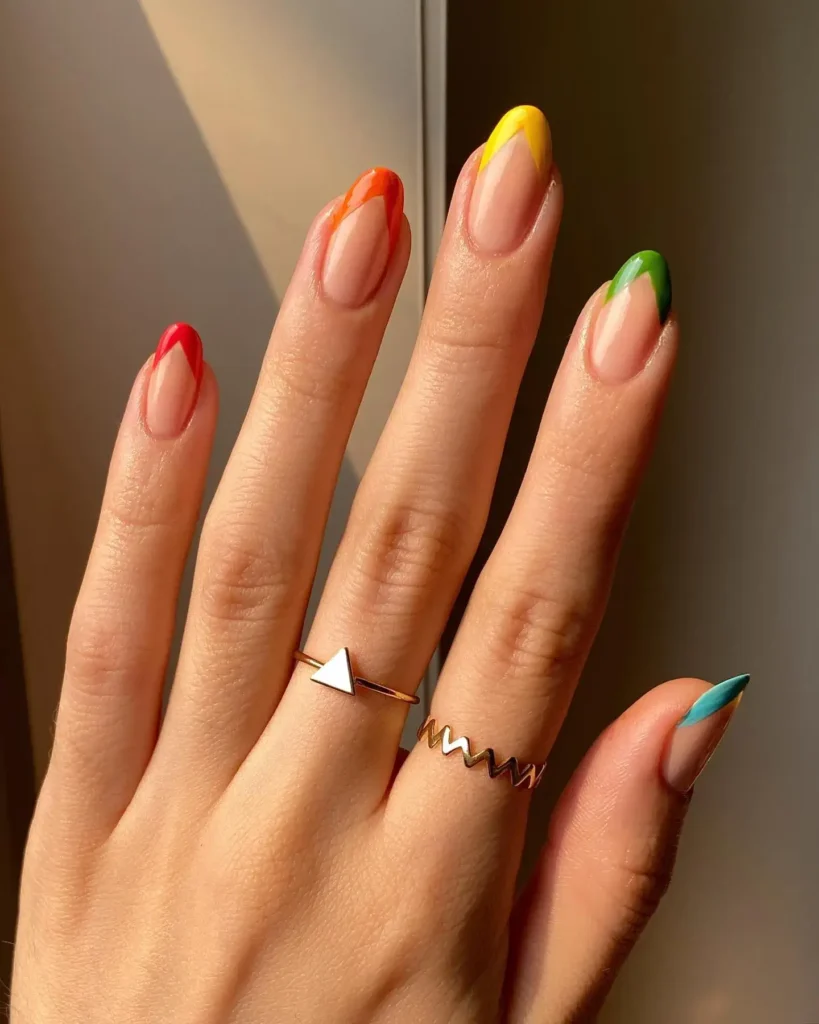
Animal Print & Pattern Summer Nail Inspo
Animal print and graphic patterns add texture and visual interest without relying on bright color alone. These designs work well on their own or paired with a simple neutral base.
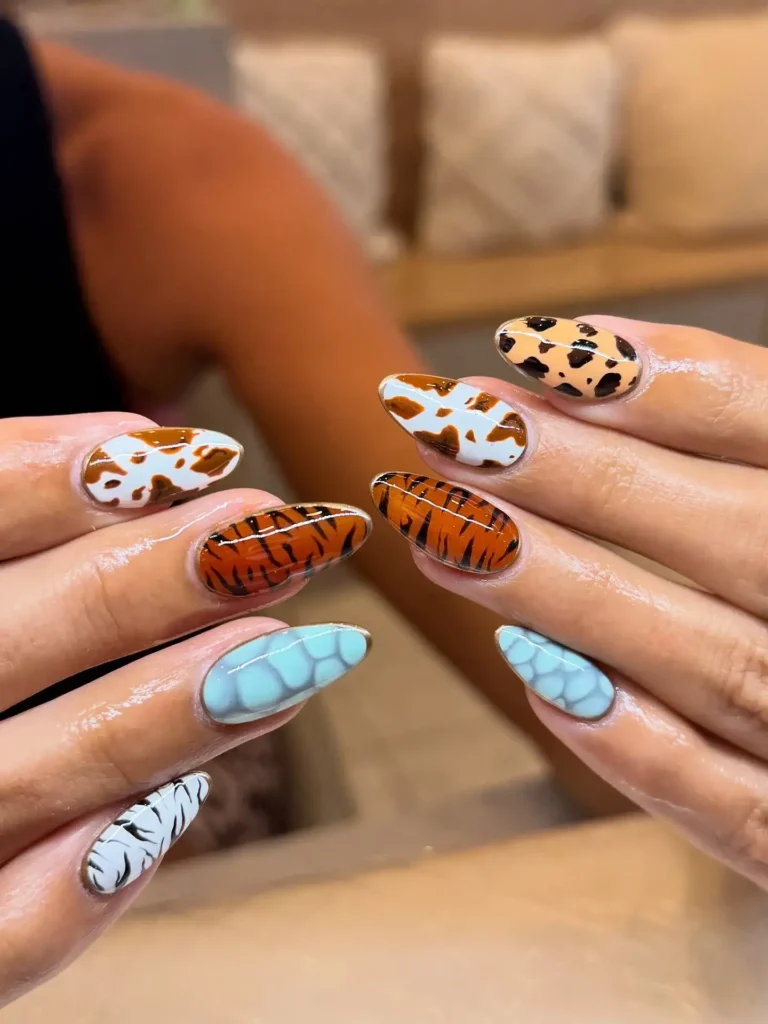
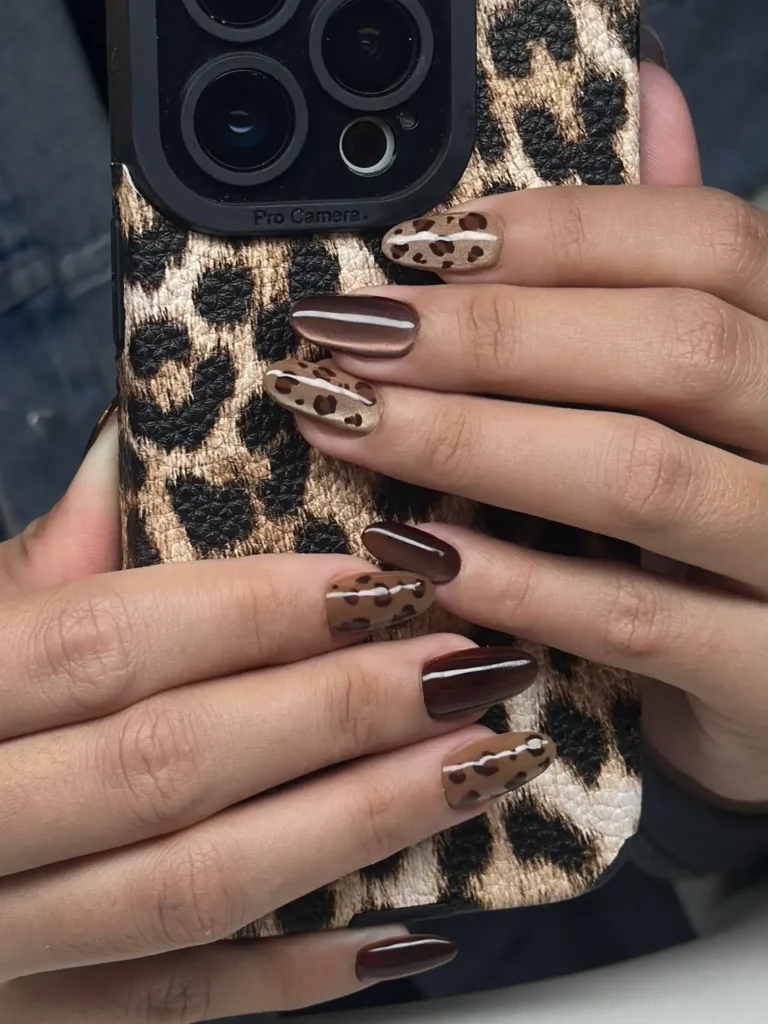
120. Leopard Print Accent Nails
Small brown and black spots cover one or two accent nails, set against a warm tan or nude background.
Perfect for: Neutral looks with texture
Best shapes: Almond, coffin
Pro tip: Paint the brown spots first, then add a smaller black outline to each one once dry.
Time to DIY: 30 minutes
121. Cheetah Print French Tips
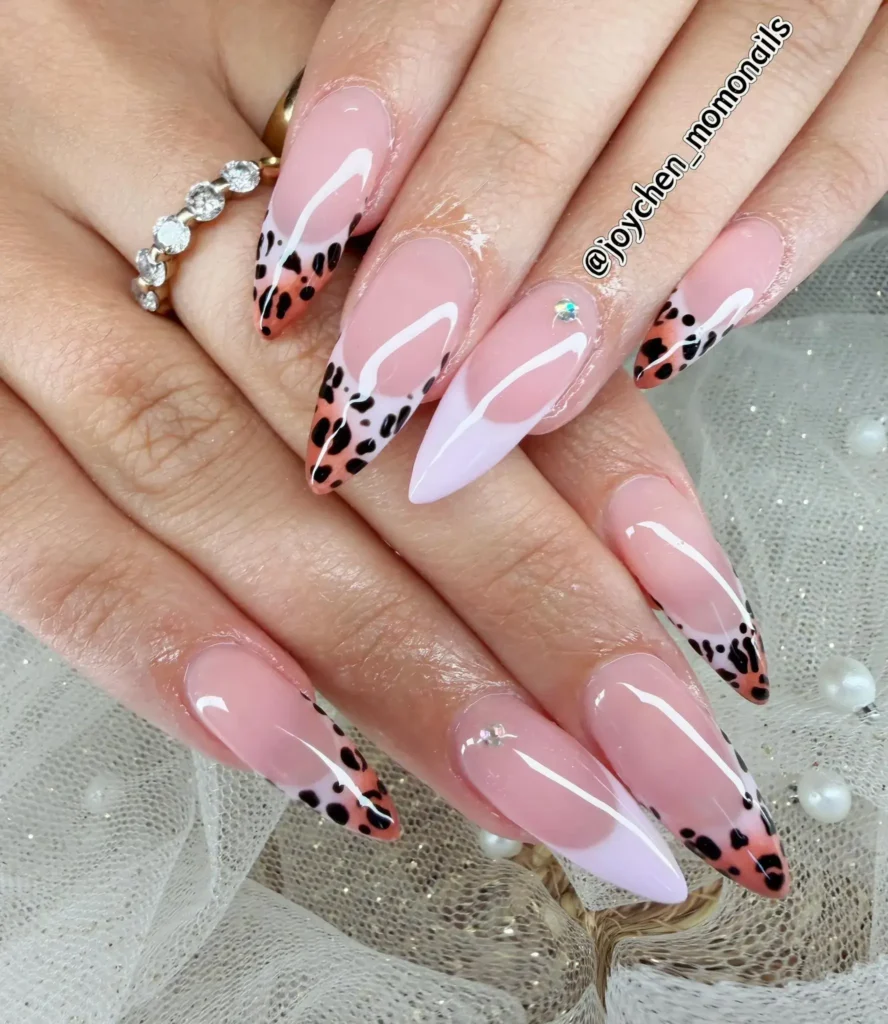
Small black spots replace the solid line of a classic French tip, set against a tan or nude tip base.
Perfect for: Subtle pattern on a classic style
Best shapes: Square, almond
Pro tip: Keep spots small and irregular in shape, since perfectly round dots look less like natural cheetah print.
Time to DIY: 30 minutes
122. Snake Skin Nail Art
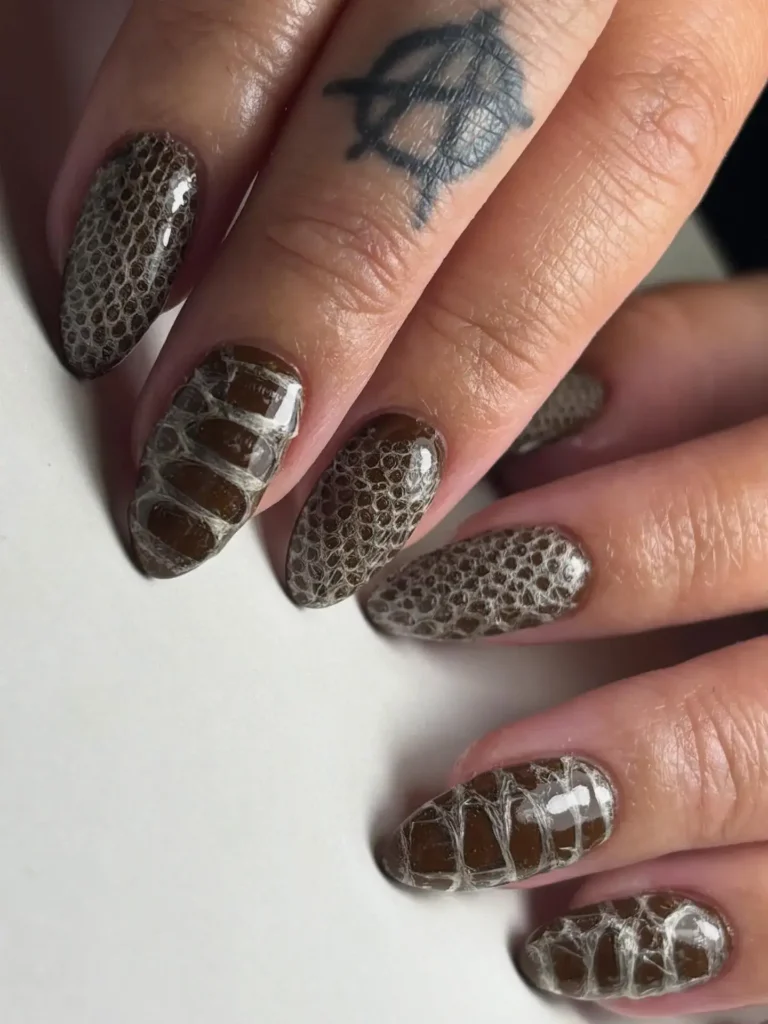
Overlapping scale shapes in muted greens or browns cover the nail, mimicking the texture of snake skin.
Perfect for: Edgy, textured statement looks
Best shapes: Coffin, almond
Pro tip: A small dotting tool creates the scale outlines more easily than a detail brush.
Time to DIY: 40 minutes
123. Cow Print Summer Nails
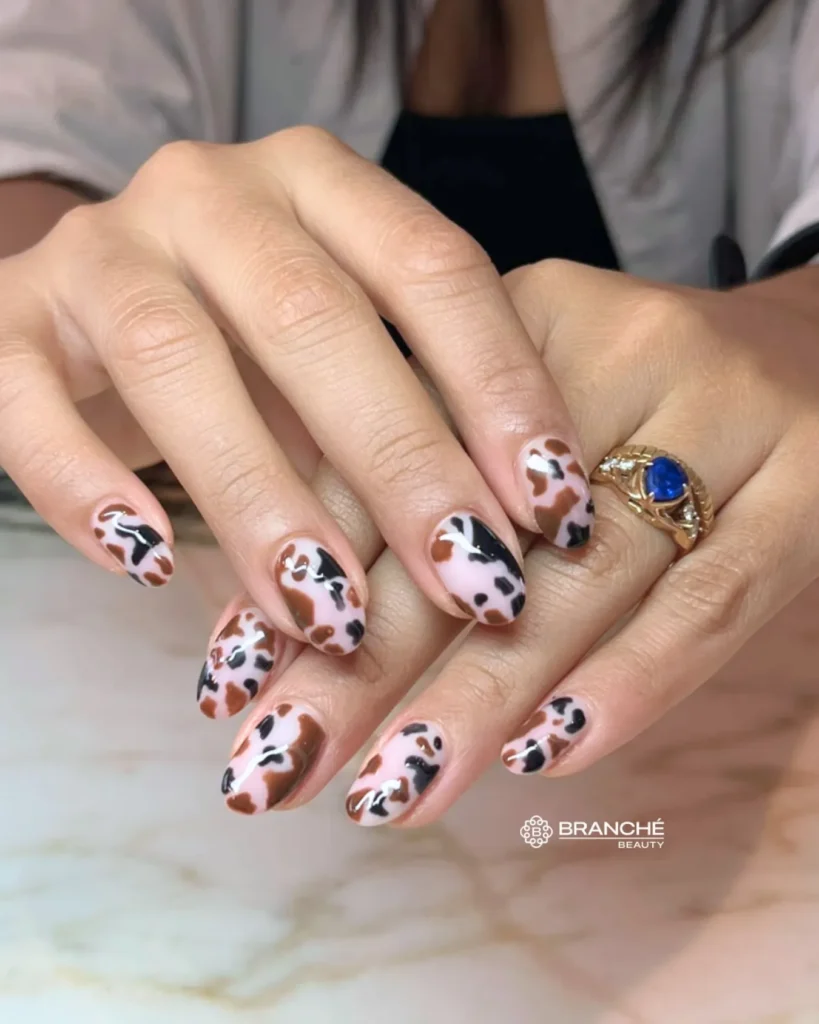
Irregular black patches sit over a white base, creating a bold, high-contrast pattern inspired by cow print.
Perfect for: Bold, trend-forward styling
Best shapes: Square, squoval
Pro tip: Paint the black patches in uneven, blobby shapes rather than clean circles for an authentic look.
Time to DIY: 30 minutes
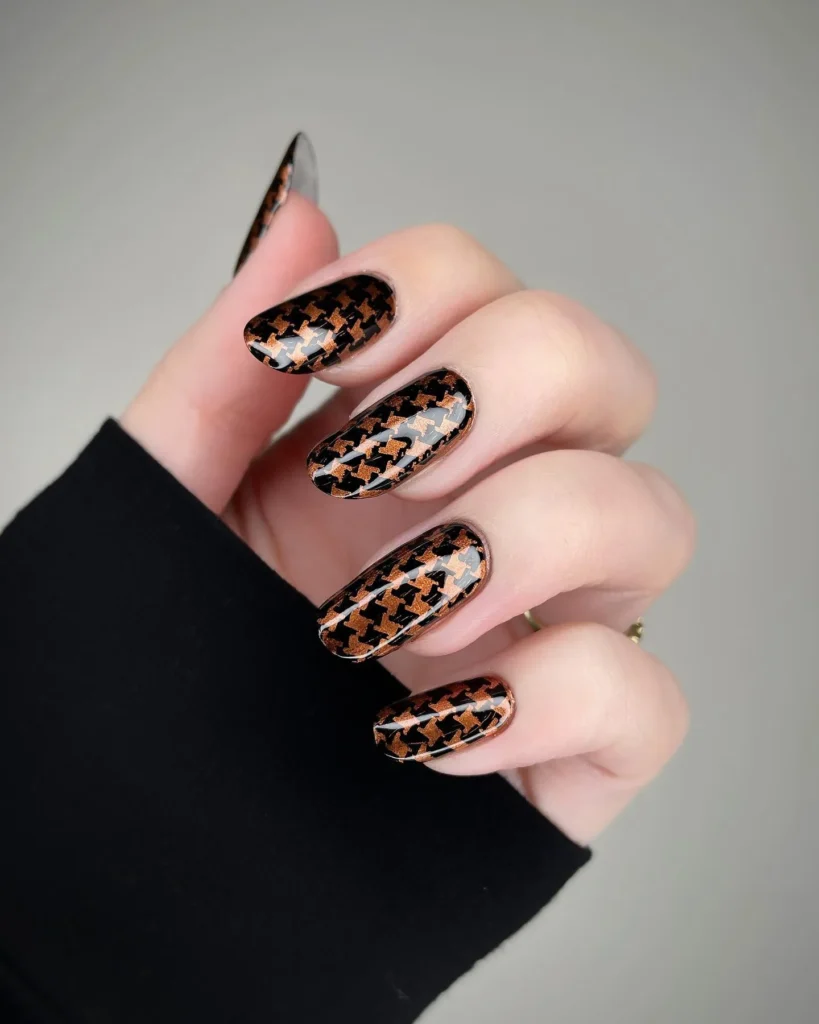
124. Houndstooth Pattern Nails
A classic black and white houndstooth print covers the nail in small, angular repeating shapes.
Perfect for: Structured, fashion-forward looks
Best shapes: Square, almond
Pro tip: Sketch the angled grid lightly in pencil first, since houndstooth relies on precise spacing.
Time to DIY: 40 minutes
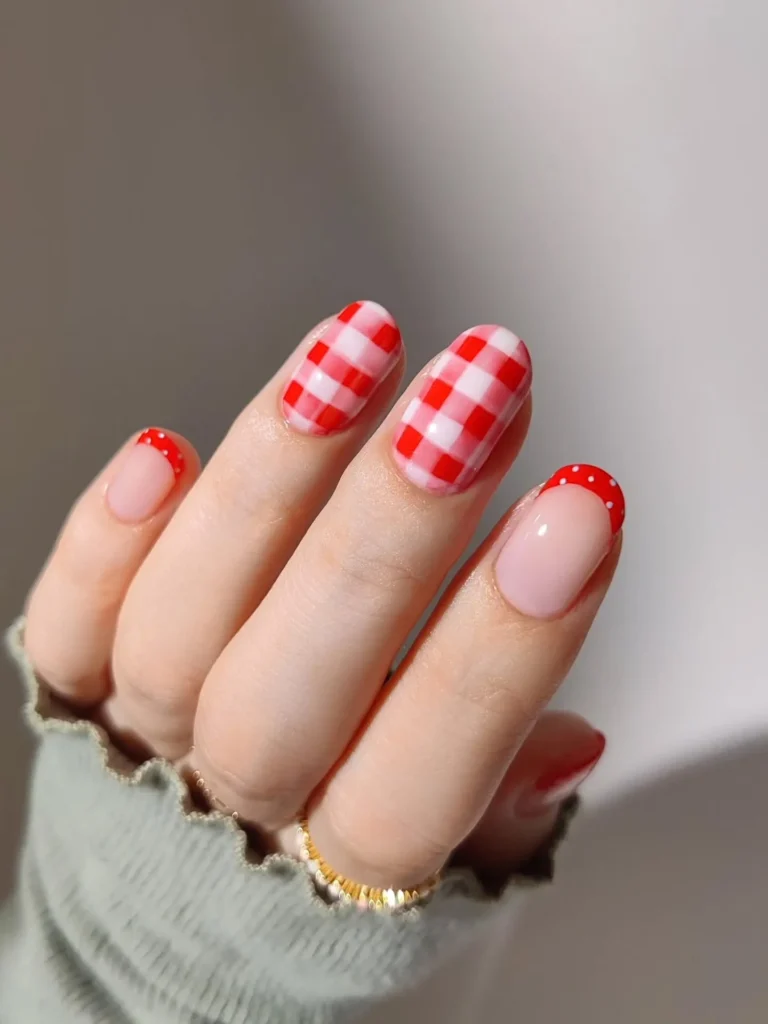
125. Gingham Check Nails
A small checkered pattern in two colors covers the nail, resembling a classic picnic blanket print.
Perfect for: Picnics, casual summer styling
Best shapes: Square, squoval
Pro tip: Use striping tape in a grid pattern to keep the checks even and aligned.
Time to DIY: 35 minutes
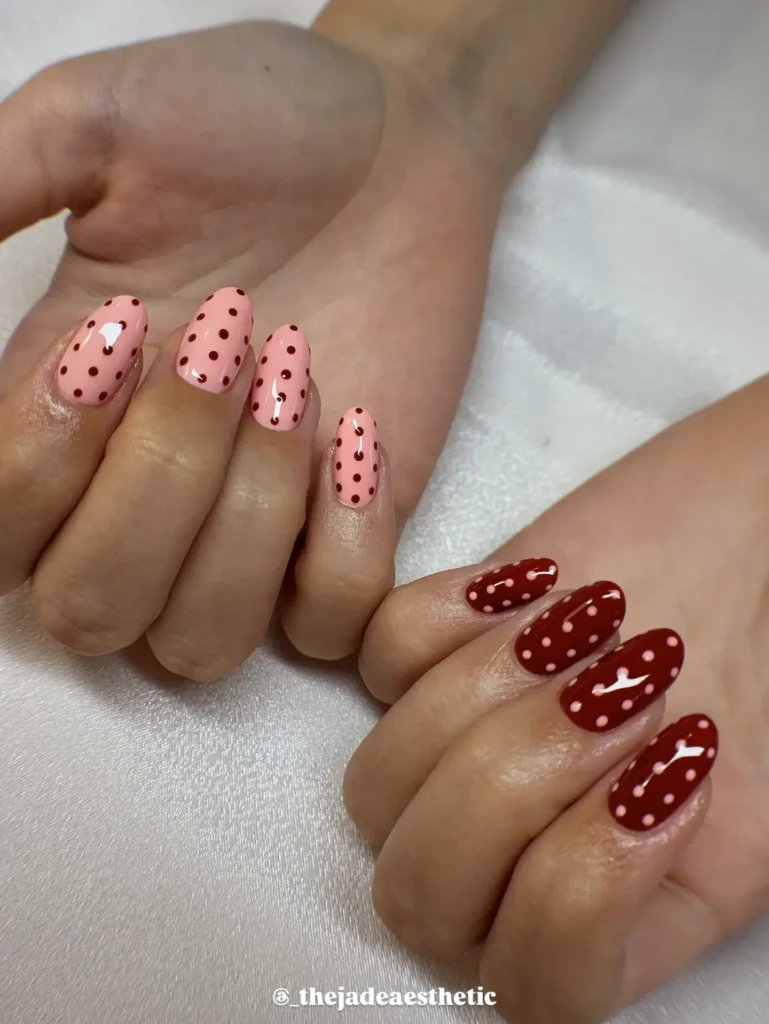
126. Two-Tone Polka Dot Nails
Dots in two contrasting colors alternate across the nail, creating more visual depth than a single color dot design.
Perfect for: Playful pattern lovers
Best shapes: Short square, round
Pro tip: Let the first color of dots dry fully before adding the second to avoid smudging.
Time to DIY: 30 minutes
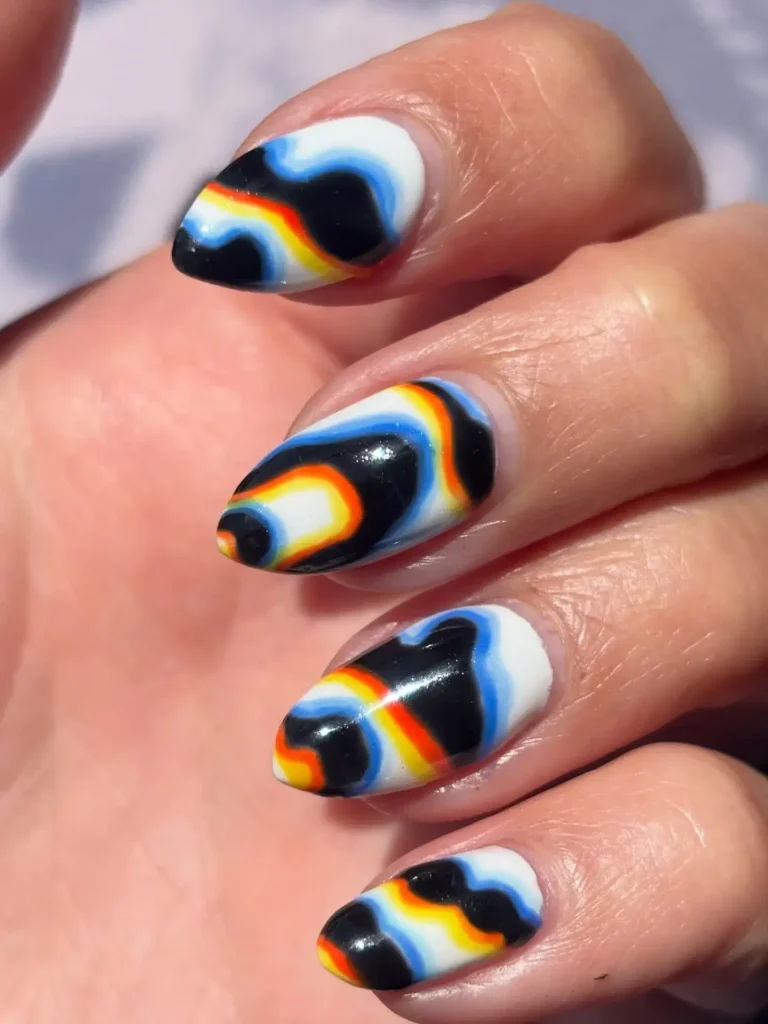
127. Retro Swirl Print Nails
Bold, curved swirl shapes in warm seventies-inspired colors cover the nail in a flowing, retro pattern.
Perfect for: Vintage-inspired, playful looks
Best shapes: Coffin, almond
Pro tip: Use a thin brush and continuous curved strokes rather than short lines for a smooth swirl shape.
Time to DIY: 35 minutes
3D & Textured Summer Nail Art
Texture adds a new dimension to nail art beyond flat color and line work. These designs use raised details, embellishments, and sculpted elements to create depth you can actually feel.
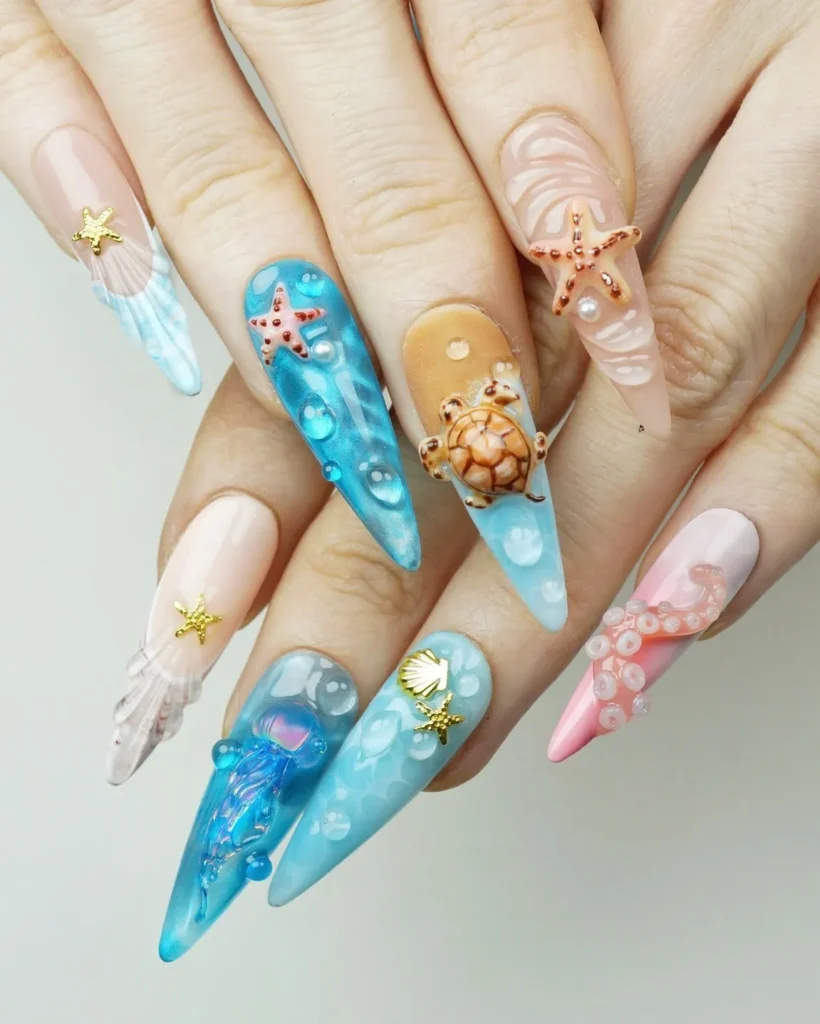
128. 3D Sculpted Rose Nails
A small rose is built up in layers of gel, creating raised, dimensional petals instead of a flat painted flower.
Perfect for: Statement nails, special occasions
Best shapes: Coffin, almond
Pro tip: Cure each petal layer briefly before adding the next, or the gel will lose its shape.
Time to DIY: 55 minutes
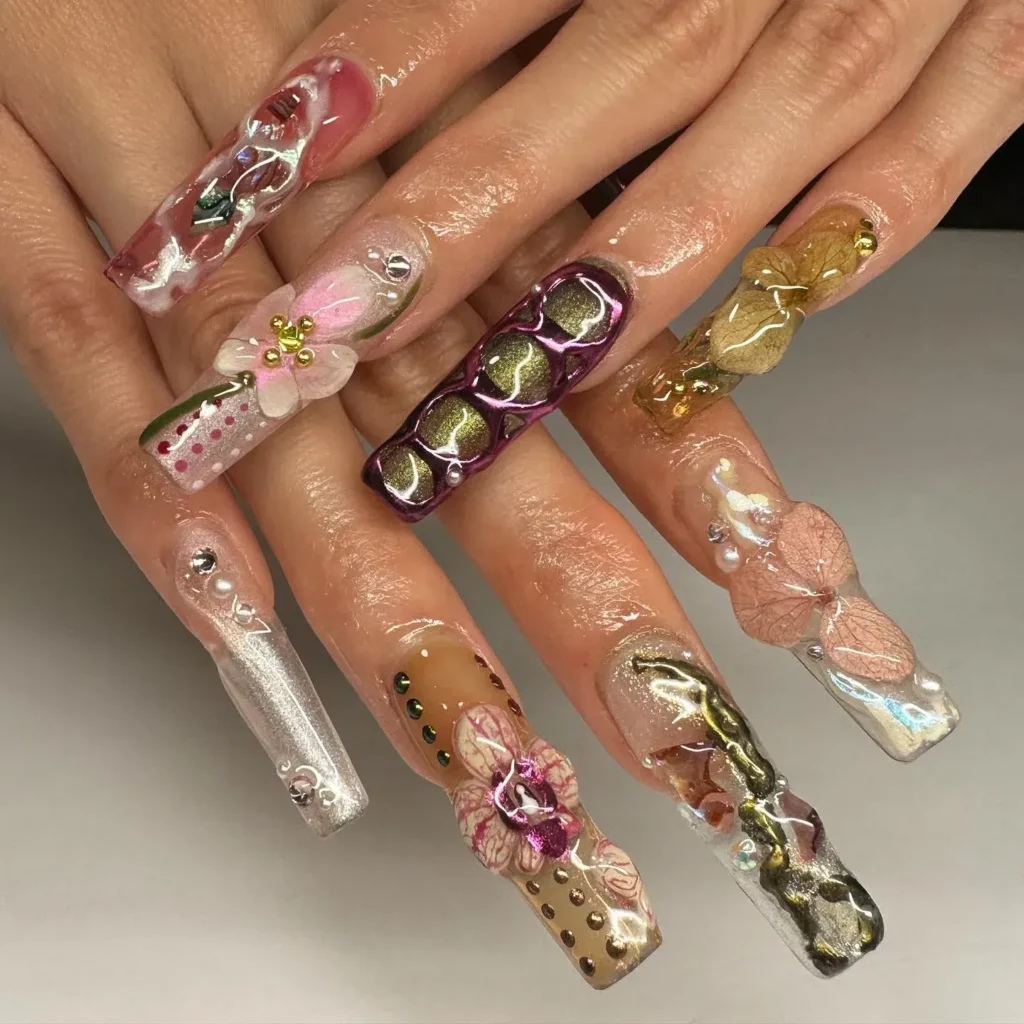
129. Builder Gel Water Droplet Nails
Small, clear gel droplets are sculpted onto the nail, mimicking beads of water sitting on the surface.
Perfect for: Pool days, summer freshness
Best shapes: Almond, coffin
Pro tip: Use a dotting tool to shape the gel before curing, since it holds its form once cured.
Time to DIY: 40 minutes
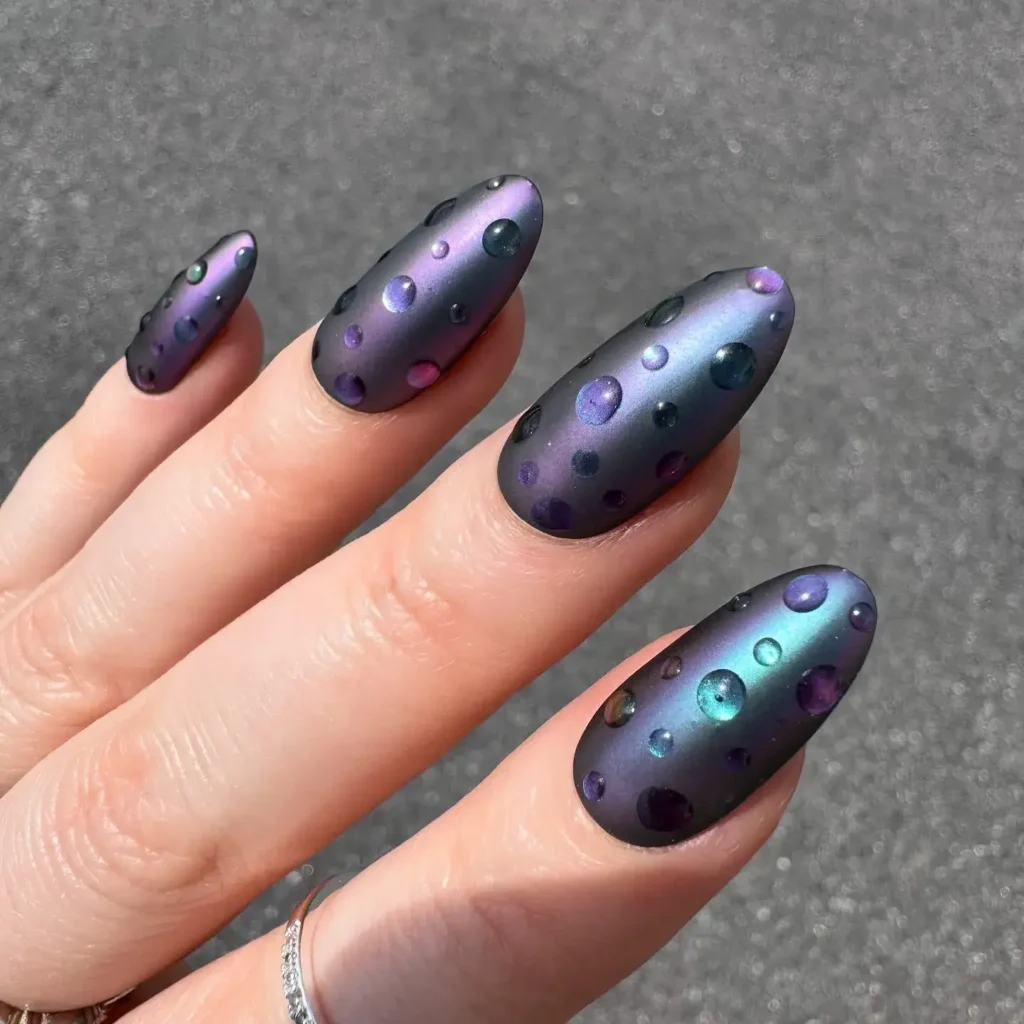
130. Pearl-Embellished Nails
Small pearls are placed near the base or tip of the nail, adding subtle texture and shine to an otherwise simple design.
Perfect for: Bridal nails, elegant everyday wear
Best shapes: Almond, oval
Pro tip: Apply pearls while the topcoat is still slightly tacky so they stay secure without extra glue.
Time to DIY: 25 minutes
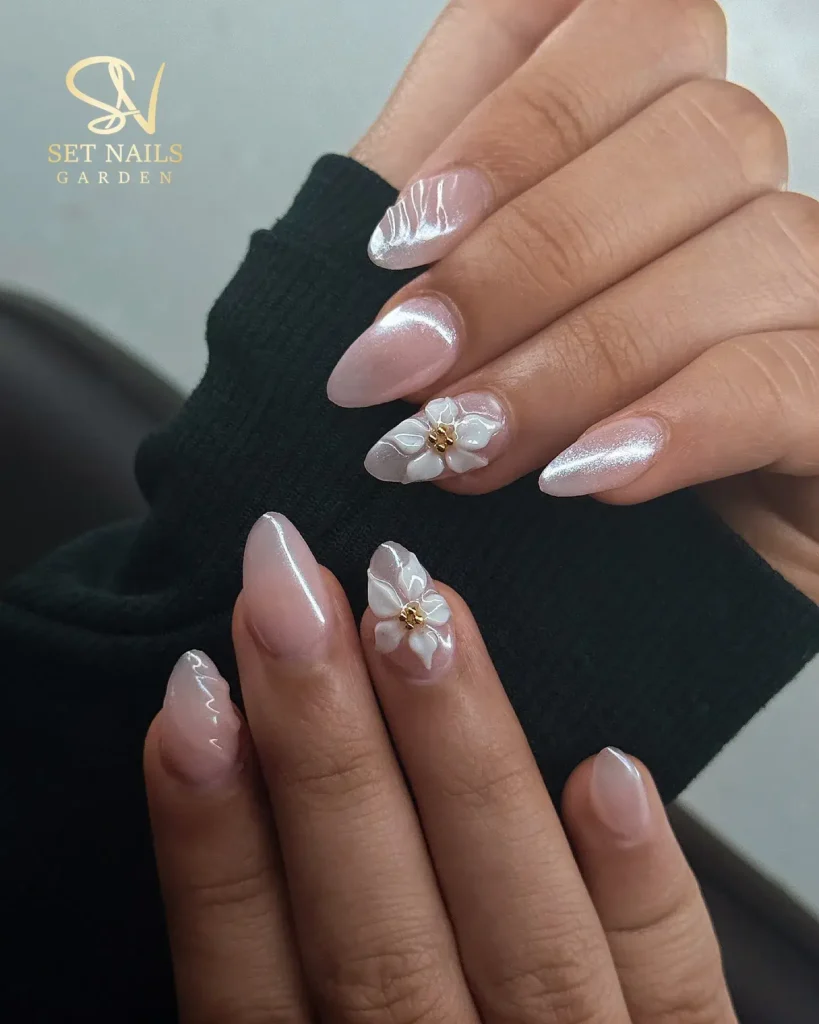
131. Rhinestone Cluster Accent Nails
Several small rhinestones are grouped together near the cuticle of one or two accent nails for a concentrated sparkle effect.
Perfect for: Evening events, subtle glam
Best shapes: Coffin, almond
Pro tip: Use a wax pencil to pick up and place each rhinestone precisely without touching the sticky side.
Time to DIY: 25 minutes
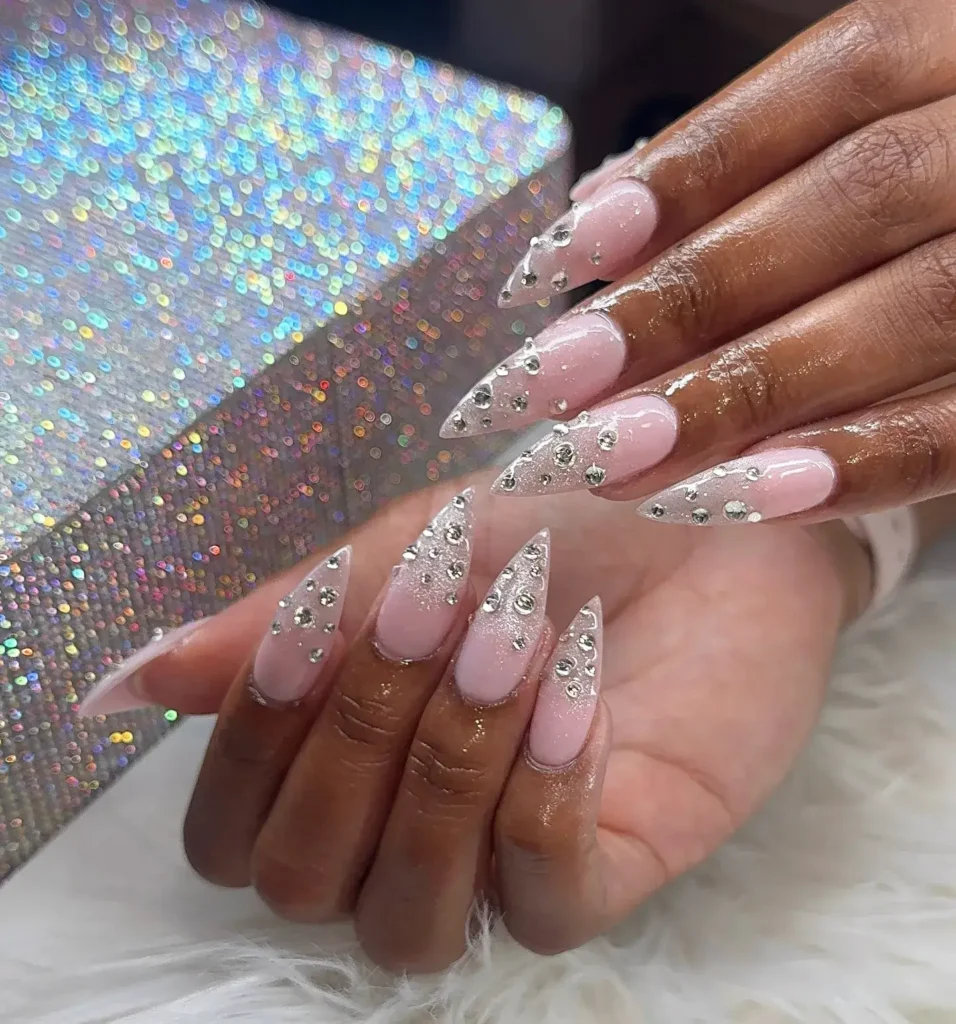
132. 3D Bow Nail Art
A small gel bow is sculpted and cured separately, then attached to the nail as a raised, dimensional accent.
Perfect for: Playful, girly styling
Best shapes: Almond, coffin
Pro tip: Cure the bow on a silicone mold first, then attach it to the nail with a thin layer of gel.
Time to DIY: 45 minutes
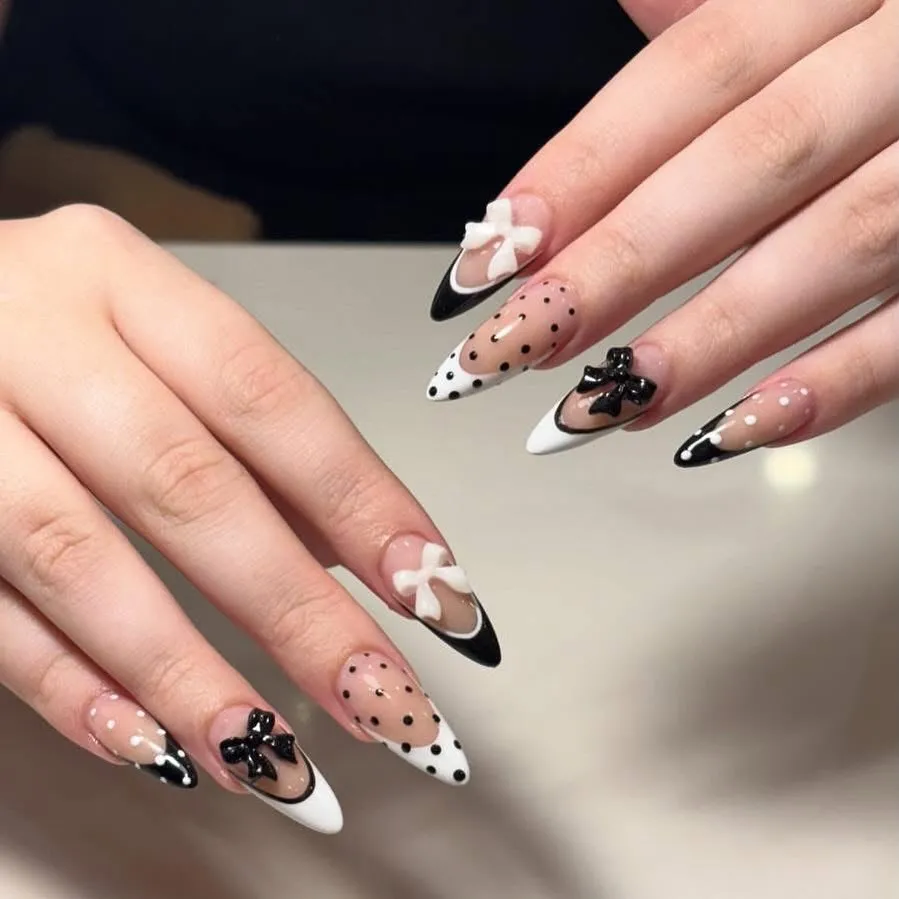
133. Sculpted Sugar-Texture Nails
A grainy, matte gel texture is applied to mimic the look of sugar crystals sitting on the nail surface.
Perfect for: Textured, tactile summer looks
Best shapes: Square, squoval
Pro tip: Dab the gel with a stippling brush rather than smoothing it flat to create the grainy texture.
Time to DIY: 35 minutes
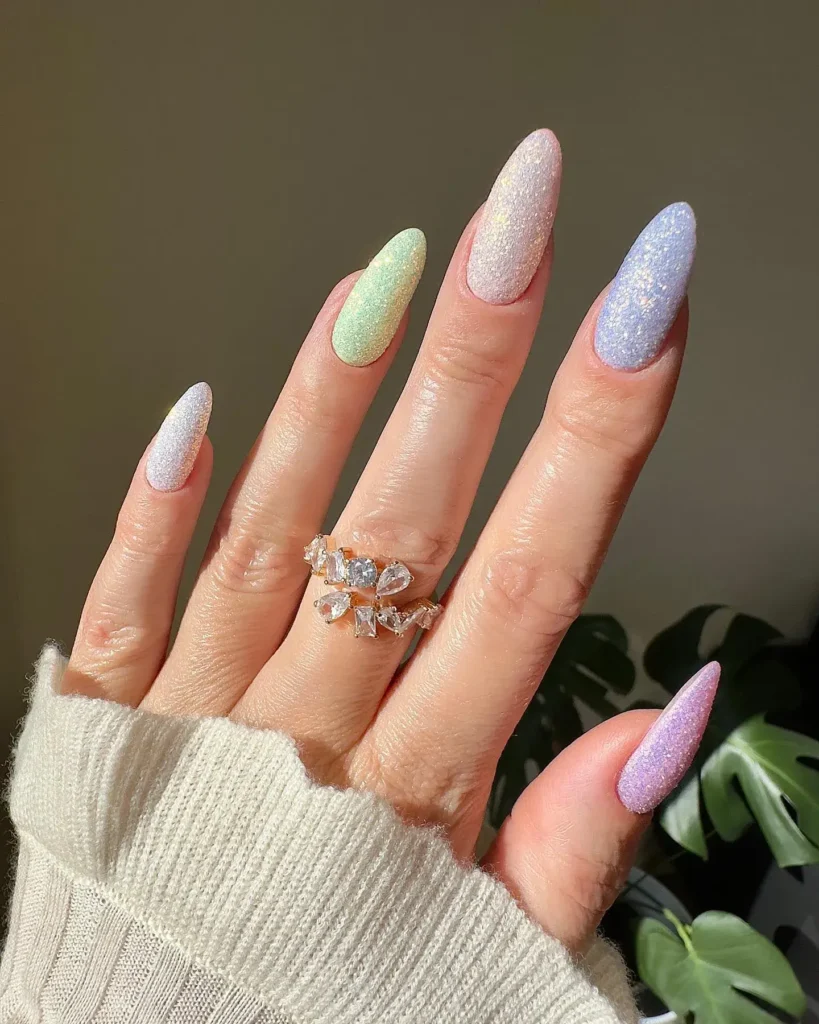
134. Raised Gel Flower Nails
Small flowers are built up with layered gel, giving them a soft, raised shape instead of sitting flat against the nail.
Perfect for: Floral lovers who want extra dimension
Best shapes: Almond, coffin
Pro tip: Build petals from the center outward and cure briefly between layers to hold their shape.
Time to DIY: 45 minutes
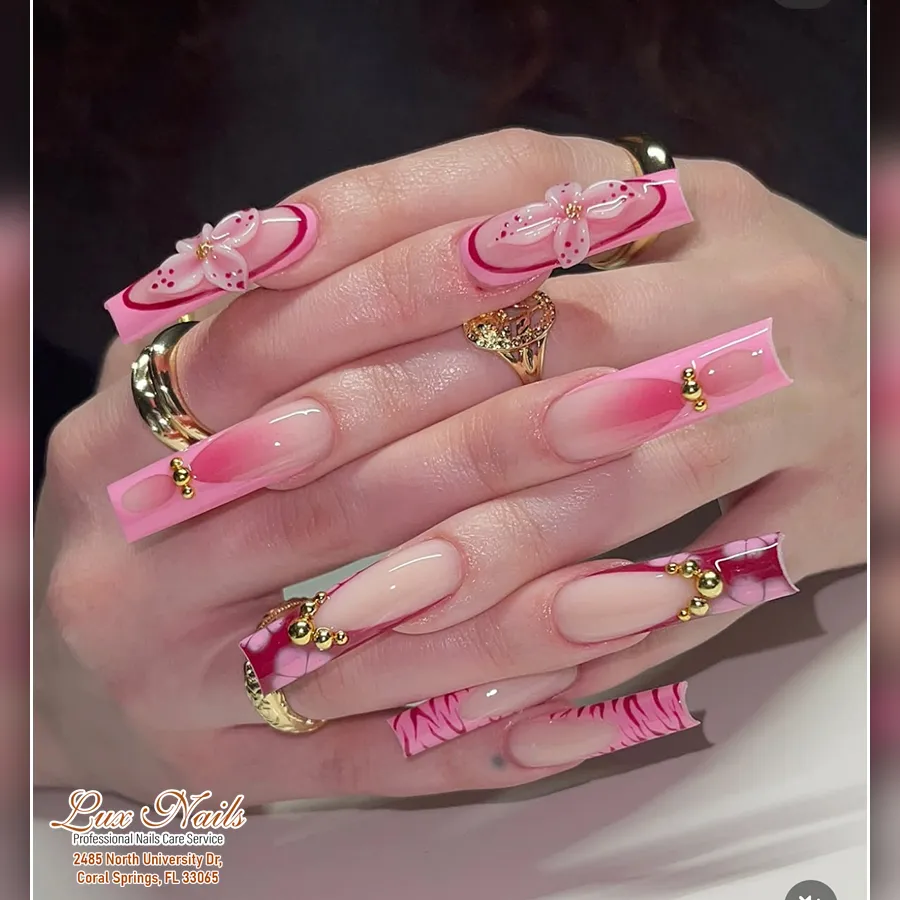
135. Encapsulated Glitter Nails
A layer of fine glitter is sealed between two layers of clear gel, creating a smooth surface with visible sparkle underneath.
Perfect for: Long-lasting shine, smooth glitter finish
Best shapes: Square, almond
Pro tip: Apply glitter in a thin, even layer before sealing, since clumps will show through the clear gel.
Time to DIY: 35 minutes
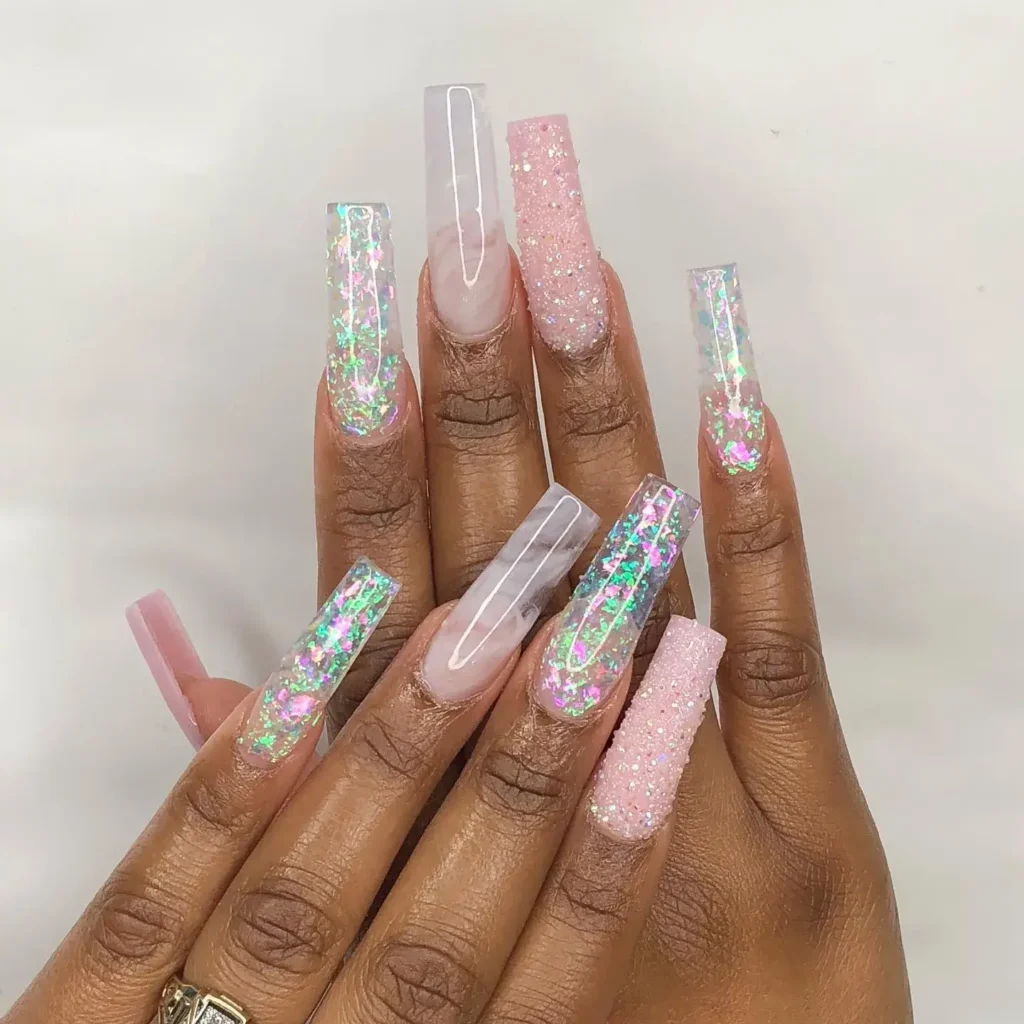
Blue Summer Nail Ideas
Blue works across nearly every skin tone and season, but summer brings out its brightest and most versatile range. From deep navy to soft sky tones, this color offers something for every style.
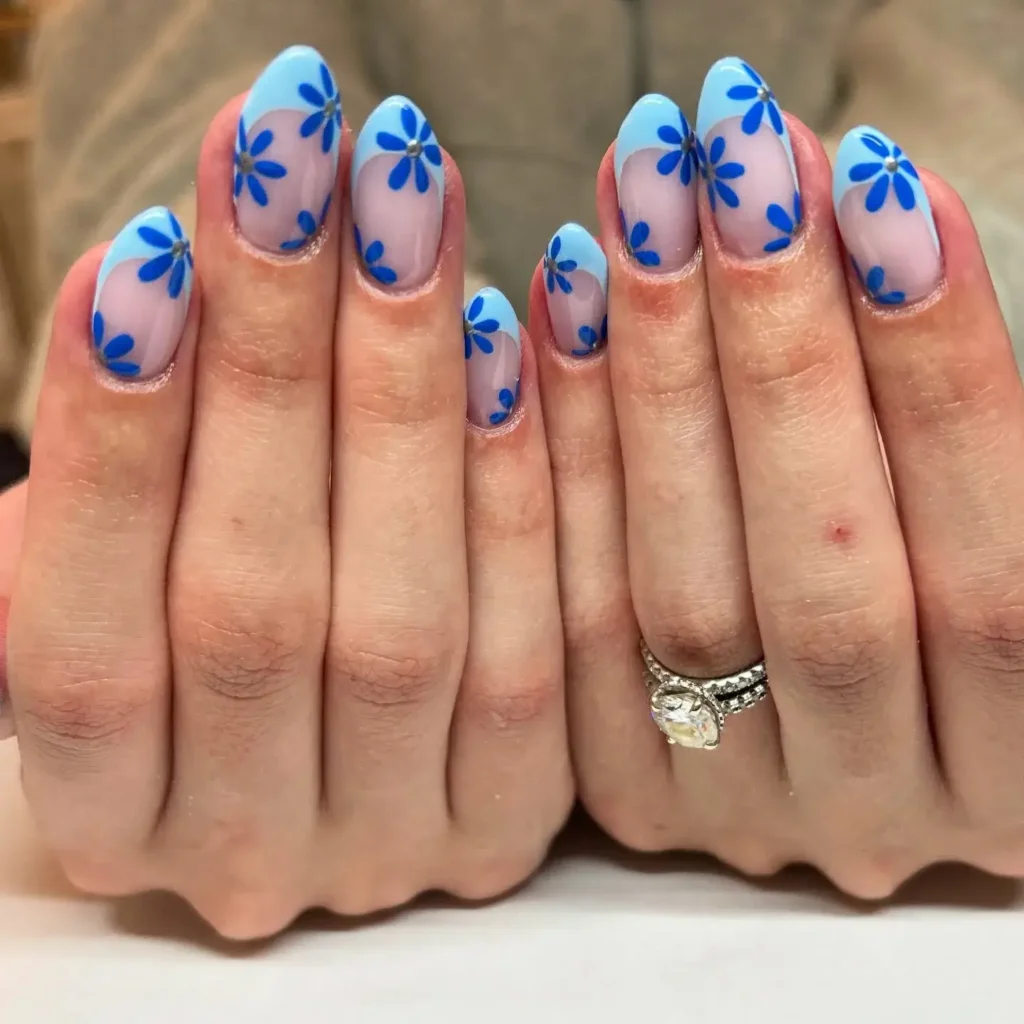
136. Cobalt Blue Glossy Nails
A rich, saturated cobalt blue covers the nail in a high-shine finish that reads as bold without needing extra detail.
Perfect for: Statement nails, evening events
Best shapes: Almond, coffin
Pro tip: Apply two coats for full opacity, since cobalt blue can look streaky with just one.
Time to DIY: 20 minutes
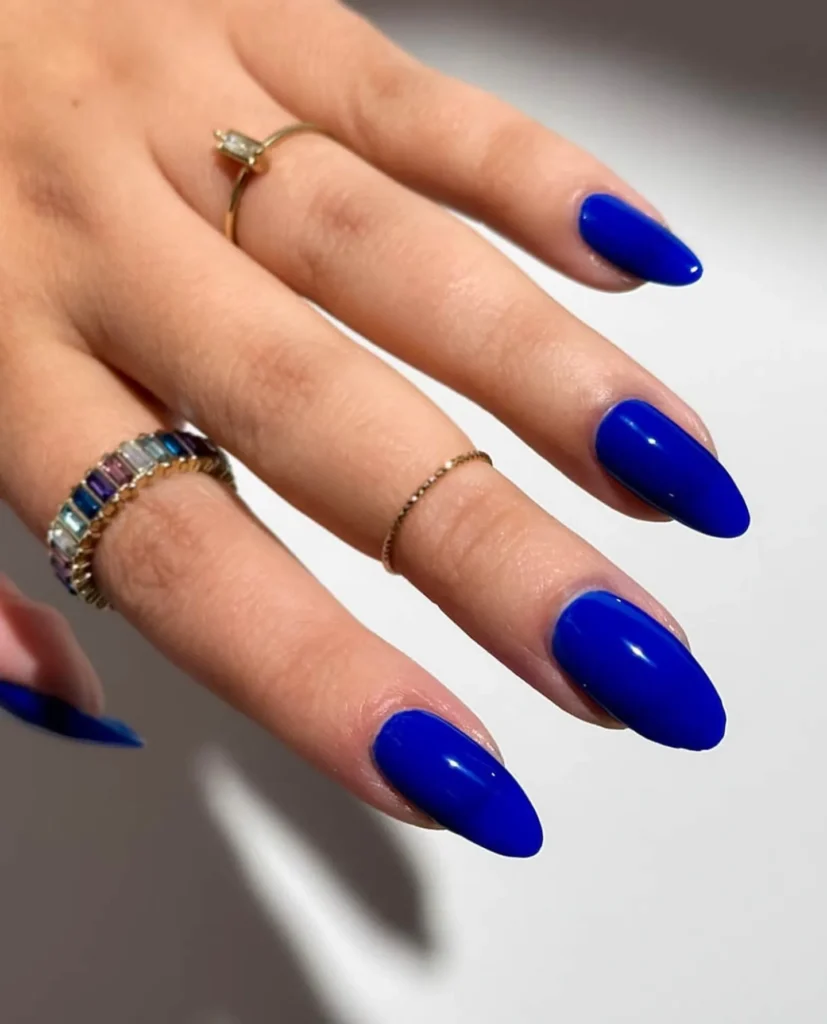
137. Sky Blue French Manicure
A soft sky blue French manicure replaces the classic white tip, keeping the French shape but softening the overall look.
Perfect for: Everyday wear, gentle color updates
Best shapes: Square, almond
Pro tip: French tip guides help keep the pale blue line clean and even.
Time to DIY: 25 minutes
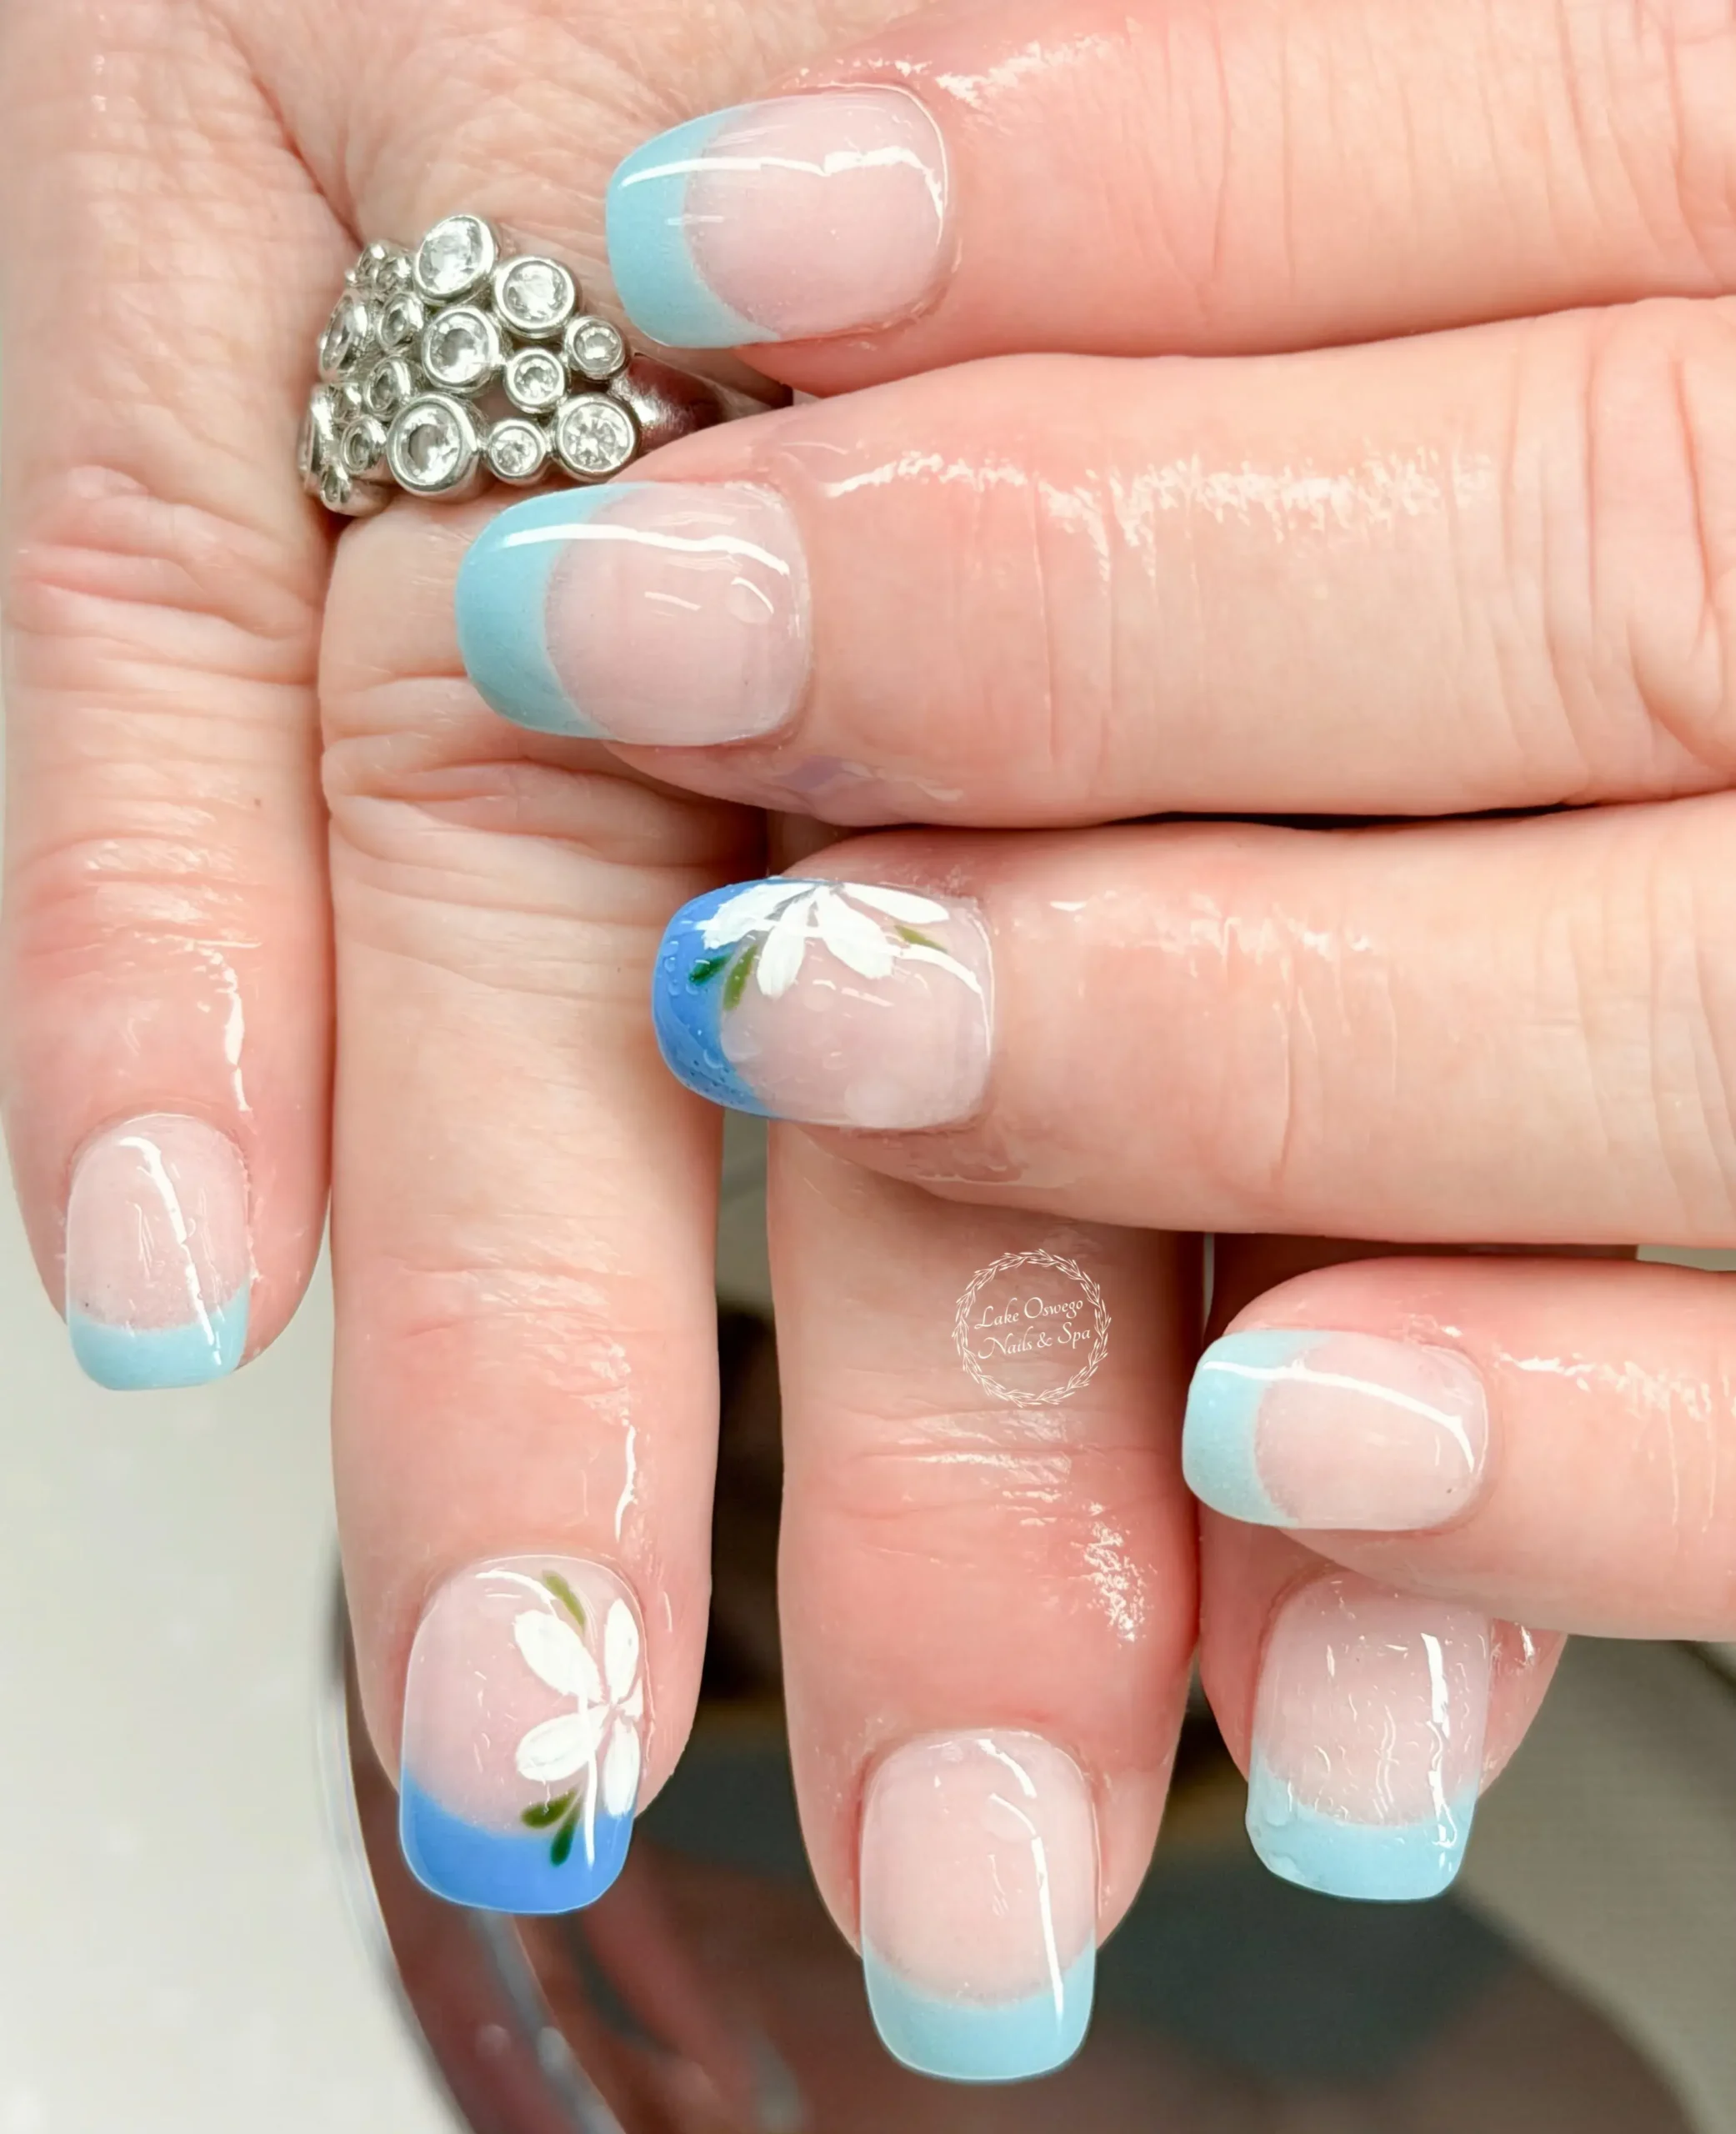
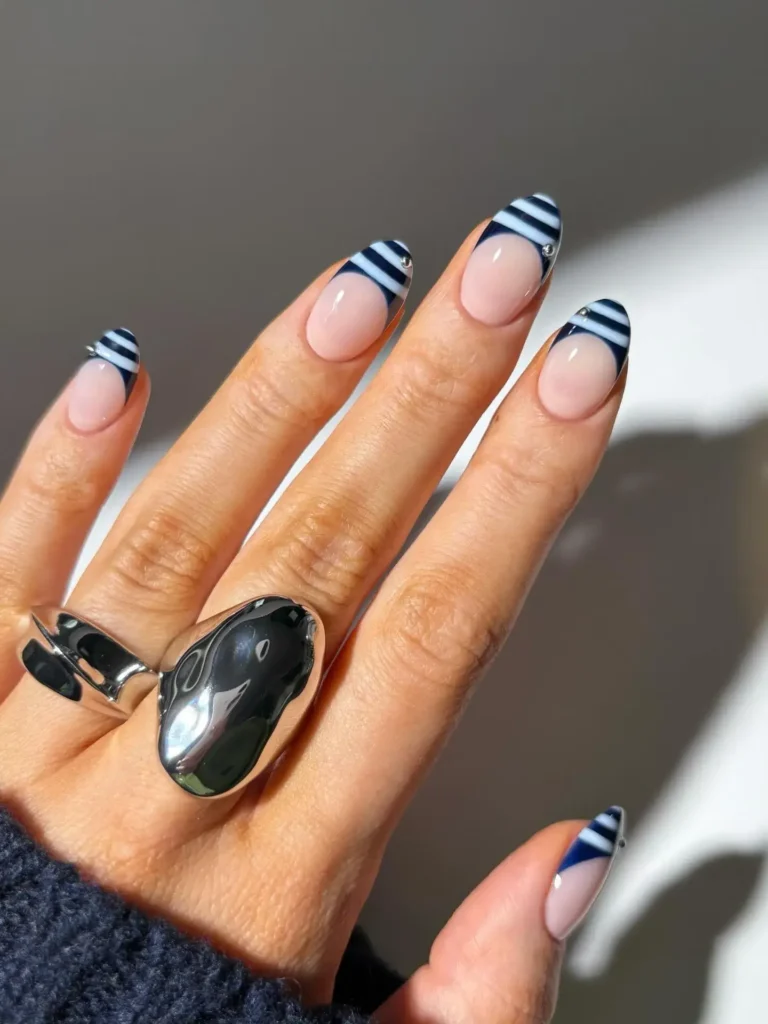
138. Navy & White Pinstripe Nails
Thin white pinstripes run across a deep navy base, creating a nautical, structured pattern.
Perfect for: Coastal styling, classic looks
Best shapes: Square, squoval
Pro tip: Let the navy base dry completely before adding white stripes to keep the lines crisp.
Time to DIY: 30 minutes
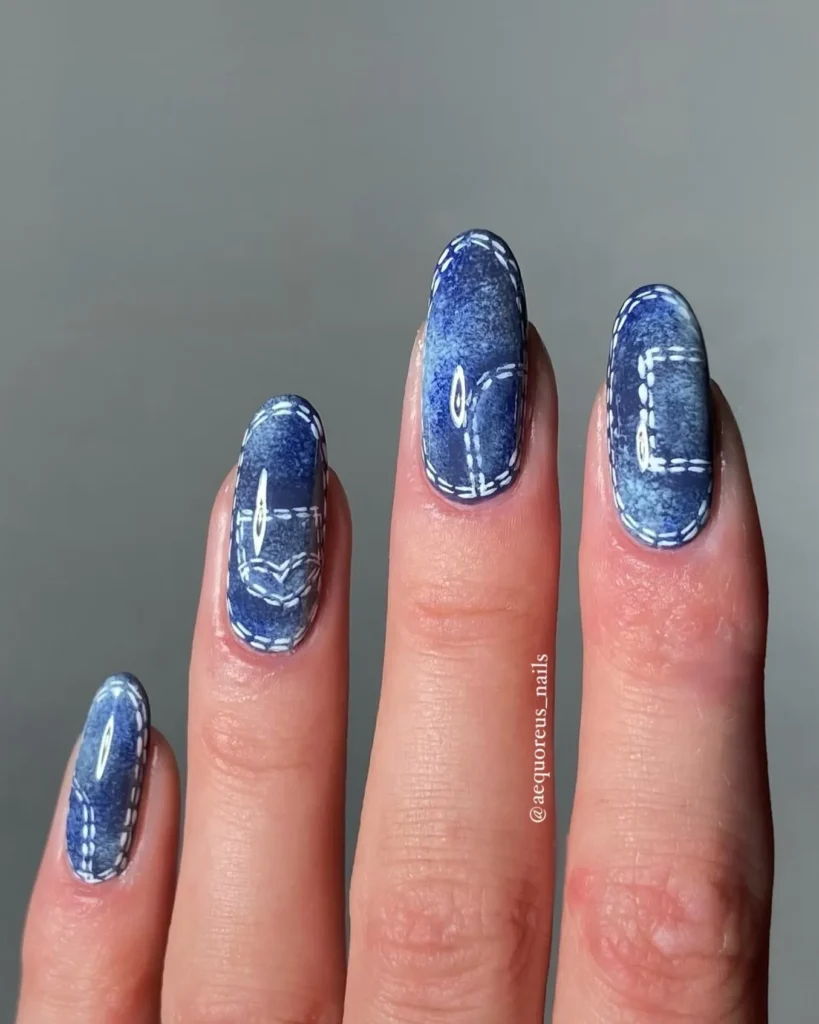
139. Denim-Inspired Blue Nails
A textured, slightly faded blue mimics the look of worn denim, sometimes paired with tiny stitch line details.
Perfect for: Casual summer styling
Best shapes: Square, oval
Pro tip: Dab a lighter blue over the base unevenly to create the faded, worn denim effect.
Time to DIY: 30 minutes
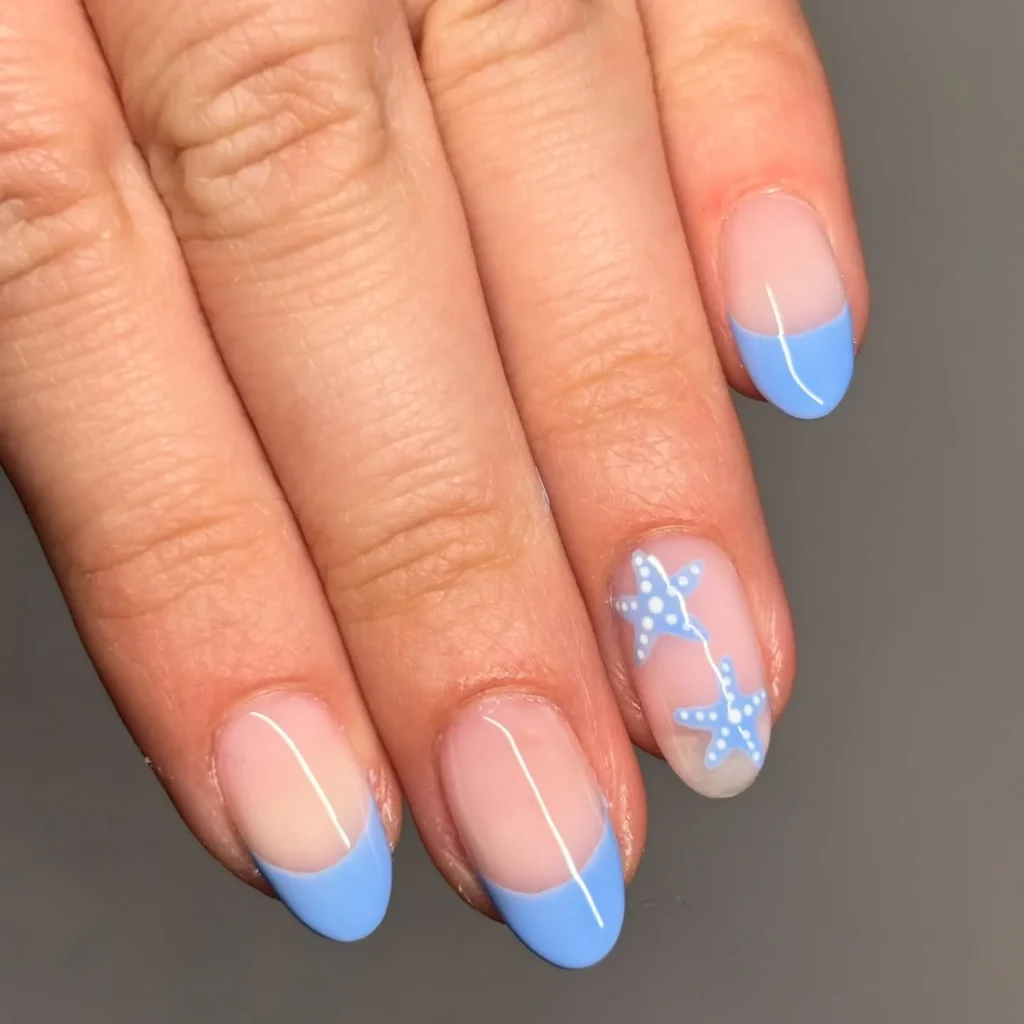
140. Baby Blue Starfish Accent
A pale blue base pairs with a small hand-painted or 3D starfish on one accent nail.
Perfect for: Beach trips, summer vacations
Best shapes: Coffin, almond
Pro tip: Add texture to the starfish with fine white lines once the base shape has dried.
Time to DIY: 30 minutes
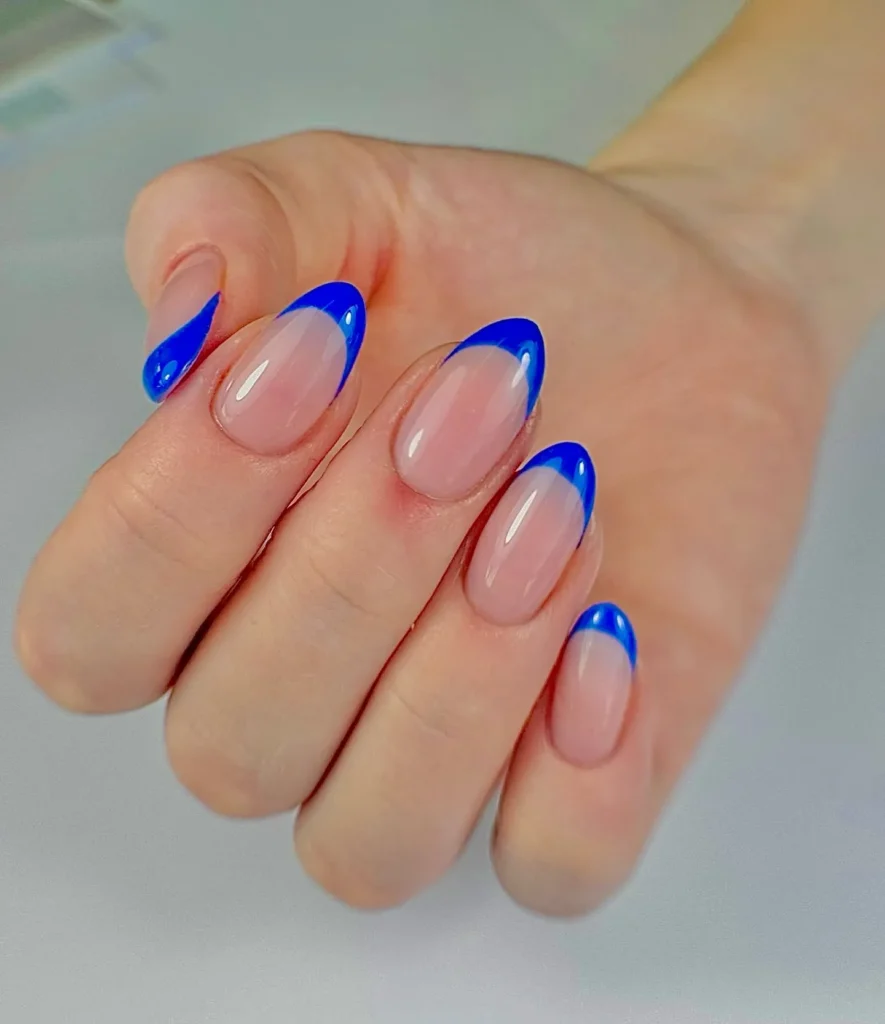
141. Electric Blue Tip Nails
A bright, saturated blue covers just the tip of the nail, set against a clean, nude or white base.
Perfect for: Bold color without full coverage
Best shapes: Square, almond
Pro tip: Use striping tape to keep the tip line sharp and straight.
Time to DIY: 25 minutes
142. Blue Marble Nails
Swirled blue and white patterns cover the nail, mimicking the natural veining found in marble stone.
Perfect for: Elegant, artistic styling
Best shapes: Almond, coffin
Pro tip: Drag a thin brush through wet polish in loose swirls rather than painting solid lines.
Time to DIY: 35 minutes
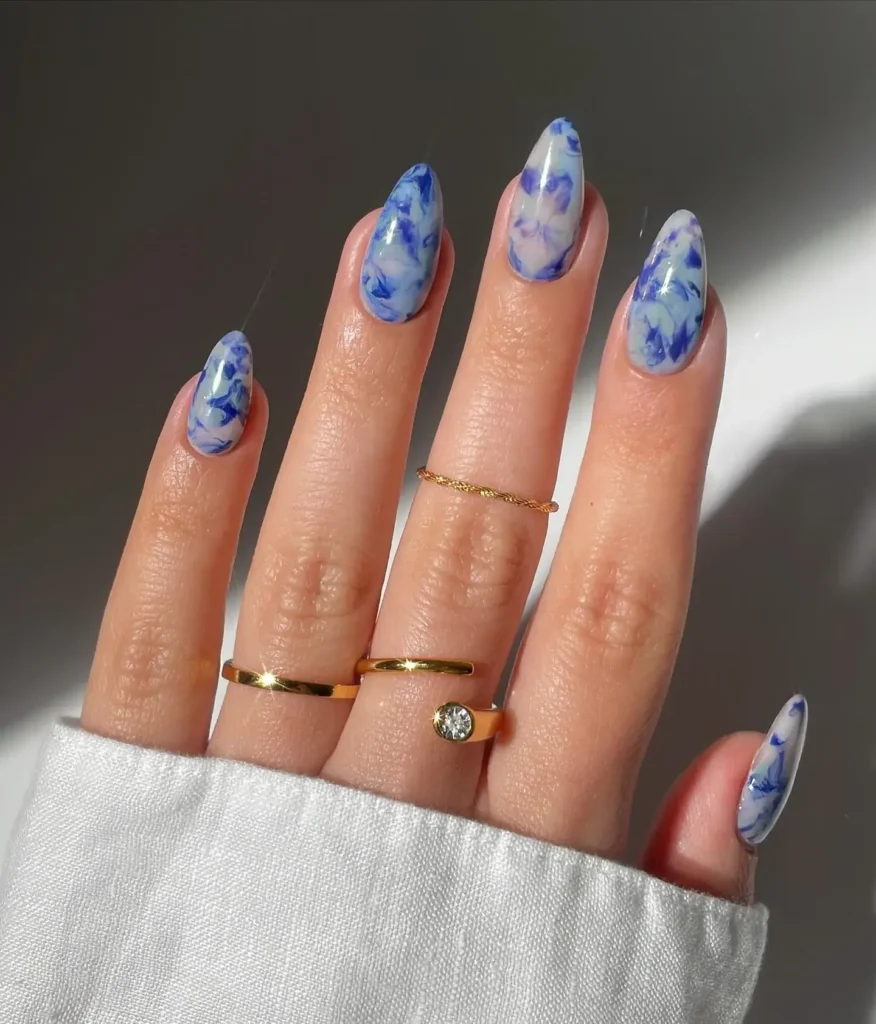
143. Deep Teal Glossy Nails
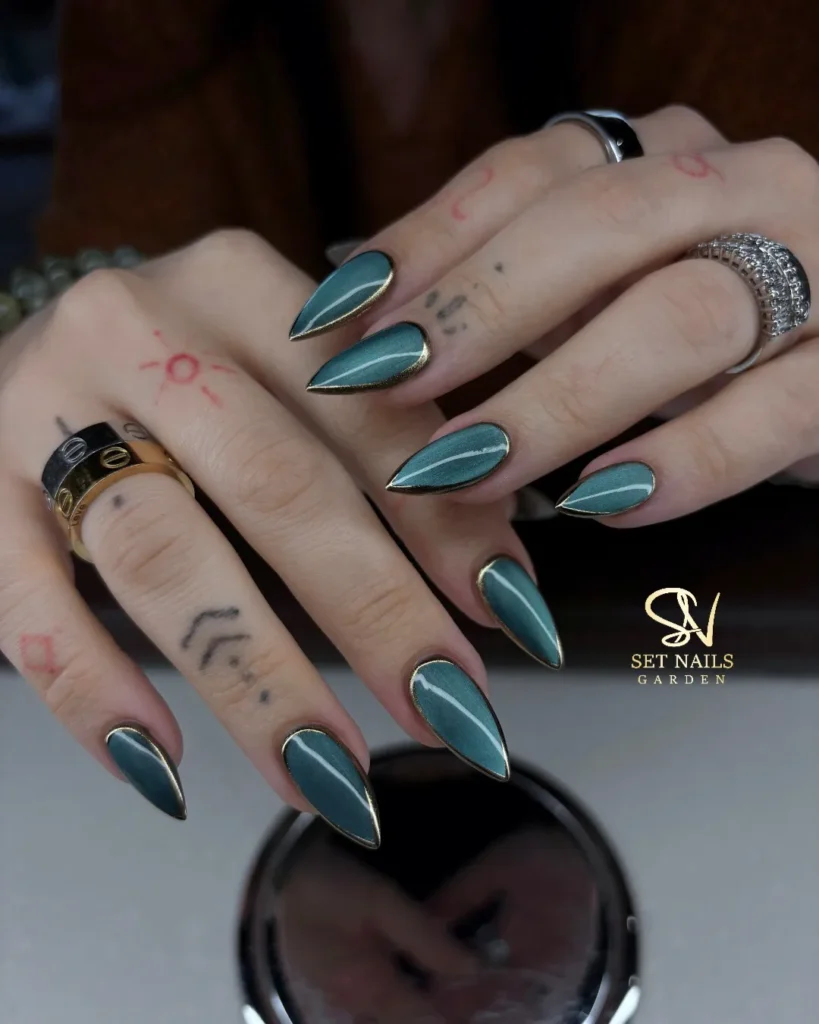
A rich teal shade, sitting between blue and green, covers the nail in a glossy, high-shine finish.
Perfect for: Versatile everyday wear
Best shapes: Oval, squoval
Pro tip: Teal shows brush strokes easily, so use thin, even coats for the smoothest finish.
Time to DIY: 20 minutes
Pink Summer Nail Ideas
Pink remains one of the most requested colors every summer. The range runs from soft and muted to loud and saturated, which makes it one of the easiest colors to personalize.
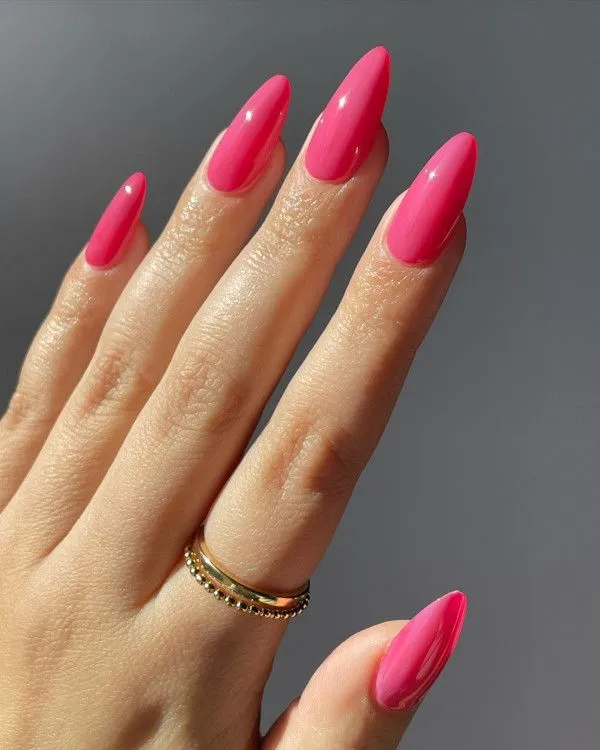
144. Bubblegum Pink Glossy Nails
A bright, saturated pink covers the nail in a high-shine finish, reading as fun and youthful without any added detail.
Perfect for: Playful everyday wear
Best shapes: Almond, square
Pro tip: Apply two coats for full opacity, since bright pinks often look sheer with just one.
Time to DIY: 20 minutes
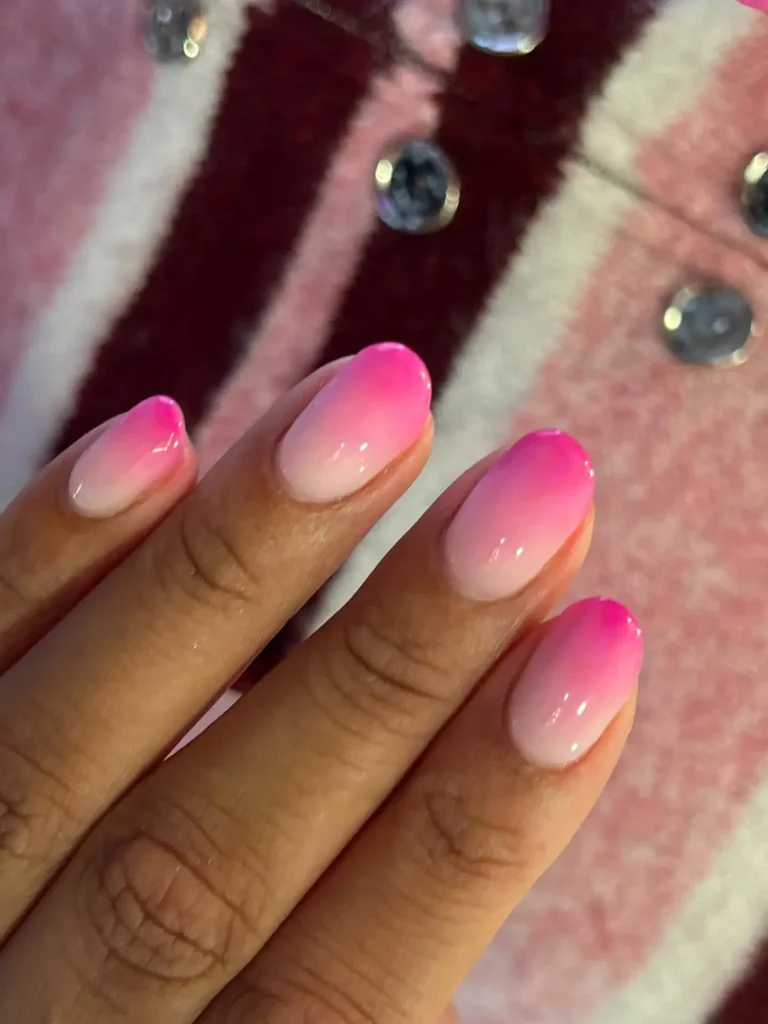
145. Hot Pink Bow Nail Art
A small 3D or painted bow sits on one accent nail, set against a solid hot pink base.
Perfect for: Girly, statement styling
Best shapes: Coffin, almond
Pro tip: Sketch the bow shape lightly first if painting freehand, since bows rely on symmetry to look clean.
Time to DIY: 30 minutes
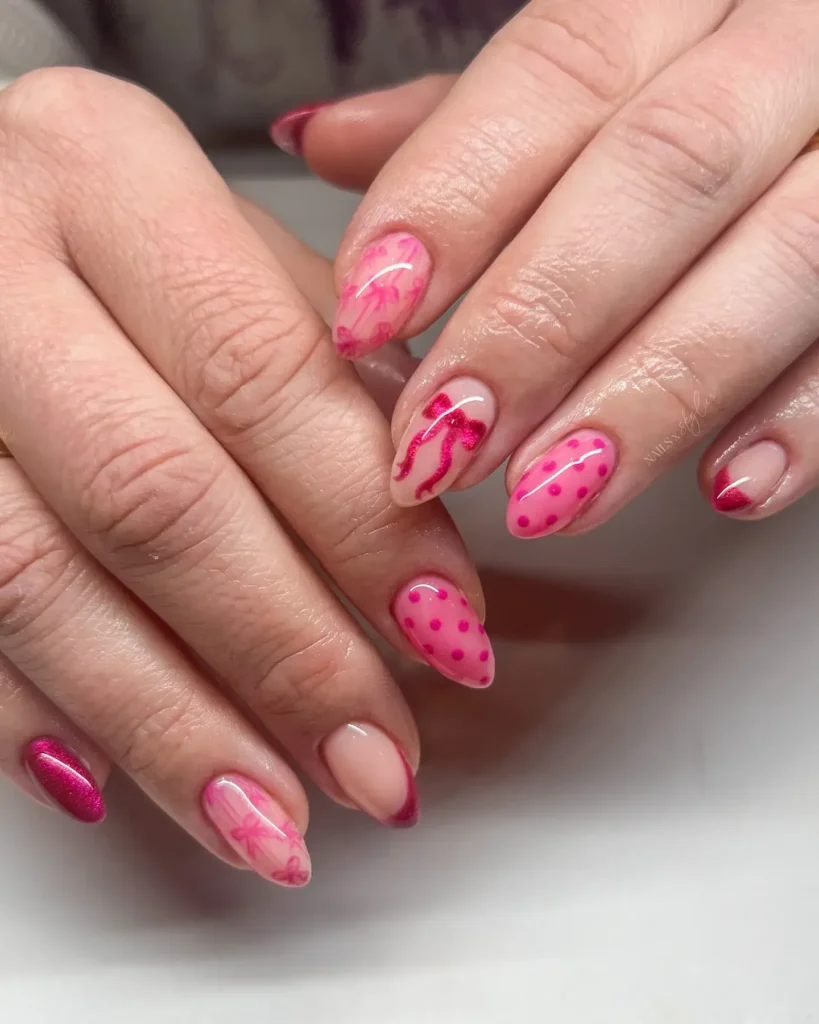
146. Dusty Rose Nails
A muted, brownish pink covers the nail in a soft matte or semi-gloss finish, reading as understated rather than bright.
Perfect for: Work settings, quiet everyday wear
Best shapes: Oval, square
Pro tip: A matte topcoat deepens the dusty tone and keeps the finish looking soft.
Time to DIY: 20 minutes
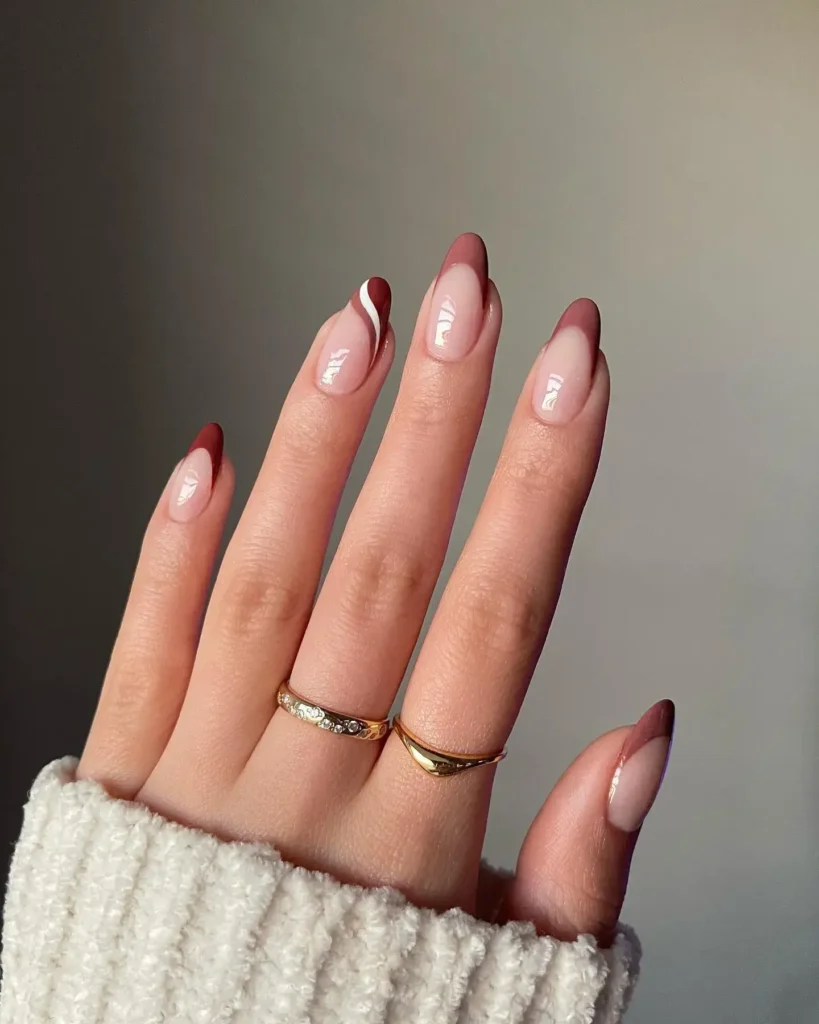
147. Pink Checkerboard French
A small pink and white checkerboard pattern replaces the classic solid French tip.
Perfect for: Playful updates to a classic look
Best shapes: Square, almond
Pro tip: Use striping tape to section off even squares before filling them in.
Time to DIY: 35 minutes
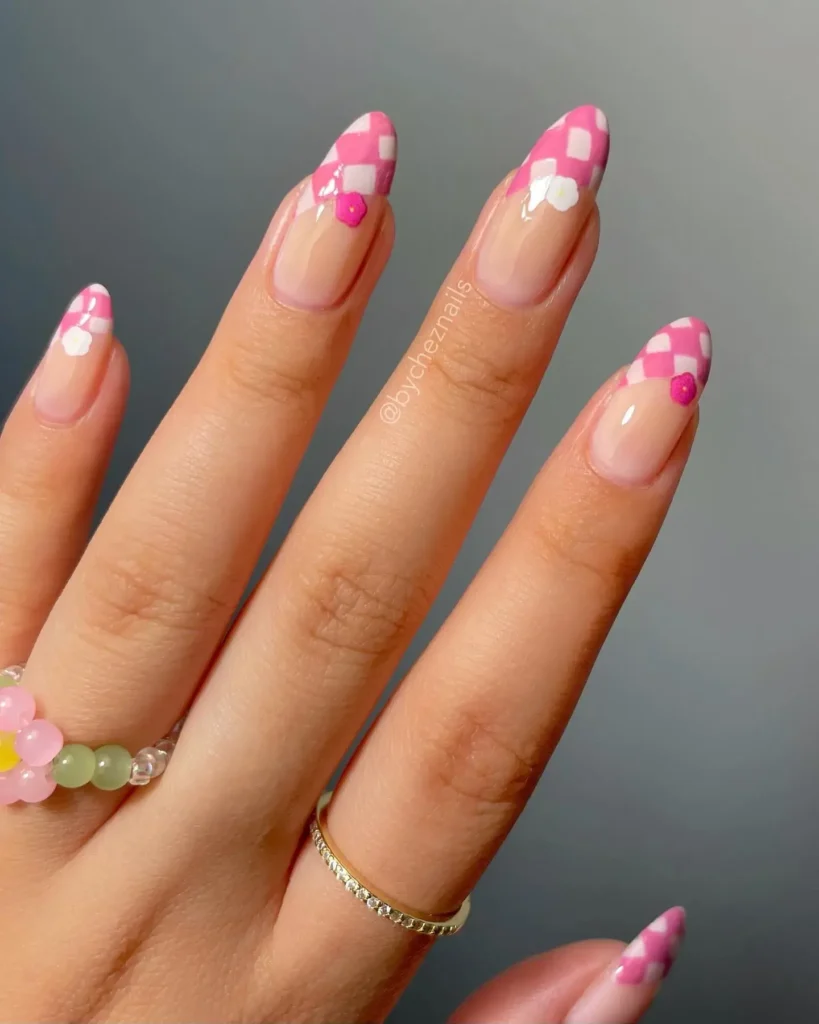
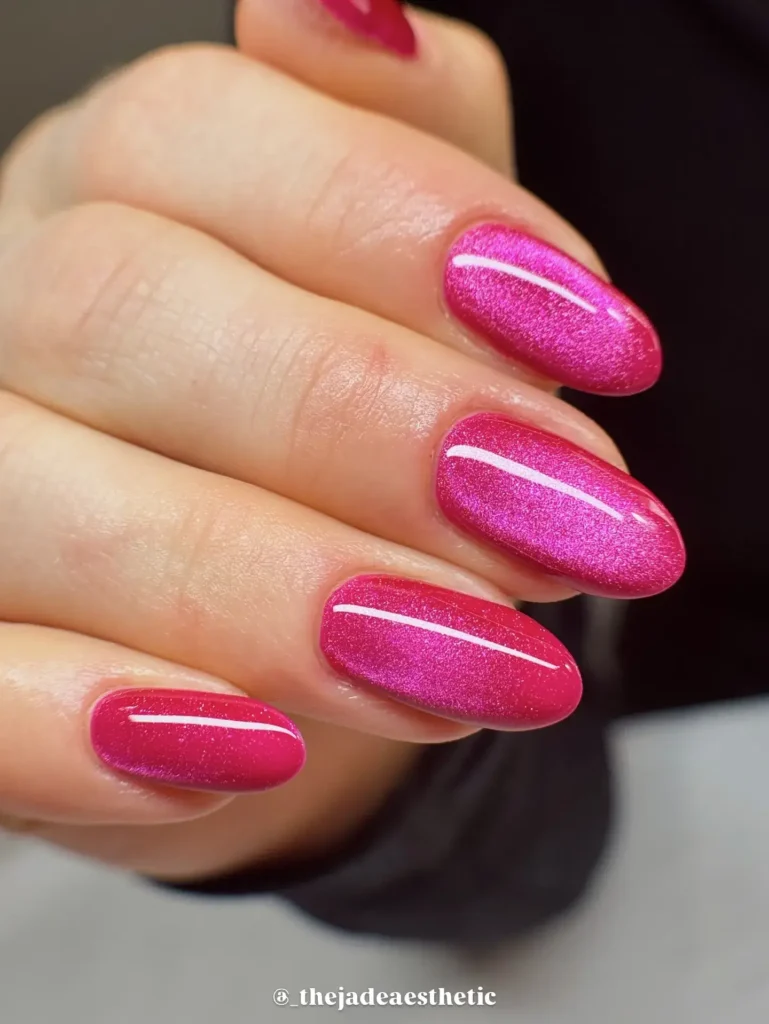
148. Fuchsia Cat-Eye Nails
A magnetic cat-eye polish in deep fuchsia creates a shifting line of shimmer that moves as your hand catches the light.
Perfect for: Bold color with subtle shine
Best shapes: Almond, coffin
Pro tip: Hold the magnet close to the nail without touching the wet polish for a crisp shimmer line.
Time to DIY: 25 minutes
149. Blush Pink Marble Nails
Soft pink and white swirl together across the nail, mimicking the natural veining of marble stone.
Perfect for: Elegant, soft glam looks
Best shapes: Almond, coffin
Pro tip: Drag a thin brush through wet polish in loose swirls rather than painting solid lines.
Time to DIY: 35 minutes
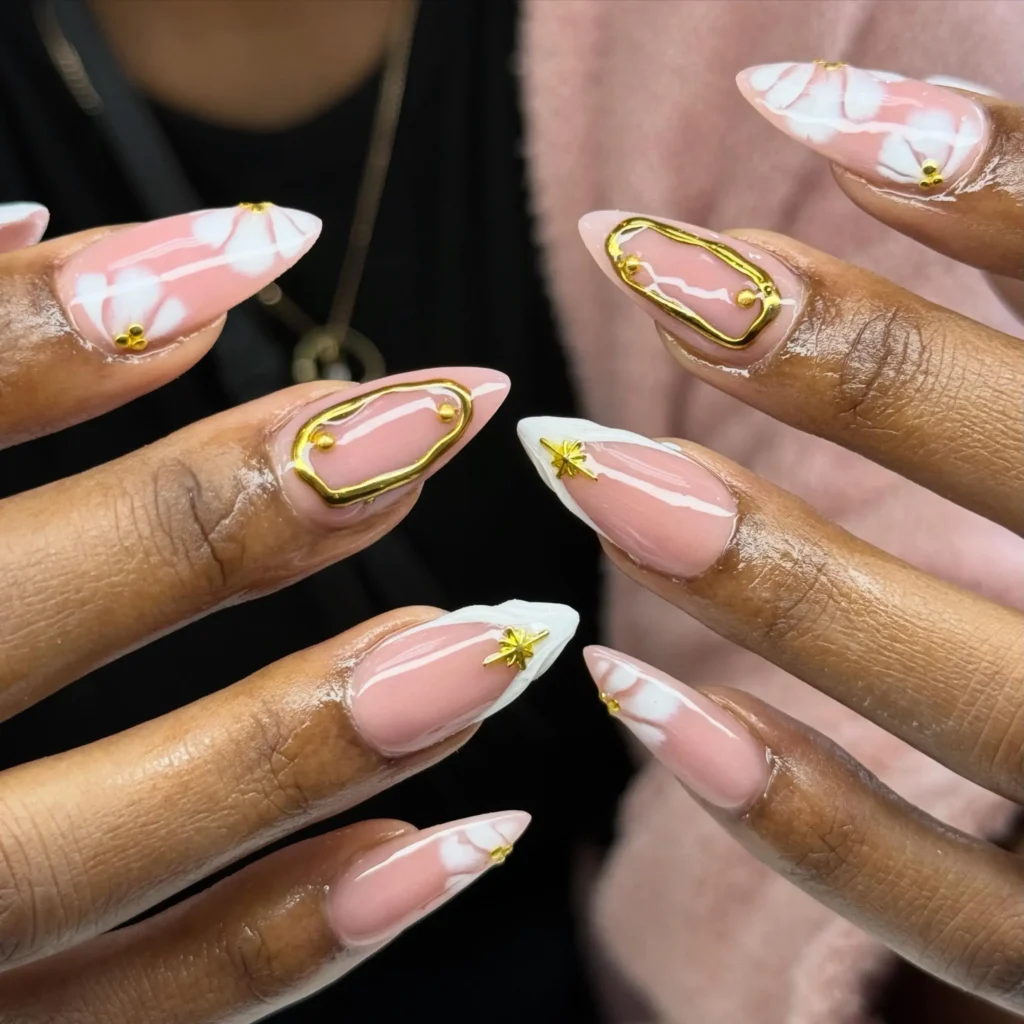
150. Pink & White Two-Tone Nails
Alternating nails are painted solid pink and solid white, creating a clean, two-tone set.
Perfect for: Simple color pairing, minimal effort
Best shapes: Square, squoval
Pro tip: Keep the finish matching across both colors, either both glossy or both matte, for a cohesive look.
Time to DIY: 20 minutes
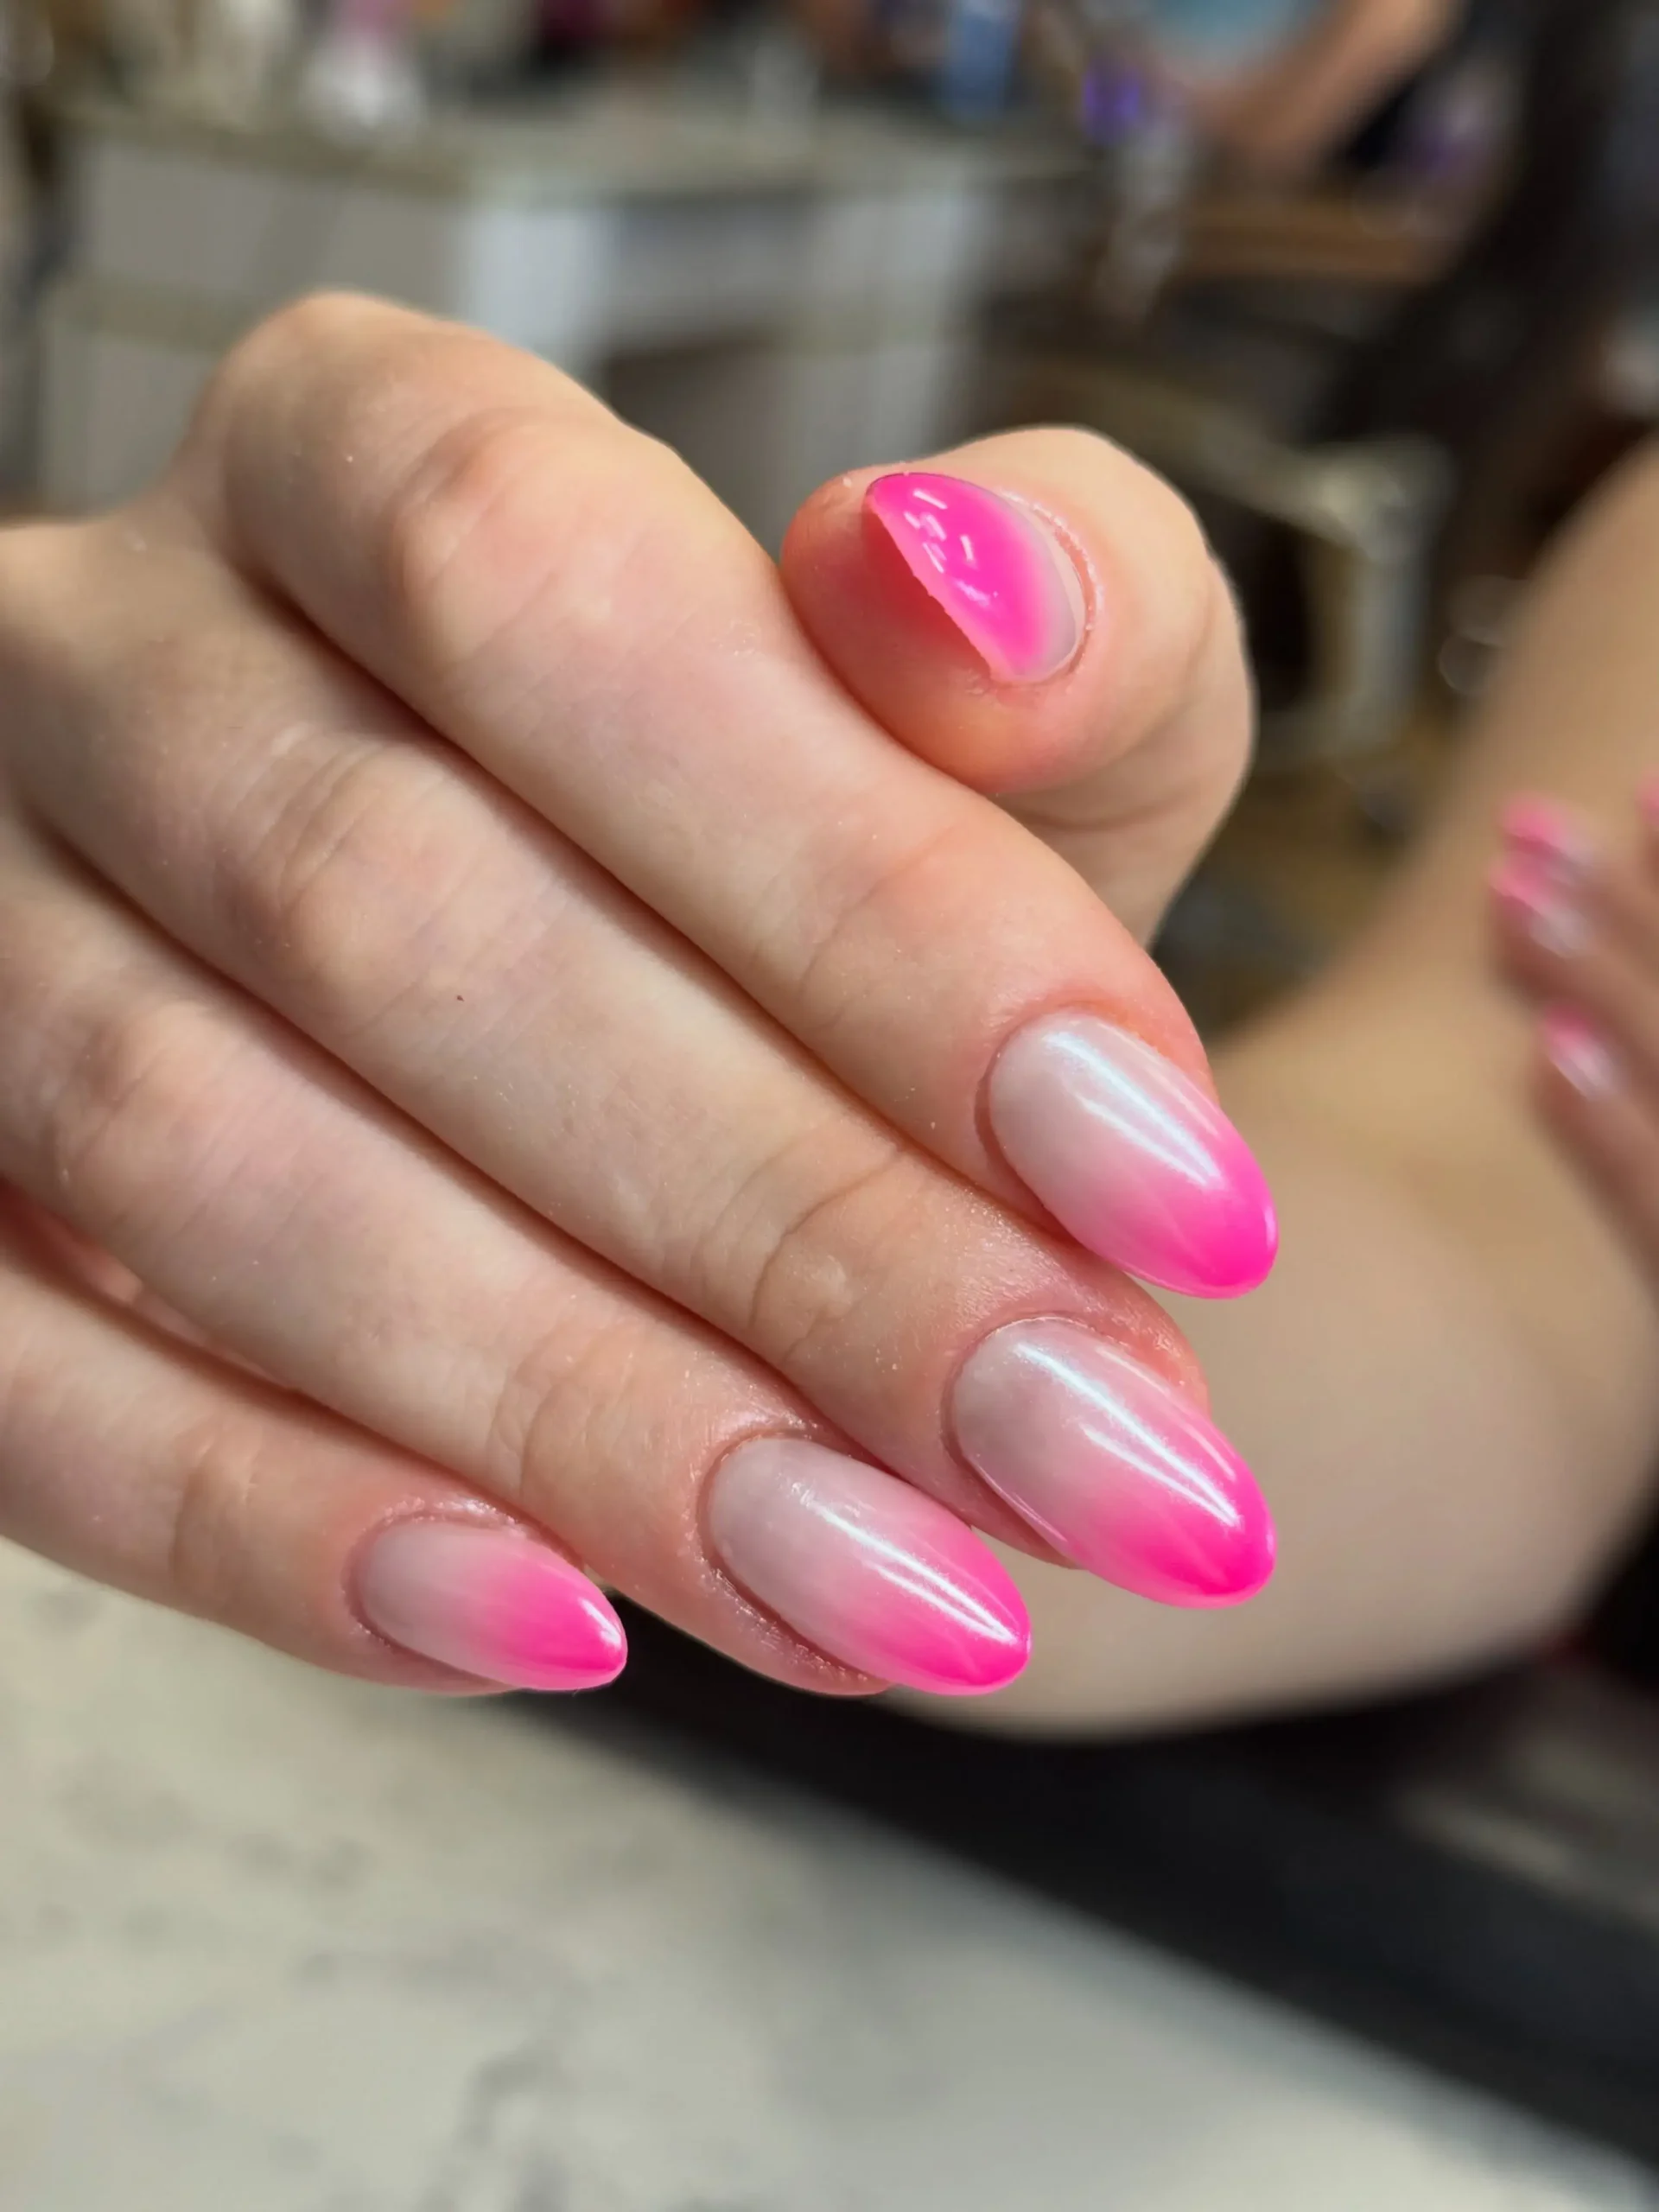
151. Barbiecore Pink Nails
A bold, saturated hot pink covers every nail in a bright, glossy finish, embracing maximum color with no additional detail.
Perfect for: Statement looks, confident color lovers
Best shapes: Almond, coffin
Pro tip: Use a bright white base coat underneath to make the hot pink look more vivid and opaque.
Time to DIY: 20 minutes
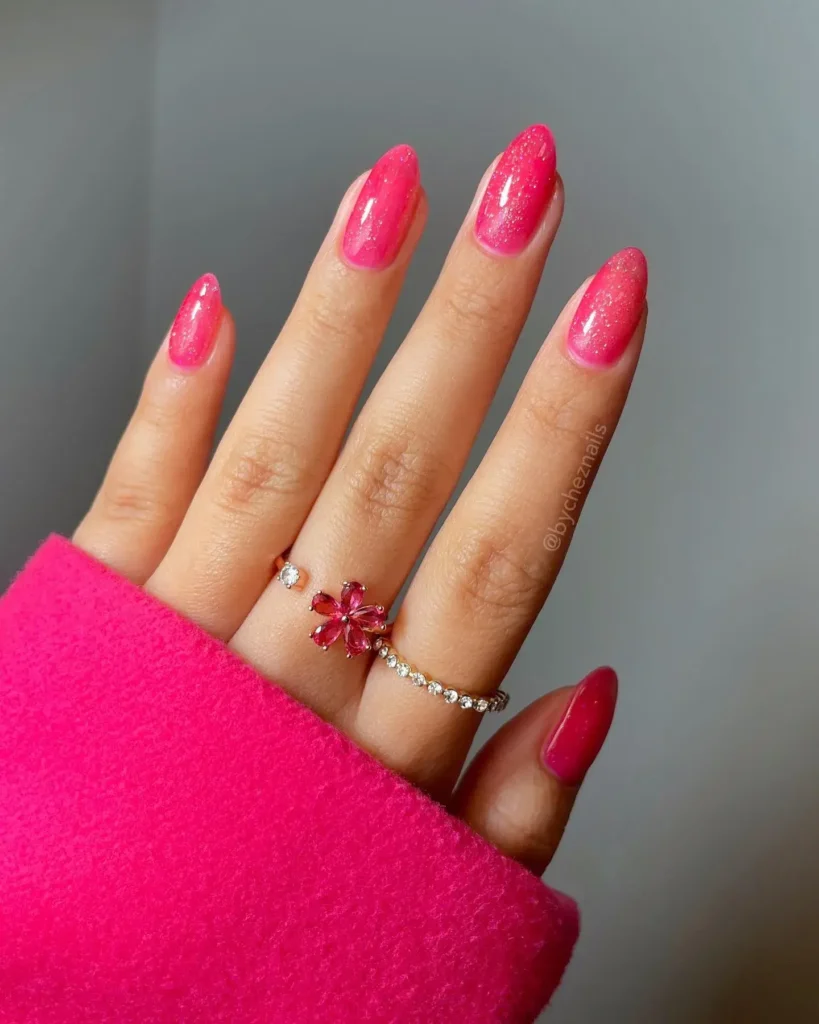
Yellow & Butter Yellow Summer Nail Ideas
Yellow brings warmth and energy to summer nails without feeling as loud as neon shades. Butter yellow in particular has stayed popular for two summers running, proving it is more than a passing trend.
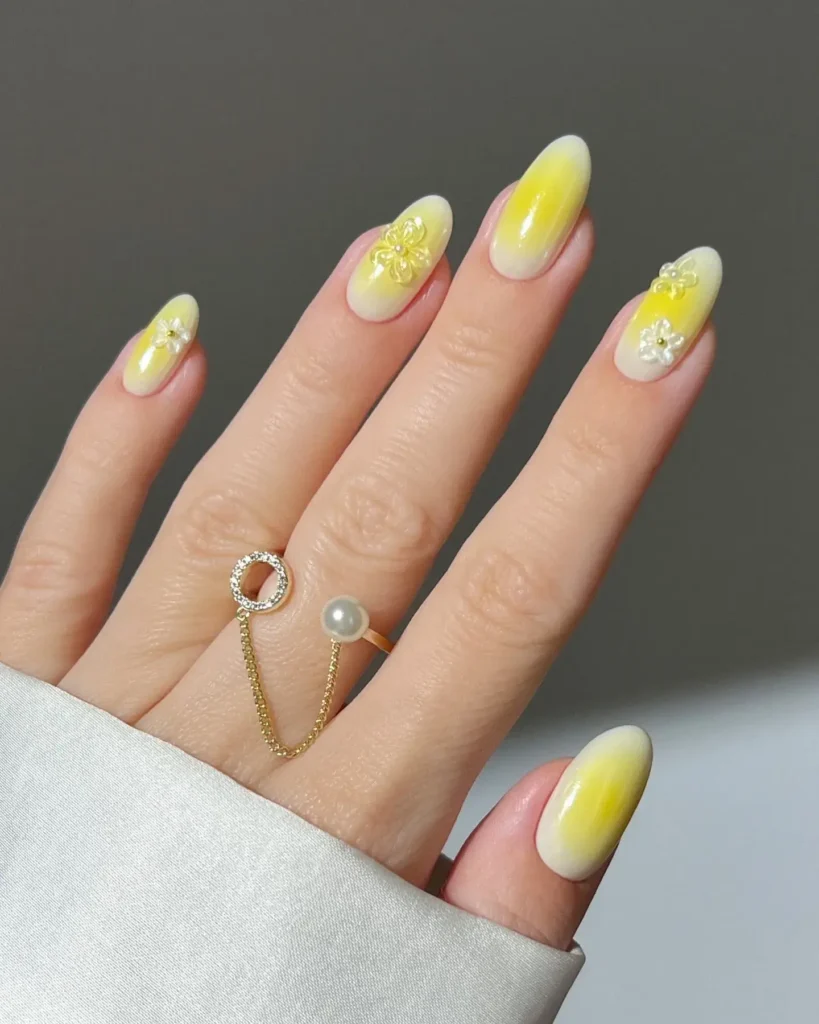
152. Classic Butter Yellow Gloss
A soft, creamy yellow covers the nail in a smooth, glossy finish that feels warm without being overpowering.
Perfect for: Everyday wear, versatile styling
Best shapes: Almond, square
Pro tip: Two thin coats give the best coverage, since butter yellow can look streaky if applied too thick.
Time to DIY: 20 minutes
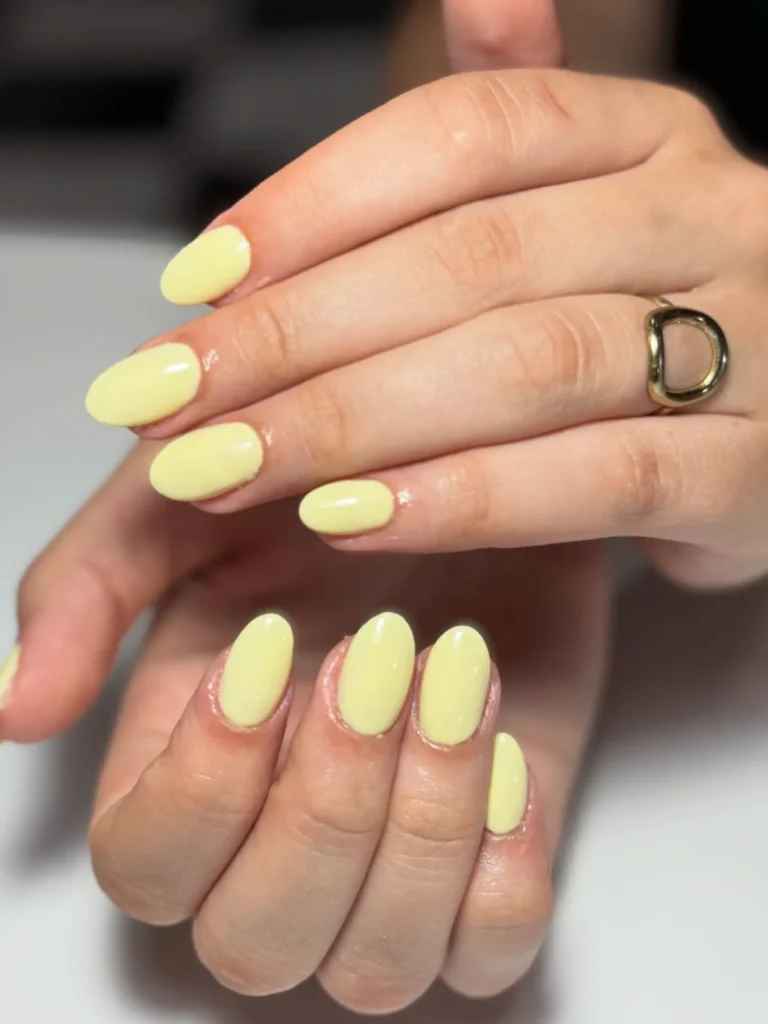
153. Yellow Gingham Nails
A small checkered pattern in yellow and white covers the nail, resembling a classic picnic blanket print.
Perfect for: Picnics, casual summer days
Best shapes: Square, squoval
Pro tip: Use striping tape in a grid pattern to keep the checks even and aligned.
Time to DIY: 35 minutes
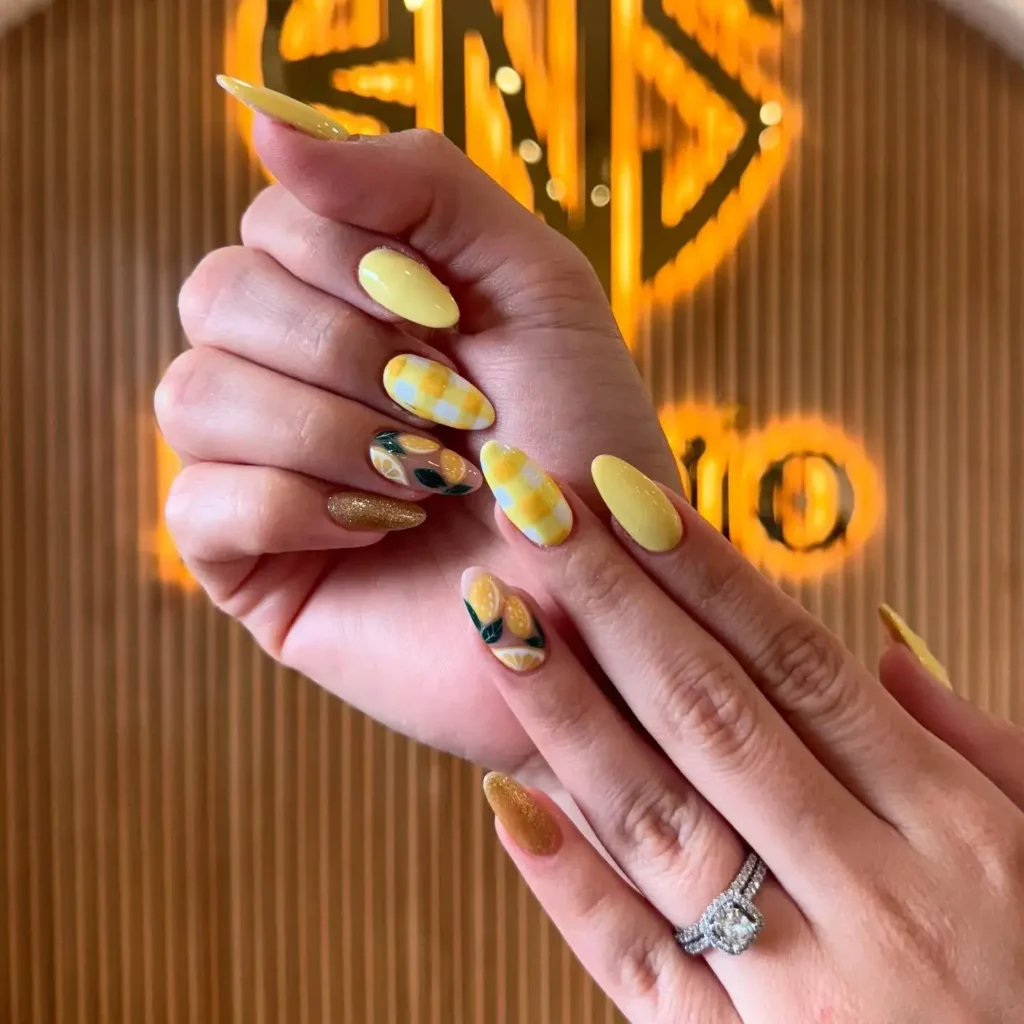
154. Lemon Yellow Oval Nails
A bright lemon yellow covers the nail shape entirely, using a bold, single tone to create a clean, punchy look.
Perfect for: Bold color, minimal detail
Best shapes: Oval
Pro tip: A white base coat underneath helps bright yellow look more opaque and vivid.
Time to DIY: 20 minutes
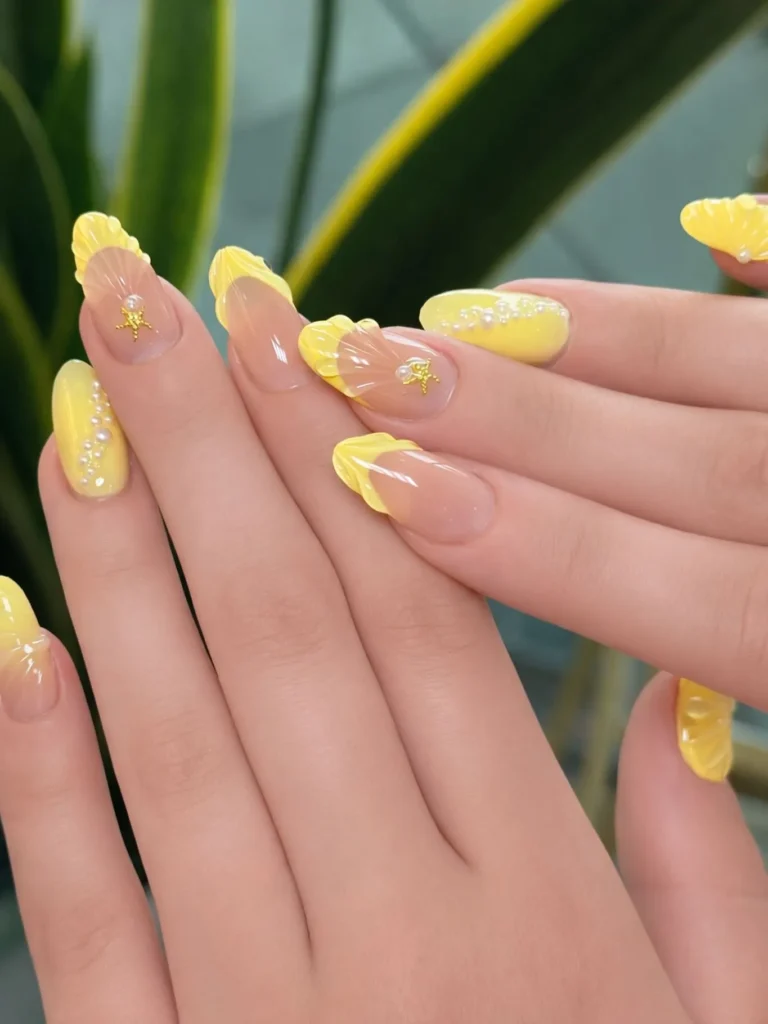
155. Yellow & Gold Accent Nails
Solid yellow nails are paired with one or two accent nails featuring fine gold foil or gold leaf detailing.
Perfect for: Elevated everyday looks
Best shapes: Almond, coffin
Pro tip: Apply gold foil while the topcoat is still tacky so it adheres without extra glue.
Time to DIY: 30 minutes
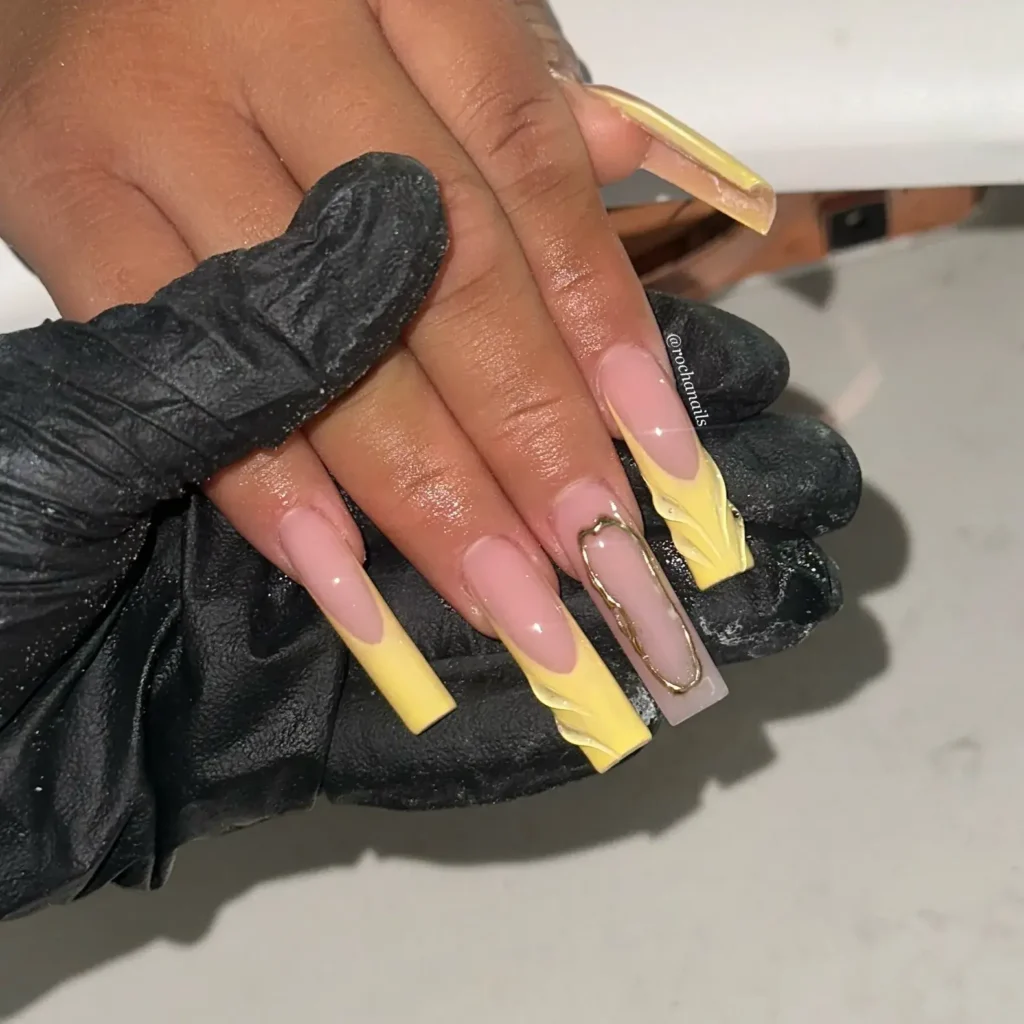
156. Marigold Ombre Tips
A deep marigold yellow fades into a lighter shade near the cuticle, creating a warm, sunny gradient.
Perfect for: Warm weather styling
Best shapes: Square, almond
Pro tip: Sponge the darker color onto the tip only, blending upward for a smooth fade.
Time to DIY: 30 minutes
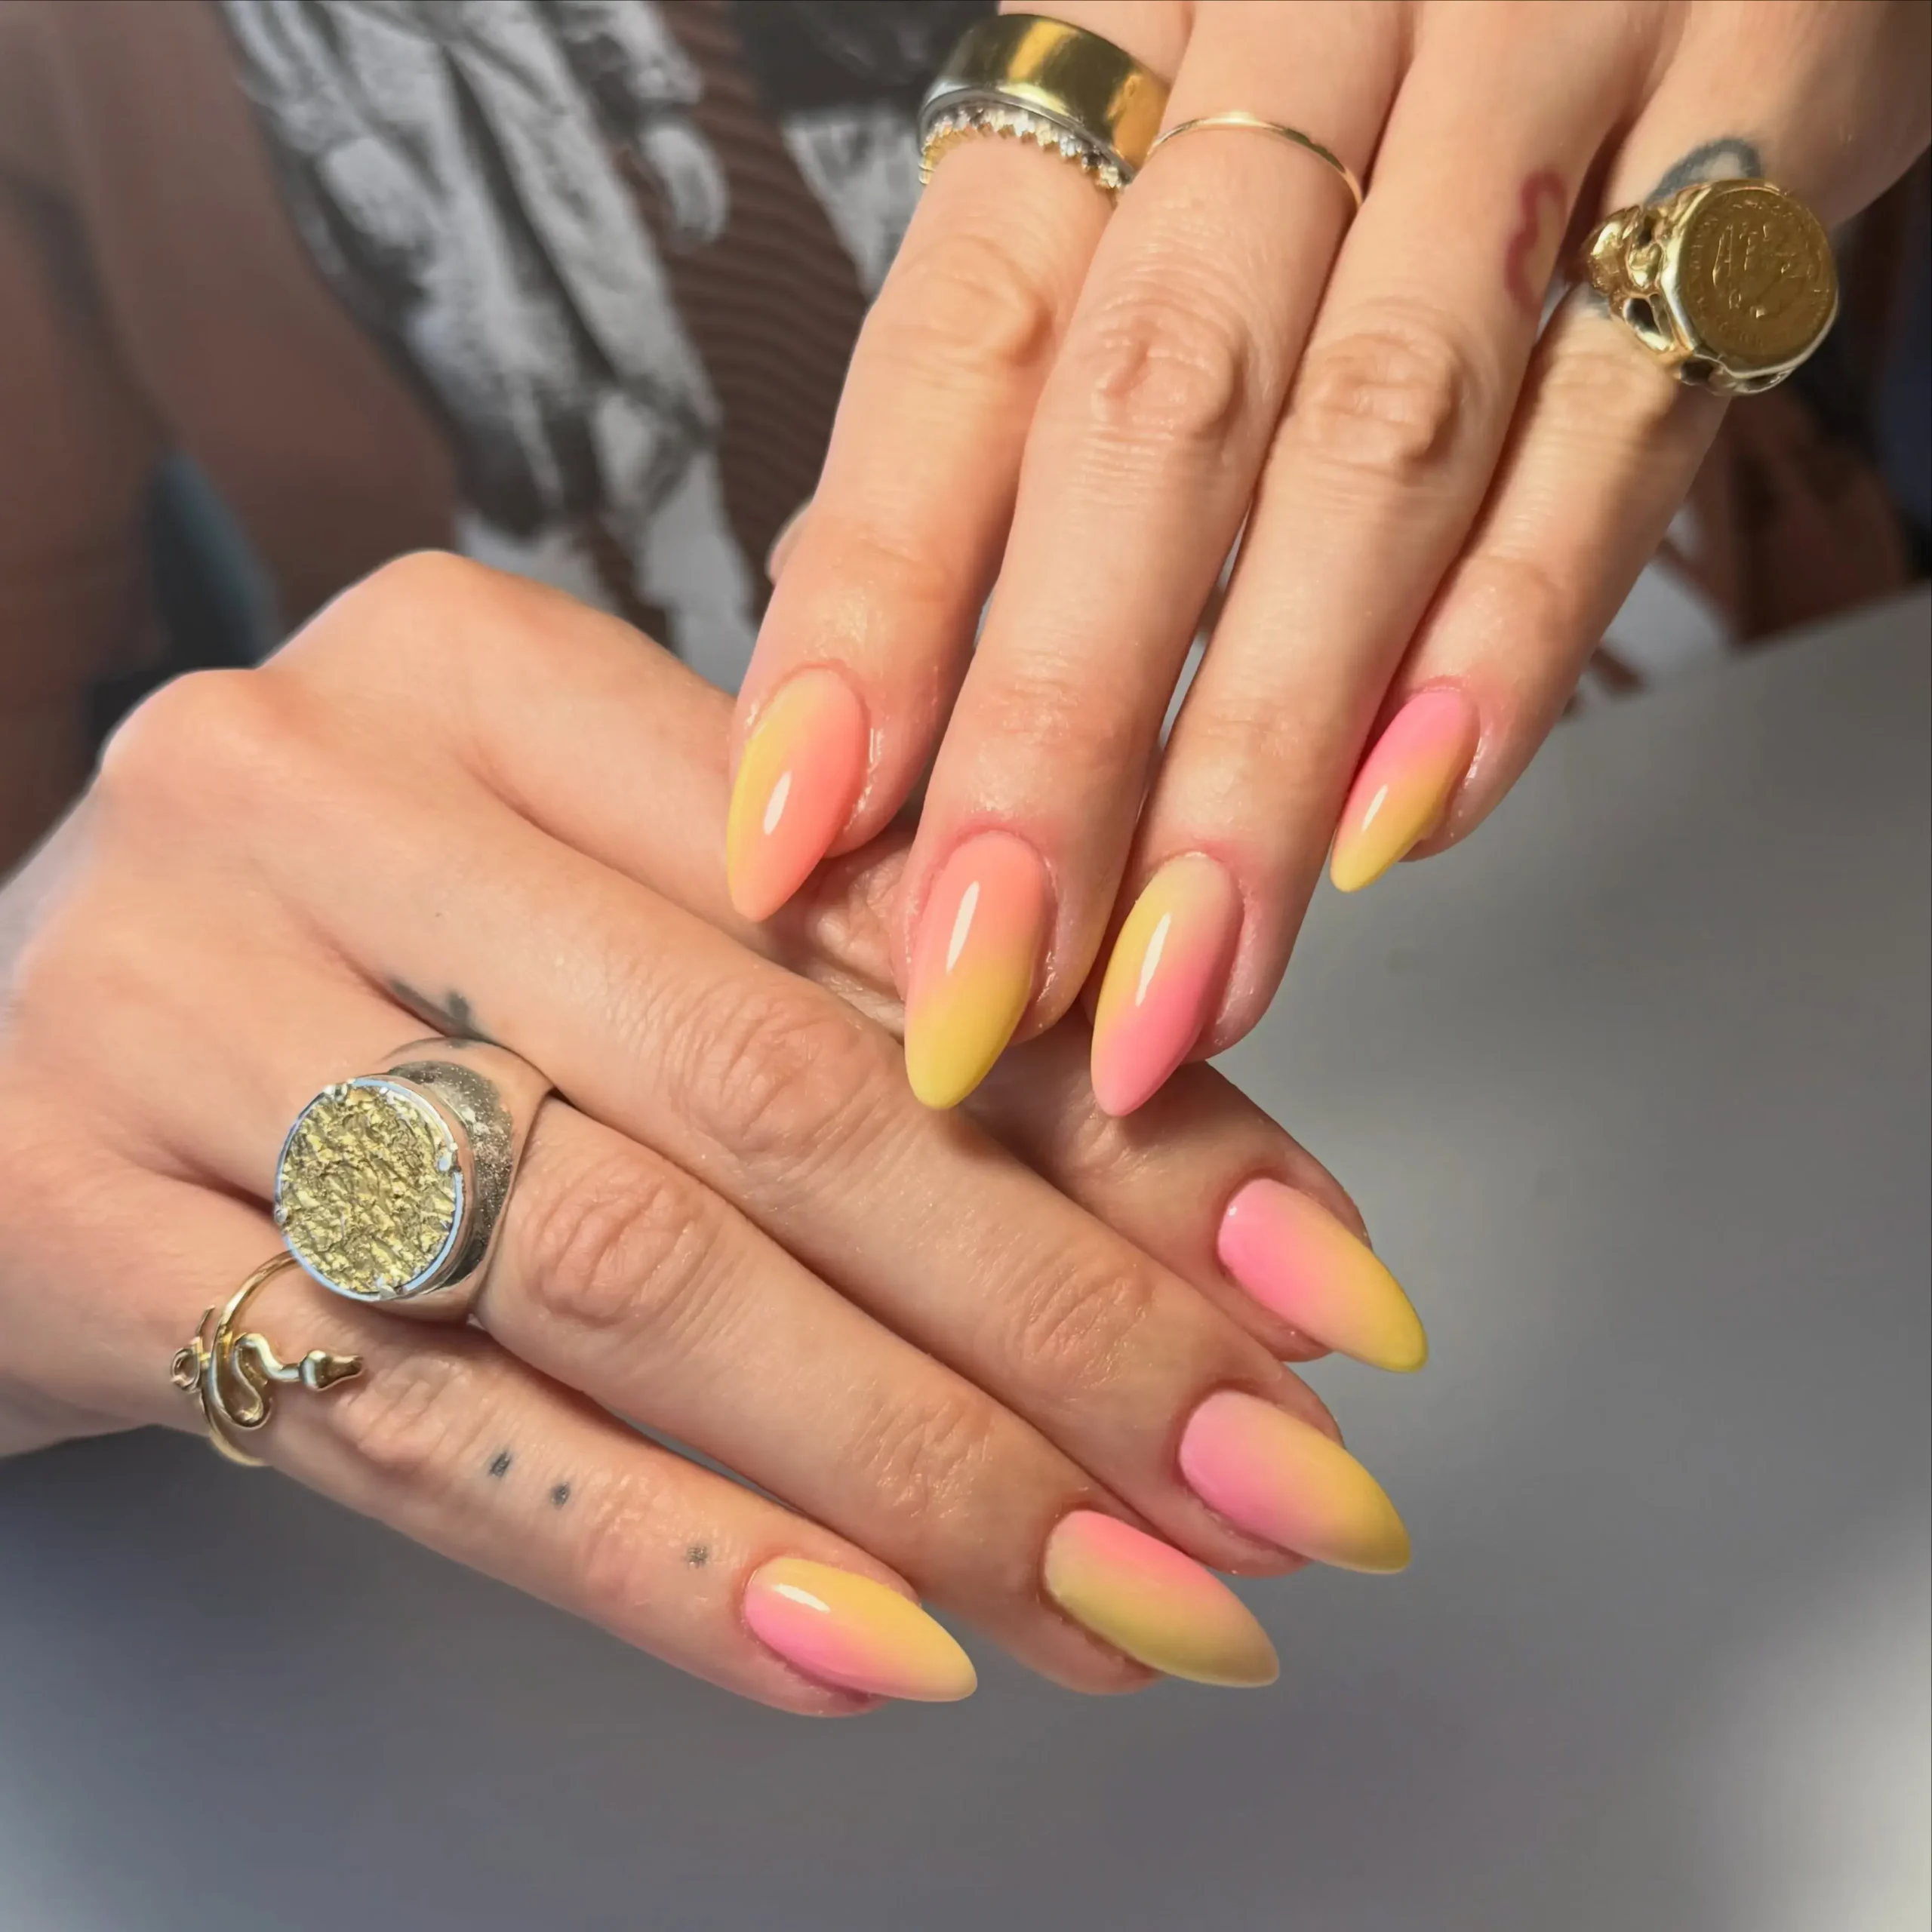
157. Sunny Yellow Swirl Nails
Two shades of yellow swirl together across the nail, creating a marbled effect instead of a flat, single tone.
Perfect for: Playful, artistic looks
Best shapes: Almond, oval
Pro tip: Work with wet polish only, since dried colors will not swirl or blend together.
Time to DIY: 30 minutes
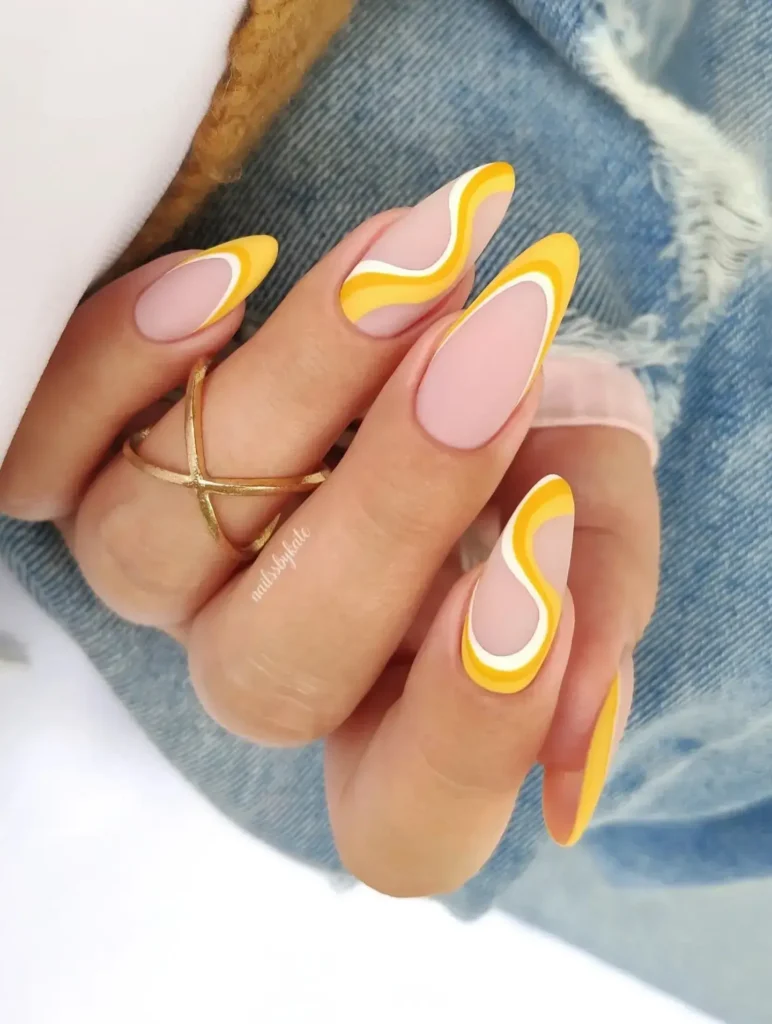
Green Summer Nail Inspo (Pistachio, Matcha, Mint)
Green has become one of the standout colors for summer 2026, led by pistachio and matcha shades. The color range spans soft and muted tones to deep, rich finishes.
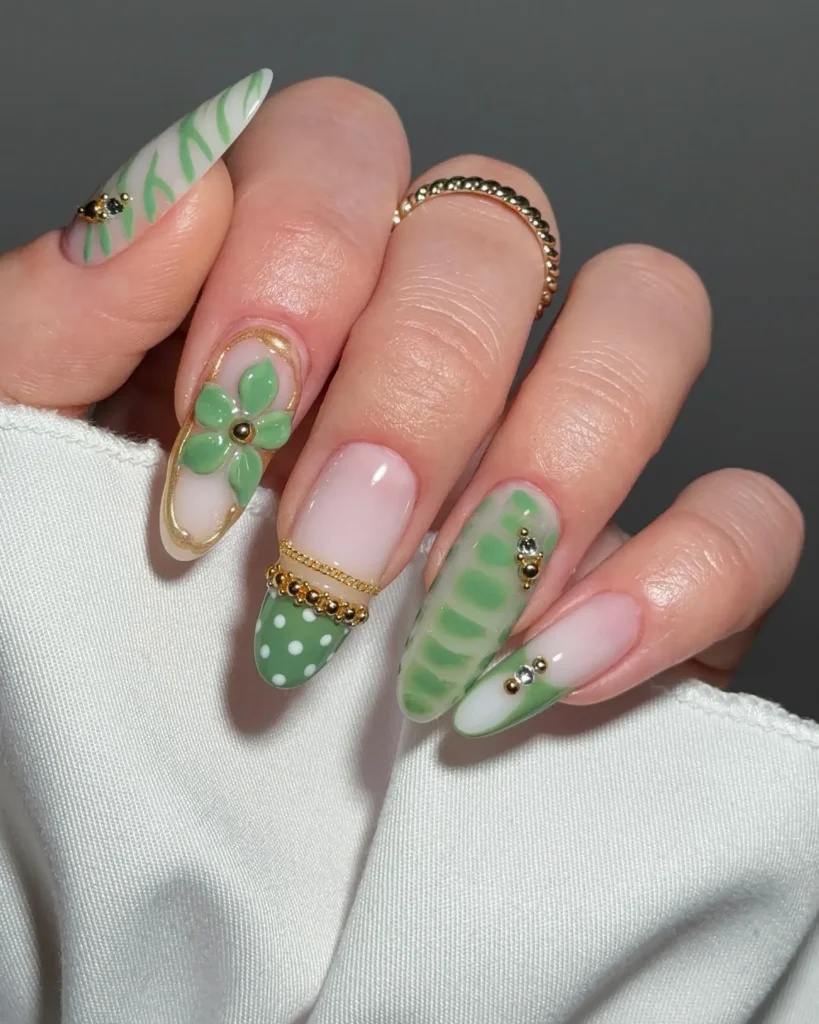
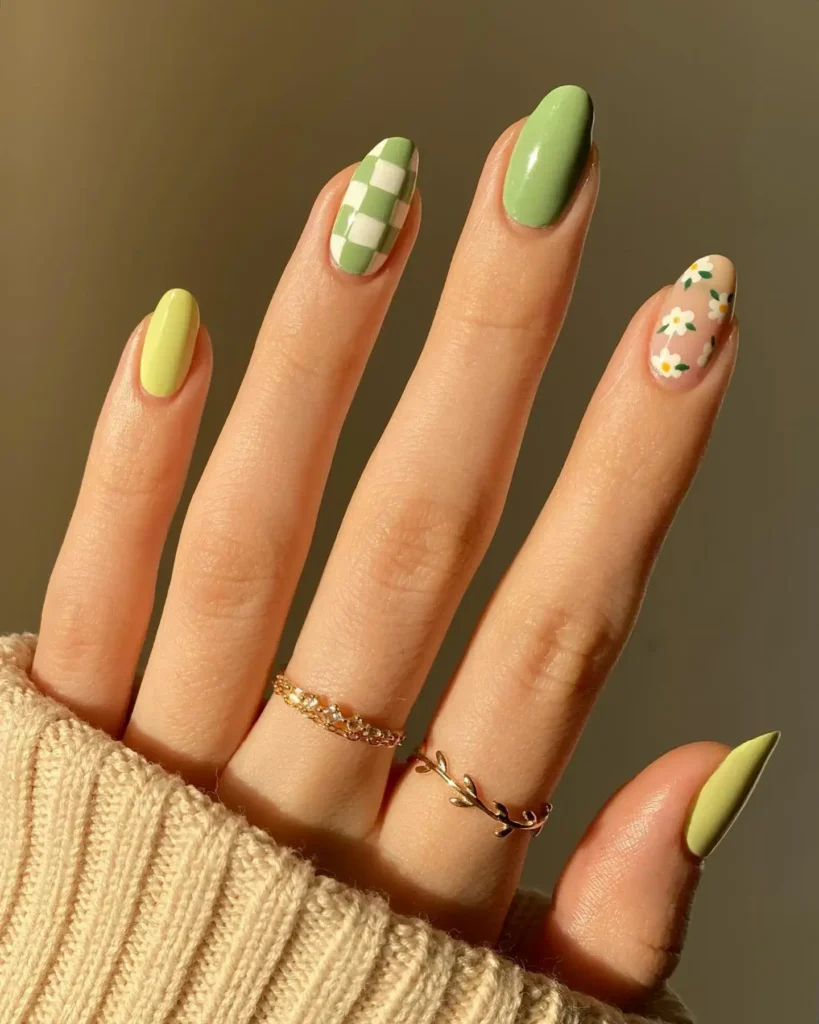
158. Matcha Green Checkered Tips
A soft matcha green checkered pattern replaces the classic solid French tip, adding texture to a trending color.
Perfect for: Playful updates to a classic look
Best shapes: Square, almond
Pro tip: Use striping tape to section off even squares before filling them in.
Time to DIY: 35 minutes
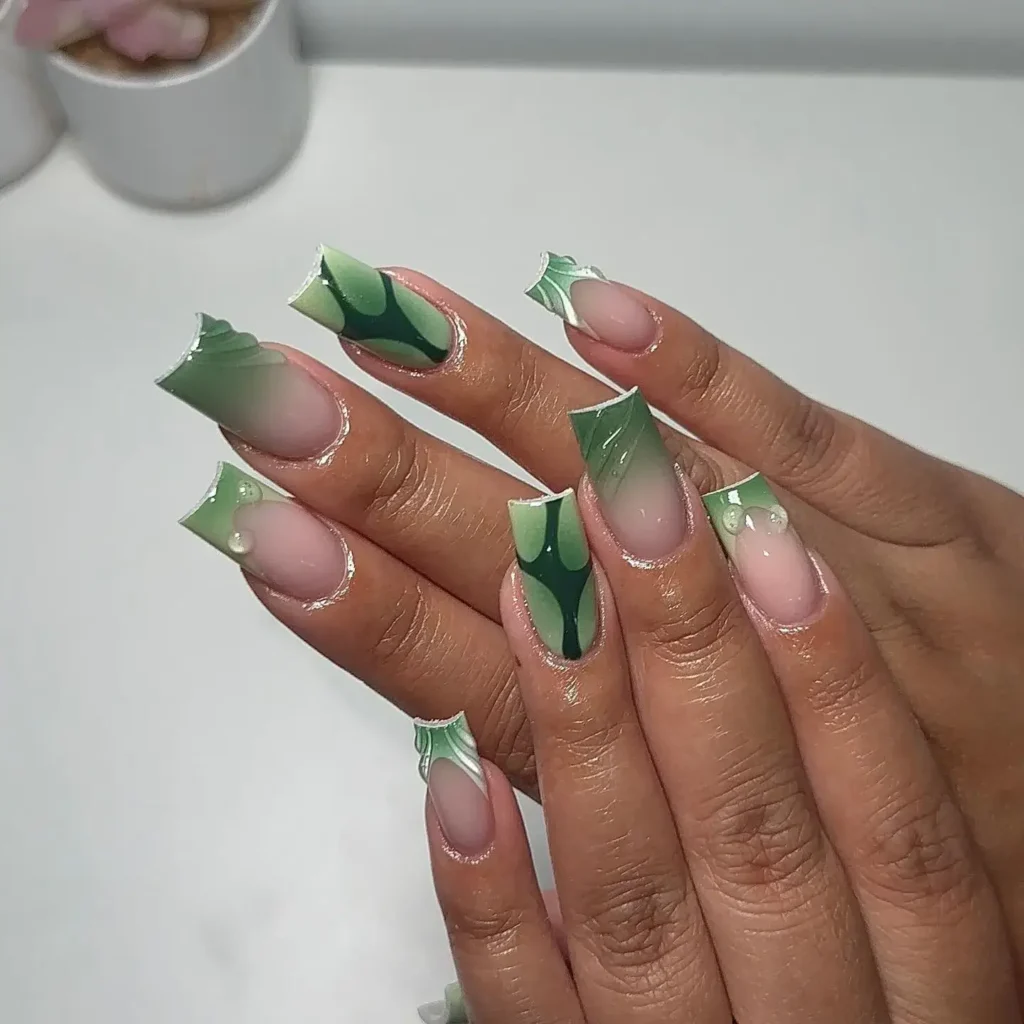
159. Emerald Glossy Nails
A deep, saturated emerald green covers the nail in a glossy, high-shine finish that reads as rich and polished.
Perfect for: Evening events, bold color lovers
Best shapes: Almond, coffin
Pro tip: Apply two coats for full opacity, since emerald tones can look uneven with just one.
Time to DIY: 20 minutes
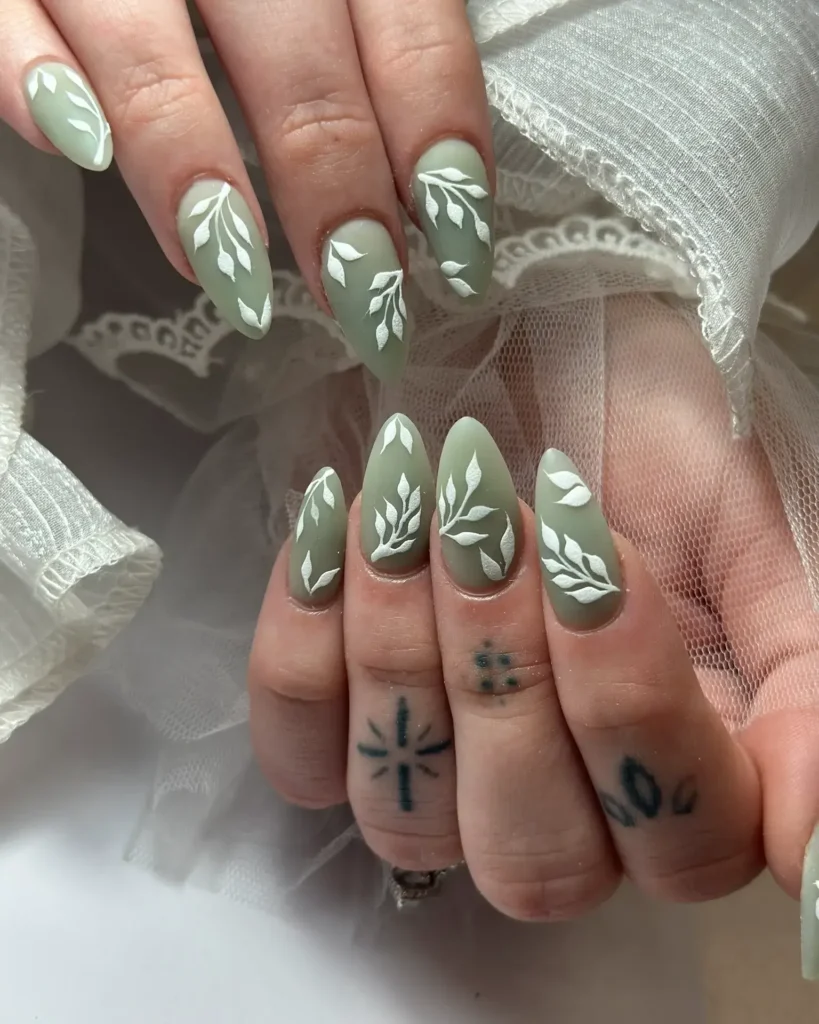
160. Sage Green Minimalist Nails
A muted, dusty sage green covers the nail in a soft matte or semi-gloss finish, staying quiet and understated.
Perfect for: Work settings, everyday minimal styling
Best shapes: Oval, square
Pro tip: A matte topcoat deepens sage green and gives it a softer, more subdued finish.
Time to DIY: 20 minutes
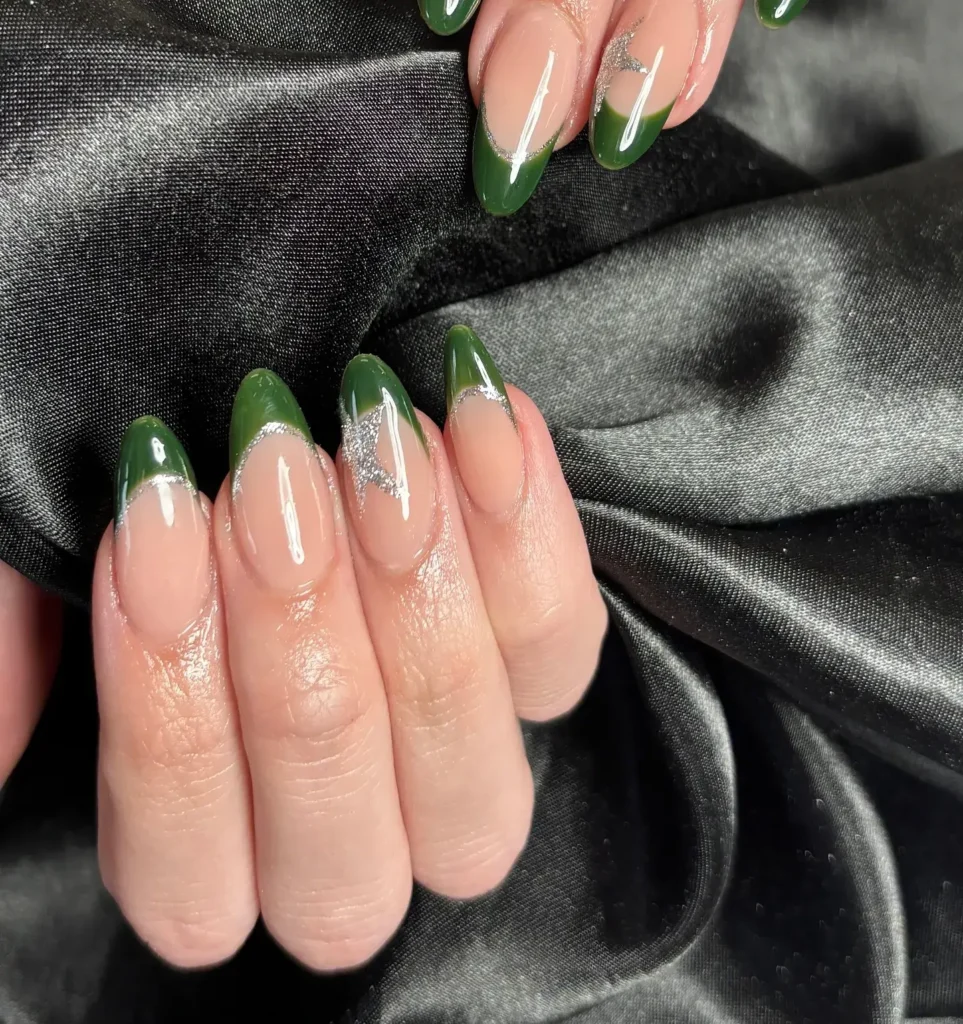
161. Forest Green French Tips
A deep forest green replaces the classic white line, keeping the French shape but adding a rich, earthy color.
Perfect for: Fall-inspired summer looks
Best shapes: Square, almond
Pro tip: French tip guides help keep the deep green line clean and even.
Time to DIY: 25 minutes
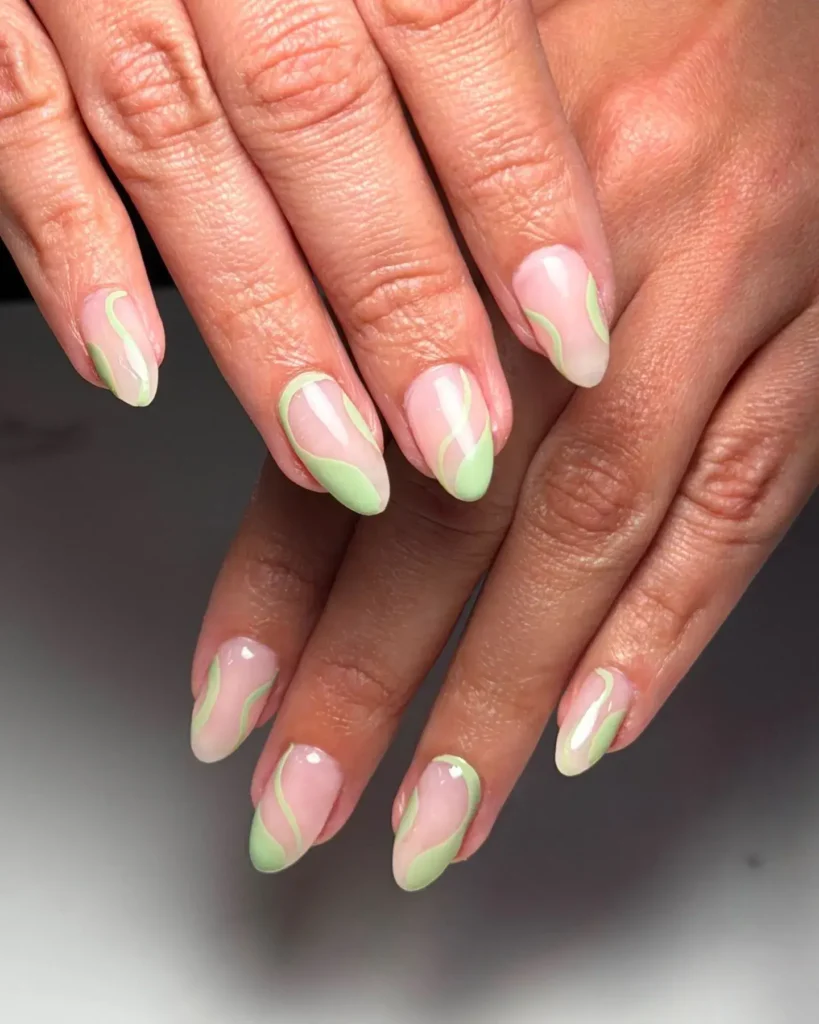
162. Mint Green Swirl Nails
Two shades of mint swirl together across the nail, creating a marbled effect instead of one flat tone.
Perfect for: Fresh, playful summer looks
Best shapes: Almond, oval
Pro tip: Work with wet polish only, since dried colors will not swirl or blend together.
Time to DIY: 30 minutes
163. Olive Green Accent Nails
A muted olive green covers most nails, with one or two accent nails featuring a small gold or bronze detail.
Perfect for: Neutral looks with warmth
Best shapes: Square, squoval
Pro tip: Apply gold accents while the topcoat is still tacky so they adhere without extra glue.
Time to DIY: 25 minutes
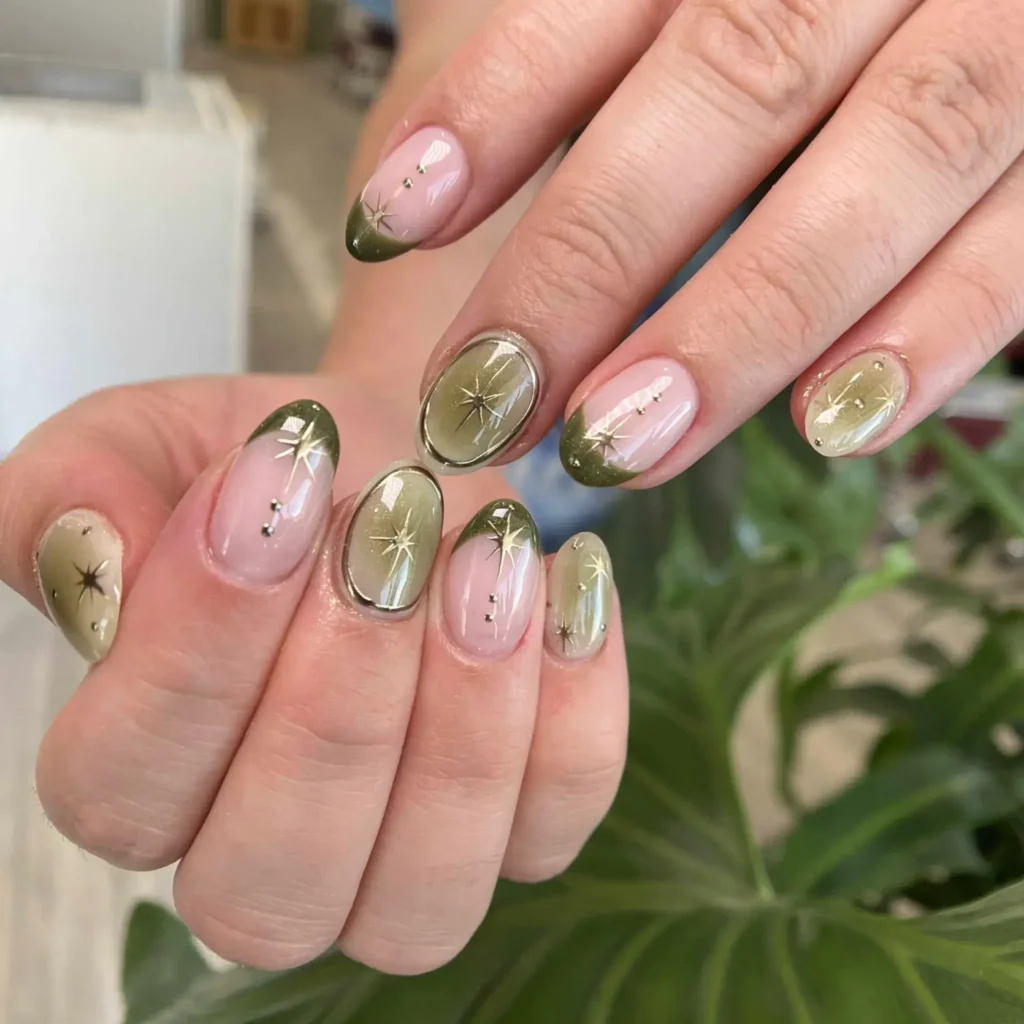
Red & Cherry Summer Nail Inspo
Red stays a summer classic year after year, and 2026 brings fresh takes on the shade. From glossy solids to playful cherry motifs, this color pairs well with both minimal and detailed styles.
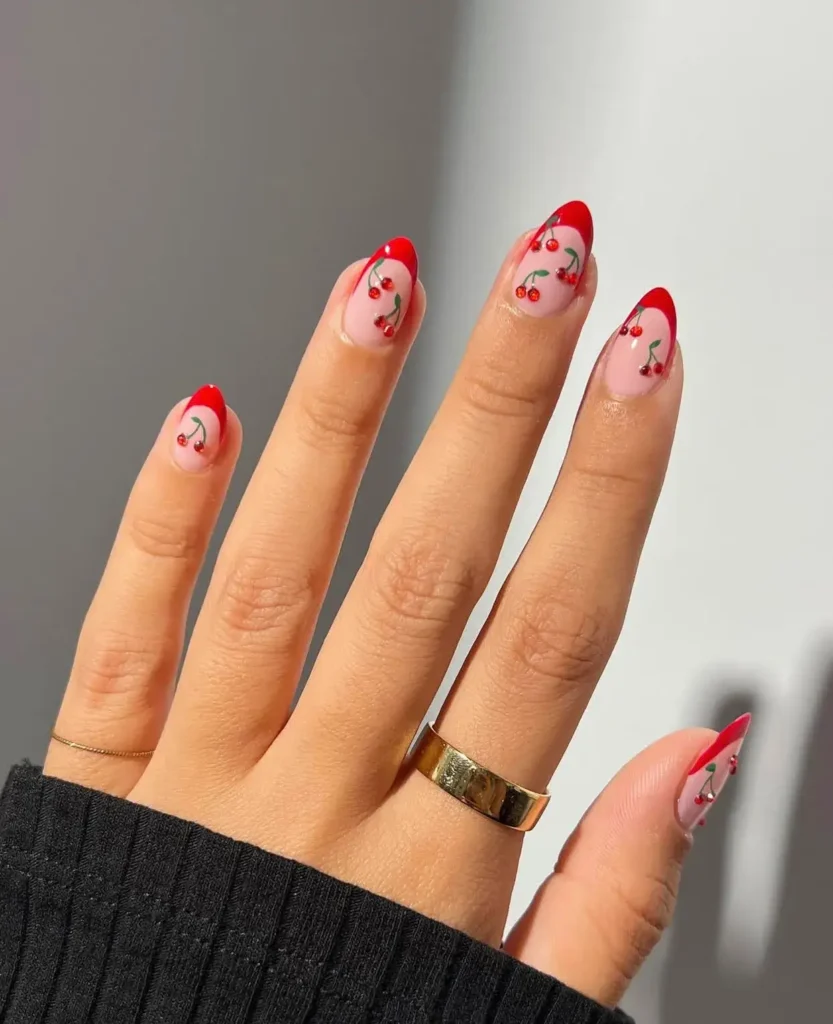
164. Classic Cherry Red Gloss
A vivid, true red covers the nail in a high-shine finish, delivering a timeless look that works for any occasion.
Perfect for: Everyday wear, classic styling
Best shapes: Almond, square
Pro tip: Two coats give the fullest color payoff, since red can look slightly sheer with just one.
Time to DIY: 20 minutes
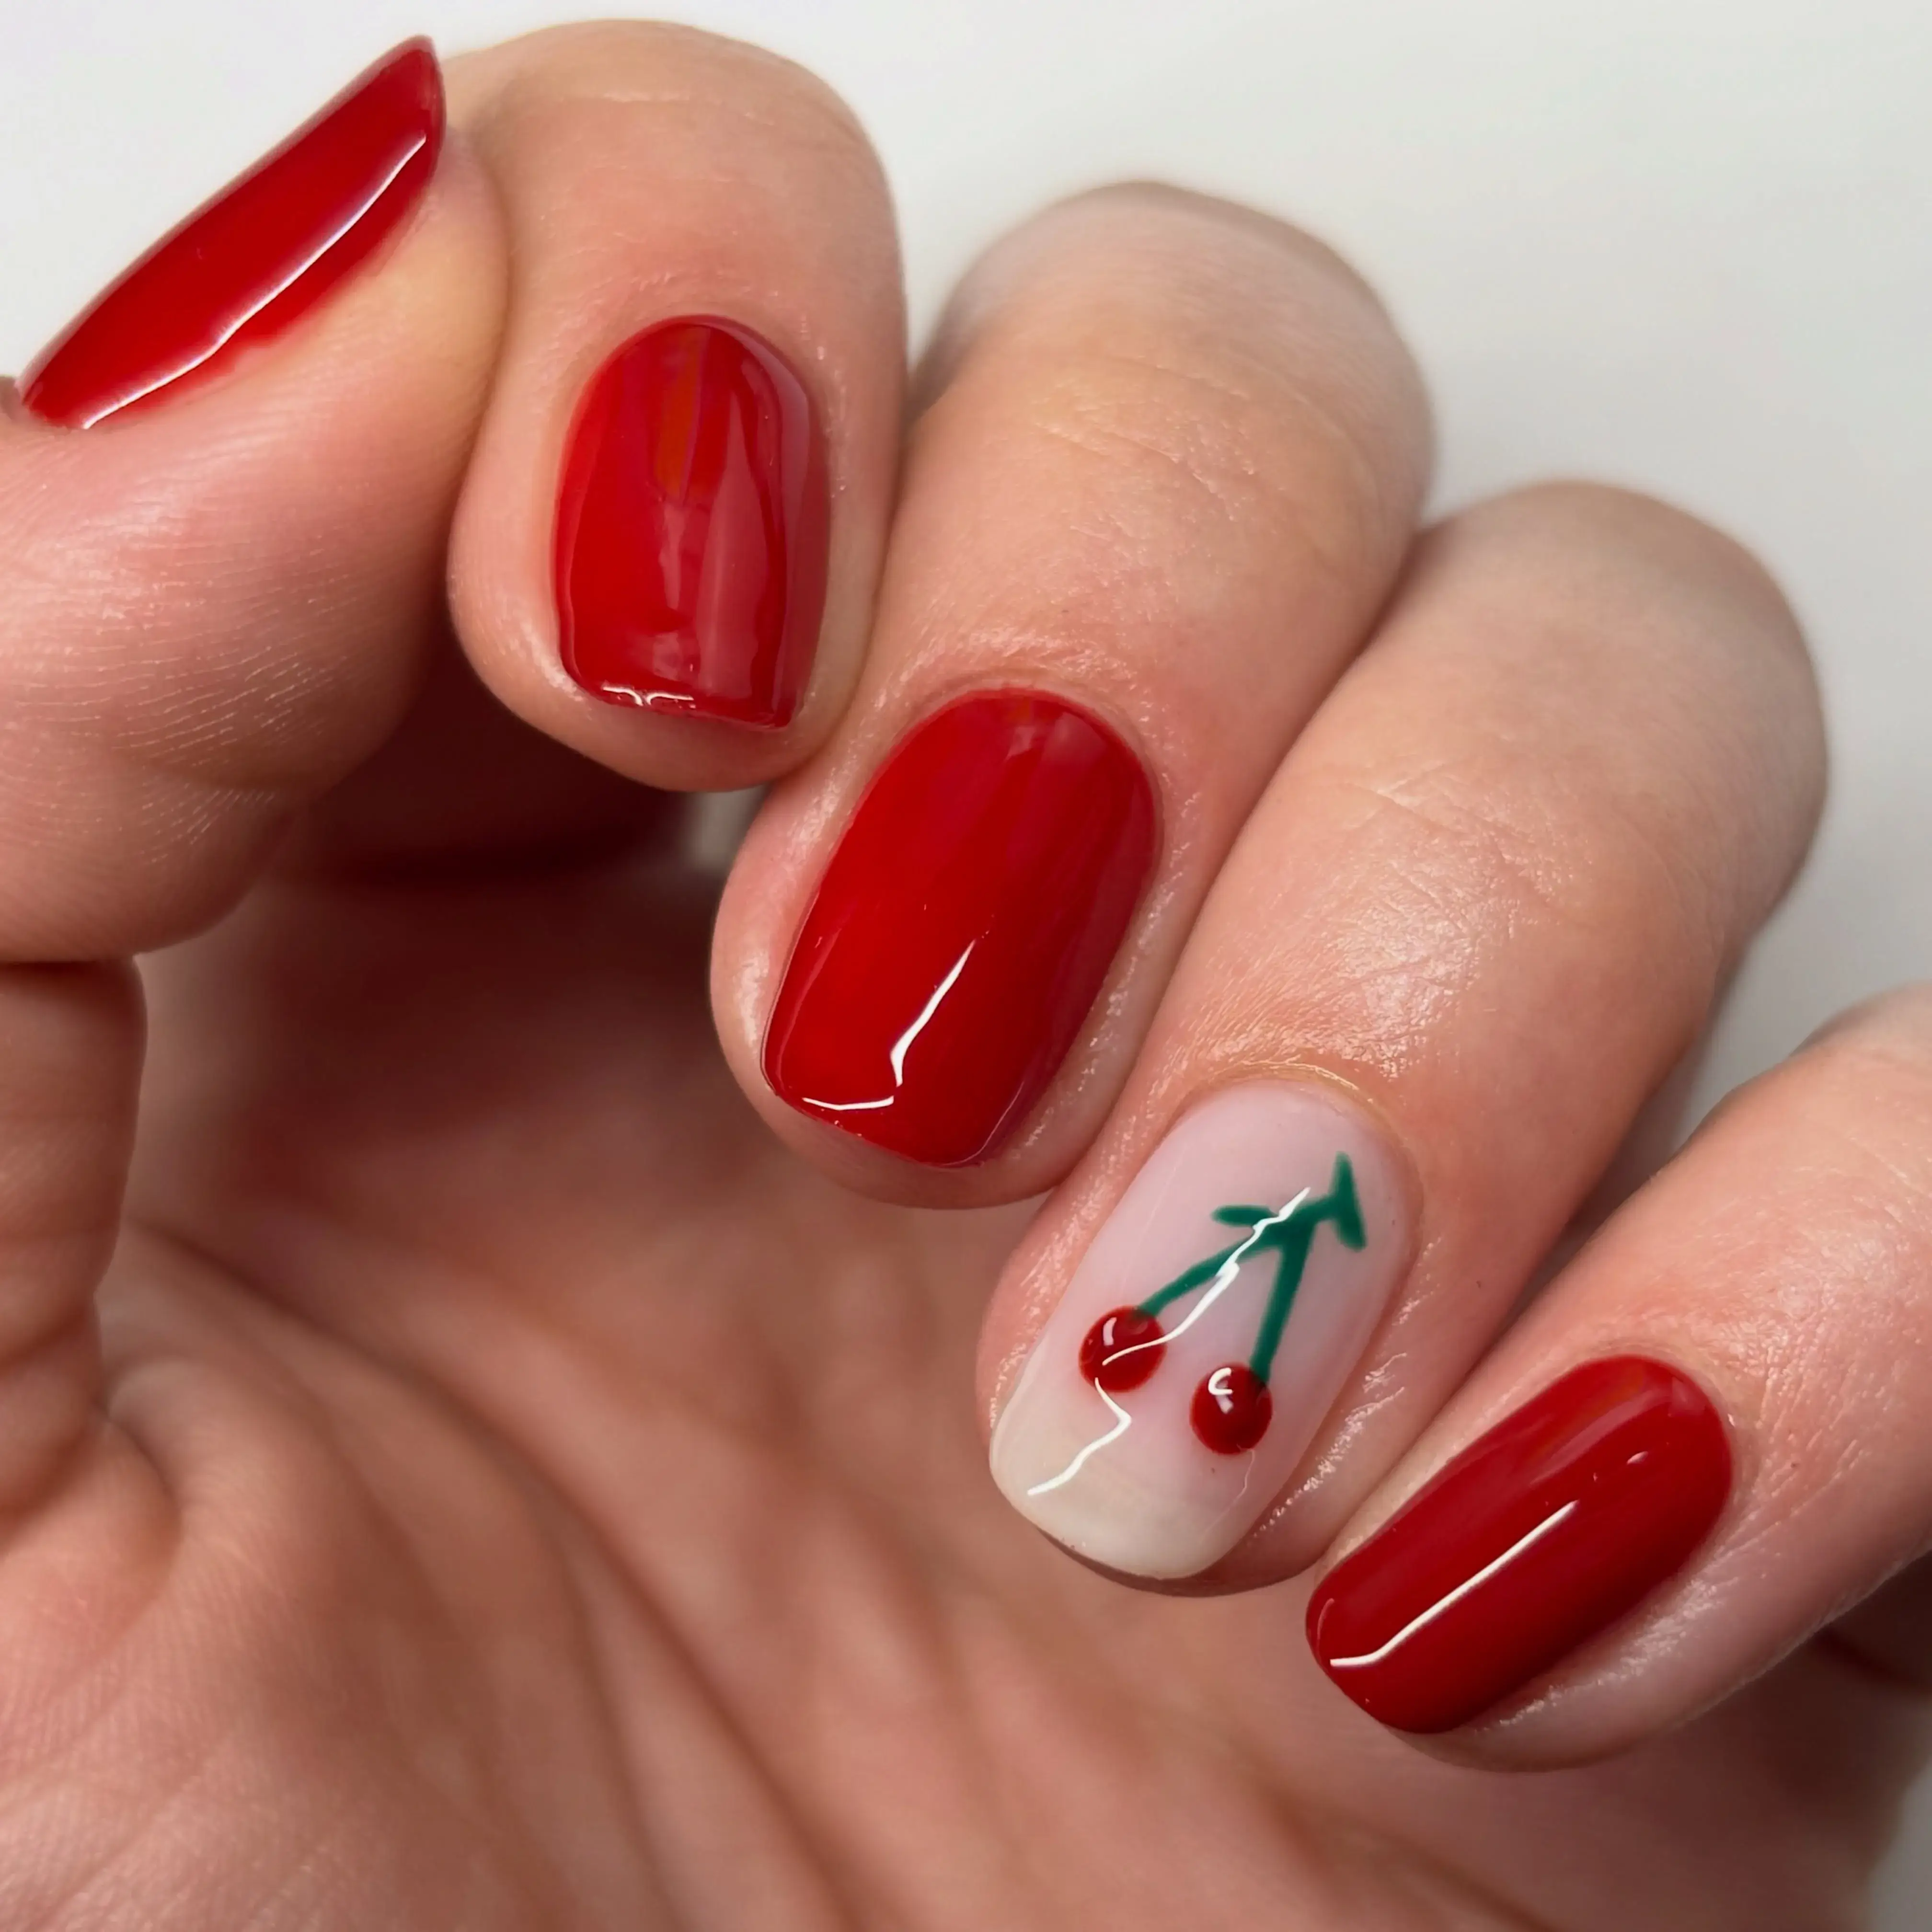
165. Red Gingham Nails
A small checkered pattern in red and white covers the nail, resembling a classic picnic blanket print.
Perfect for: Picnics, casual summer days
Best shapes: Square, squoval
Pro tip: Use striping tape in a grid pattern to keep the checks even and aligned.
Time to DIY: 35 minutes
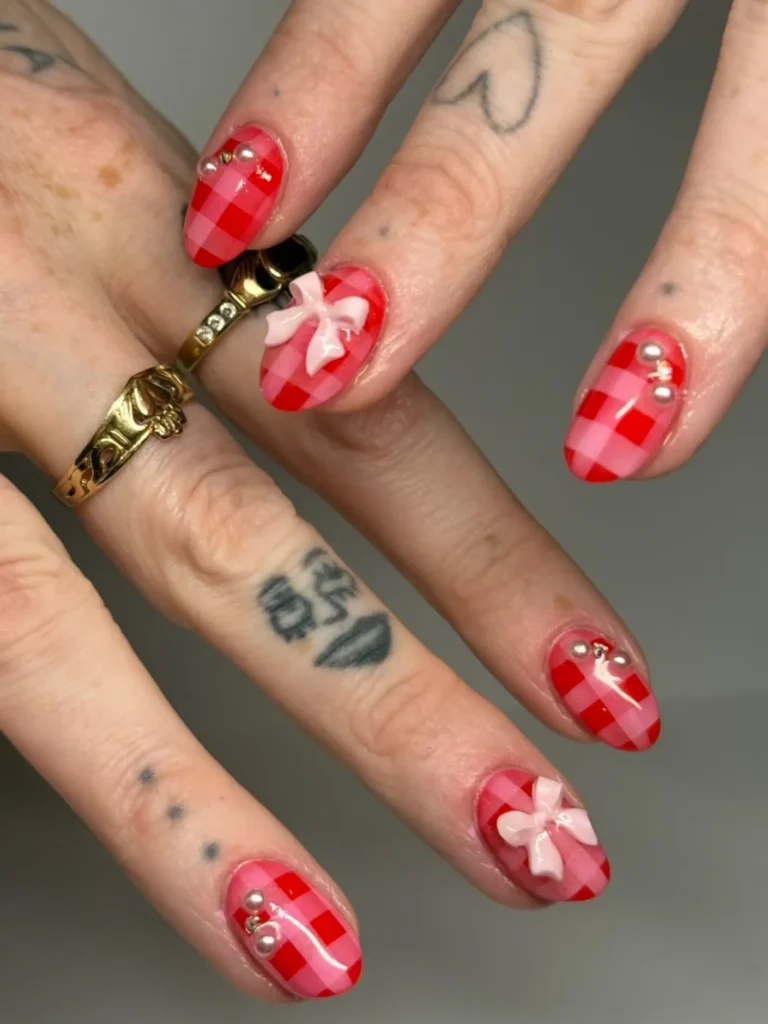
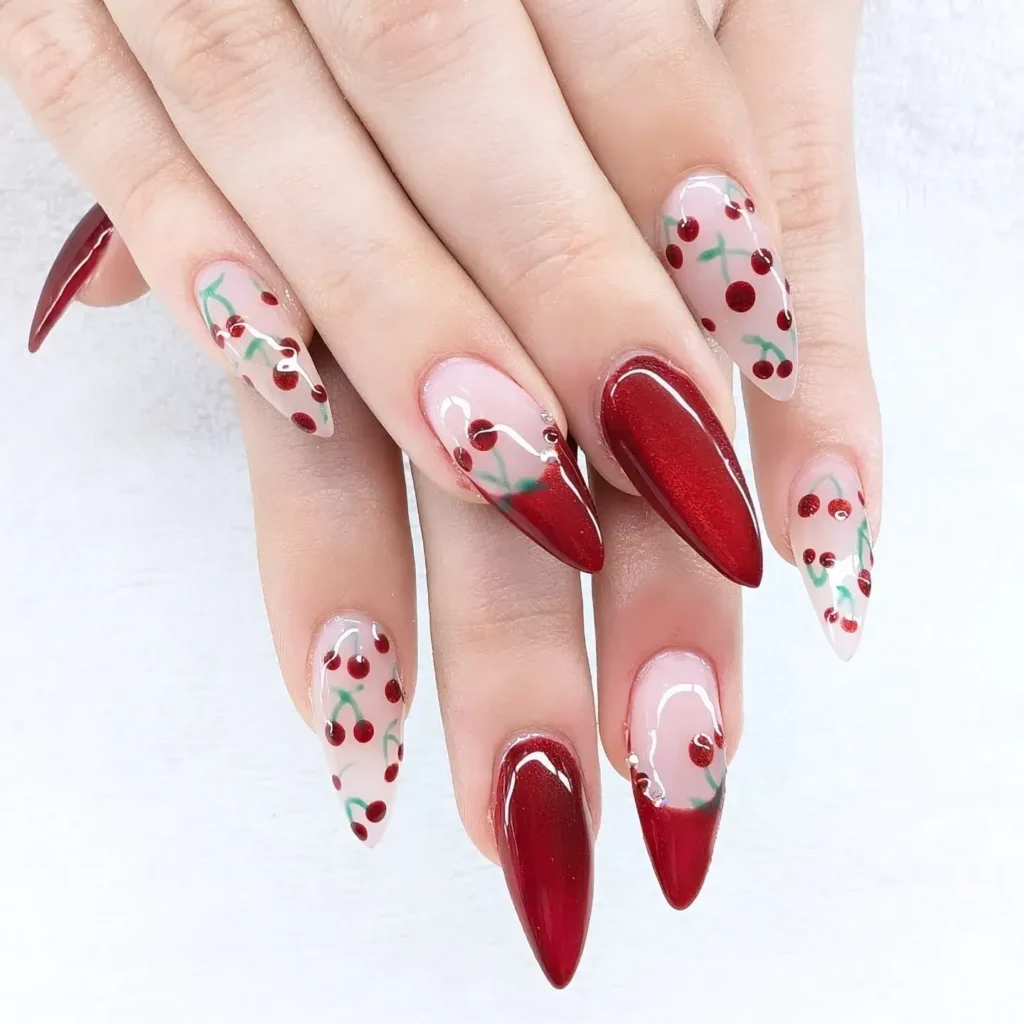
166. Cherry Print Nail Art
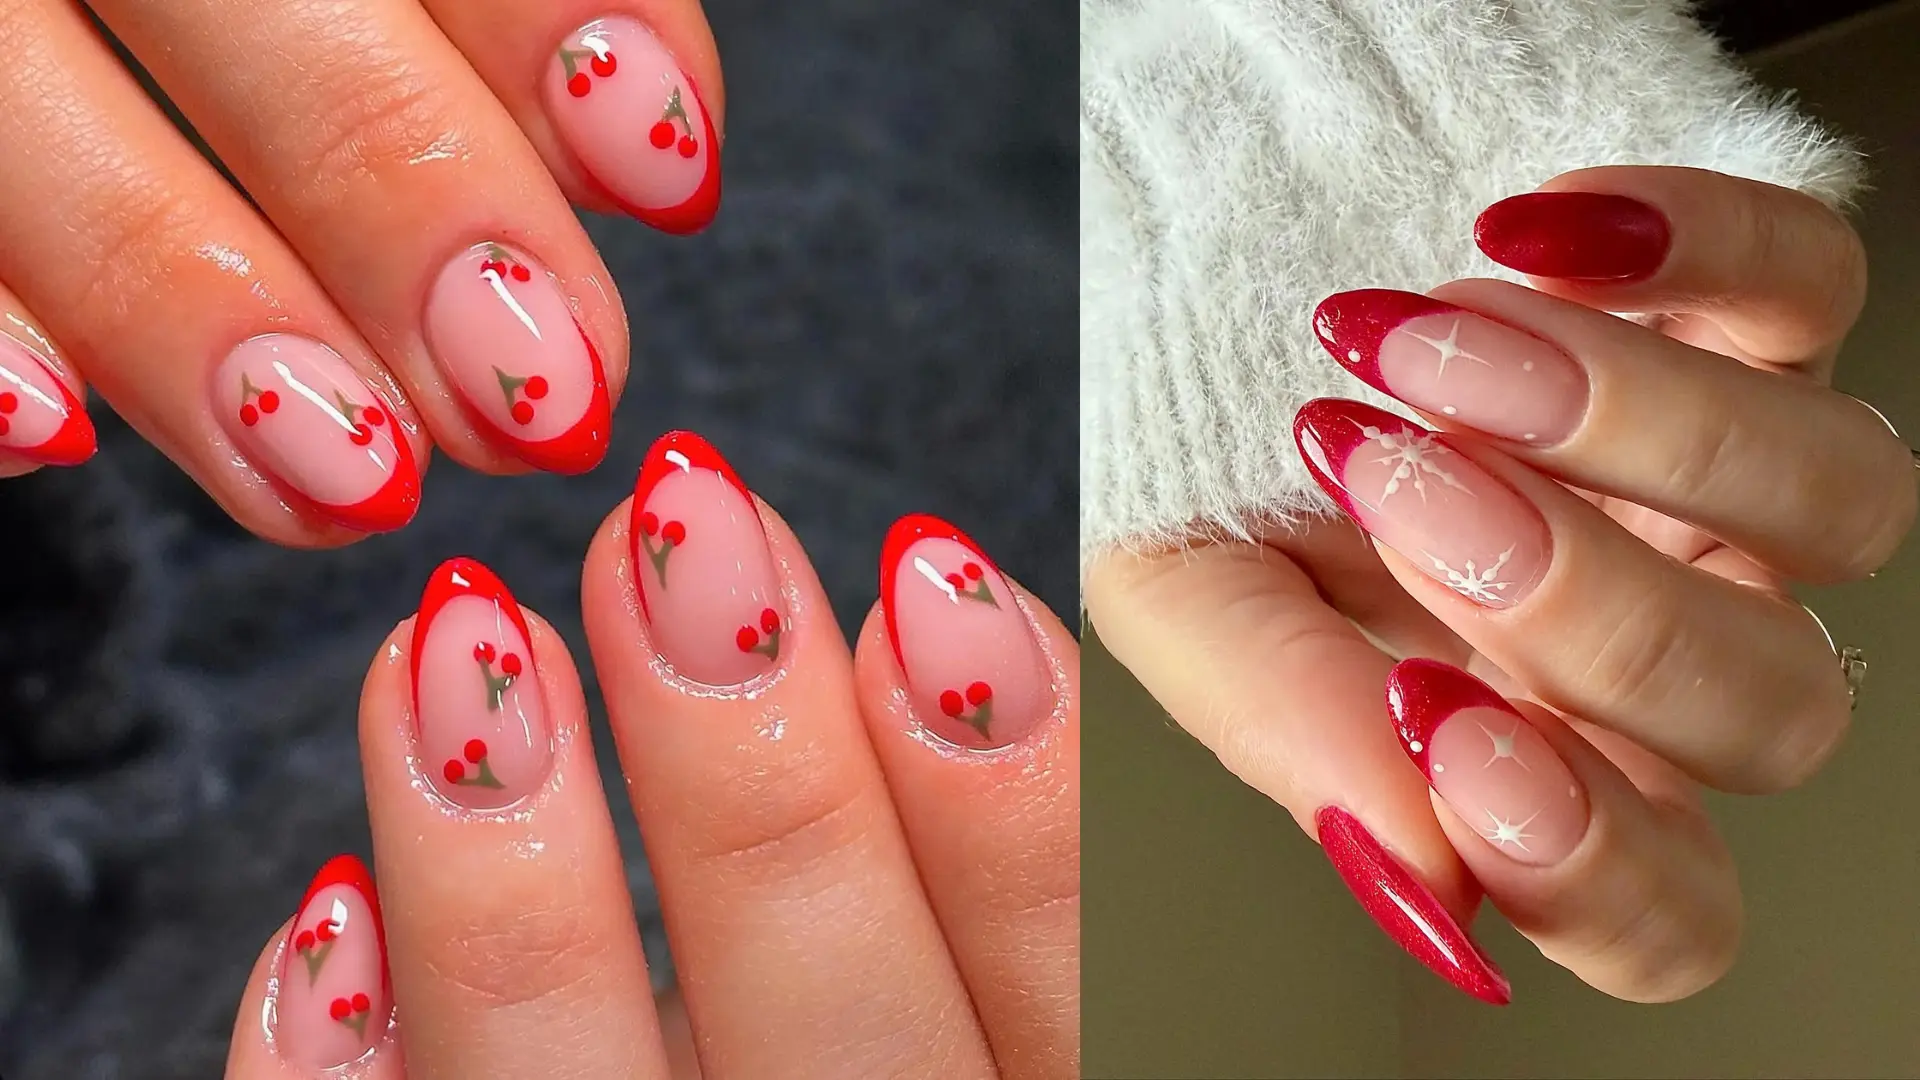
Two small cherries connected by a thin green stem sit on a clean base, usually placed on one or two accent nails.
Perfect for: Retro-inspired, playful looks
Best shapes: Short square, round
Pro tip: Add a tiny white highlight dot on each cherry to give them a glossy, three-dimensional look.
Time to DIY: 25 minutes
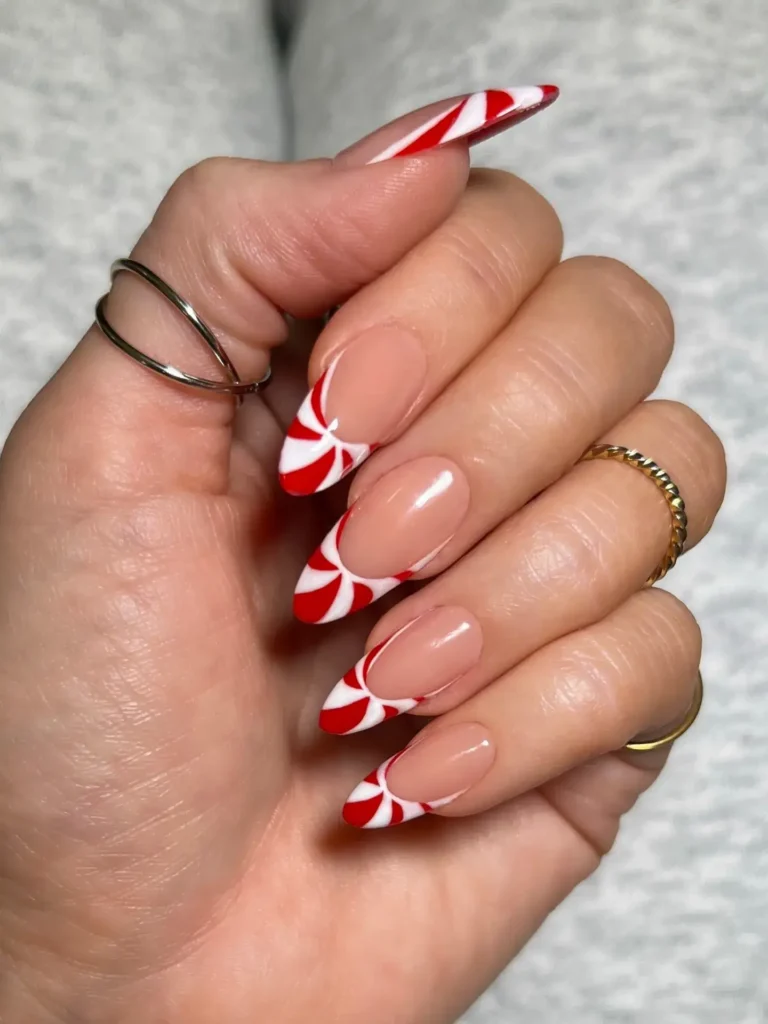
167. Red & White Candy Stripe Nails
Thin red and white stripes alternate across the nail, creating a bold, candy cane-inspired pattern.
Perfect for: Fun, graphic summer looks
Best shapes: Square, almond
Pro tip: Use striping tape to keep each colored line sharp and evenly spaced.
Time to DIY: 30 minutes
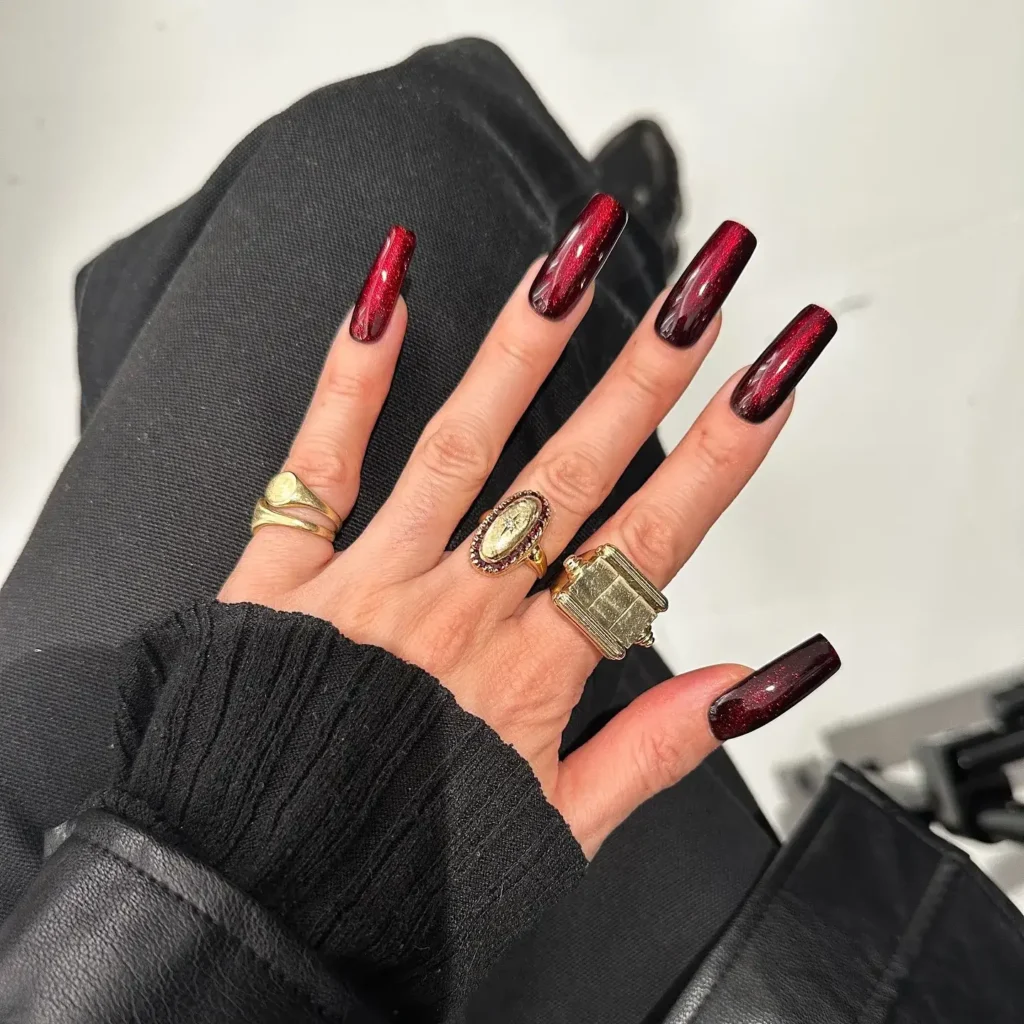
168. Deep Red Velvet Nails
A matte velvet topcoat sits over a rich, deep red, giving the nail a soft, textured finish instead of shine.
Perfect for: Fall-inspired summer looks, texture lovers
Best shapes: Coffin, almond
Pro tip: Apply the velvet topcoat while the base color is still slightly tacky for the best texture grip.
Time to DIY: 25 minutes
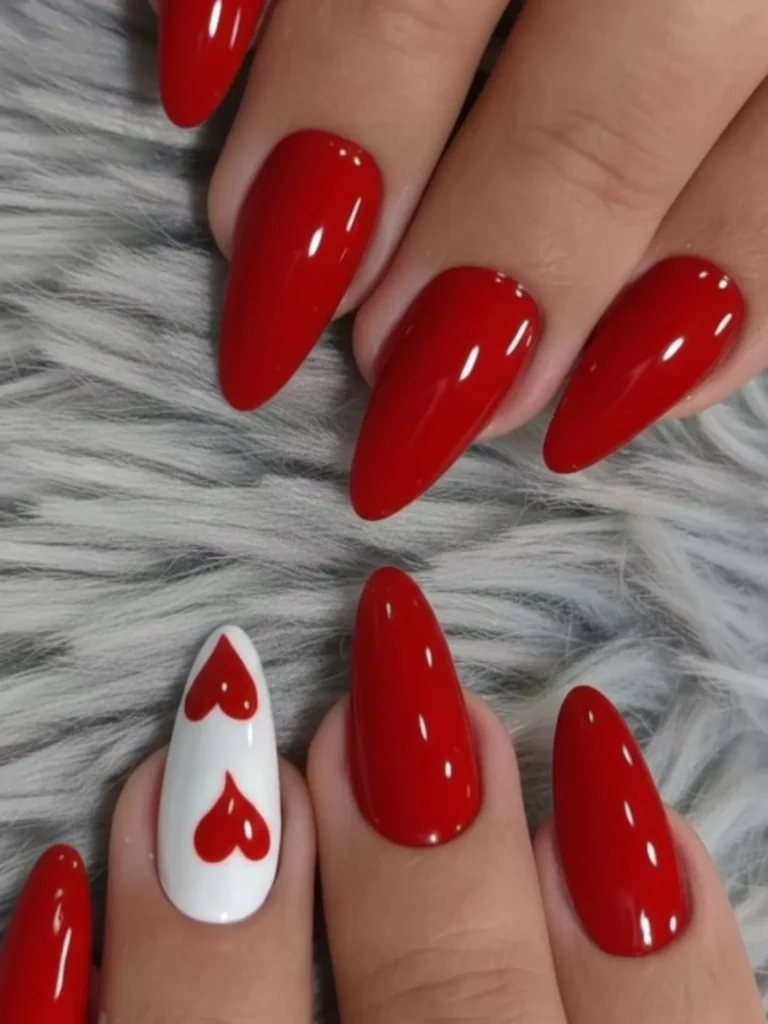
169. Red Heart Accent Nails
A small painted heart sits on one accent nail, set against a clean red or nude base for contrast.
Perfect for: Romantic, playful styling
Best shapes: Almond, oval
Pro tip: Paint two curved strokes that meet at a point for a clean heart shape without a stencil.
Time to DIY: 20 minutes
Vacation & Poolside Nail Ideas
Vacation nails need to handle sunscreen, chlorine, and long travel days while still looking photo-ready. This category focuses on designs built for the actual vacation experience, not just the inspiration board.
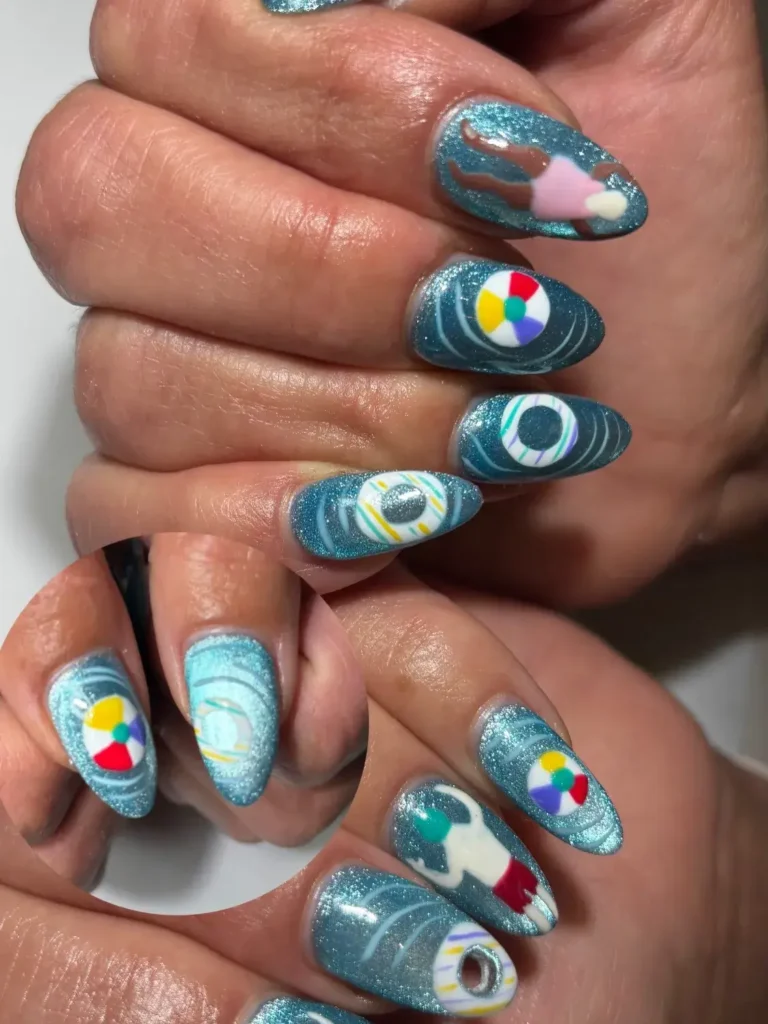
170. Pool Water Droplet Nails
Small, clear gel droplets are sculpted onto a light blue base, mimicking beads of pool water sitting on the nail.
Perfect for: Pool days, resort styling
Best shapes: Almond, coffin
Pro tip: Use a dotting tool to shape the gel before curing, since it holds its form once cured.
Time to DIY: 40 minutes
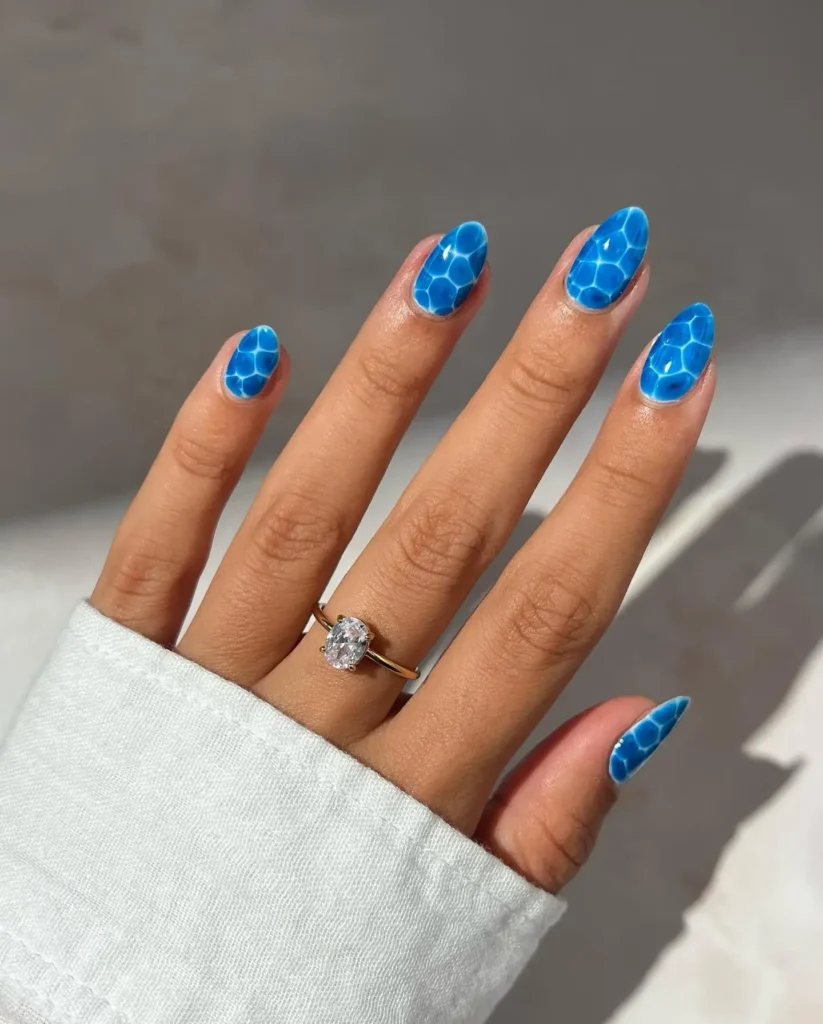
171. Sunburst Vacation French
Warm orange and yellow rays fan out from the tip of the nail, replacing the classic straight French line.
Perfect for: Beach vacations, bright statement looks
Best shapes: Square, almond
Pro tip: Paint the rays from the tip inward, keeping them thin near the center for a cleaner sunburst shape.
Time to DIY: 35 minutes
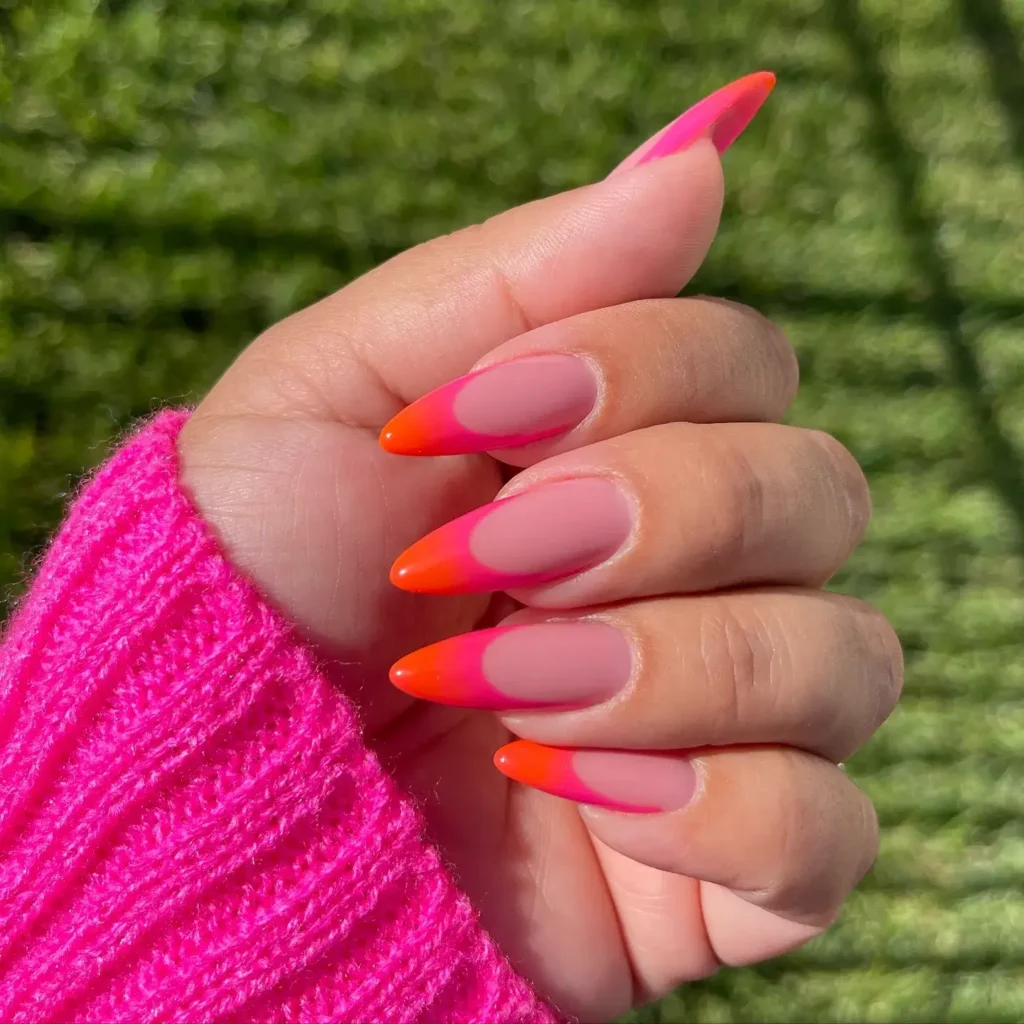
172. Passport Stamp Nail Art
Small stamp-style graphics, resembling travel visa marks, are painted across one or two accent nails.
Perfect for: Frequent travelers, themed sets
Best shapes: Square, squoval
Pro tip: Keep the stamp shapes simple, since overly detailed graphics are hard to read at nail size.
Time to DIY: 35 minutes
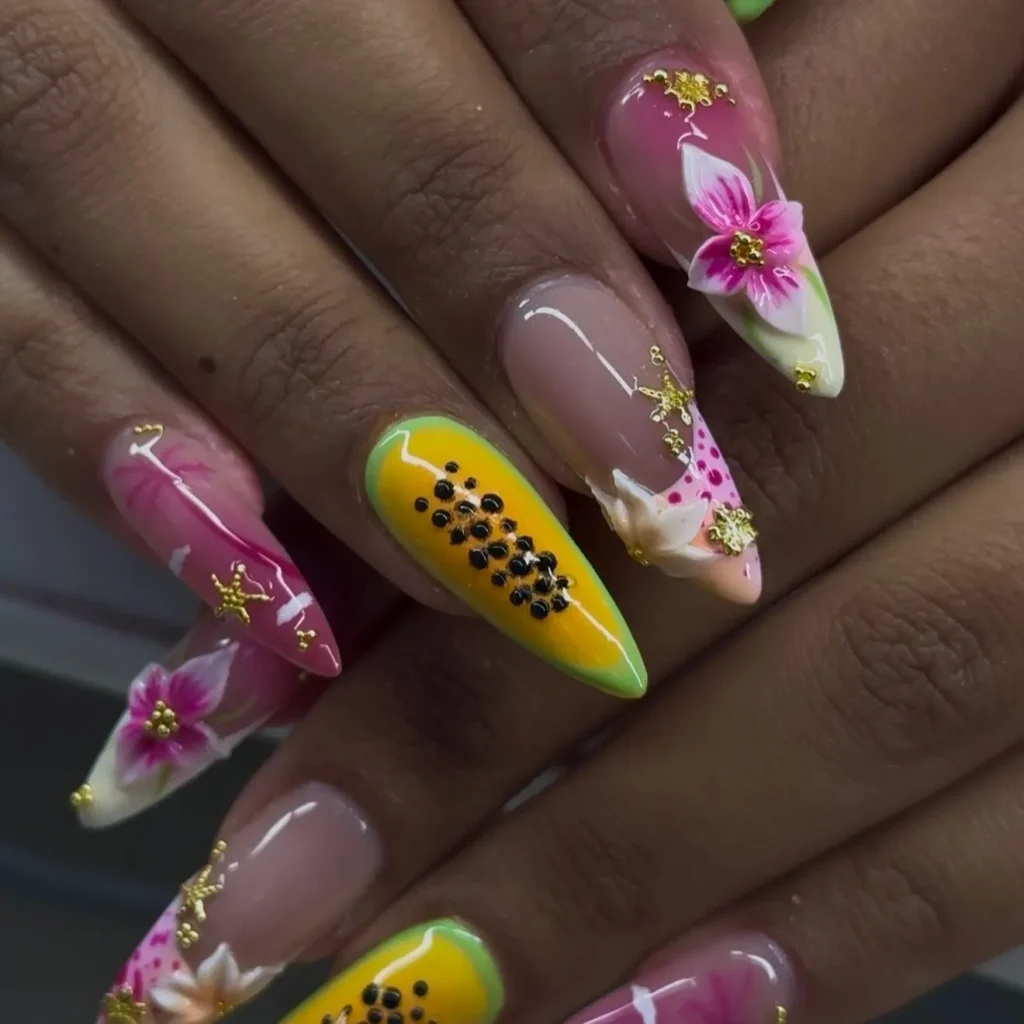
173. Cocktail-Inspired Nail Set
Each nail features a different summer drink detail, like a lime slice, tiny umbrella, or striped straw.
Perfect for: Vacation, playful themed looks
Best shapes: Almond, coffin
Pro tip: Pick one drink detail per nail rather than combining several, so each design stays clear and readable.
Time to DIY: 45 minutes
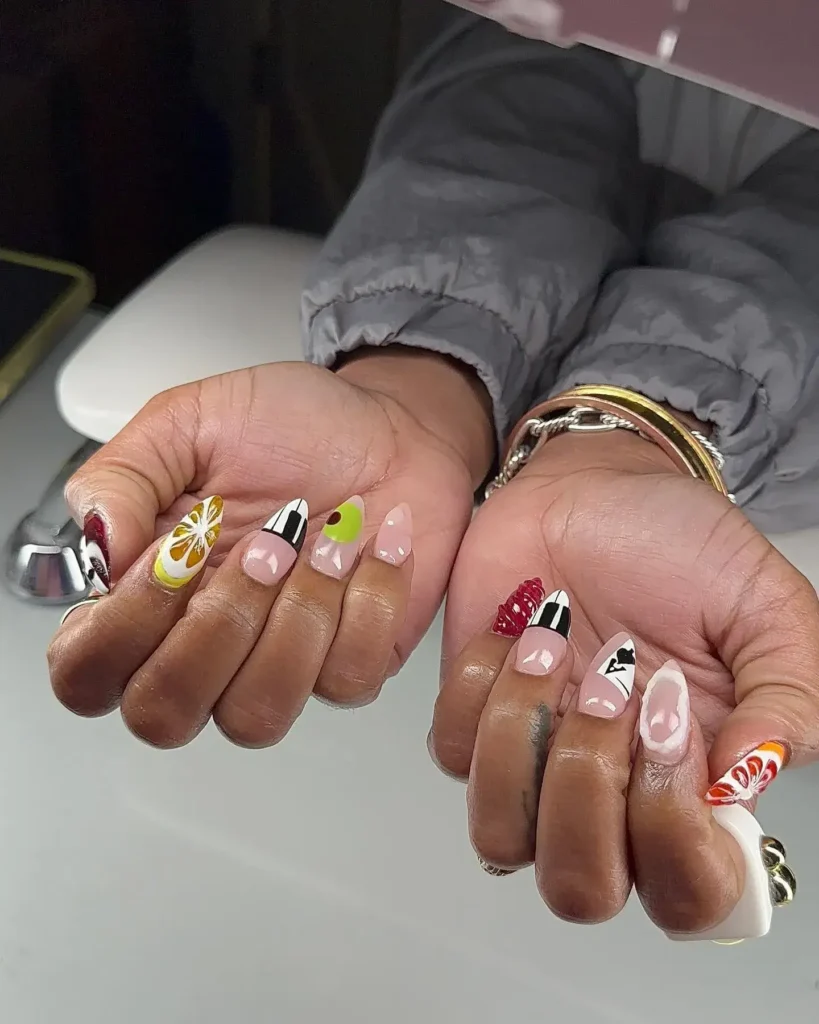
174. Woven Beach Bag Texture Nails
A crosshatch pattern in tan and white mimics the woven texture of a straw beach bag.
Perfect for: Resort wear, textured minimal looks
Best shapes: Square, squoval
Pro tip: Use a striping brush to create the crosshatch lines, working one direction fully before adding the other.
Time to DIY: 35 minutes
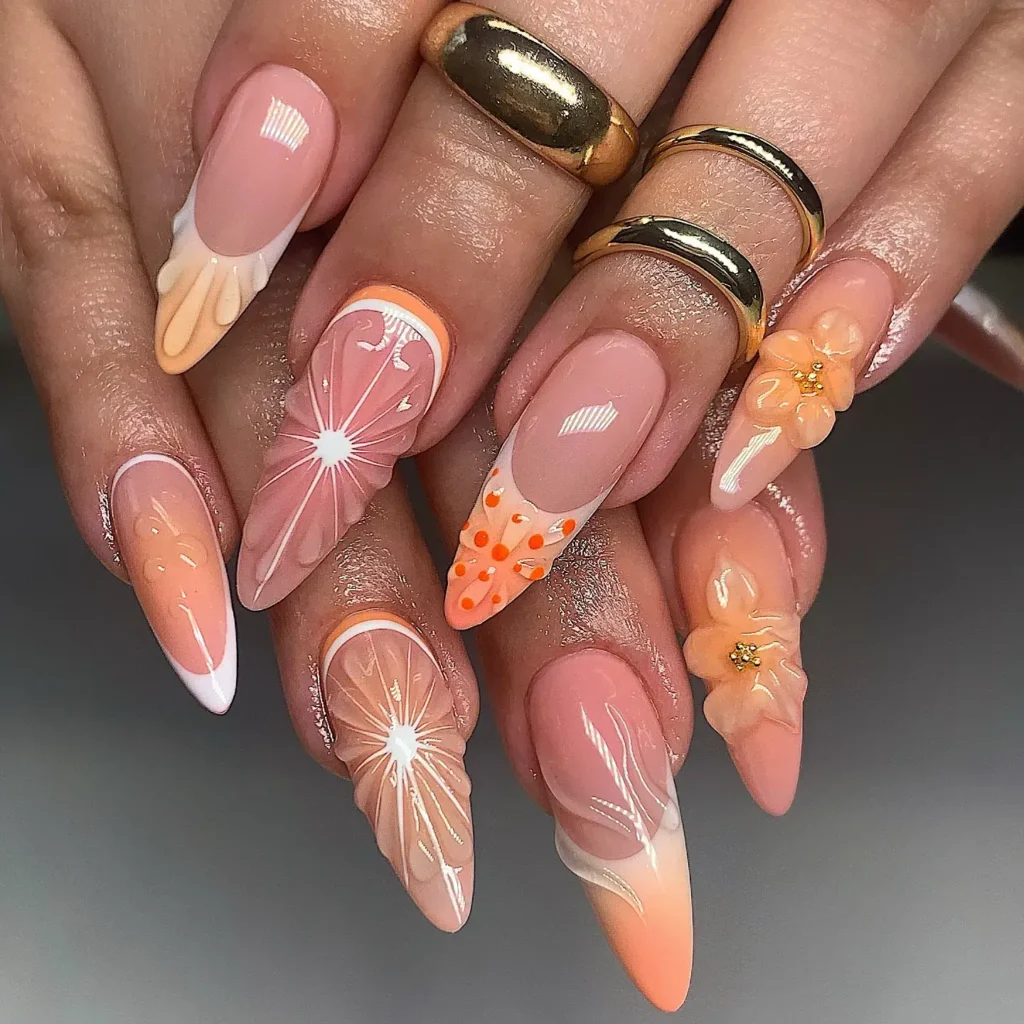
175. Sarong Print Nails
Bold, tropical print patterns cover the nail, inspired by the fabric designs found on beach sarongs and wraps.
Perfect for: Beach vacations, bold pattern lovers
Best shapes: Almond, coffin
Pro tip: Sketch the print loosely in pencil first, since sarong patterns rely on flowing, irregular shapes.
Time to DIY: 45 minutes
176. Tennis Bright Mani
A simple, solid bright color, often white, yellow, or hot pink, covers the nail with a small sporty accent line.
Perfect for: Active vacations, clean sporty looks
Best shapes: Short square, squoval
Pro tip: Keep the accent line thin and centered so the design stays simple and sporty.
Time to DIY: 20 minutes
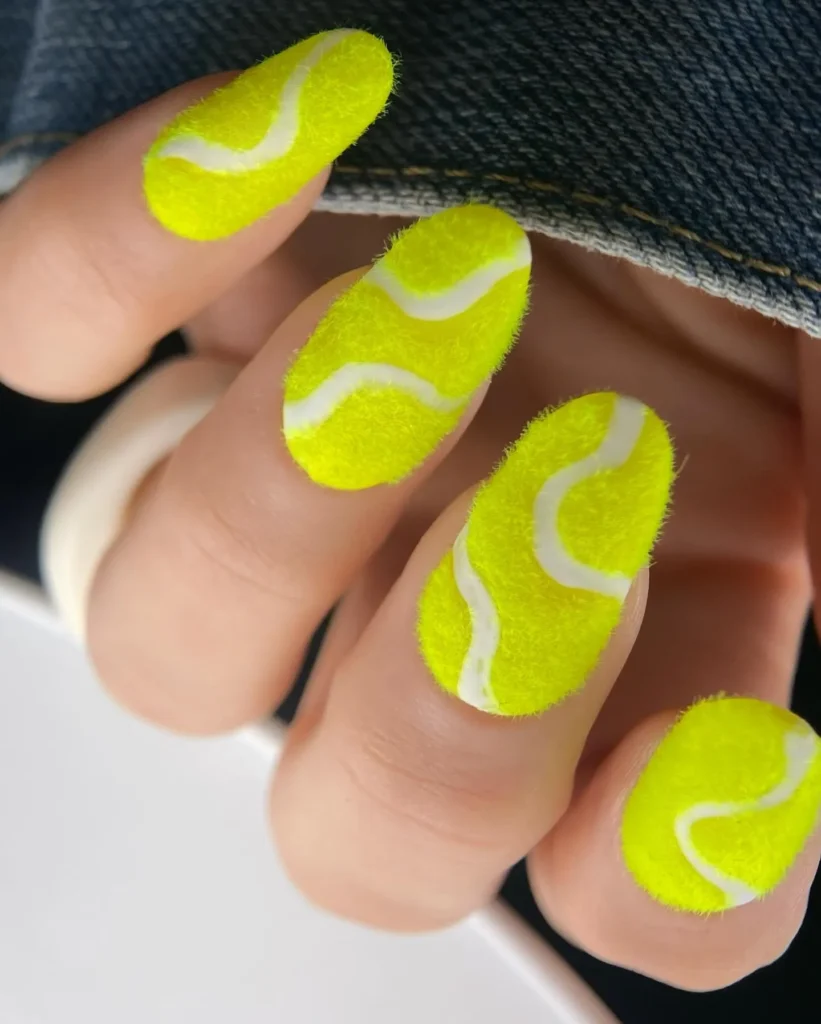
177. Airport-Ready Neutral Set
A soft, solid neutral color covers every nail, chosen specifically to match nearly any travel outfit without clashing.
Perfect for: Long travel days, versatile styling
Best shapes: Square, oval
Pro tip: Choose a neutral with a slight warmth, like soft beige, since it tends to photograph better than stark white.
Time to DIY: 20 minutes
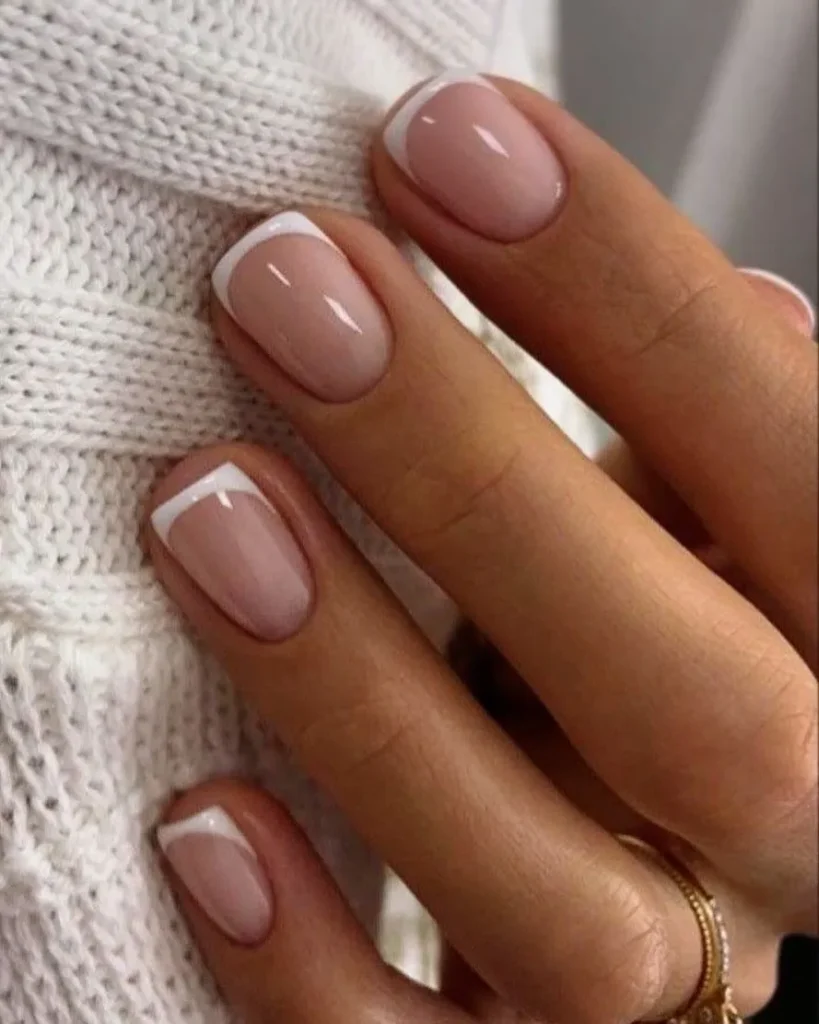
Work-Appropriate & Professional Summer Nail Designs
Office settings usually call for something quieter than a bright vacation set. These designs stay polished and professional while still feeling current for summer.
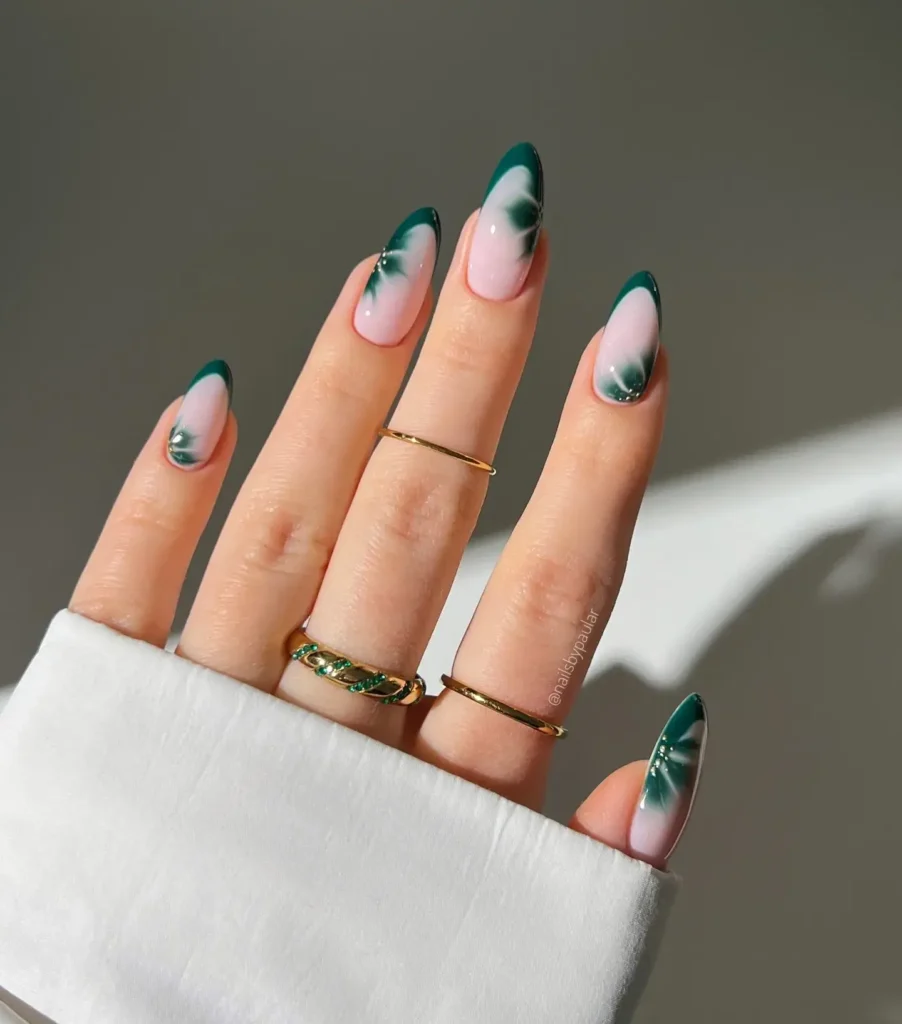
178. Nude Glaze Office Nails
A soft nude polish sits under a glossy glaze topcoat, giving the nail a clean, polished shine without any bold color.
Perfect for: Meetings, everyday office wear
Best shapes: Almond, square
Pro tip: Apply the glaze in one smooth layer to avoid streaks over the light nude base.
Time to DIY: 20 minutes
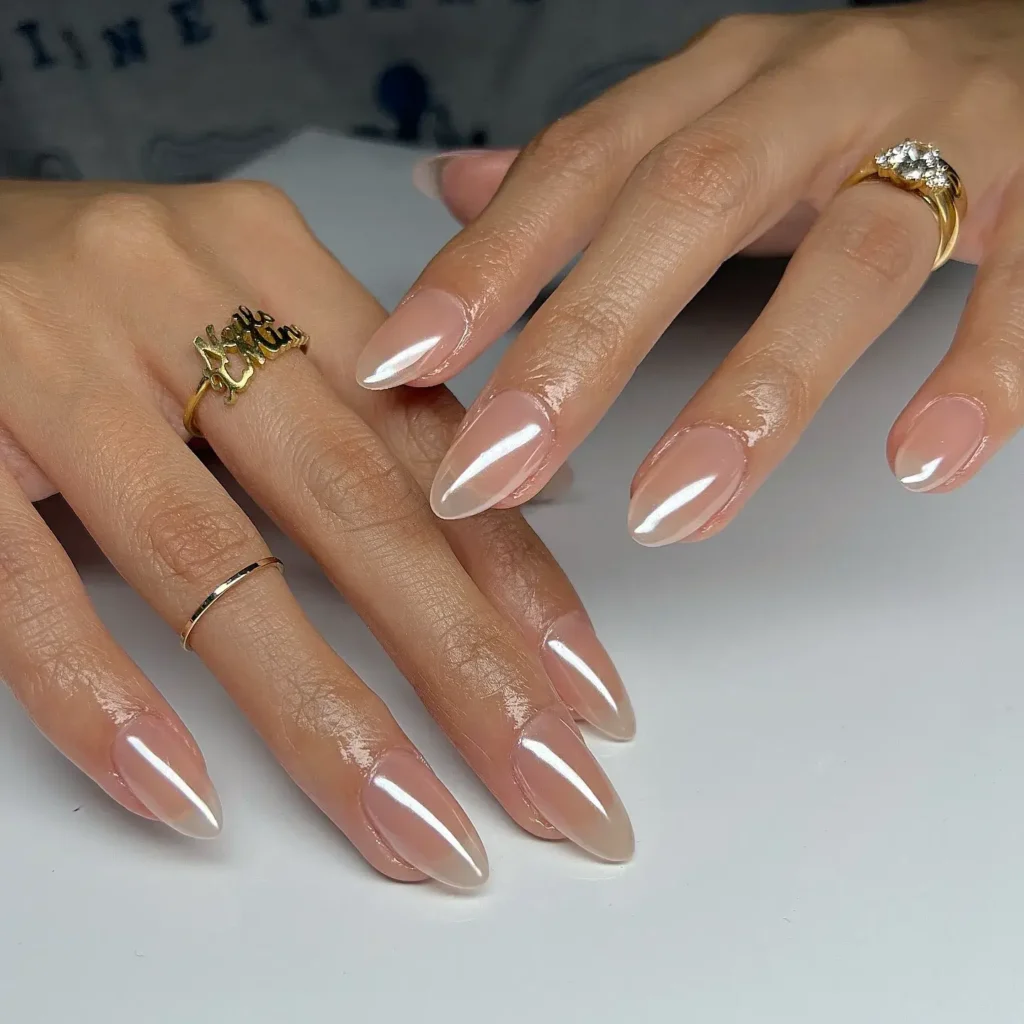
179. Soft Taupe Squoval Nails
A muted taupe shade covers the nail in a clean, semi-gloss finish that reads as neutral and professional.
Perfect for: Conservative workplaces, daily wear
Best shapes: Squoval
Pro tip: Two thin coats give even coverage without making the color look flat or chalky.
Time to DIY: 20 minutes
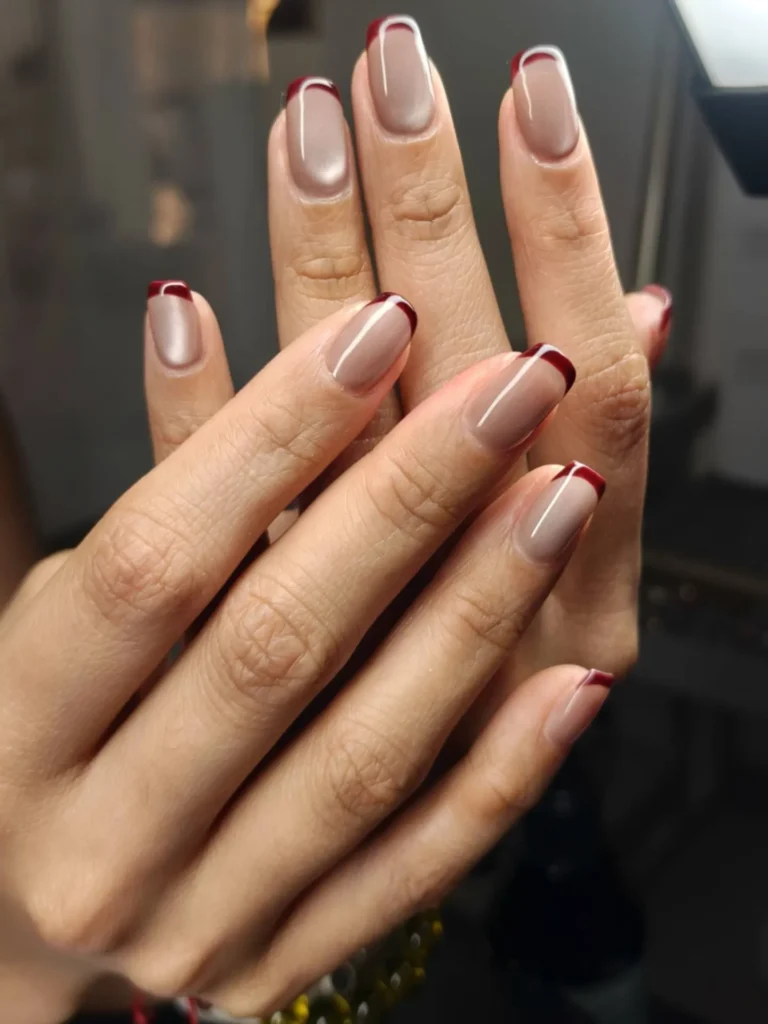
180. Sheer Blush Manicure
A barely there pink tint covers the nail, adding a hint of color while still looking close to a natural nail.
Perfect for: Interviews, understated professional looks
Best shapes: Oval, round
Pro tip: One thin coat is often enough, since sheer polish builds color gradually with each layer.
Time to DIY: 15 minutes
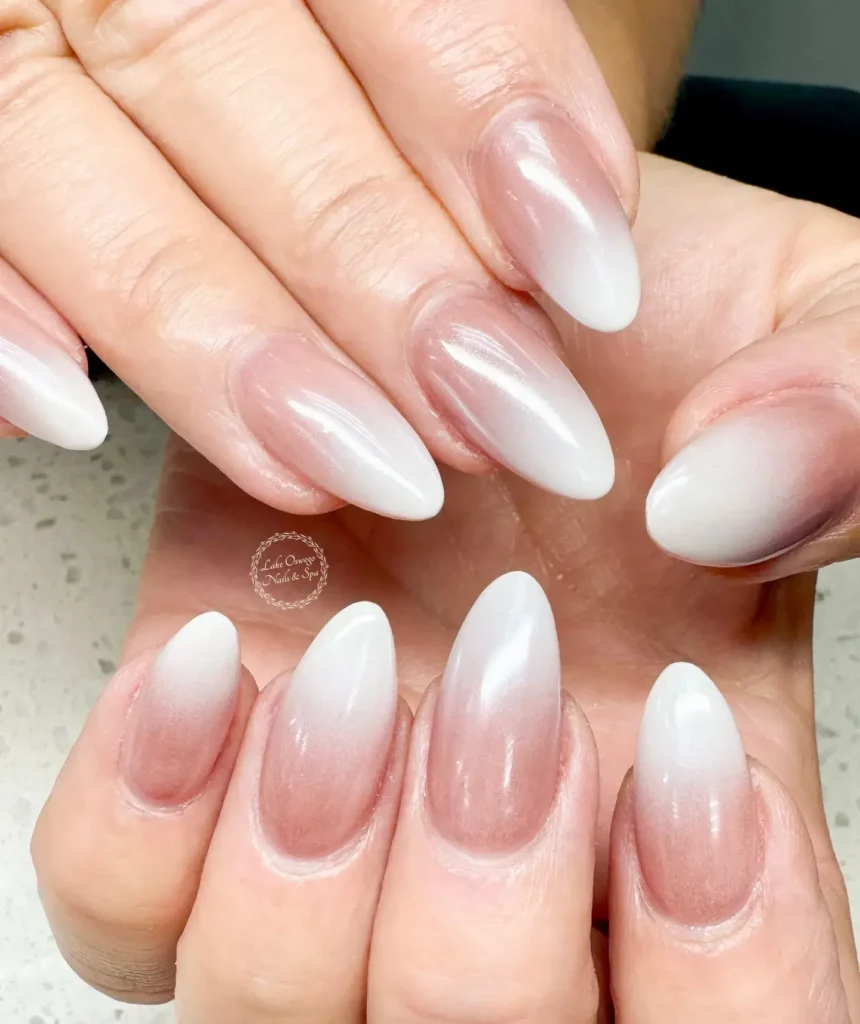
181. Classic Milky Nude Nails
A soft, milky white polish covers the nail, staying close to natural but with a slightly brighter, cleaner finish.
Perfect for: Client meetings, minimal daily styling
Best shapes: Square, squoval
Pro tip: Two thin coats give better coverage than one thick coat, which can look chalky.
Time to DIY: 20 minutes
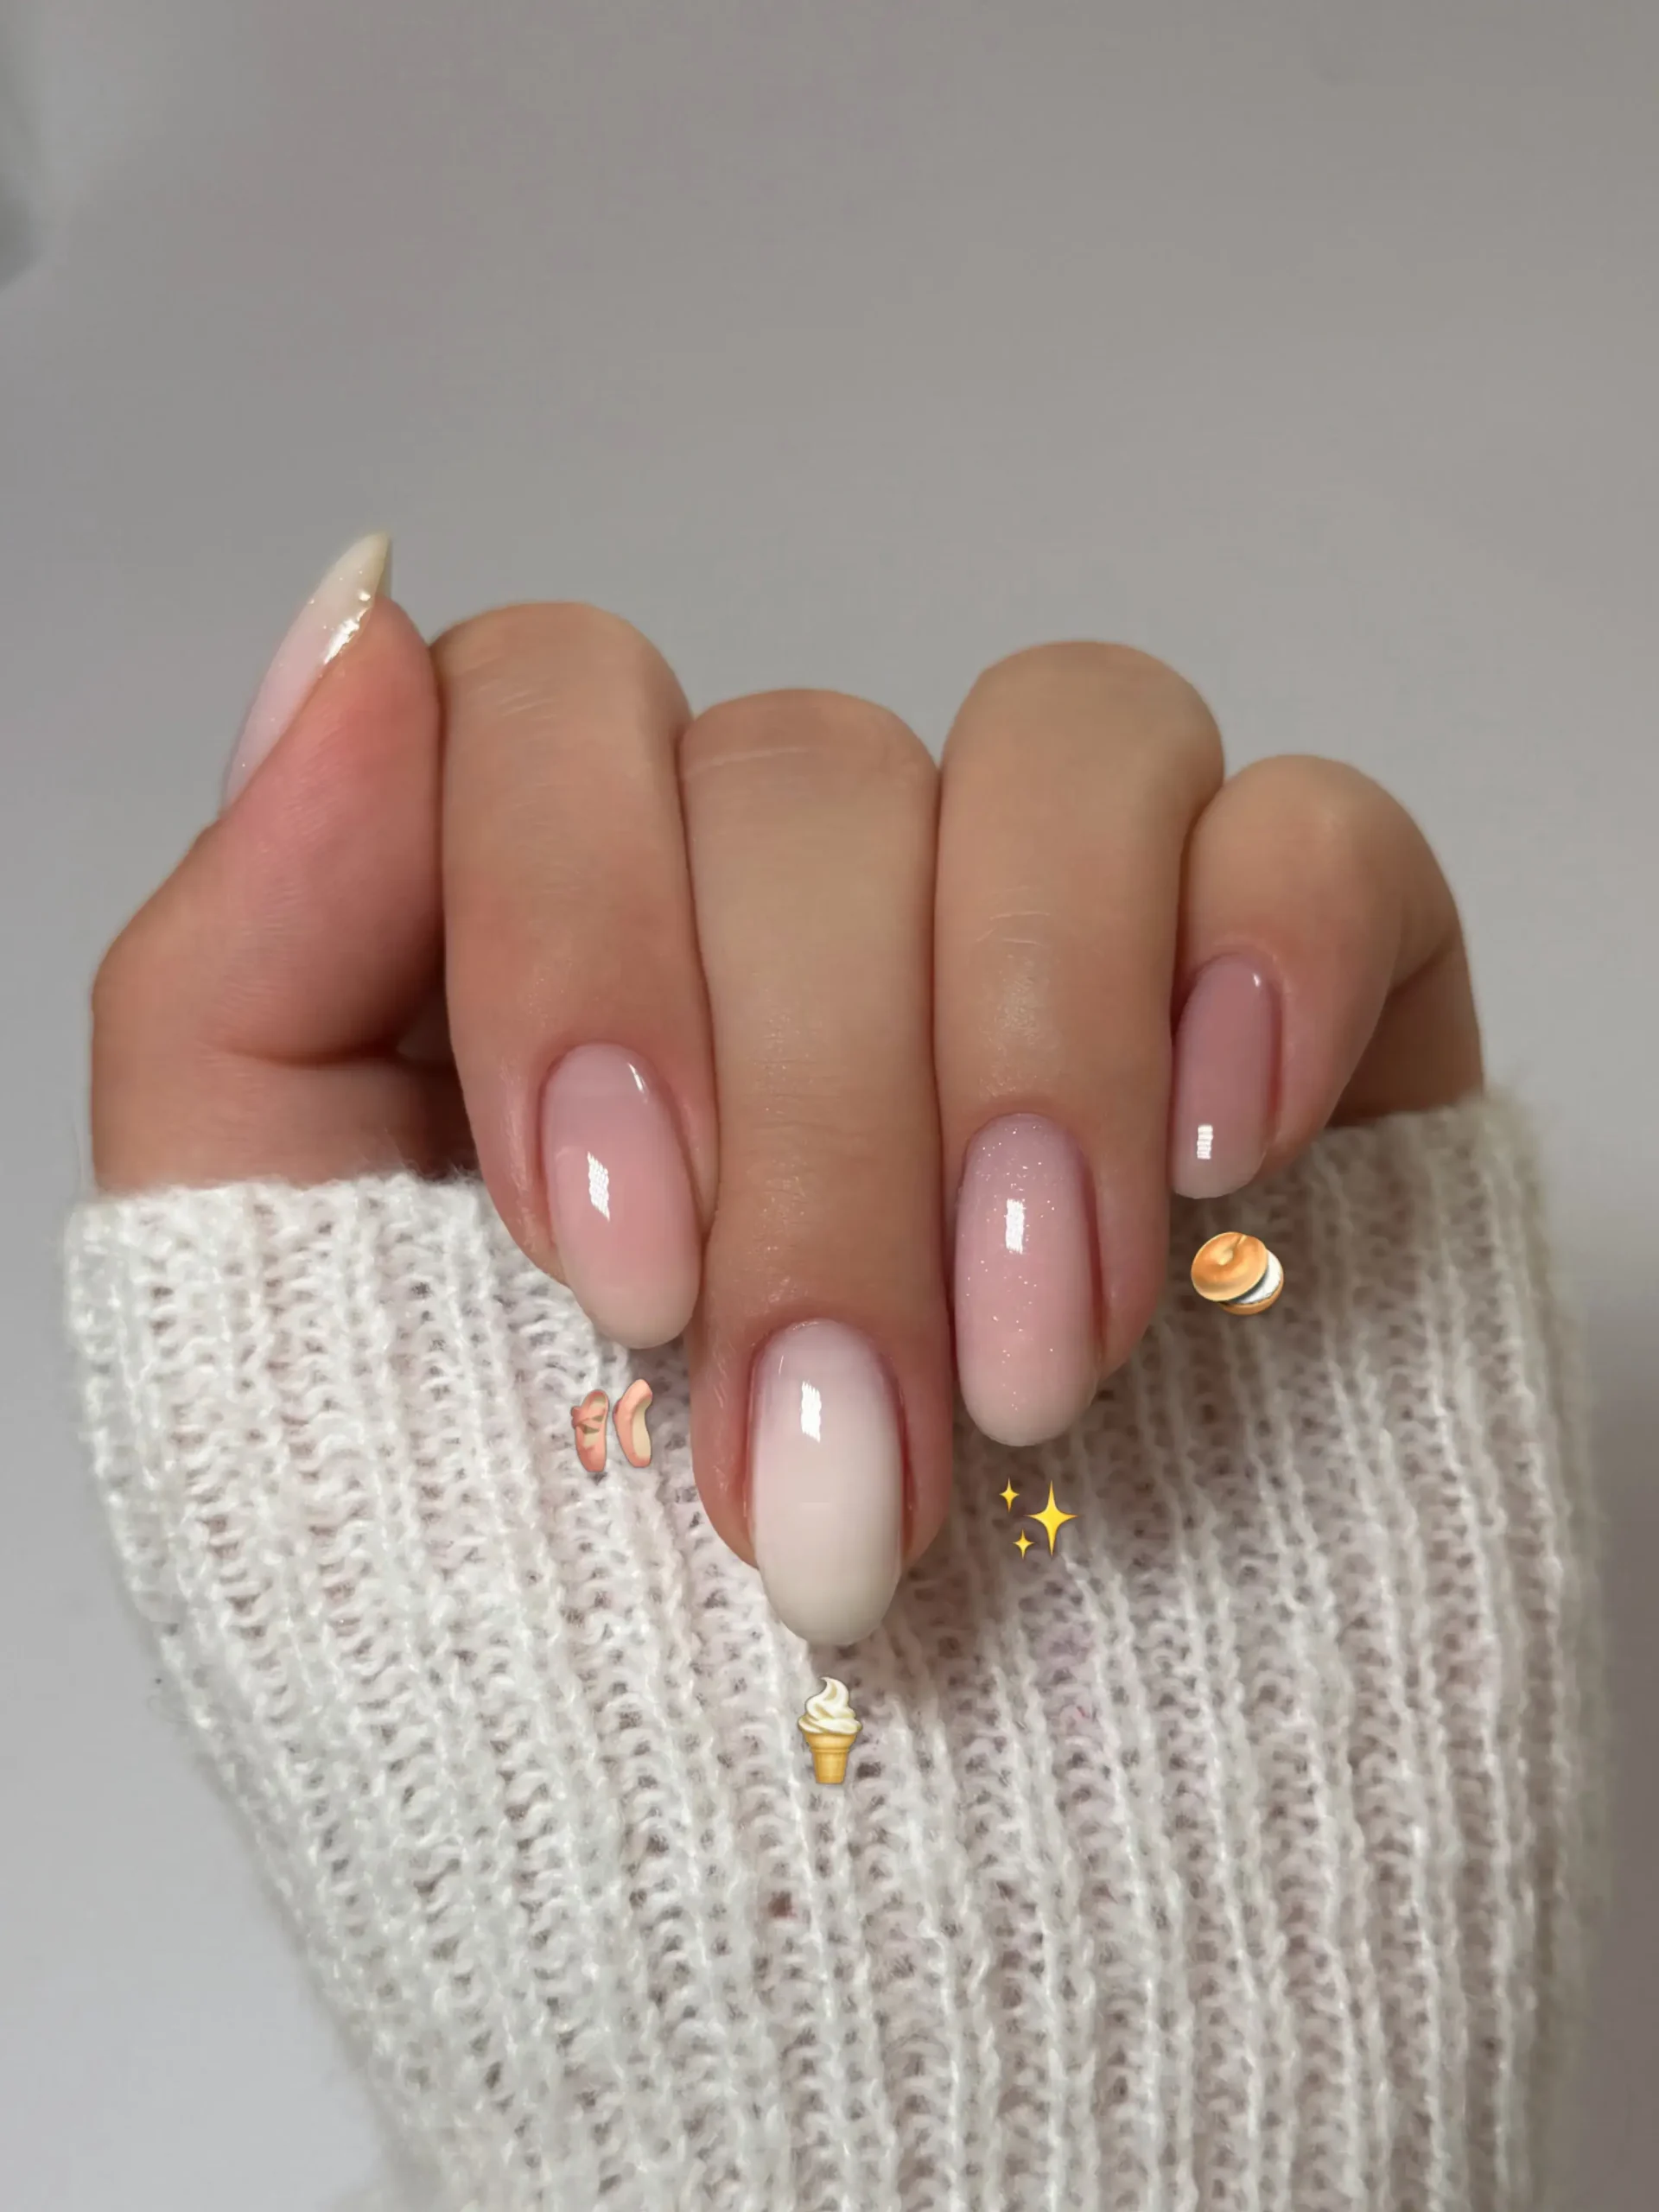
182. Thin Line Minimal Nails
A single thin line, either straight or curved, sits across the nail over a clean, neutral base.
Perfect for: Subtle detail without distraction
Best shapes: Almond, squoval
Pro tip: Use a striping brush loaded with a small amount of polish for the thinnest, most precise line.
Time to DIY: 20 minutes
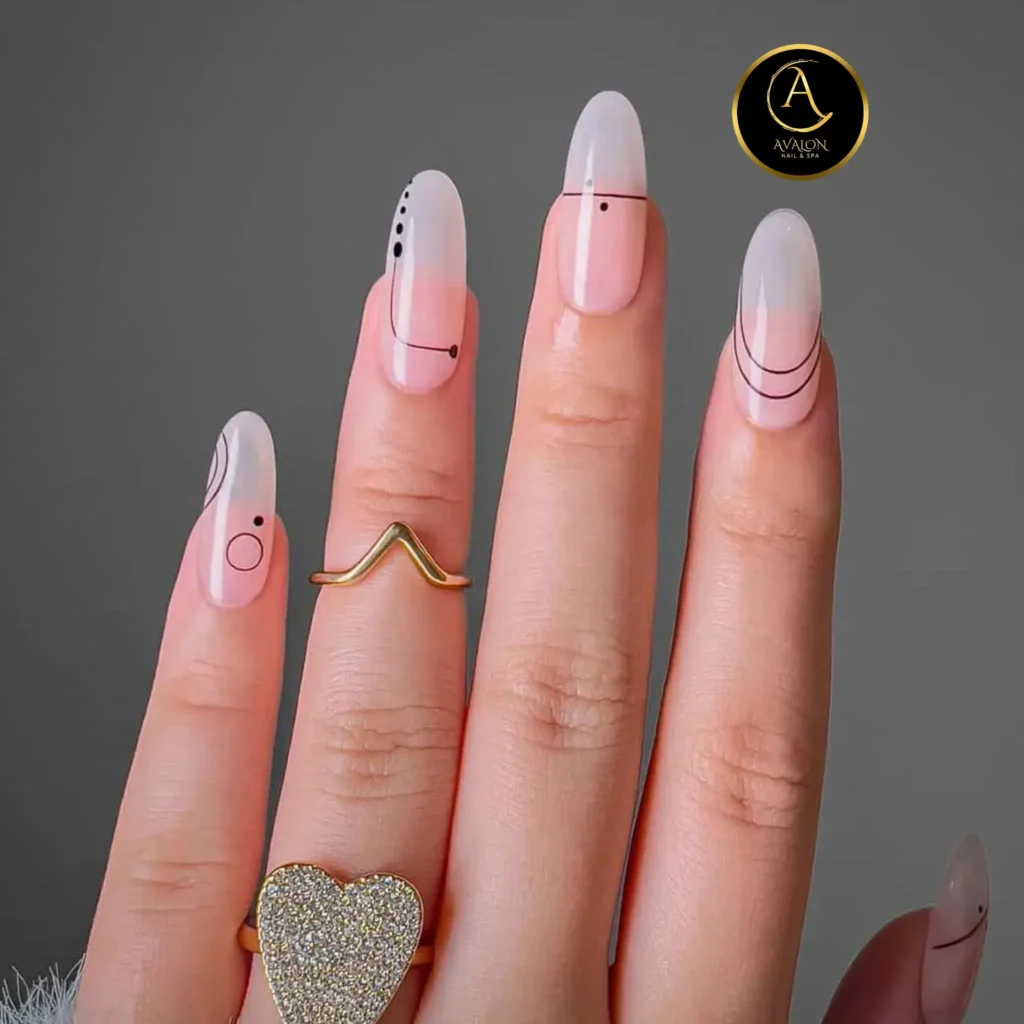
183. Neutral Glossy Almond Nails
A solid neutral shade covers the nail in a smooth, glossy finish, keeping the look simple and polished.
Perfect for: Everyday professional styling
Best shapes: Almond
Pro tip: Choose a shade close to your natural nail bed color for the most versatile, wear anywhere option.
Time to DIY: 20 minutes
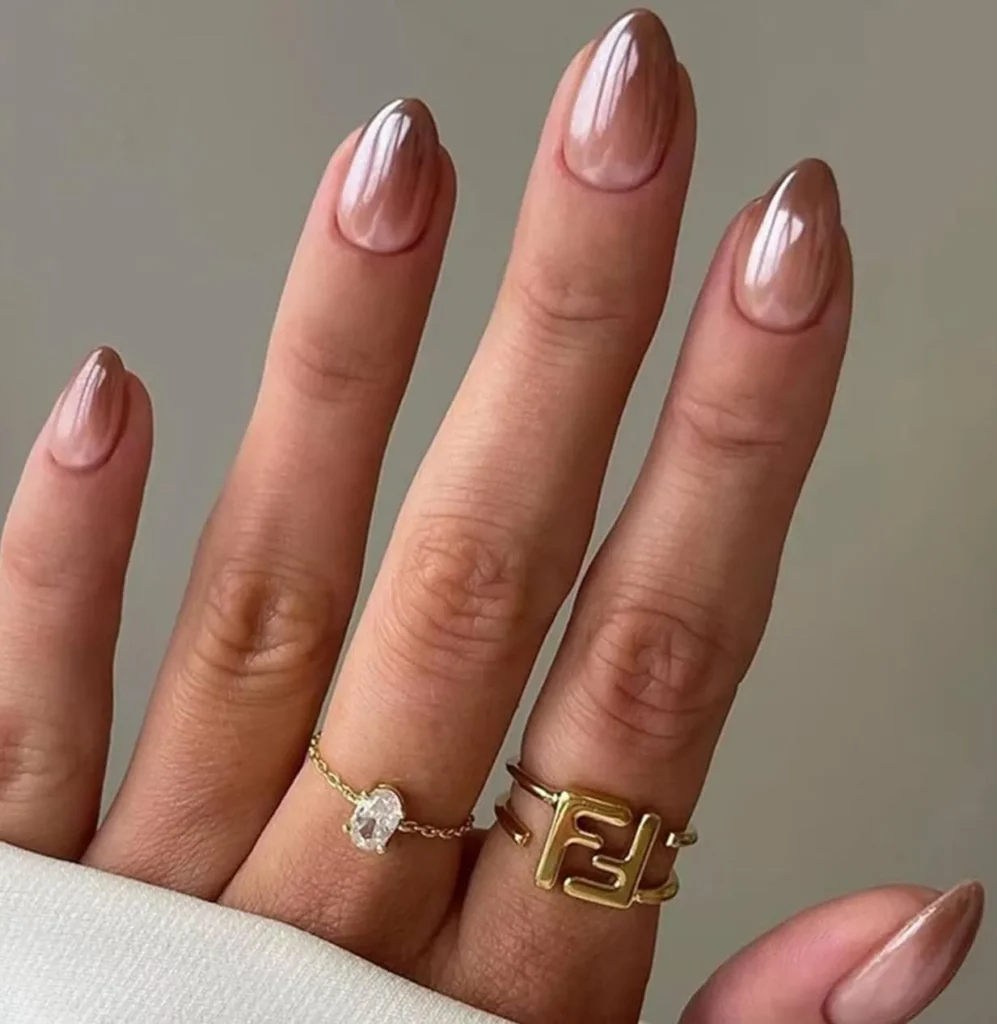
Wedding Guest & Bridal Summer Nail Inspo
Wedding season overlaps heavily with summer, yet most nail guides skip this occasion entirely. These designs work for brides and guests who want something polished without pulling focus from the event.
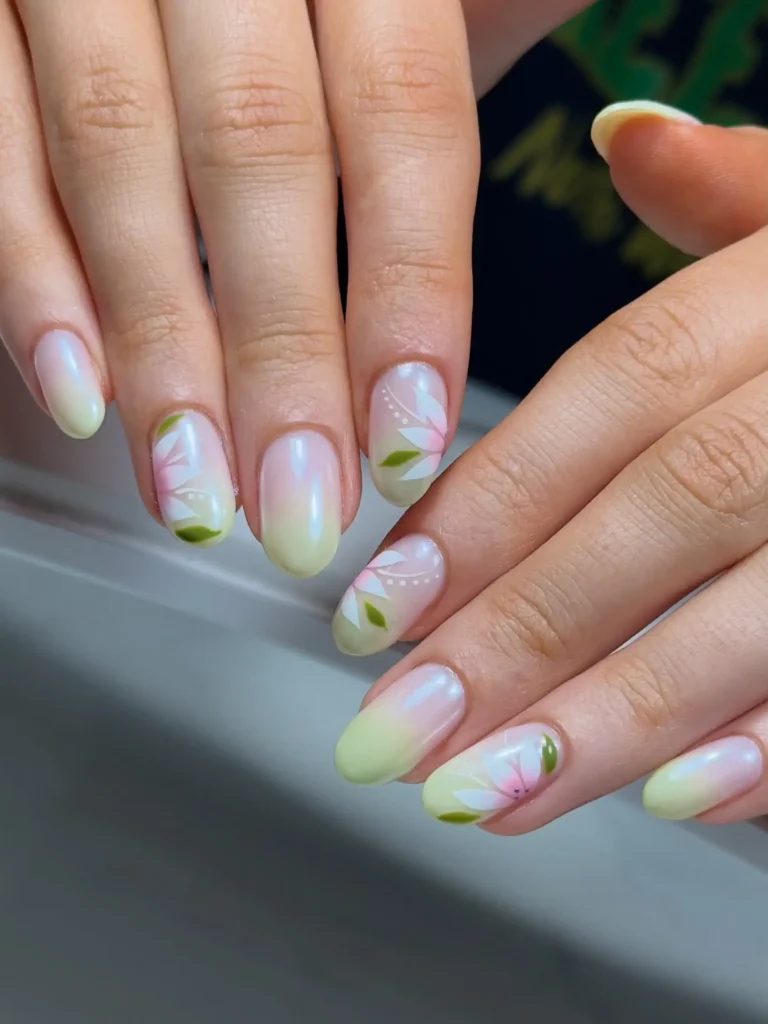
184. Bridal Milky White Nails
A soft, milky white polish covers the nail, giving a clean, bright finish that photographs well throughout a long wedding day.
Perfect for: Brides, formal summer events
Best shapes: Almond, oval
Pro tip: Two thin coats give better coverage than one thick coat, which can look chalky in photos.
Time to DIY: 20 minutes
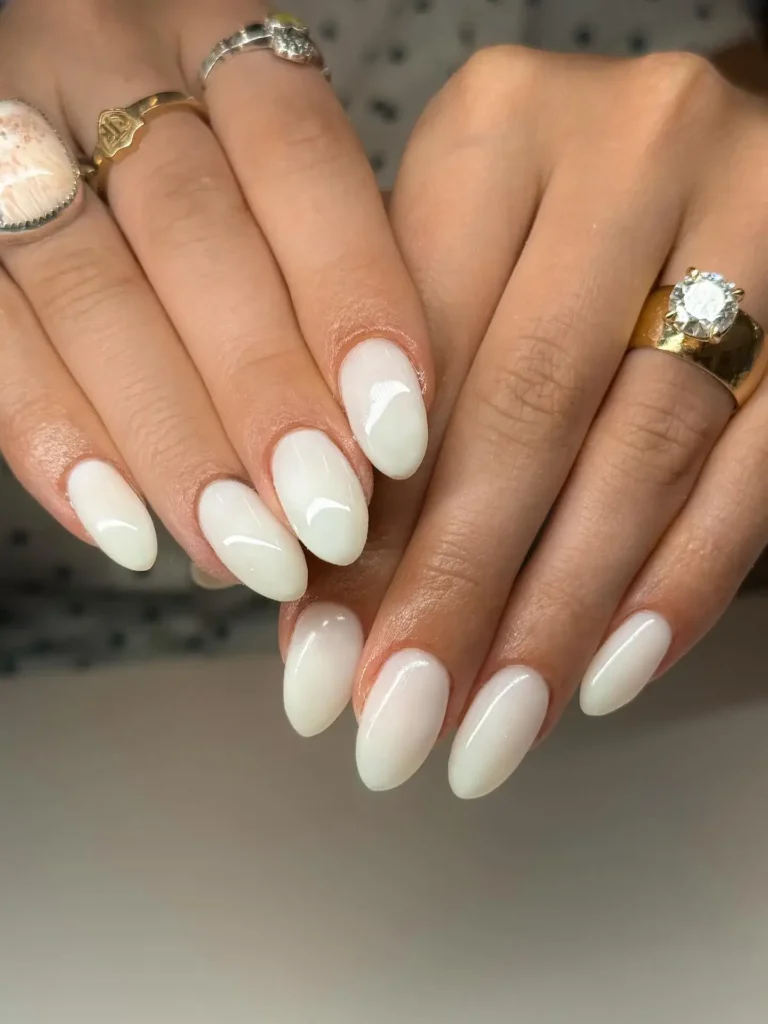
185. Pearl Bridal French Tips
A classic white French tip gets a small pearl detail near the base of each nail, adding subtle texture and shine.
Perfect for: Weddings, elegant formal styling
Best shapes: Almond, coffin
Pro tip: Apply pearls while the topcoat is still slightly tacky so they stay secure through a full day of events.
Time to DIY: 30 minutes
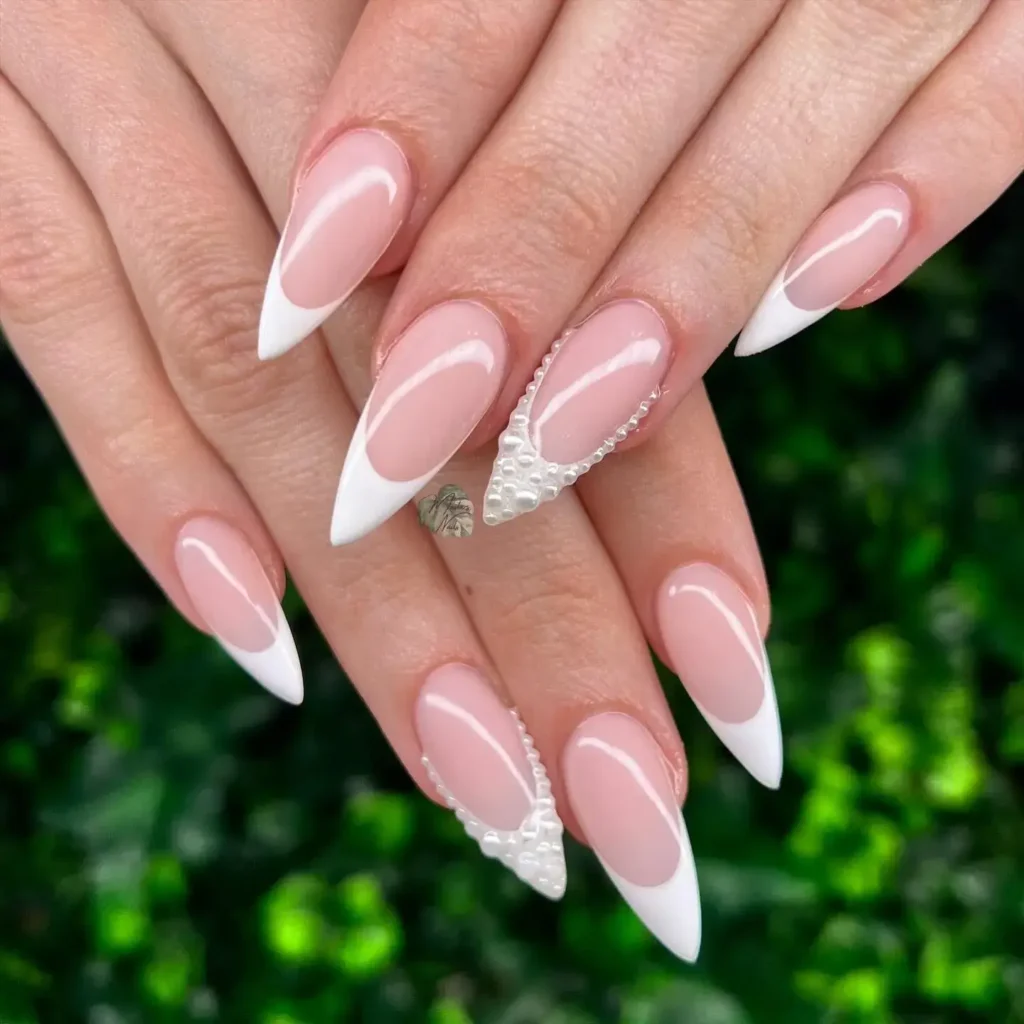
186. Soft Blush Bridal Set
A gentle blush pink covers the nail in a soft matte or semi-gloss finish, staying quiet and romantic without heavy detail.
Perfect for: Brides, bridesmaids
Best shapes: Oval, square
Pro tip: A matte topcoat softens the blush tone further for a more romantic finish.
Time to DIY: 20 minutes
187. Delicate Lace-Inspired Nail Art
Fine, hand-painted lace patterns cover one or two accent nails, echoing the texture of bridal lace fabric.
Perfect for: Detailed bridal styling
Best shapes: Almond, coffin
Pro tip: Use a fine detail brush and thin white polish, building the lace pattern in small sections rather than all at once.
Time to DIY: 45 minutes
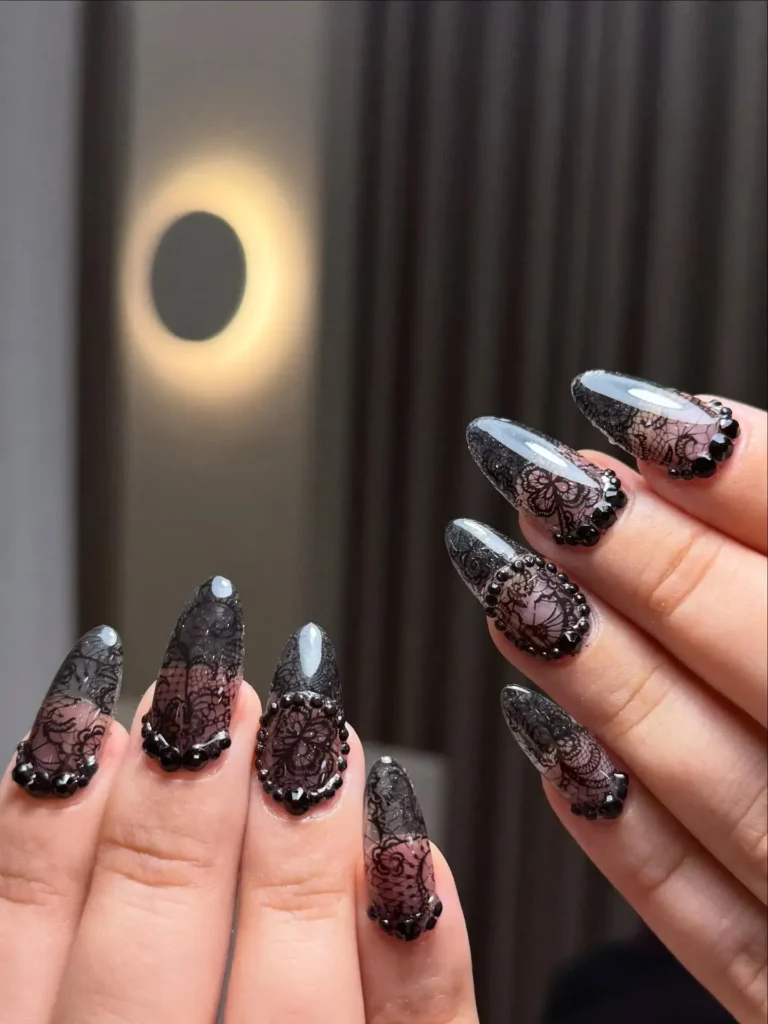
188. Ivory Chrome Bridal Nails
A warm ivory base gets a light chrome finish, creating a soft shimmer that photographs beautifully in natural light.
Perfect for: Outdoor summer weddings
Best shapes: Almond, coffin
Pro tip: Apply chrome powder in a thin, even layer, since ivory bases show unevenness more than white ones.
Time to DIY: 35 minutes
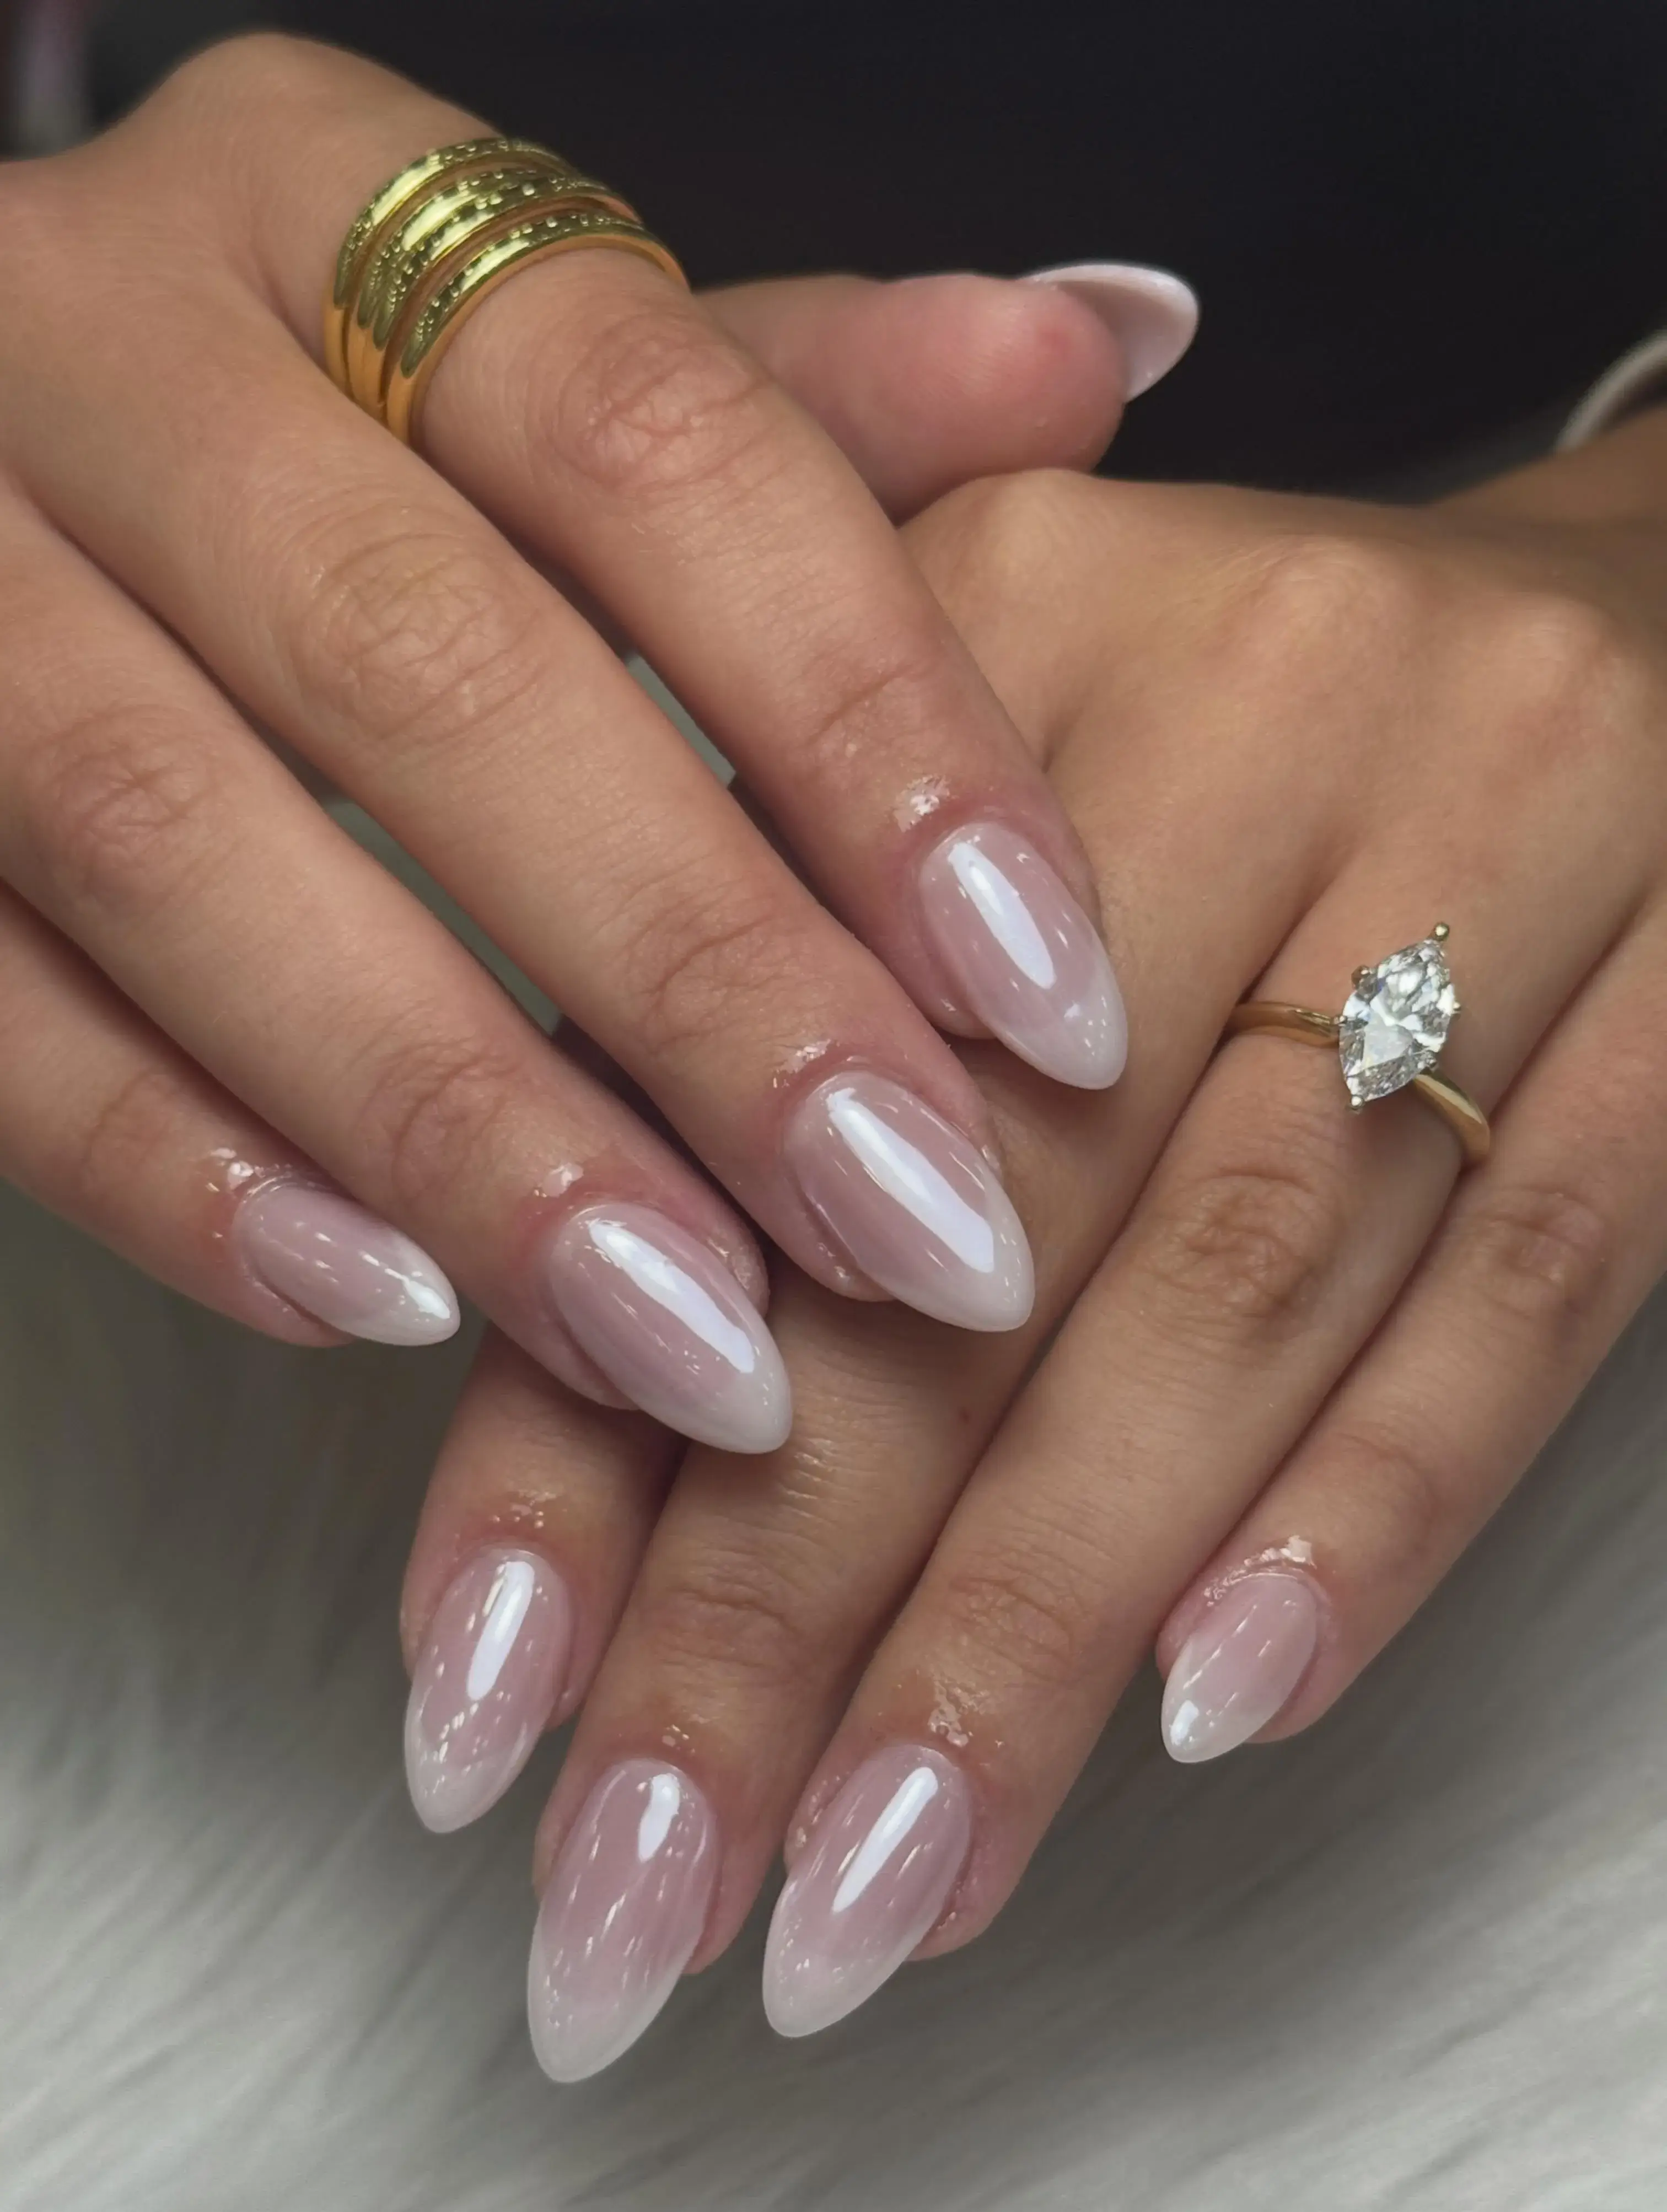
189. Wedding Guest Floral Accent
A clean neutral base pairs with a single small floral detail on one accent nail, keeping the look polished but not plain.
Perfect for: Wedding guests, semi-formal events
Best shapes: Almond, square
Pro tip: Choose floral colors that echo your outfit for a coordinated but not matchy look.
Time to DIY: 30 minutes
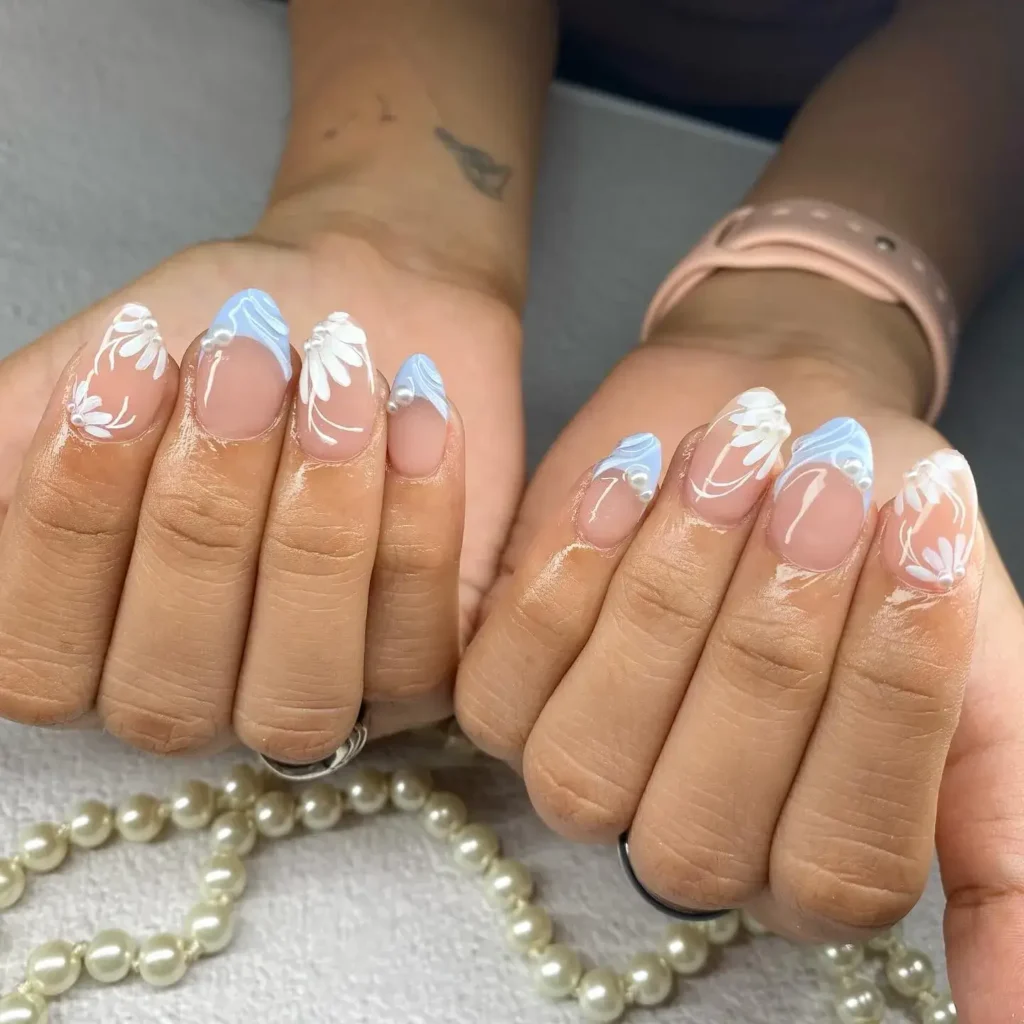
Late Summer / End-of-Season Nail Ideas
August and early September call for colors that bridge summer and fall. This transitional window rarely gets its own attention, even though the color shift is real and worth planning for.
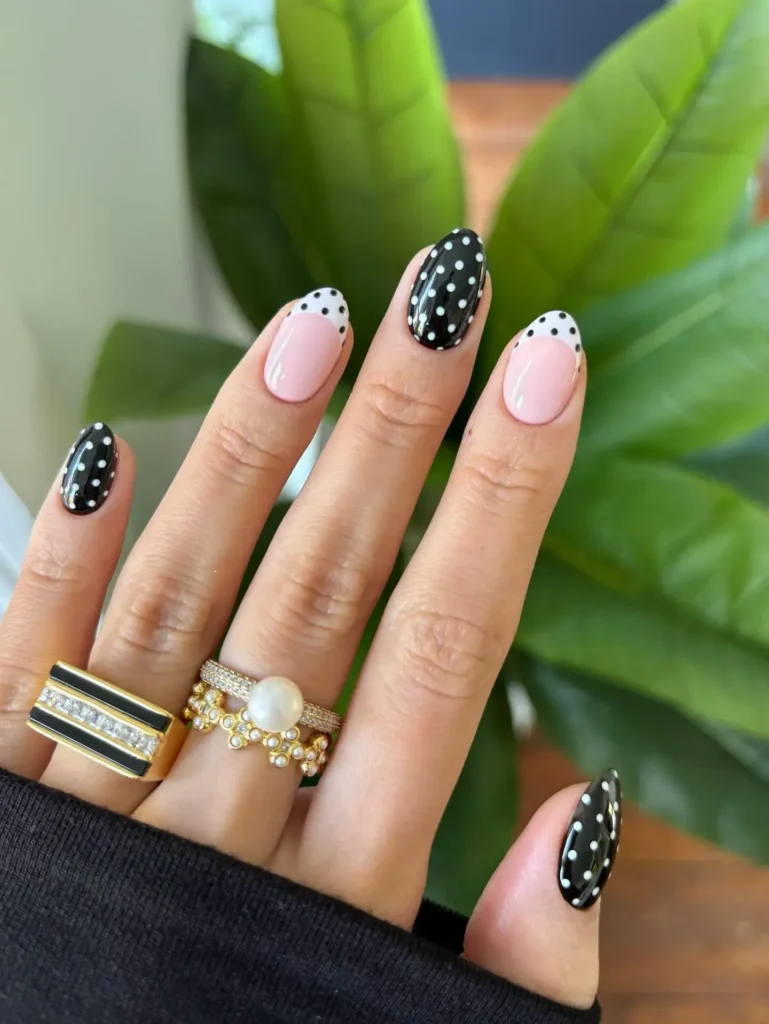
190. Burnt Orange Transitional Nails
A deep, muted orange covers the nail in a glossy finish, warmer and darker than the bright orange tones of early summer.
Perfect for: Late August, early fall transition
Best shapes: Almond, coffin
Pro tip: Apply two coats for full opacity, since burnt orange can look uneven with just one.
Time to DIY: 20 minutes
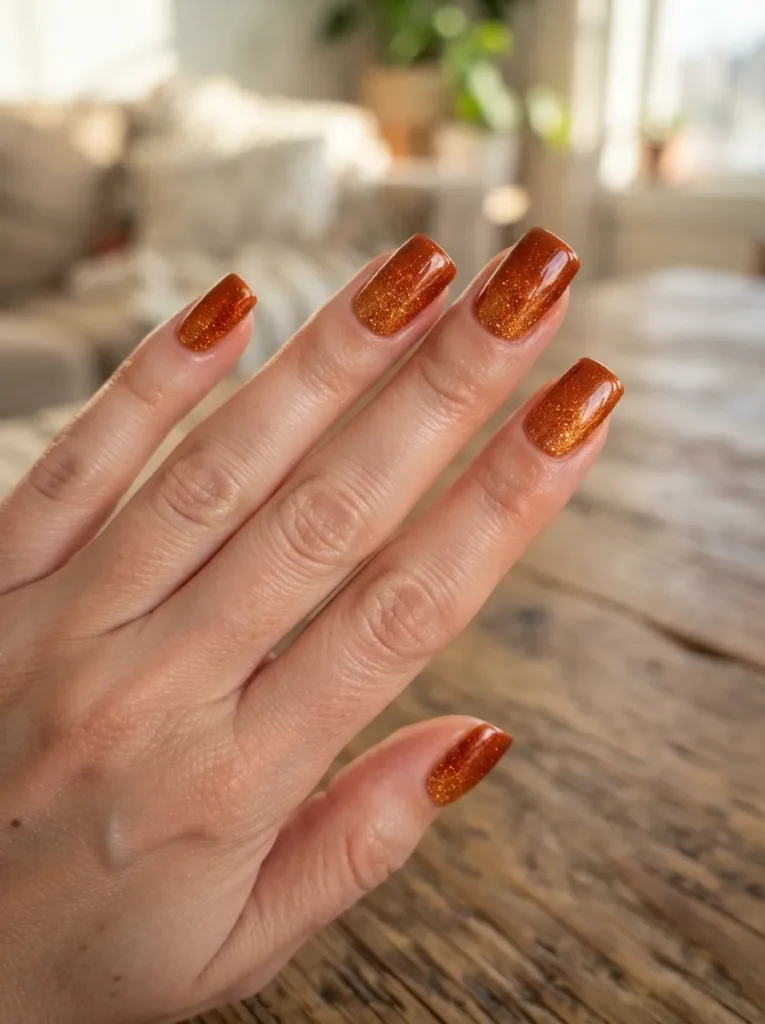
191. Deep Terracotta Nails
A warm, earthy terracotta shade covers the nail, pairing well with tanned summer skin while easing toward fall neutrals.
Perfect for: Transitional styling, warm undertones
Best shapes: Square, oval
Pro tip: A matte topcoat deepens terracotta and gives it a more grounded, autumnal finish.
Time to DIY: 20 minutes
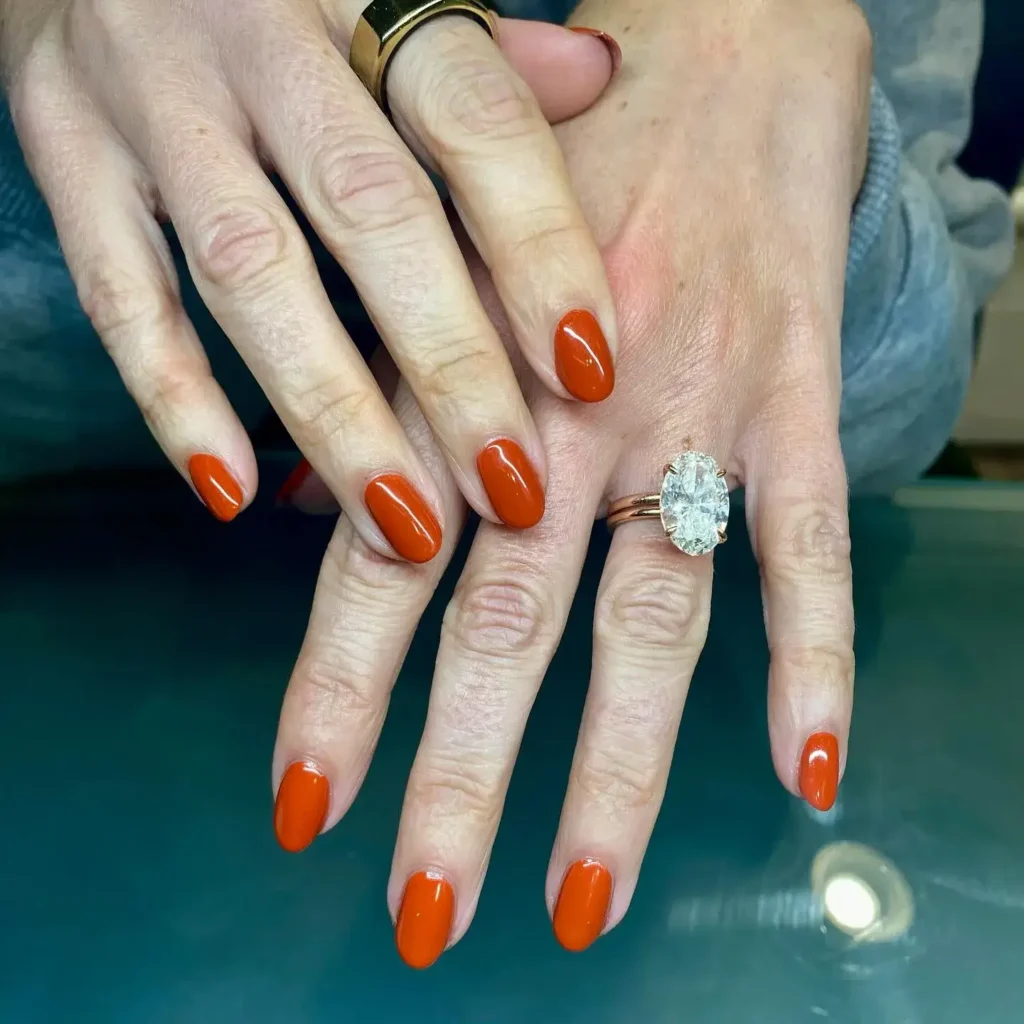
192. Amber Glow Nails
A rich amber shade with a subtle shimmer covers the nail, capturing the warm light of late summer evenings.
Perfect for: Evening events, golden hour styling
Best shapes: Almond, coffin
Pro tip: Apply shimmer polish in thin layers to avoid a gritty texture on the nail surface.
Time to DIY: 20 minutes
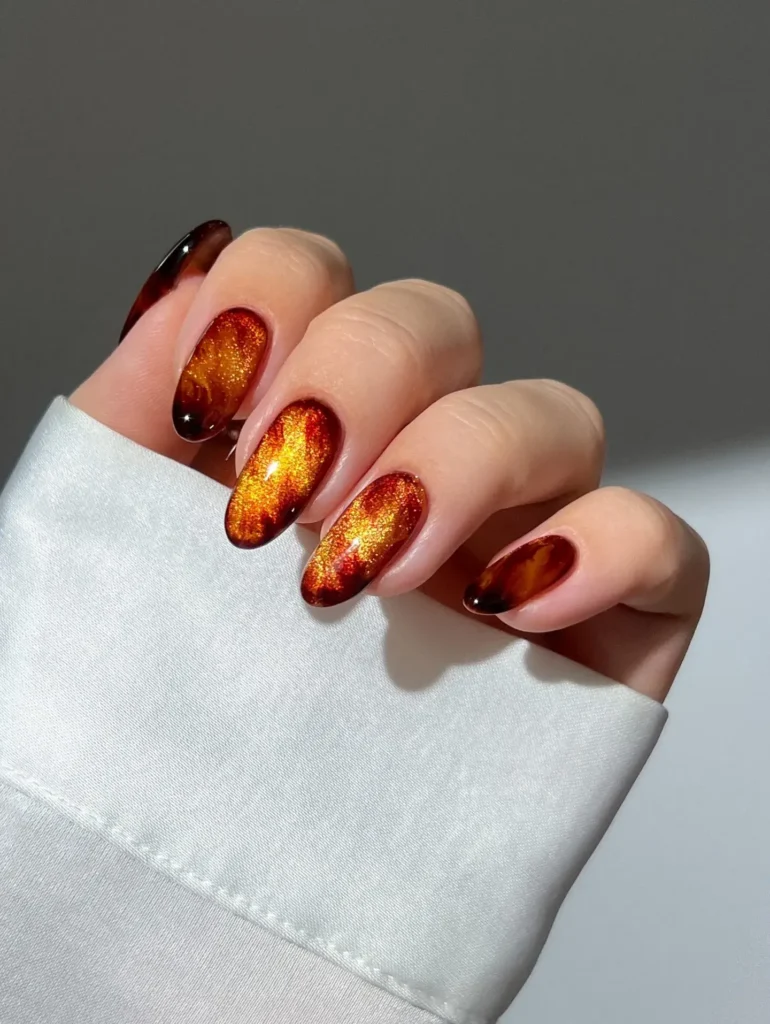
193. Mocha Mousse Nails
A soft brown shade with a creamy finish covers the nail, offering a neutral that works through the end of summer and into fall.
Perfect for: Versatile transitional wear
Best shapes: Squoval, oval
Pro tip: Two thin coats keep the mocha shade smooth and even without looking streaky.
Time to DIY: 20 minutes
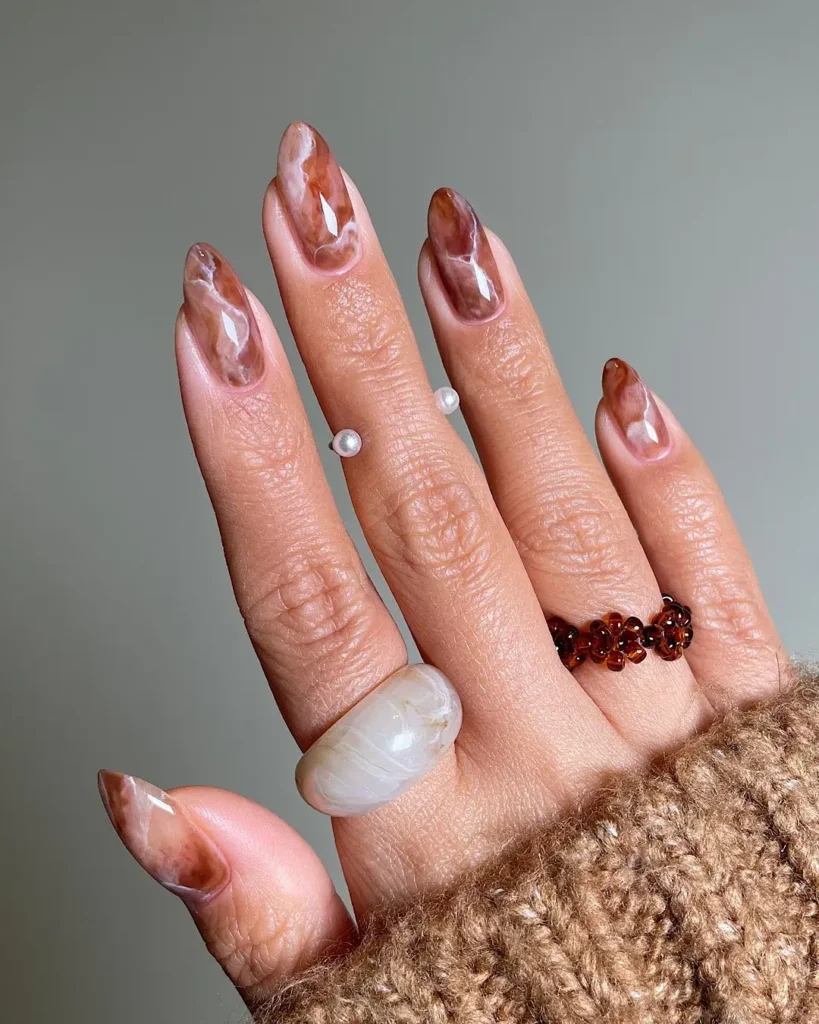
194. Muted Olive Transitional Set
A dusty, muted olive green covers the nail, moving away from the brighter greens of peak summer toward a deeper, earthier tone.
Perfect for: Late summer, early fall styling
Best shapes: Square, almond
Pro tip: A matte topcoat suits olive well, giving it a softer, more subdued finish.
Time to DIY: 20 minutes
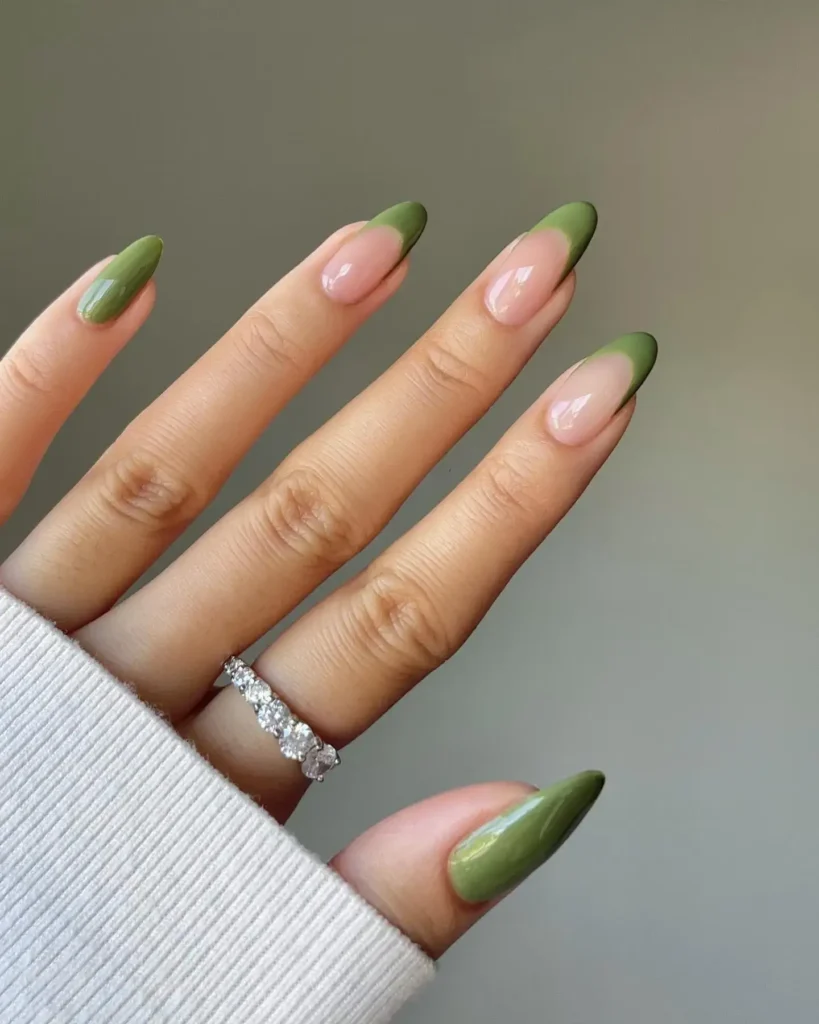
195. Dusty Plum Nails
A muted, purplish brown shade covers the nail, signaling the shift toward cooler fall tones while still feeling wearable in late summer heat.
Perfect for: Transitional evening wear
Best shapes: Almond, coffin
Pro tip: Apply two coats for full opacity, since dusty plum can look sheer with just one.
Time to DIY: 20 minutes
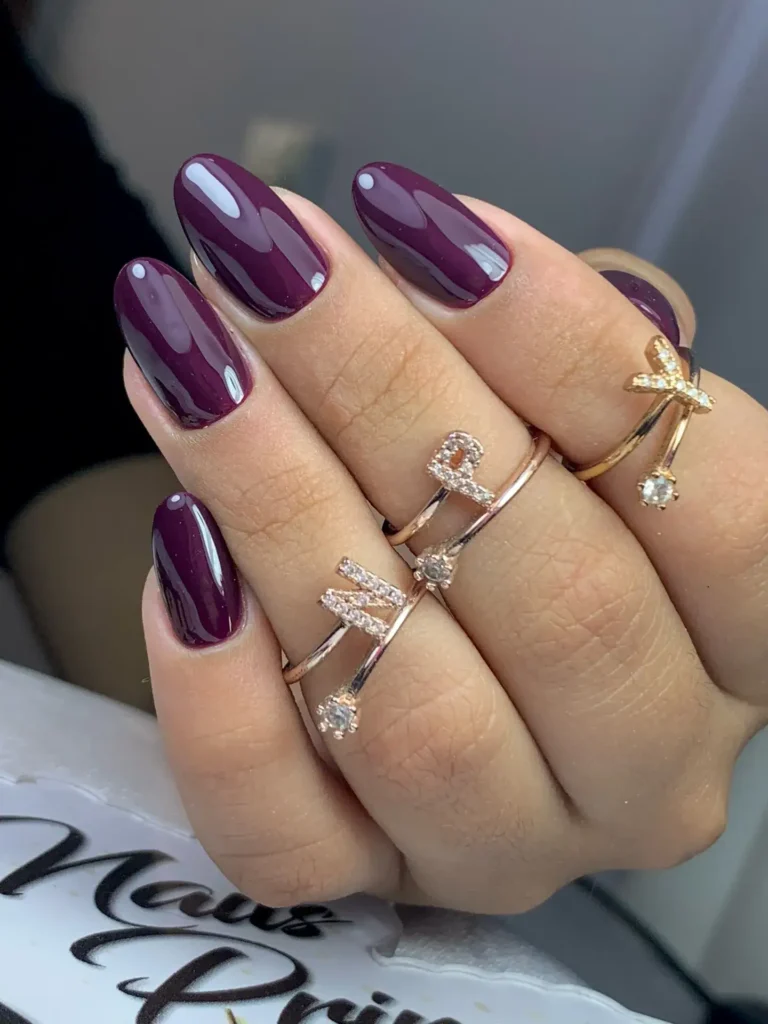
Nail Prep & Care for Summer
Good nail art starts before any polish goes on. A little prep work makes every design last longer and look cleaner.
How to Prep Your Nails Before Summer Starts
Start with a clean, bare nail. Remove any old polish completely, including color trapped near the cuticle line.
Trim and shape your nails before applying anything else. Filing after polish can chip the finish and waste your work.
Push back cuticles gently with a wooden stick. Avoid cutting them, since this can lead to irritation and slower healing in humid summer weather.
Buff the nail surface lightly to remove ridges. A smooth surface helps polish and gel adhere evenly and last longer.
Finish prep with a dehydrator or alcohol wipe. This removes oils from the nail bed so your base coat bonds properly.
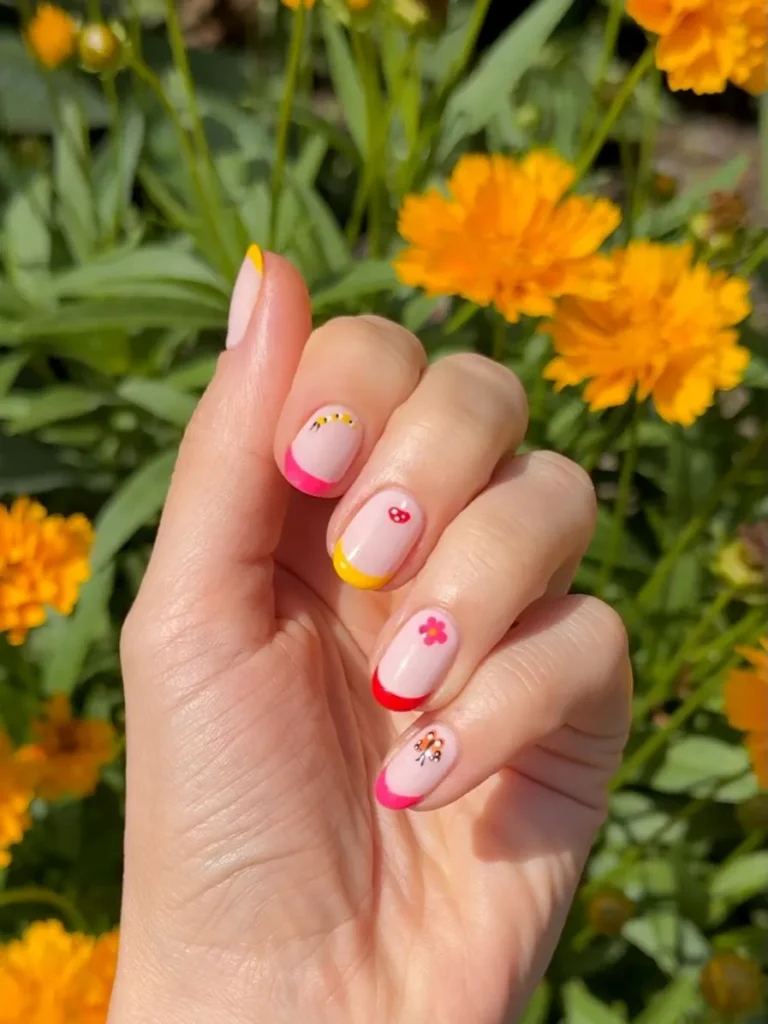
Why Gel Lifts Faster in Summer Heat
Heat and humidity change how gel polish behaves. Warm temperatures can soften the gel slightly before it fully cures under UV or LED light.
Sweat also plays a role. Increased moisture on the skin around the nail can weaken the seal between gel and nail bed over time.
Water exposure compounds the problem. Frequent swimming or hand washing during hot months speeds up the natural lifting process at the edges.
Thinner gel layers actually hold up better in heat than thick ones. Thick layers trap more stress as they expand and contract with temperature changes.
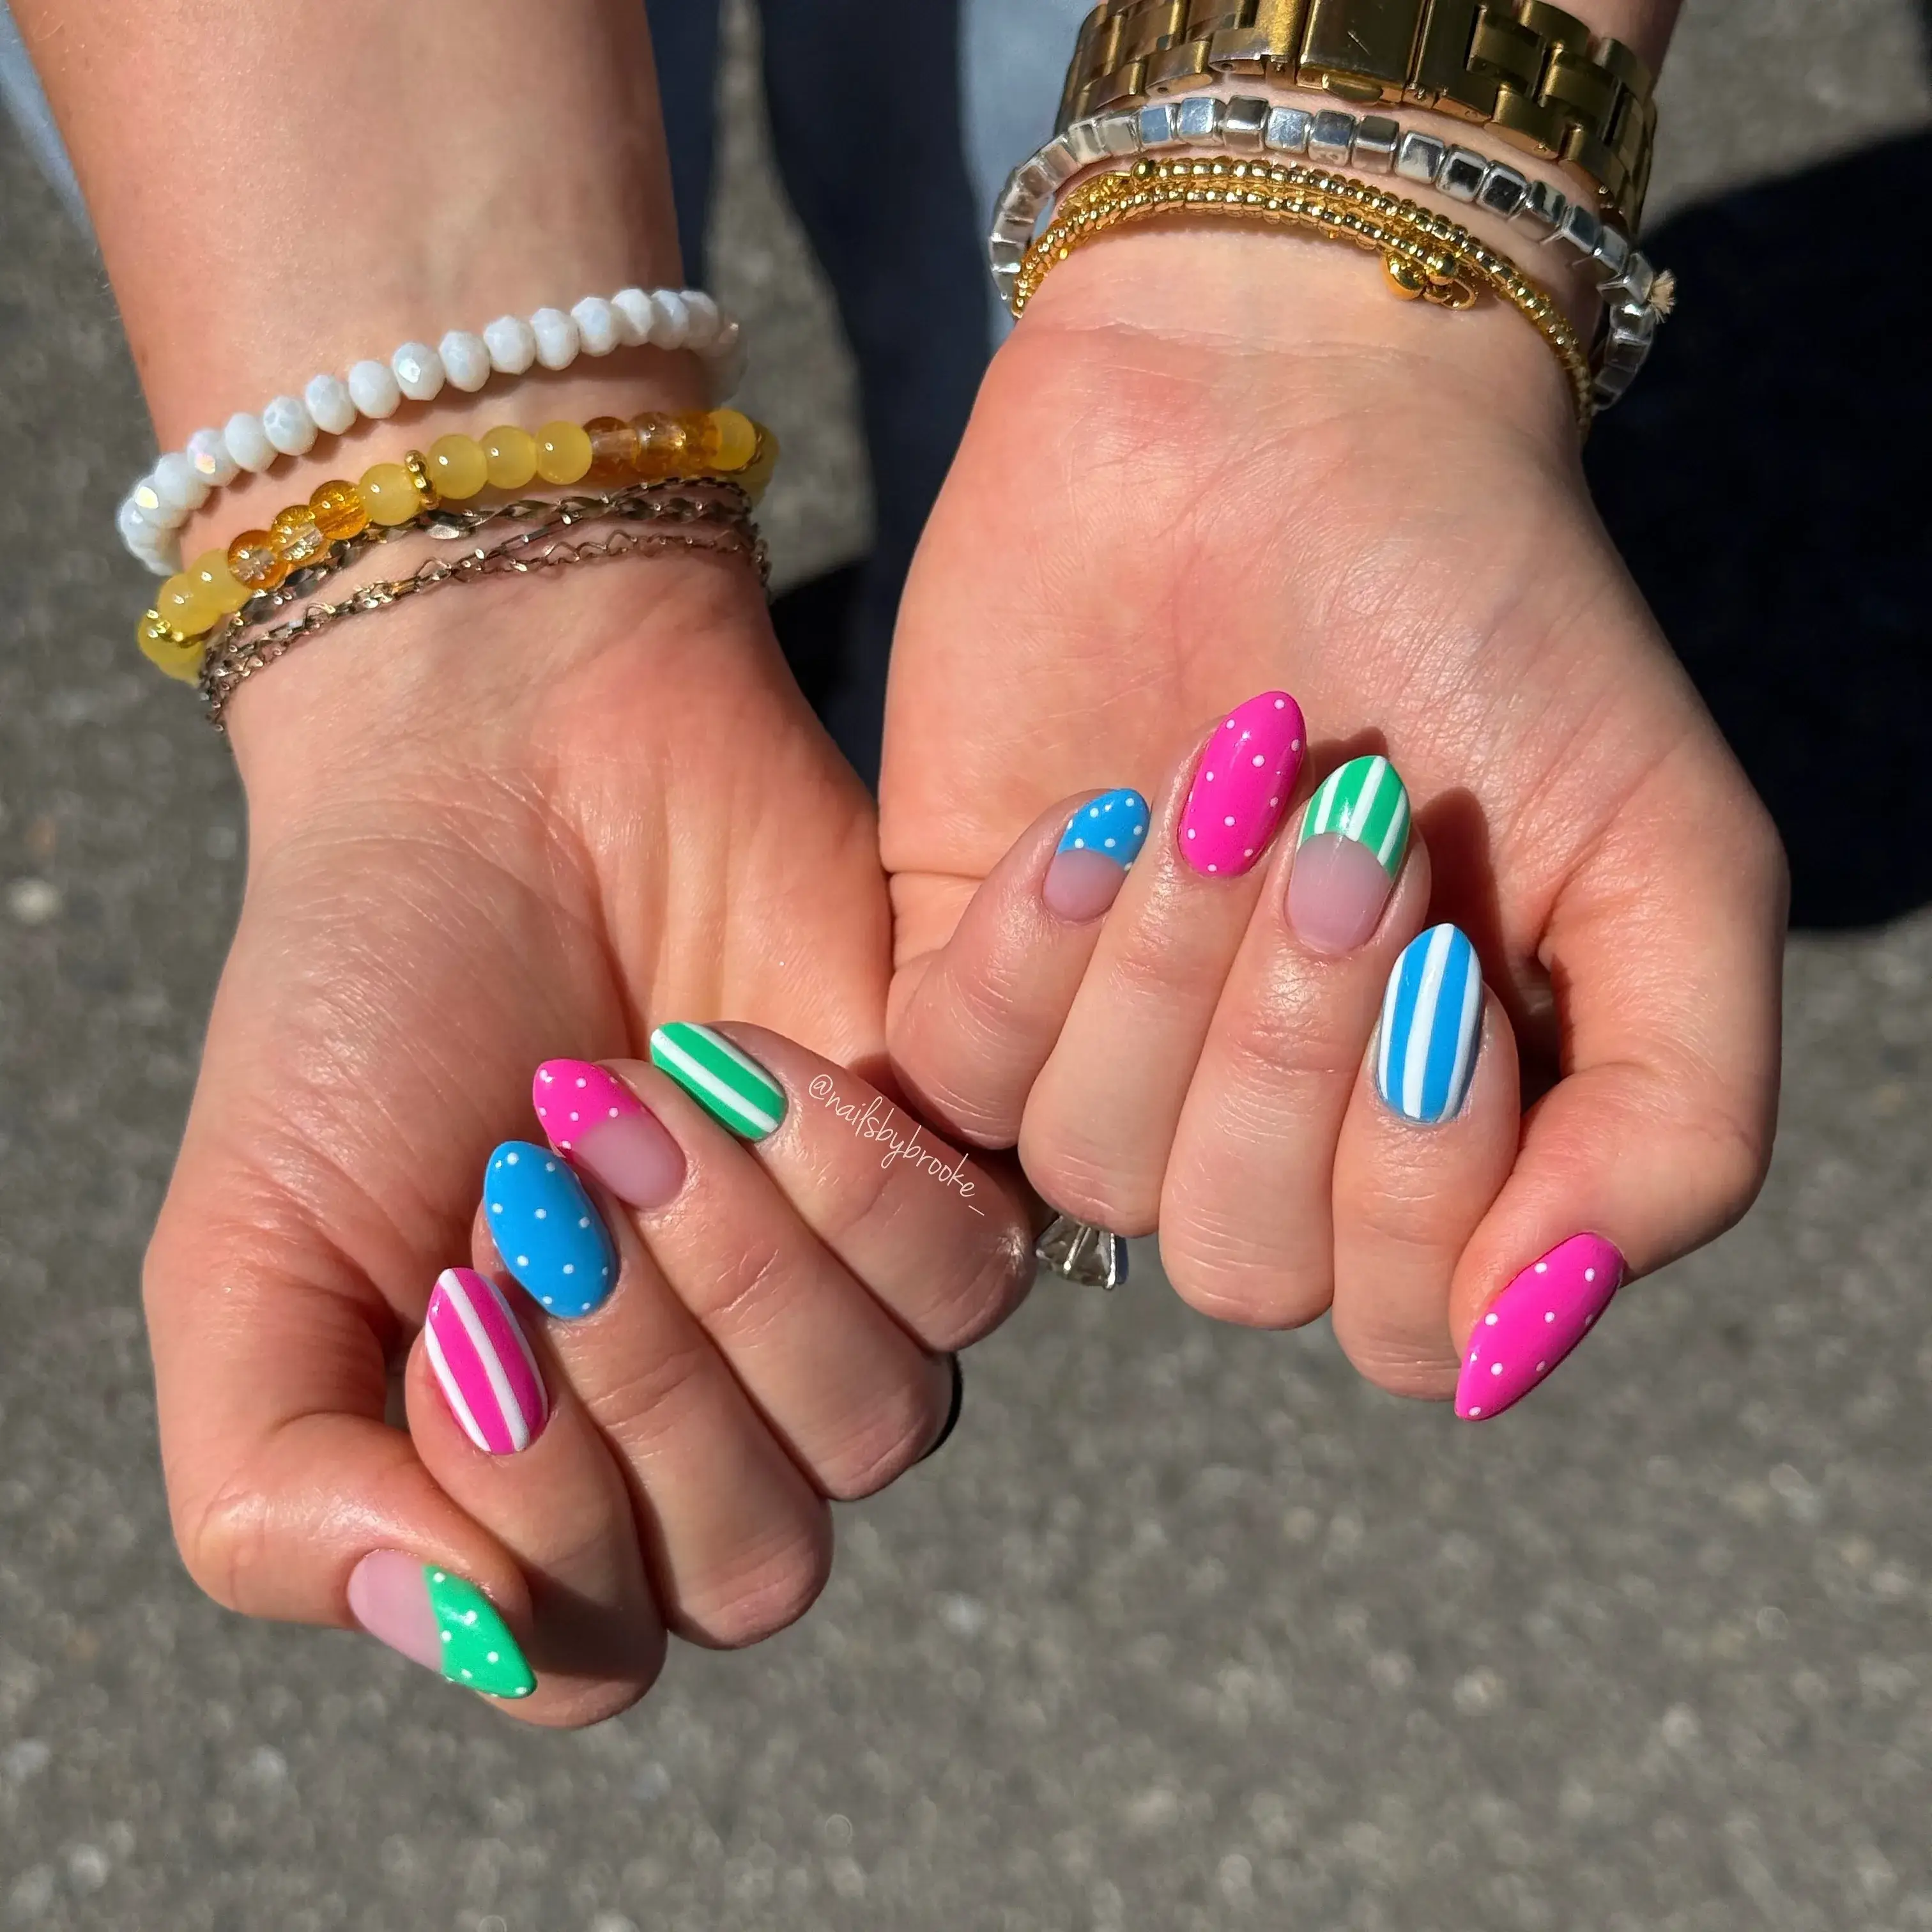
Sunscreen & Chlorine: What Actually Damages Your Polish
Chemical sunscreens contain ingredients that can break down polish over time, especially around the edges of each nail.
Chlorine strips natural oils from both skin and nails. This leaves nails more brittle and polish more prone to chipping.
Salt water causes similar drying effects, though usually less aggressive than chlorinated pool water.
Applying sunscreen with a cotton pad instead of your fingers reduces direct contact between the product and your polish.
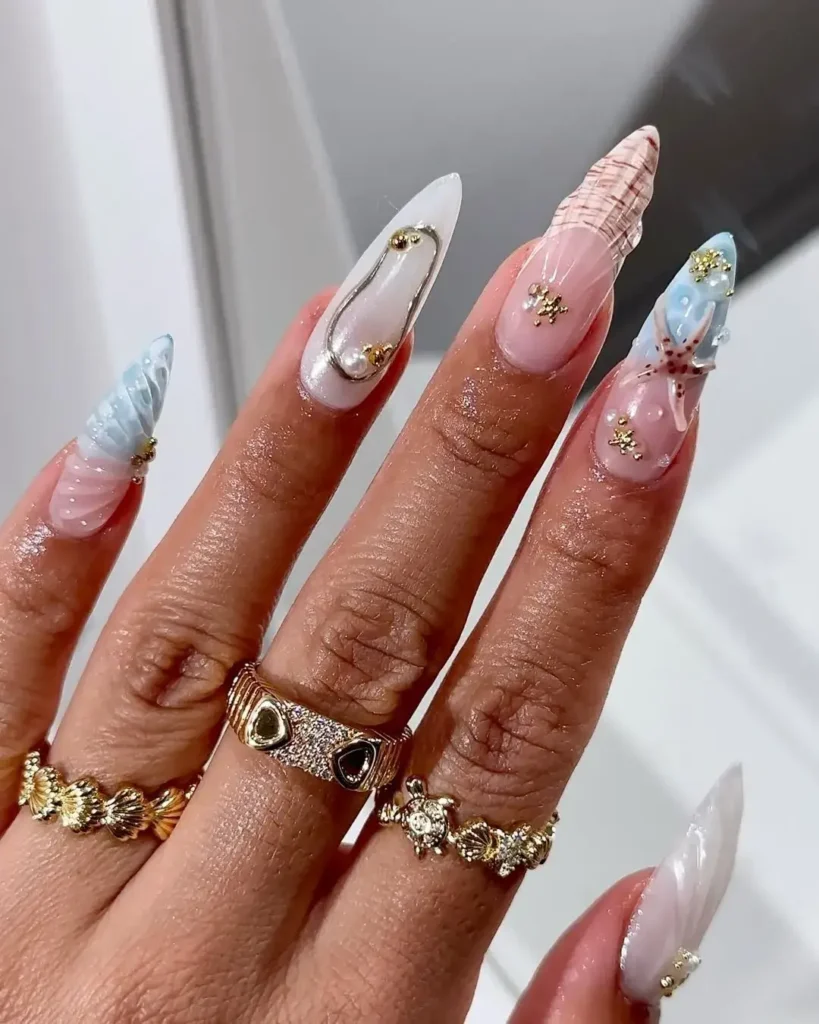
Daily Maintenance Routine (Cuticle Oil, Top Coat)
Cuticle oil should go on daily, not just at your appointment. It keeps the skin around your nails hydrated, which supports healthier polish adhesion.
Apply oil at night after your hands are done for the day. This gives it time to absorb without being wiped away.
A fresh top coat every four to five days extends the life of any manicure. It restores shine and adds a protective barrier against daily wear.
Gloves during cleaning or dishwashing protect both your polish and your natural nails from repeated water exposure.
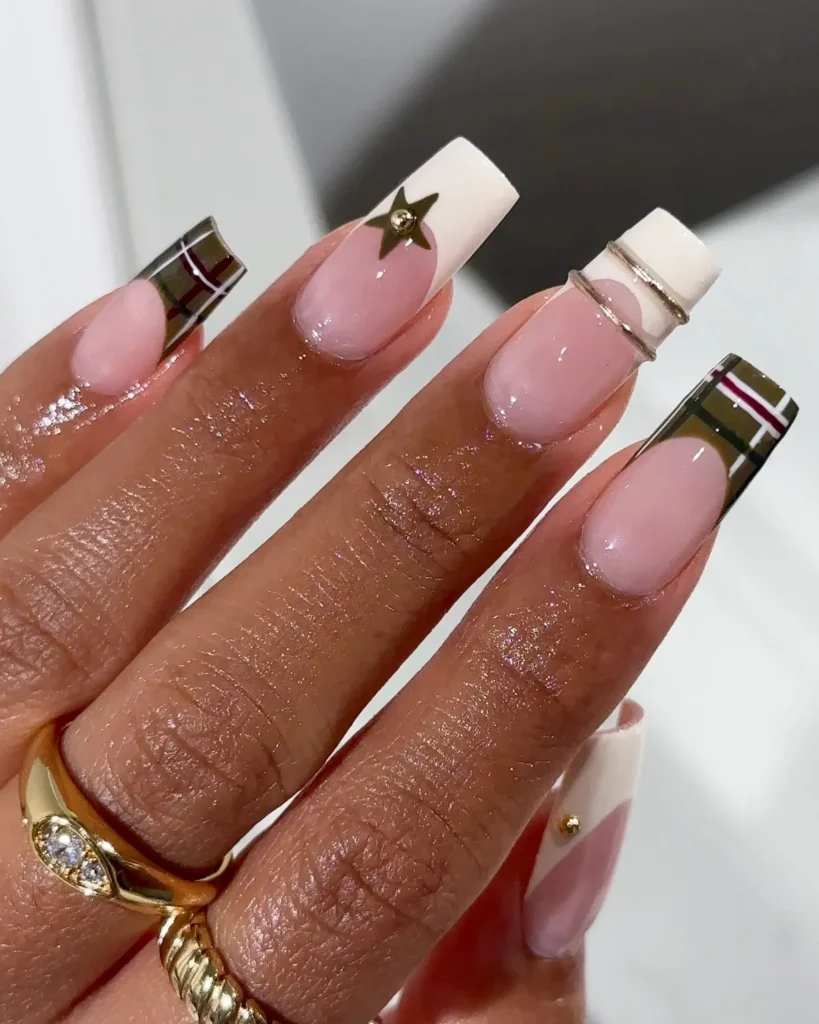
How to DIY These Looks at Home
Many designs in this guide are realistic to recreate yourself. The right tools and a little patience go a long way.
Tools You’ll Need
A basic kit covers most designs. You need a base coat, your chosen polish colors, a topcoat, and a few thin detail brushes.
A dotting tool handles polka dots, small flowers, and fine texture work. Most kits include two or three sizes.
Striping tape helps create clean lines for French tips, color blocking, and geometric patterns.
For chrome or aura designs, you also need a small applicator or airbrush tool, along with the specific powder or airbrush polish.
A makeup sponge works well for blending ombre and gradient designs without needing an airbrush setup.
Techniques Explained (Ombre Sponge, Airbrush, Chrome Powder, Dotting Tool)
The sponge technique works by dabbing two or more wet polish colors directly onto a makeup sponge, then pressing that sponge onto the nail. Repeat until the color builds to your liking.
Airbrushing uses a small handheld device to spray thin, even layers of color. It creates smoother gradients than a sponge but requires more practice to control.
Chrome powder needs a fully cured gel base underneath. Rub the powder directly onto the nail using a soft applicator until it reaches full shine.
A dotting tool creates dots by simply pressing the rounded tip into wet polish, then lifting straight up. Different tool sizes create different dot sizes on the same design.
Beginner vs. Advanced Designs
Start with single color looks, simple French tips, or basic dot patterns if you are new to nail art. These require fewer steps and less precision.
Ombre and gradient designs are a good next step. They demand some blending skill but forgive small imperfections better than fine line work.
Save 3D art, detailed florals, and multi step chrome designs for once you feel comfortable with basic techniques. These take longer and are harder to fix if something goes wrong midway.
Practice on paper first for any freehand design, like swirls or florals. It builds muscle memory before you commit polish to your actual nails.
Nail Shape Guide for Summer
Choosing the right nail shape affects how designs actually look on your hands. Each shape suits certain styles better than others.
Almond nails taper into a rounded point at the tip. This shape suits detailed art well, since the extra length gives artists room to work. Florals, ombre, and chrome designs all show up beautifully here.
Coffin nails are long with a flat, squared tip. The wide surface makes this shape ideal for bold graphic patterns, 3D art, and anything with fine detail work.
Square nails have a completely flat tip with sharp corners. This shape suits clean lines and structured patterns, like color blocking or pinstripes, since the straight edges keep everything crisp.
Squoval nails soften the square shape with slightly rounded corners. This shape works well for both simple and detailed designs, making it one of the most versatile options.
Oval nails curve gently from base to a rounded tip. This shape tends to elongate the fingers and suits softer, simpler designs best.
Round nails follow the natural curve of the fingertip closely. Shorter and more practical, this shape works well for everyday wear and simple color choices.
Short nails, regardless of shape, need smaller-scale designs. Micro florals, tiny dots, and thin lines translate better than large, detailed art on a smaller canvas.
Your daily routine matters as much as personal taste. If you type often or work with your hands, shorter, sturdier shapes tend to hold up better over time.
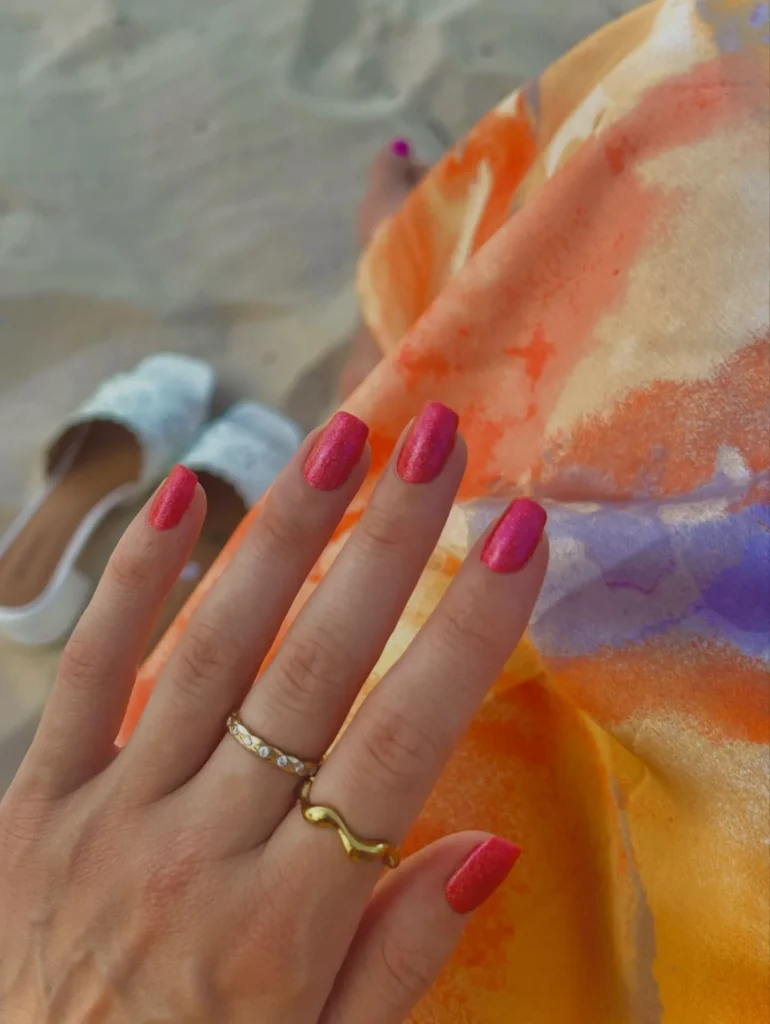
Skin Tone & Undertone Guide for Summer Nail Colors
Nail color can look completely different once it is actually on your hand, even if the bottle color looked perfect.
Warm undertones show up as gold, peachy, or yellow tones in the skin, often visible in the veins on your wrist, which appear more green than blue. Coral, terracotta, warm reds, and golden chrome tend to look especially striking against warm undertones.
Cool undertones show pink or blue tones in the skin, with veins that appear more blue than green. Blue-based pinks, lavender, icy chrome, and true reds tend to complement cool undertones well.
Neutral undertones sit between warm and cool, often showing a mix of both in different lighting. This undertone has the most flexibility and can wear nearly any shade comfortably.
Tanned skin, common in summer months, often shifts how colors read. Bright colors can look even more vivid against a tan, while pale neutrals may appear washed out by comparison.
If you are unsure of your undertone, look at the inside of your wrist in natural light. Green veins suggest warm undertones. Blue veins suggest cool undertones. A mix of both suggests neutral.
When in doubt, chrome and glazed finishes tend to flatter every undertone, since the shine itself adds visual interest regardless of the base color underneath.
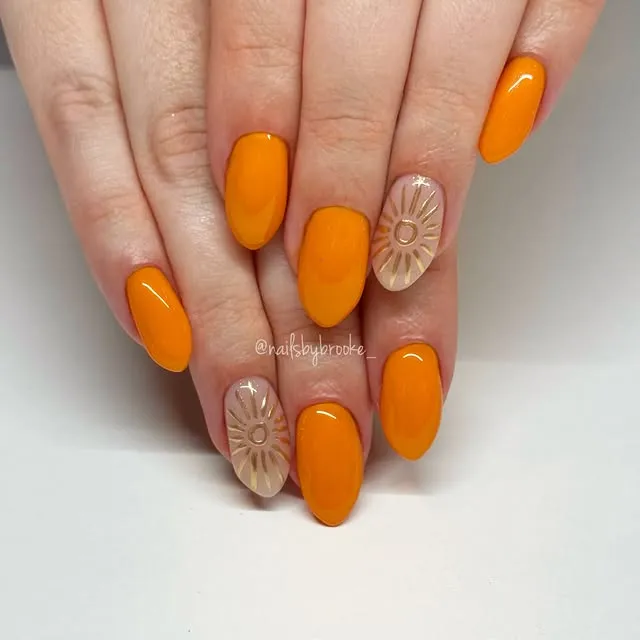
Summer Nail Activity Guide (What Lasts Through Swimming, Travel, Work)
Not every design holds up the same way once real life gets involved. Matching your manicure to your actual plans saves time and frustration.
For swimming and pool days, choose shorter nails with simple, solid designs. Chlorine and constant water exposure wear down detailed art faster than plain color. Gel polish outlasts regular polish in water-heavy conditions.
For beach vacations, medium-length nails with sealed, glossy finishes travel well. Avoid loose embellishments like charms or rhinestones unless they are secured under a topcoat, since sand and saltwater can loosen them over time.
For long flights or travel days, simple neutral or solid colors show the least wear. Cabin air can dry out cuticles, so packing a small cuticle oil helps maintain your manicure mid-trip.
For office or work settings, choose designs without raised texture or heavy embellishment. Typing and repetitive hand movements wear down 3D details faster than flat, glossy finishes.
For active days, like hiking or sports, short nails with a strong topcoat hold up best. Longer shapes are more prone to snagging or breaking during physical activity.
For special events, like weddings, detailed designs are fine since the wear window is shorter. A fresh manicure the day before or morning of the event minimizes the risk of chips before photos.
Matching your design choice to your actual week, not just your ideal aesthetic, keeps your manicure looking fresh for longer.
Frequently Asked Questions
What is the most popular nail color for summer 2026?
Pistachio green and butter yellow lead summer 2026 trends. Warm chrome finishes and cherry red also remain highly requested at salons this season.
What nail shape is trending this summer?
Almond and coffin shapes are trending most this summer. Both offer enough surface area for detailed art while still looking elegant and wearable.
Are short nails good for summer?
Yes, short nails work well for summer. They hold up better against water, chlorine, and heat, and they suit swimming, travel, and active days more practically than long extensions.
What nail color makes nails look longer?
Vertical lines and darker center colors with lighter edges create a lengthening effect. Placing small accents near the cuticle instead of the tip also helps nails appear longer.
What nail colors look best on tan or sun-kissed skin?
Bright colors, coral, and warm terracotta tones tend to stand out against tanned skin. White and pale neutrals also look crisp and fresh next to a summer tan.
Should toenails and fingernails match?
No, toenails and fingernails do not need to match. Many people choose coordinating shades from the same color family instead of an exact match for a more relaxed look.
How soon should I get my nails done before vacation?
Book your nail appointment one to two days before travel. This gives gel polish time to fully cure and reduces the risk of smudging during a long flight or drive.
What are easy summer nail designs to do at home?
Single color glazes, basic French tips, and simple dot accents are the easiest summer designs to recreate at home. Most take under thirty minutes with a few basic tools.
What is the difference between spring and summer nail trends?
Spring nail trends favor lighter pastels and softer florals. Summer trends shift toward bolder brights, chrome finishes, and tropical themes like fruit and beach-inspired art.
How long do summer gel nails last?
Summer gel nails typically last two to three weeks. Heat, chlorine, and sun exposure can shorten this slightly compared to cooler months, so daily cuticle oil helps extend wear.
Related Nail Designs and Ideas